Patagonia – Chile & Argentina
Road Trip through Patagonia
Exploring Torres del Paine National Park in Chile and Los Glaciares National Park in Argentina in Fall
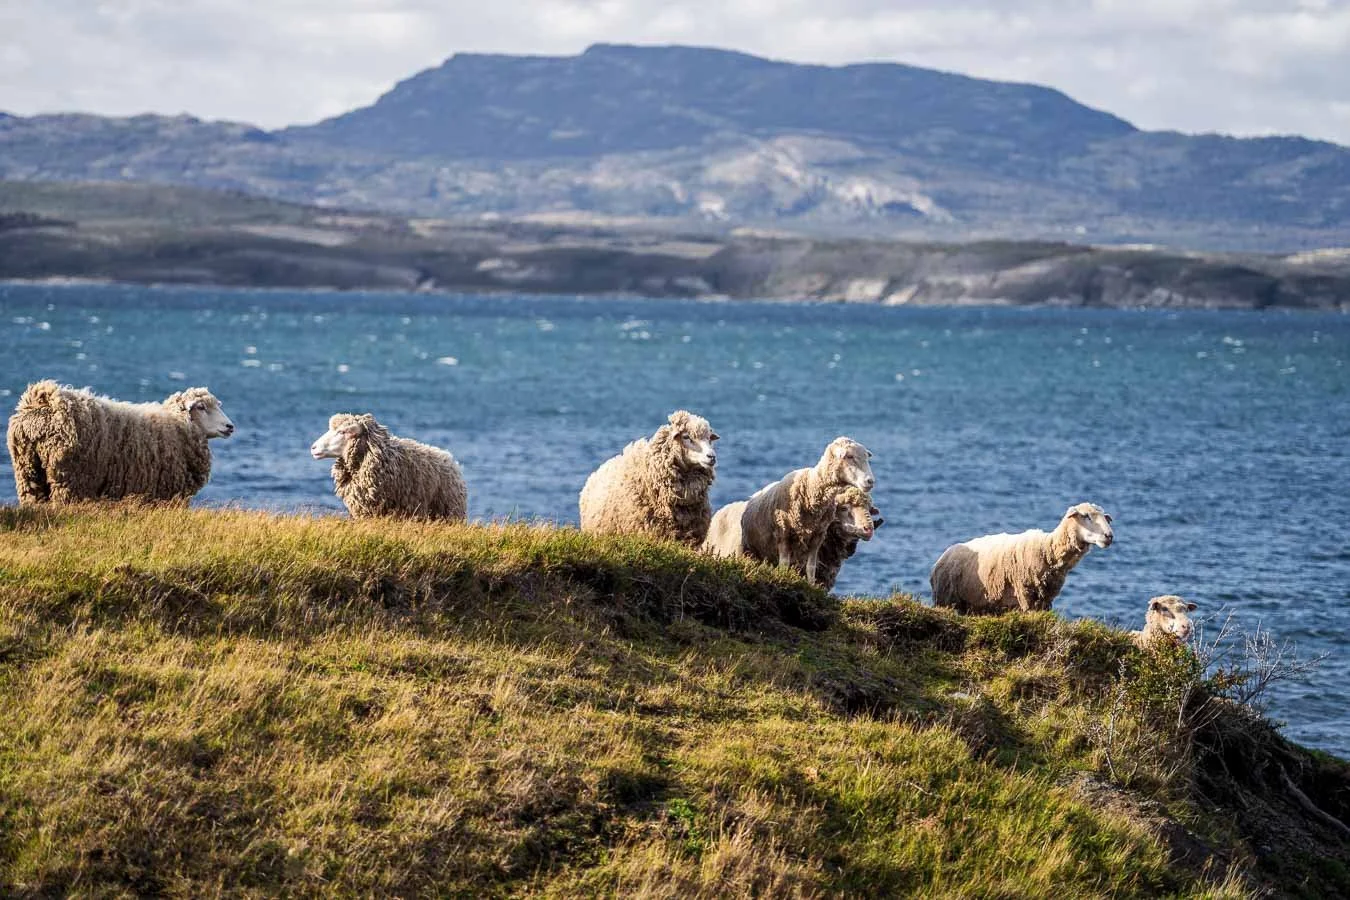
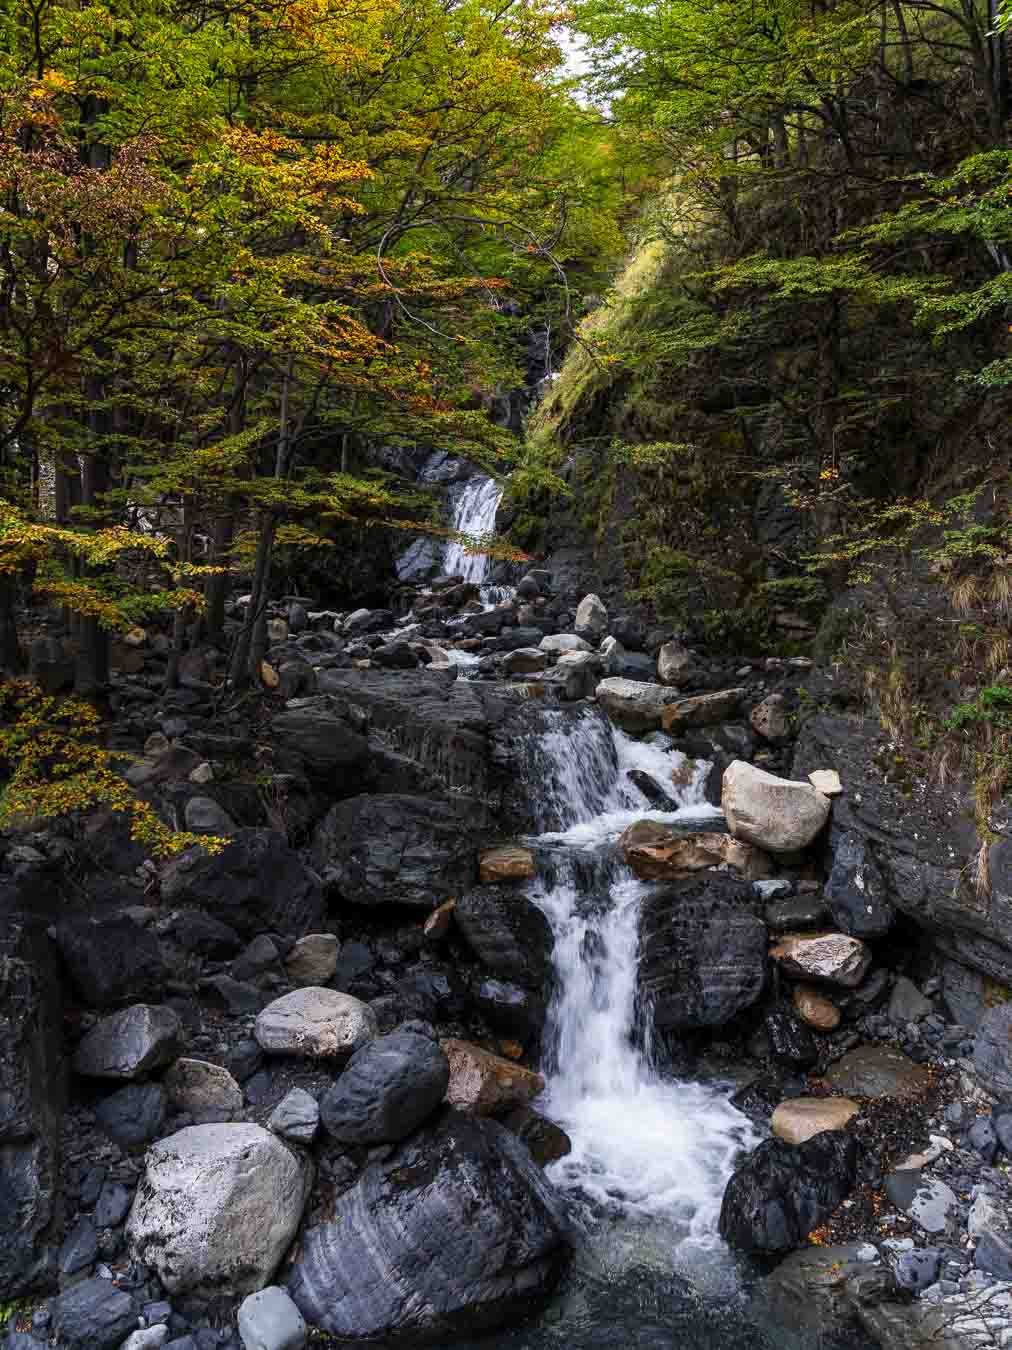
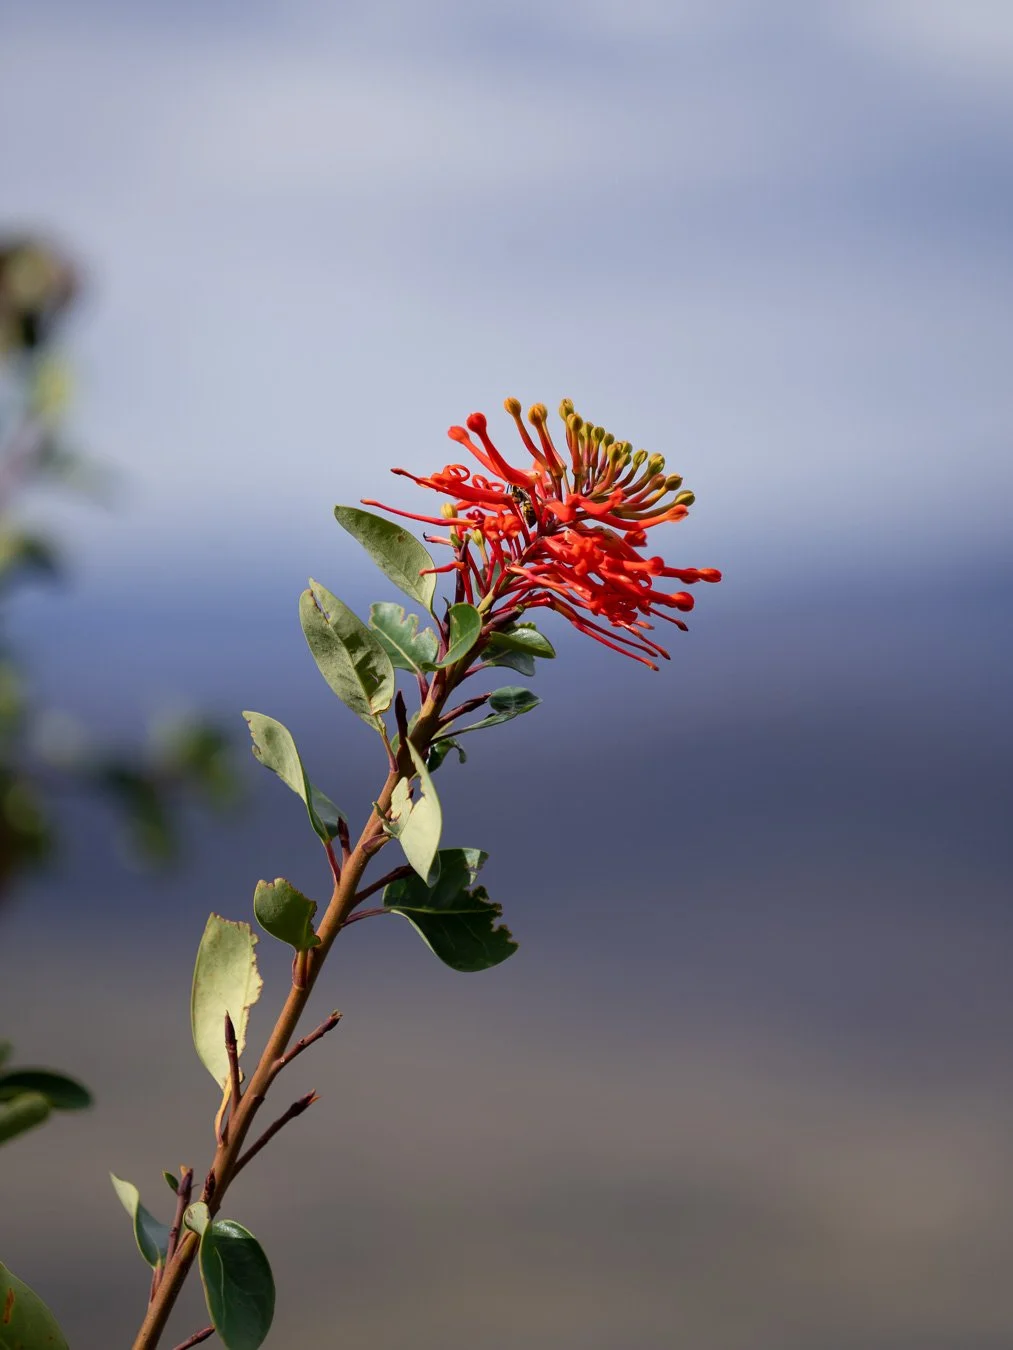
Patagonia, located at the southern tip of the South American continent, is home to some of Earth’s most dramatic and breathtaking landscapes. Stretching across Chile and Argentina, its sheer size is difficult to comprehend – from the massive ice fields that feed its glaciers, to the expansive Pampas grasslands and jagged mountain ranges, it feels like a world unto itself. With its proximity to the Antarctic and its exposed position between the Pacific and Atlantic Oceans, Patagonia’s weather is as extreme as its landscapes. Unsettled and relentless, the elements have shaped the region’s rugged terrain, further enhancing its dramatic scenery. Patagonia’s volatile climate also supports a unique blend of wildlife, such as the playful guanacos, the elusive pumas, and the majestic Andean condors soaring above. The flora is equally fascinating, with the gnarled Nothofagus forests that create a primeval atmosphere as you travel through them, especially when they burst into vibrant shades of yellow and red in autumn.
This allure of exploring one of the last great wilderness areas is what convinced us to travel there. Before we dive into the details of our experience, here's a quick overview to help you navigate this post and jump to the sections that interest you most.
Overview
Itinerary | Planning | Recommendations | Conclusion | Links | Map
Itinerary
We began our journey by flying into Punta Arenas and planned to start our adventure with a guided tour to Magdalena Island. This small island is located in the Strait of Magellan and is home to one of the largest nesting sites of Magellanic penguins in Chile. Based on other reviews and pictures, it appears to be a nice and rather short experience to kick off your trip, especially if you are a wildlife enthusiast and/or photographer. Unfortunately, rough weather led to the tour being canceled at short notice, which is the first rule of planning a Patagonia itinerary – be prepared for plans to change abruptly! Thus, we adjusted our plans, picked up our rental car, and headed north towards Puerto Natales earlier than expected. With the extra time, we explored the town and stocked up on supplies for our time in Torres del Paine National Park. A quick note: there are no ‘real’ supermarkets within the park itself, so if you’re camping, it’s essential to bring enough food unless you want to rely on snacks from the campsites or spend a considerable amount at the park’s dining options (most campsites have some sort of restaurant).
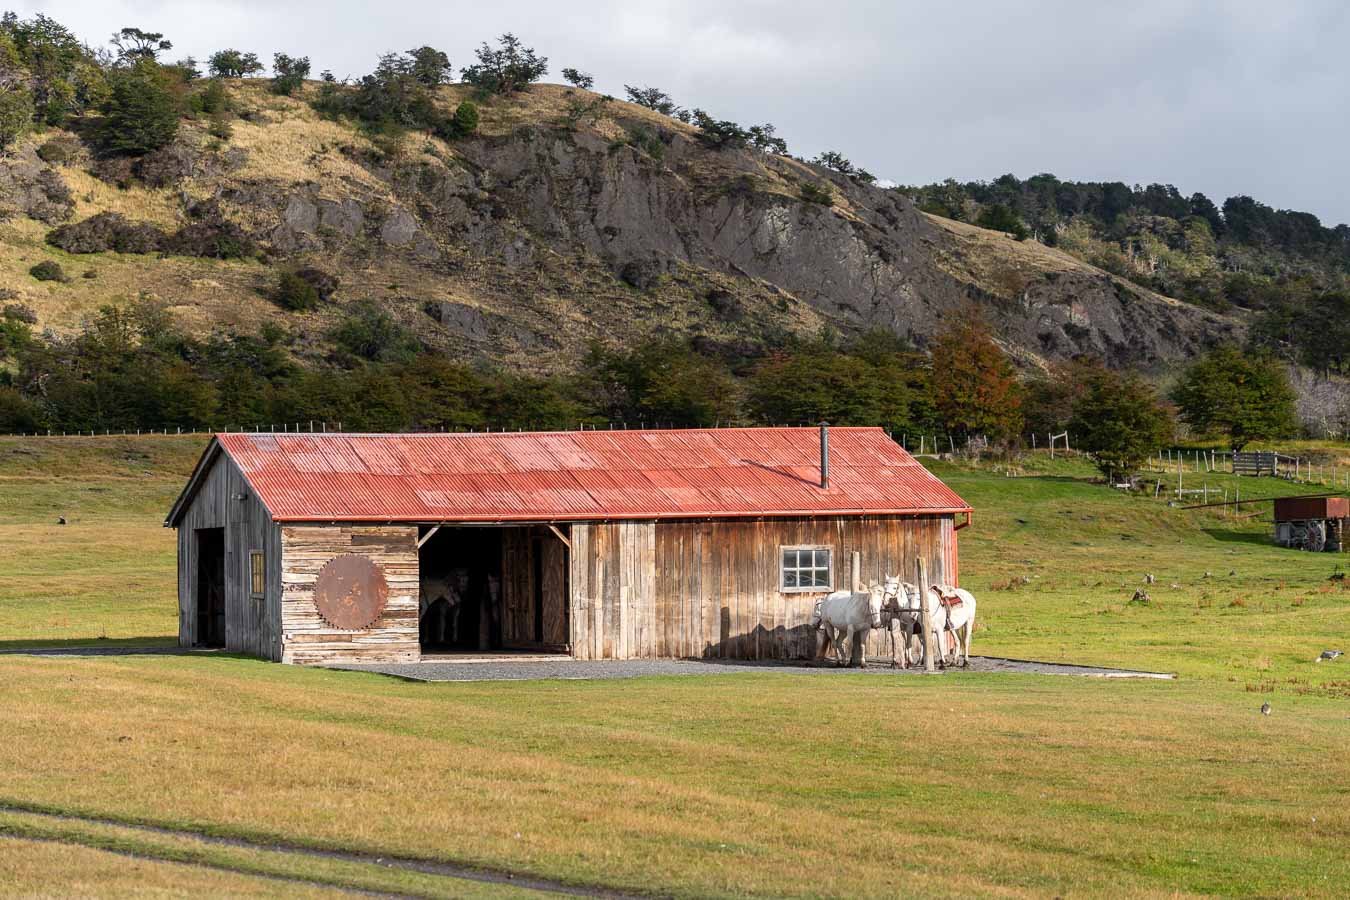
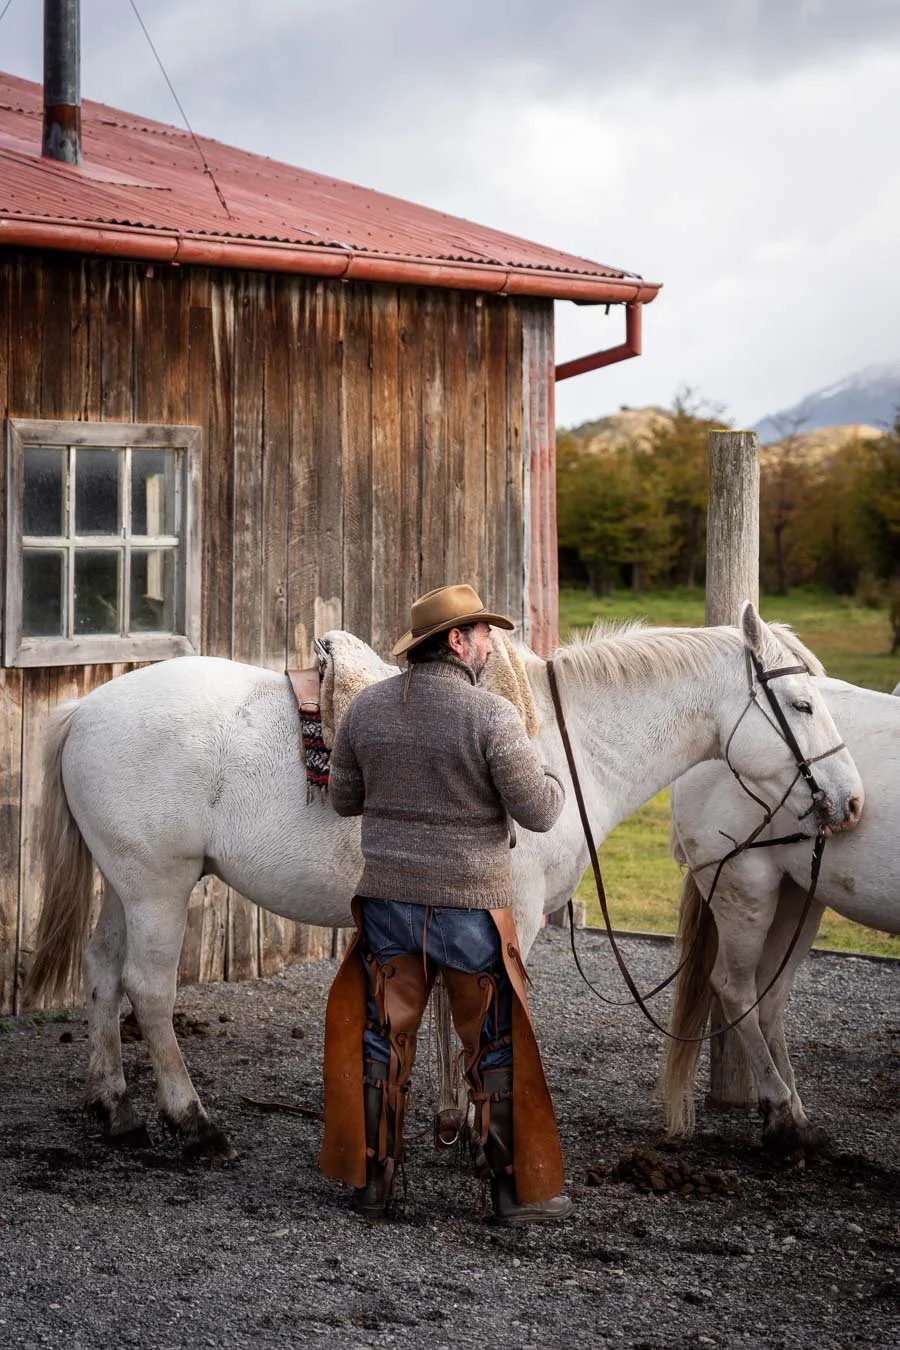
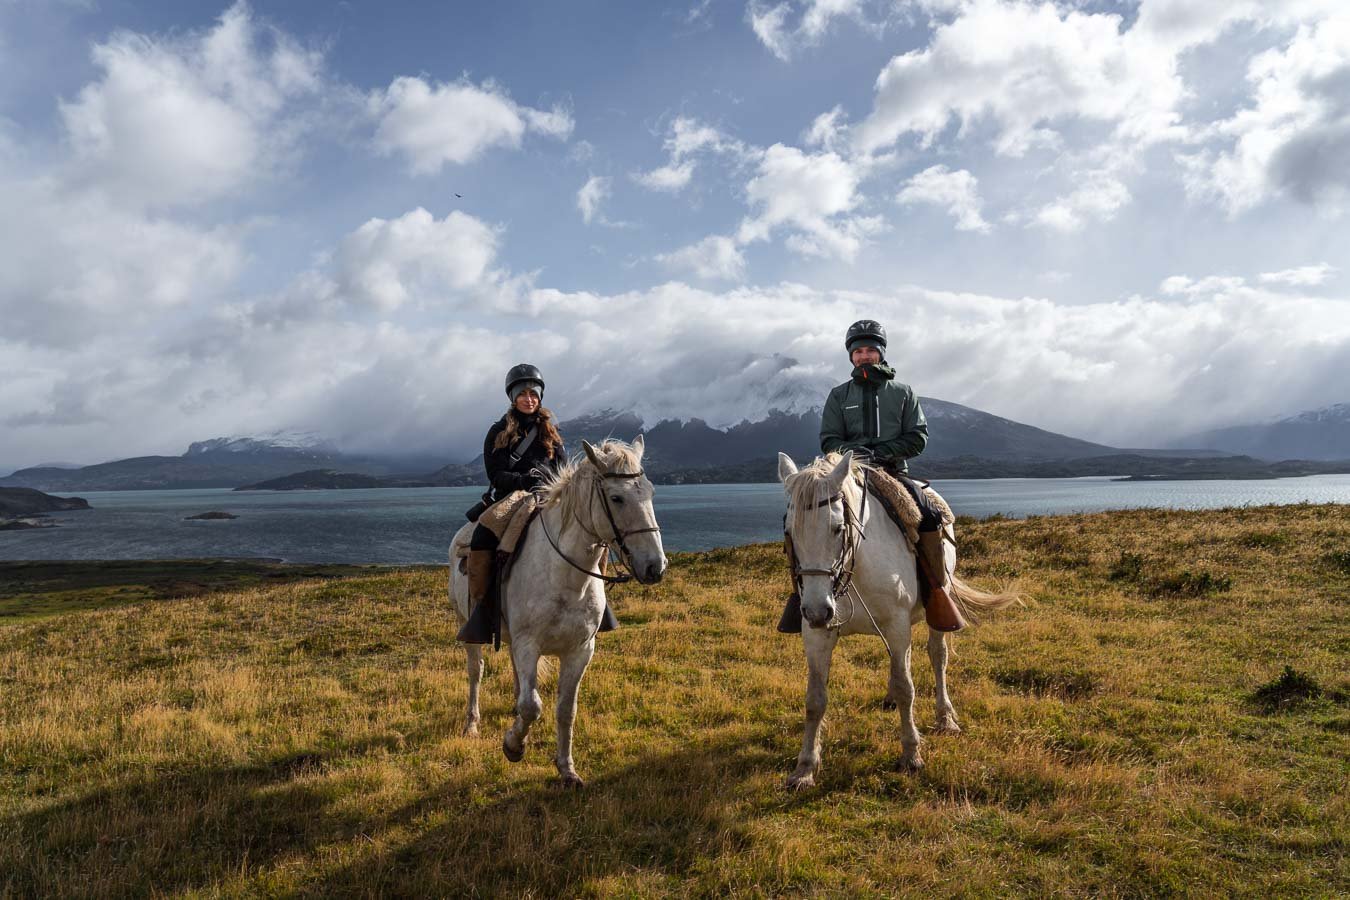
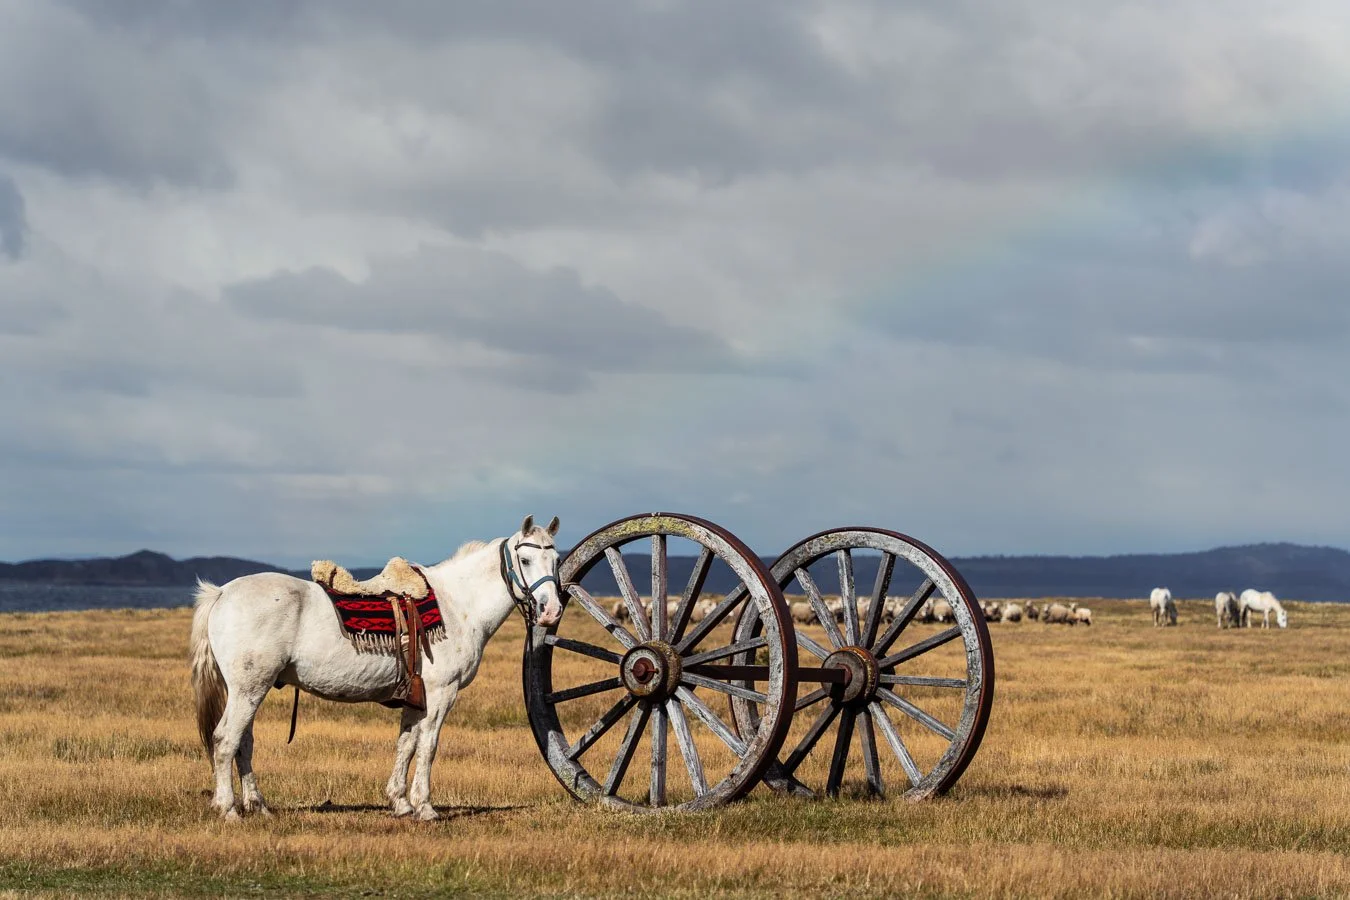
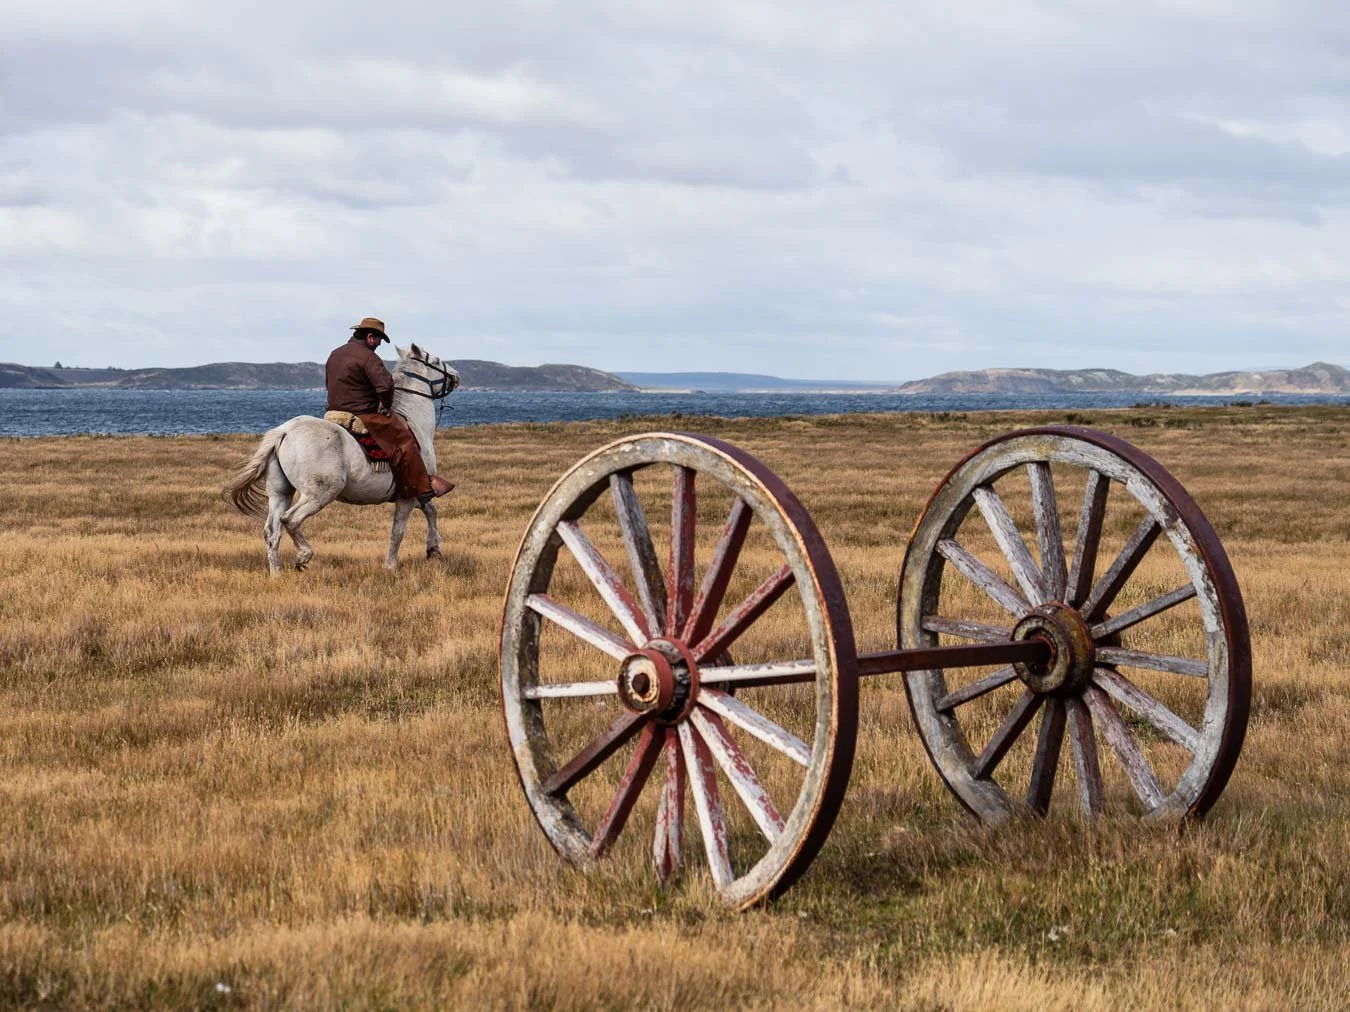
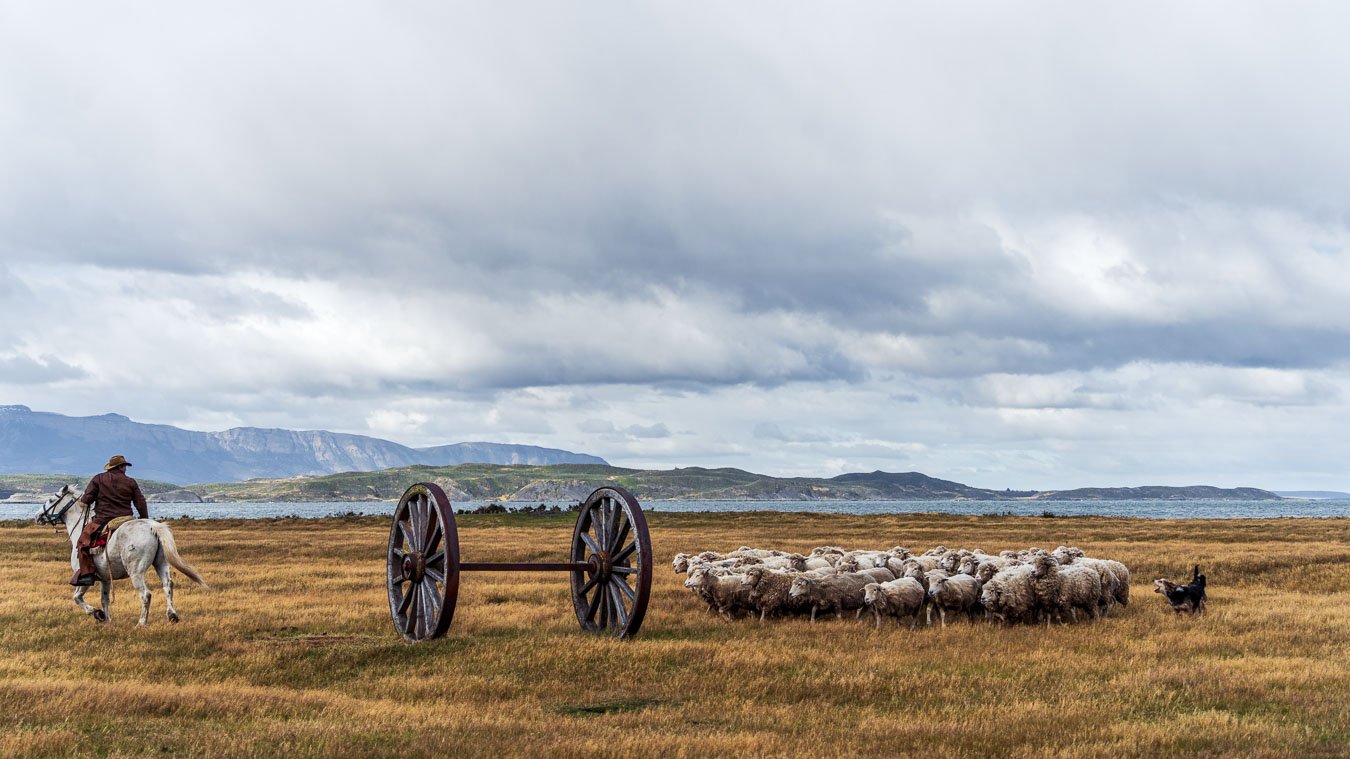
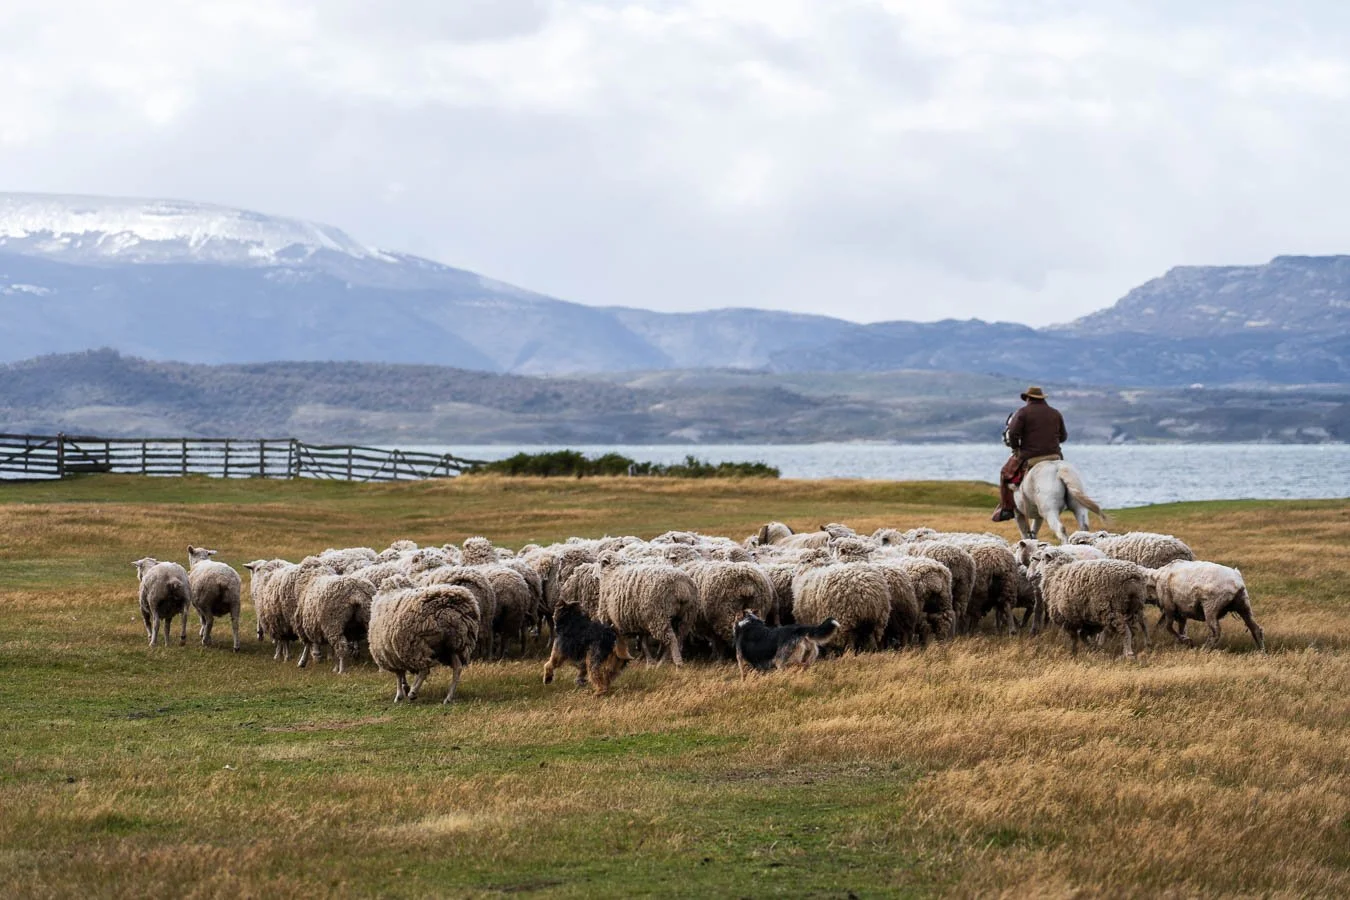
The next morning, we left Puerto Natales early, but we didn’t head directly to the park. Instead, we stopped just outside of the city for a visit to a traditional estancia. Patagonian estancias, and the gauchos that run them, are at the heart of the region’s rich cultural heritage. We chose to visit Estancias La Peninsula, which is considered one of the more popular among visitors. The excursion began with a short boat ride to the estancia, where we were greeted by breathtaking views and the cozy structures of the ranch. After coffees and homemade sopapillas, we geared up for the first activity of the day: a 3-hour horseback ride. The guides will fit you with helmets and leather gaiters before assigning you to a horse based on your riding experience. La Peninsula has a herd of all-white Criollo horses, which are native to the Pampas region. If you’ve never ridden before this is a great first opportunity with some calm and well-behaved horses! You also get to ride in a gaucho-style saddle, which makes the experience even more unique (and comfortable). The trail ride takes you up a mountain and through a lenga forest before looping back to the ranch.
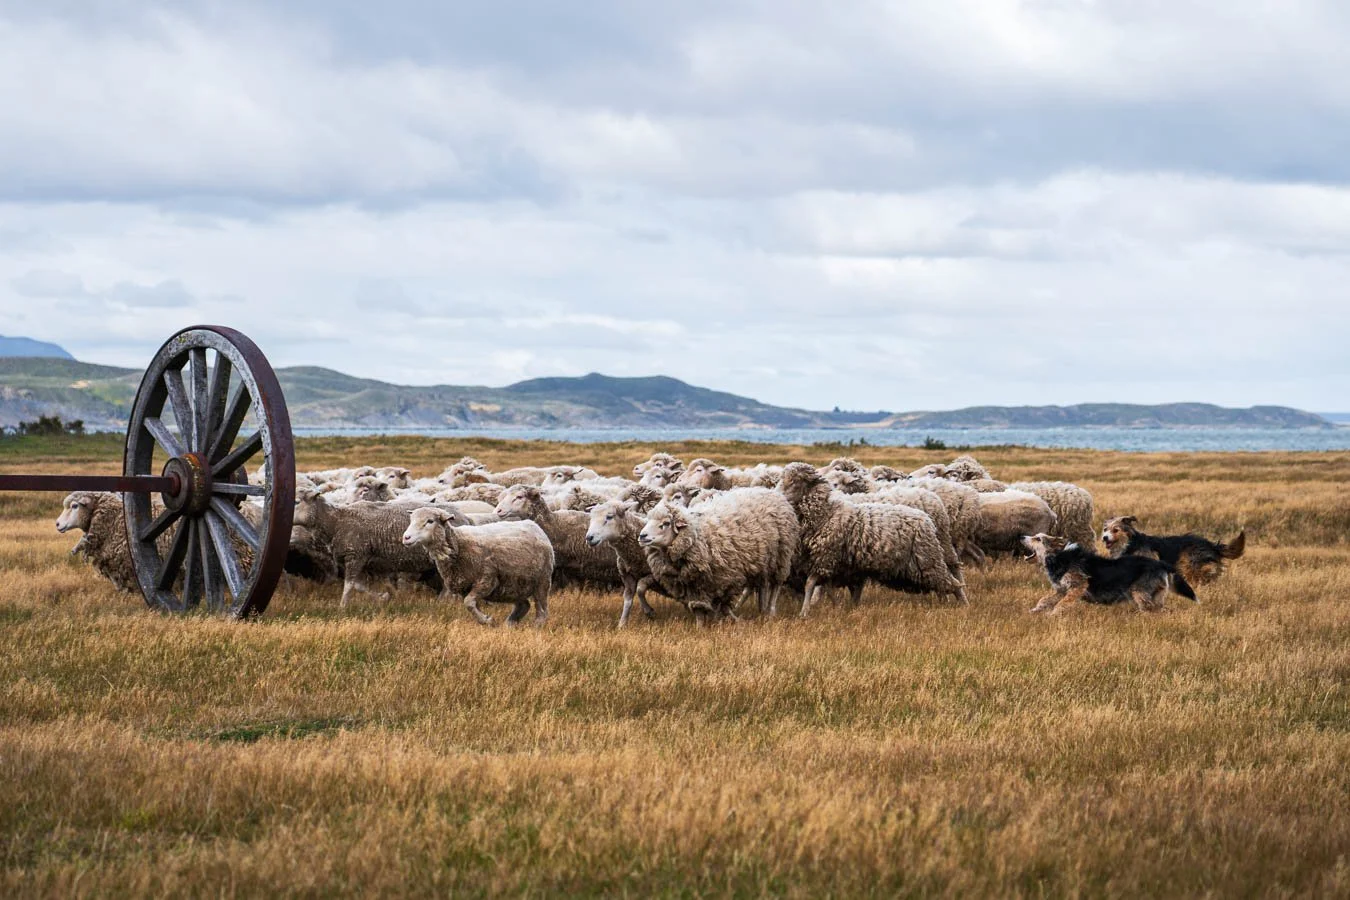
The second half of the estancia visit showcased Patagonian sheep herding and shearing, led by a skilled gaucho and some very cute working dogs. The day concluded with a traditional lamb barbecue paired with Chilean wine, which was a true culinary highlight. Throughout the visit, our guide shared fascinating insights into estancia life. He explained the modern challenges these ranches face, described small communities deep in the fjords that still speak their ancestral languages, and mentioned the seasonal influx of migrant sheep shearers, particularly from Australia and New Zealand. Overall, this experience offered a wonderful contrast to the rugged wilderness you will experience in Torres del Paine National Park and made for a fantastic start to our trip.
Torres del Paine National Park
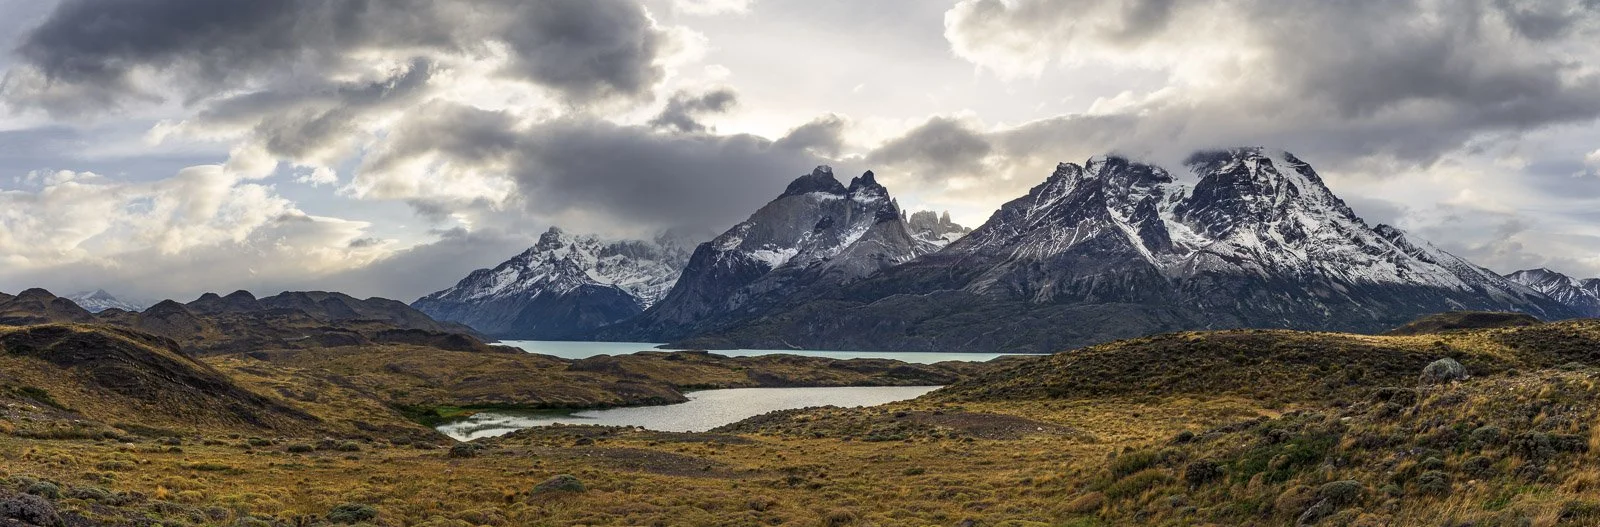
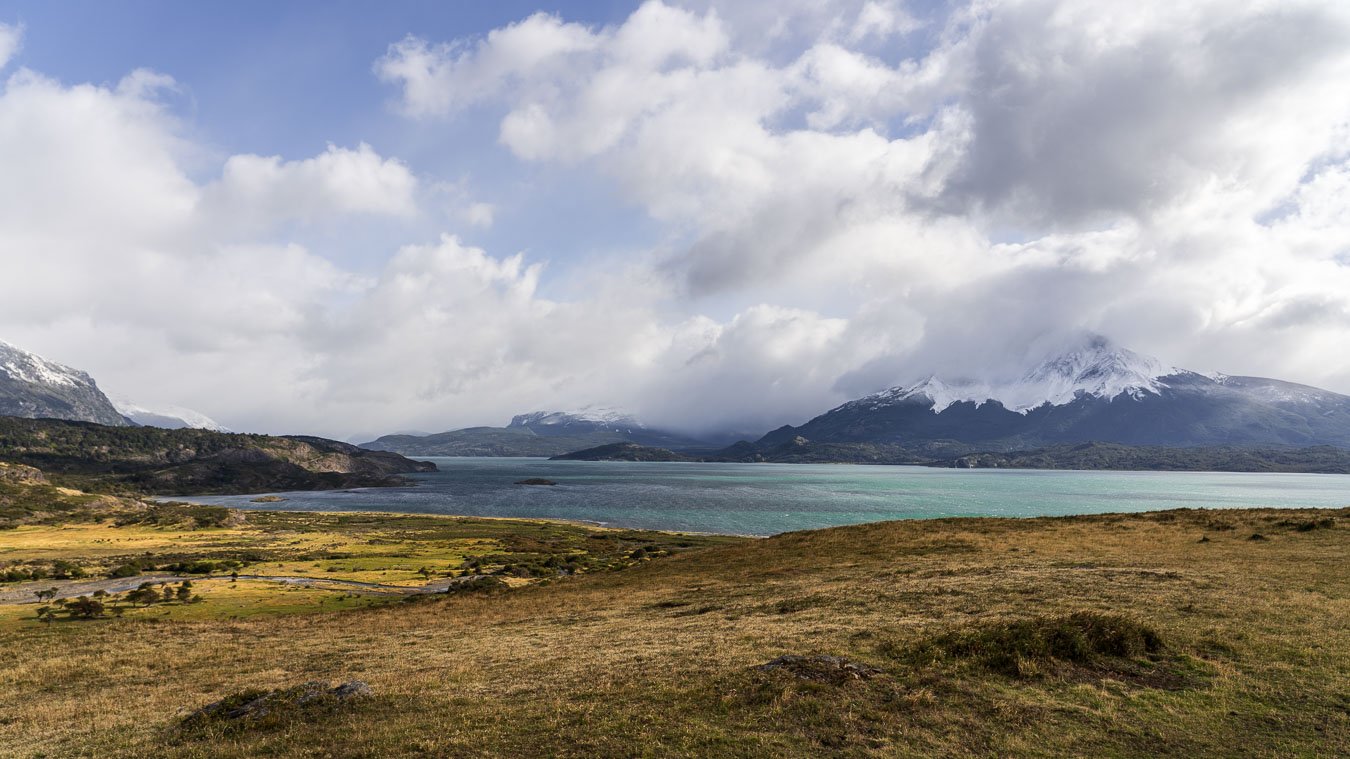
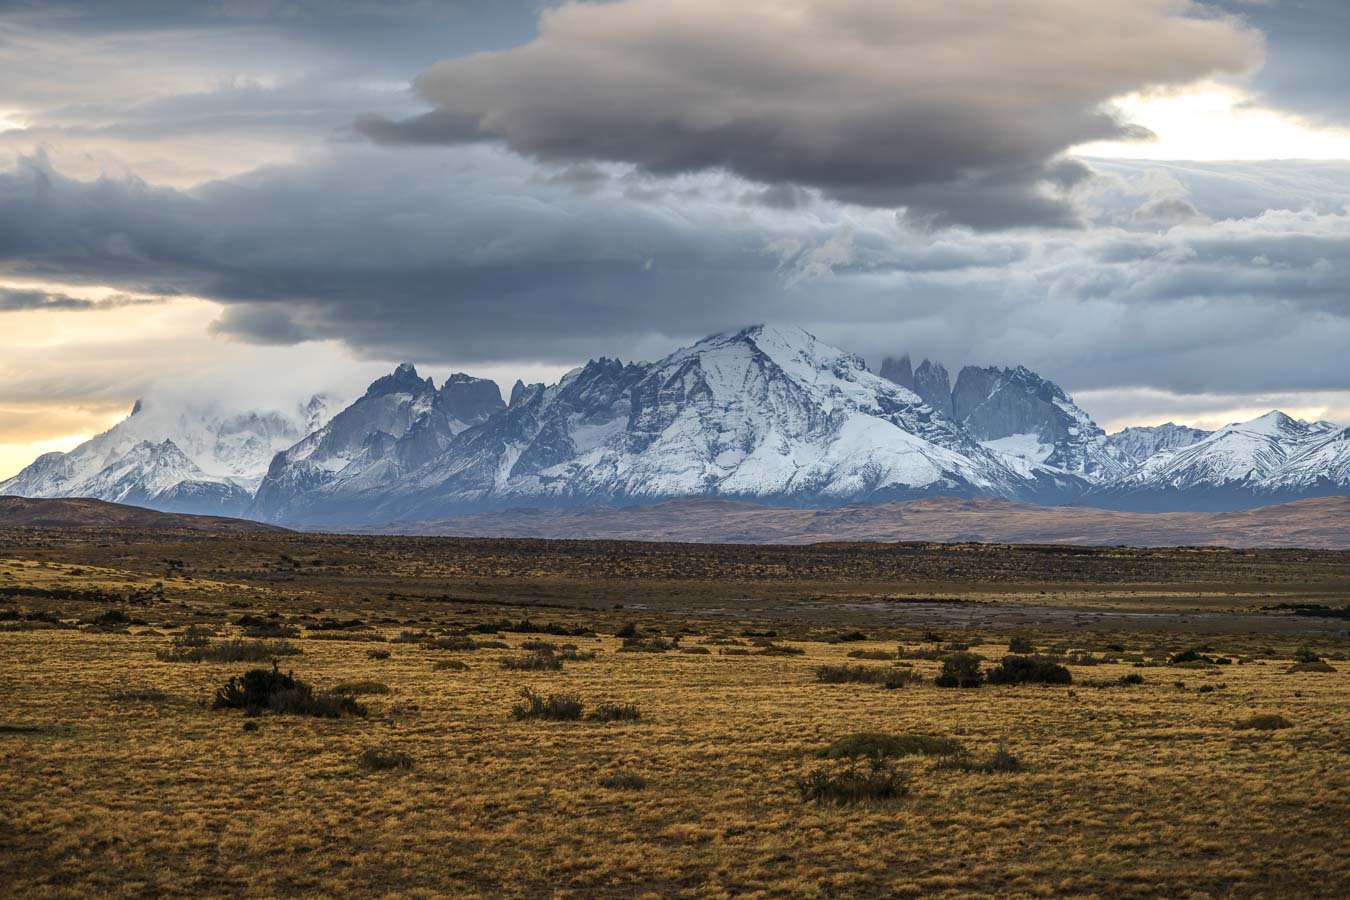
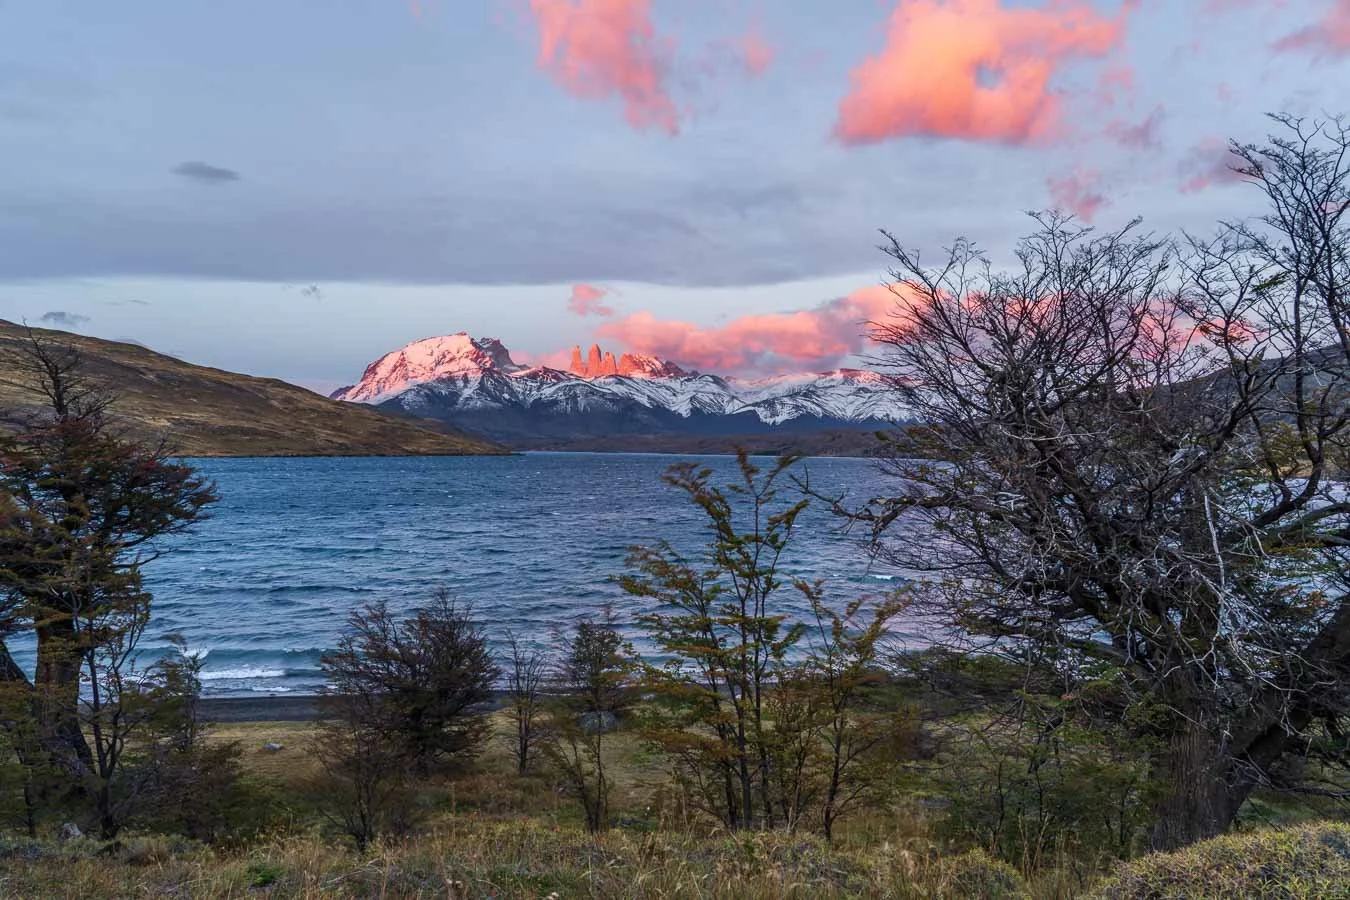
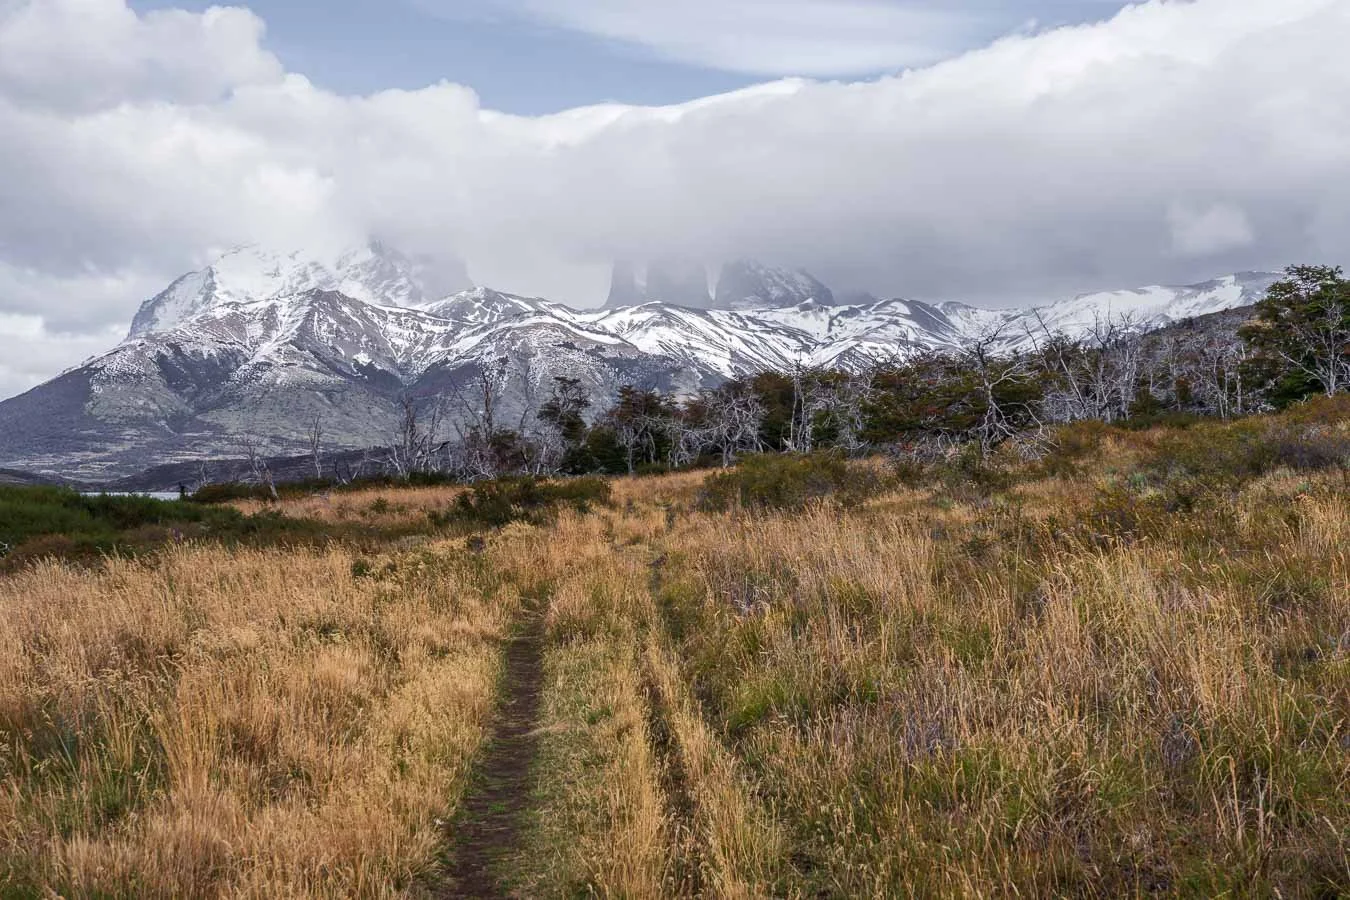
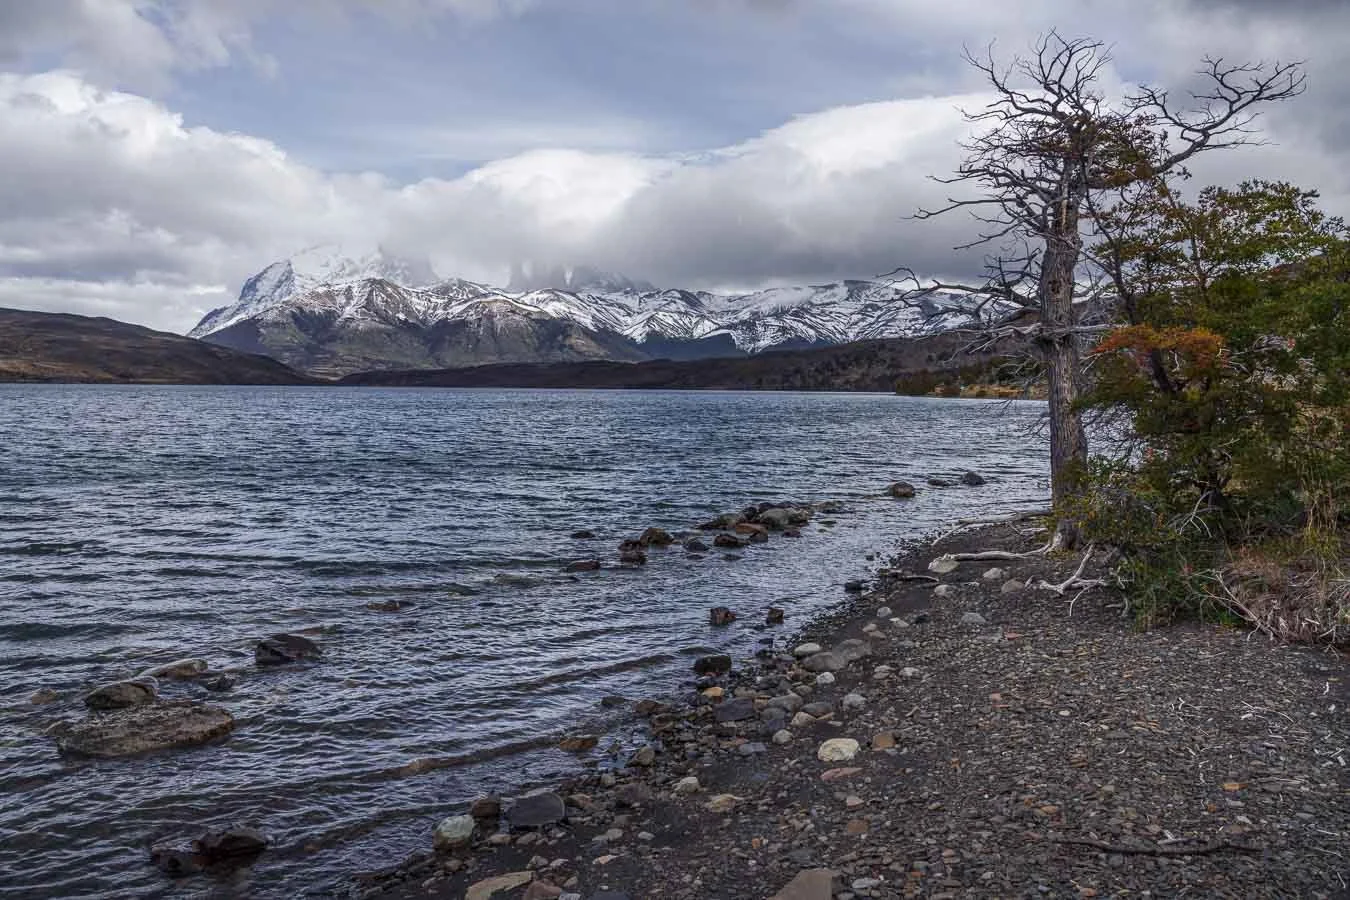
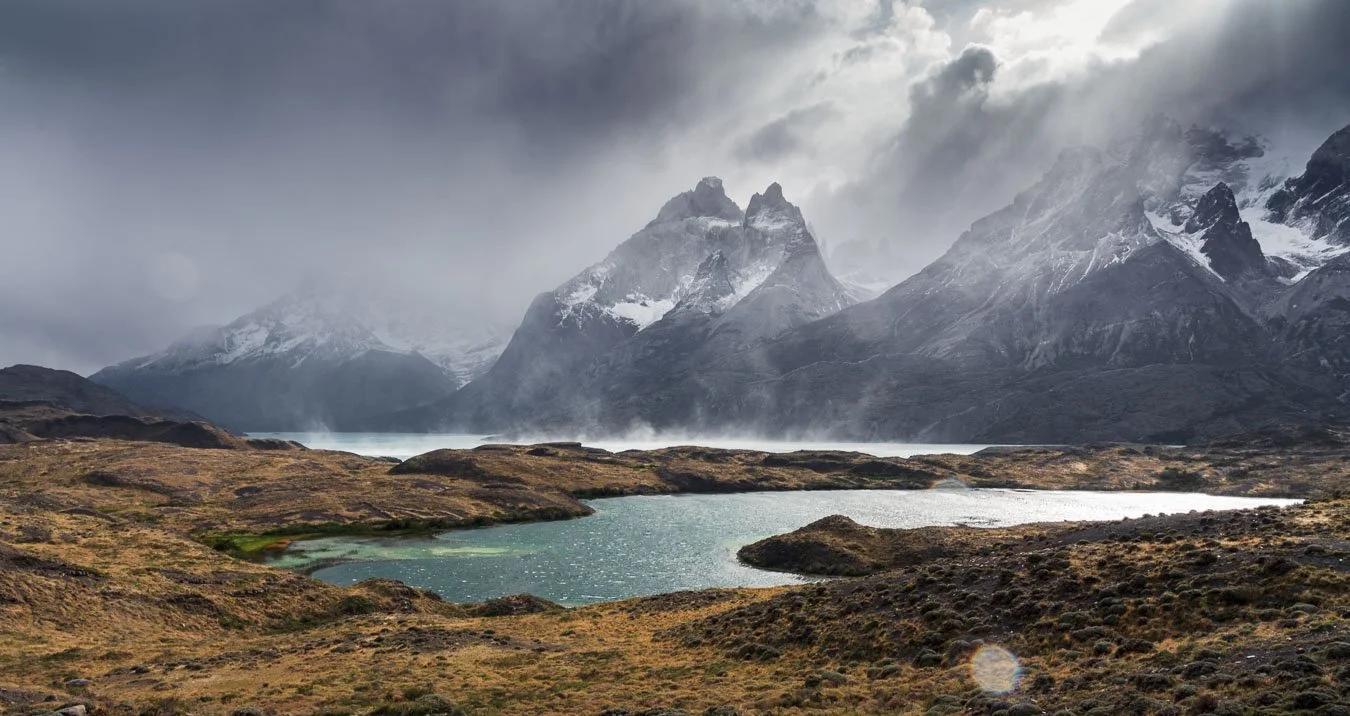
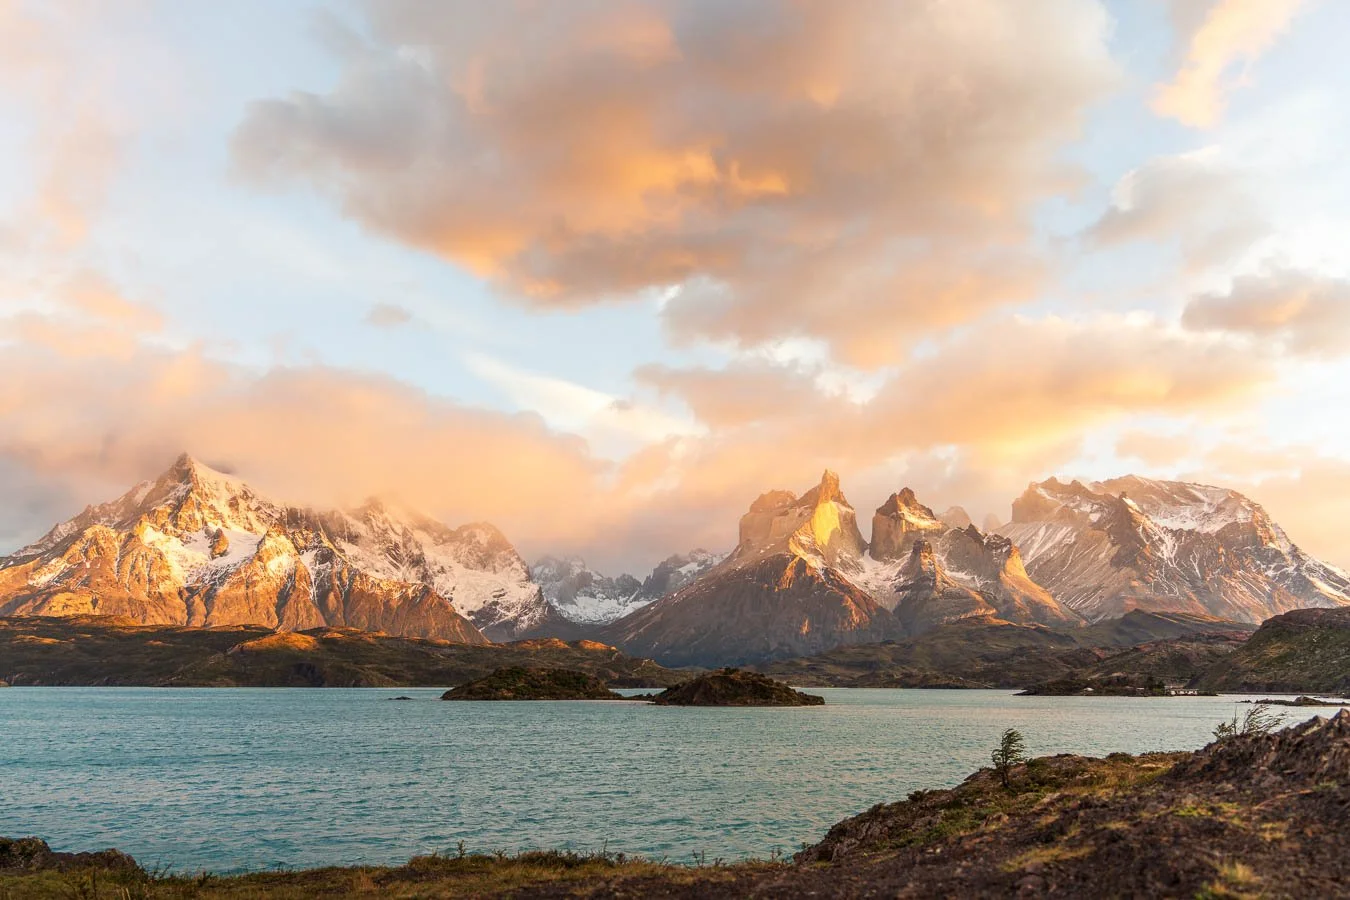
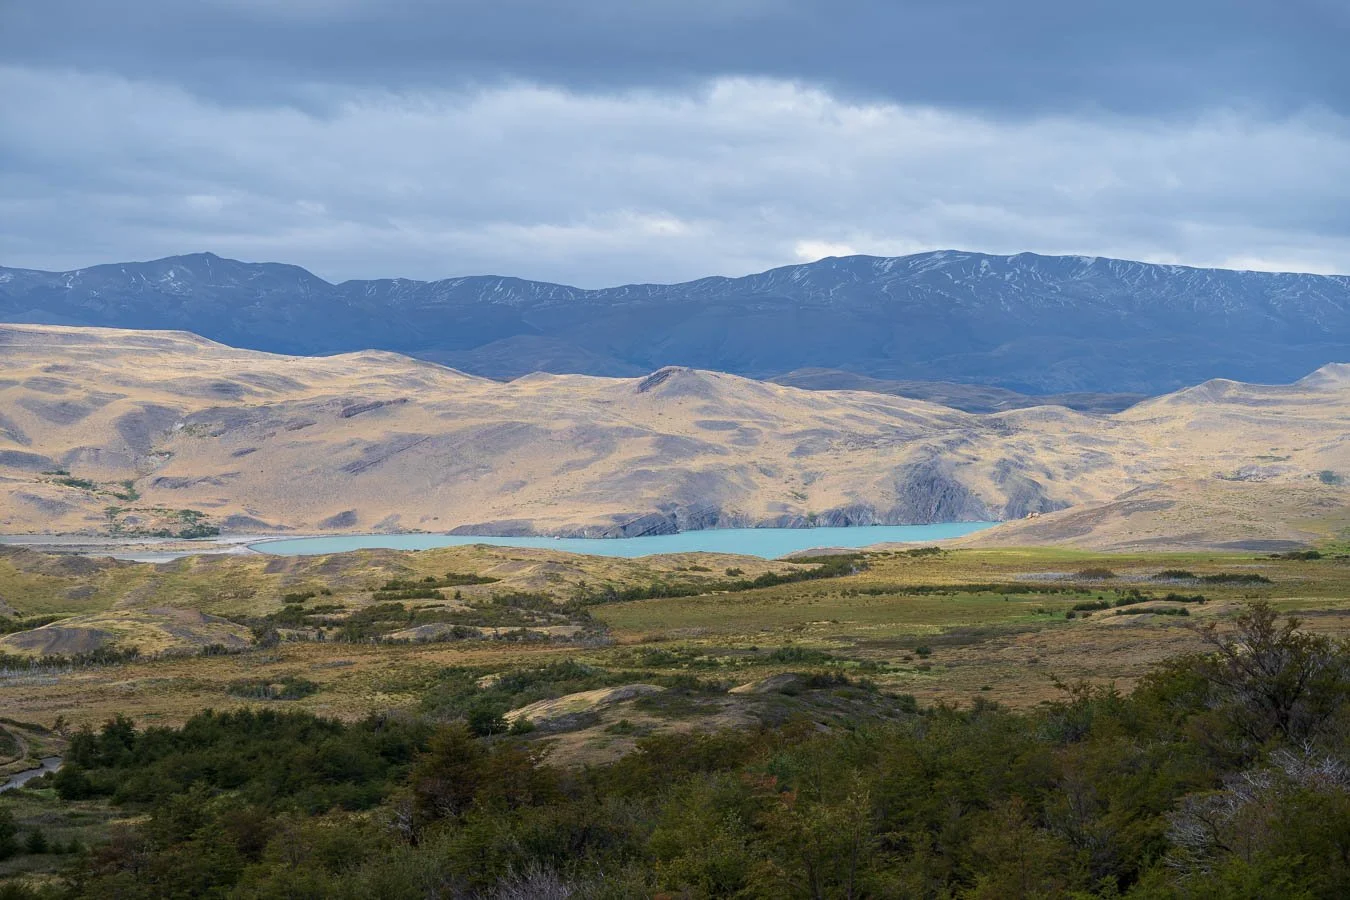
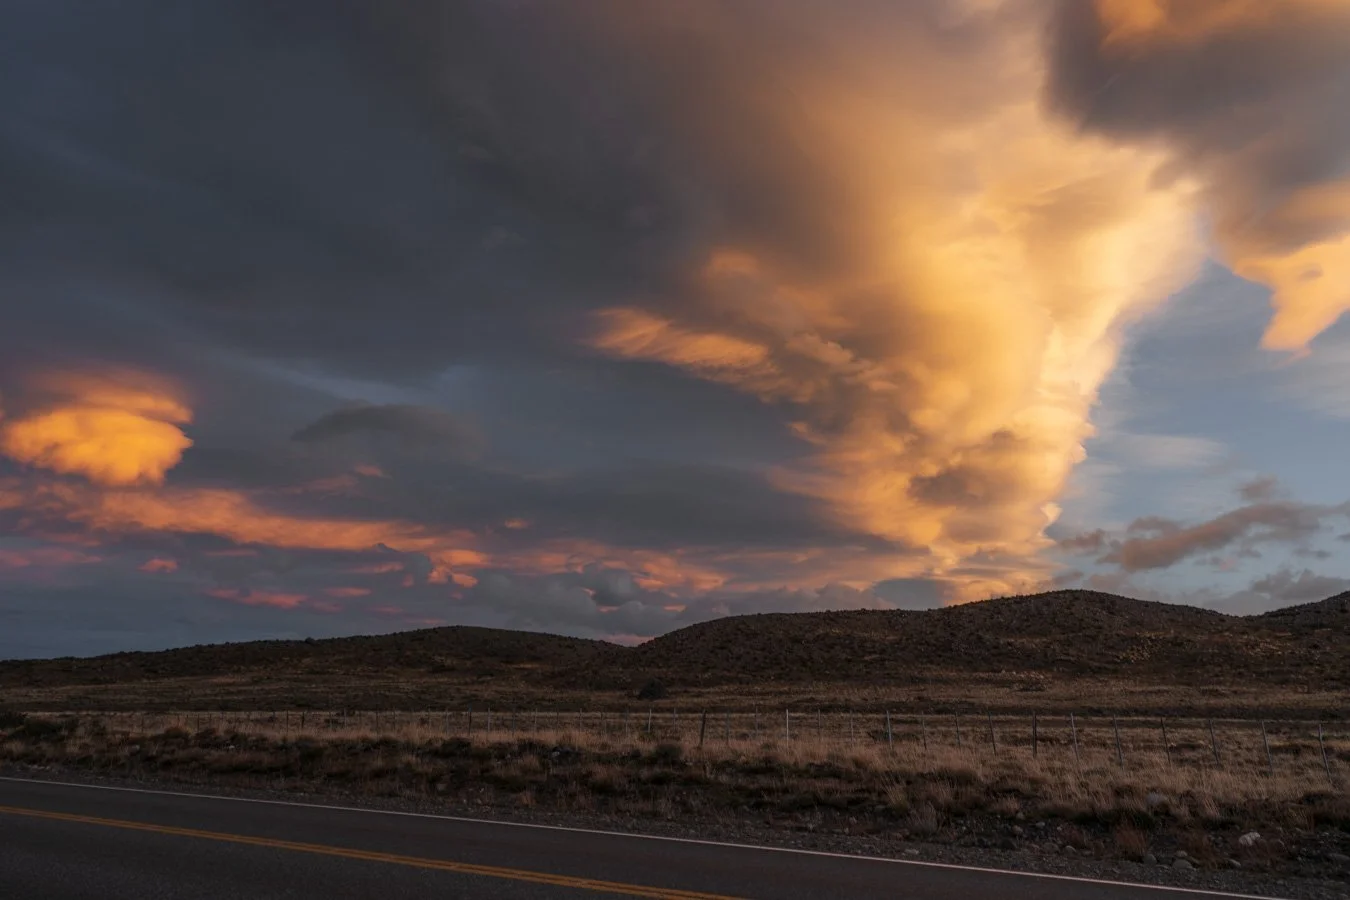
In the afternoon we headed towards Torres del Paine National Park. We approached the park from the eastern plains via the roads Y-150/Y-156/Y-160 because we spent our first night at Camp Laguna Azul. As the name implies, this campsite is nicely situated directly next to the Laguna Azul. As we approached the campsite, we managed to get a first view of the Paine Massif and the great plains surrounding it, which was a thrilling experience! The setting sun at the time of our approach and the dramatic cloudscape shrouding the mountains amplified this even more.
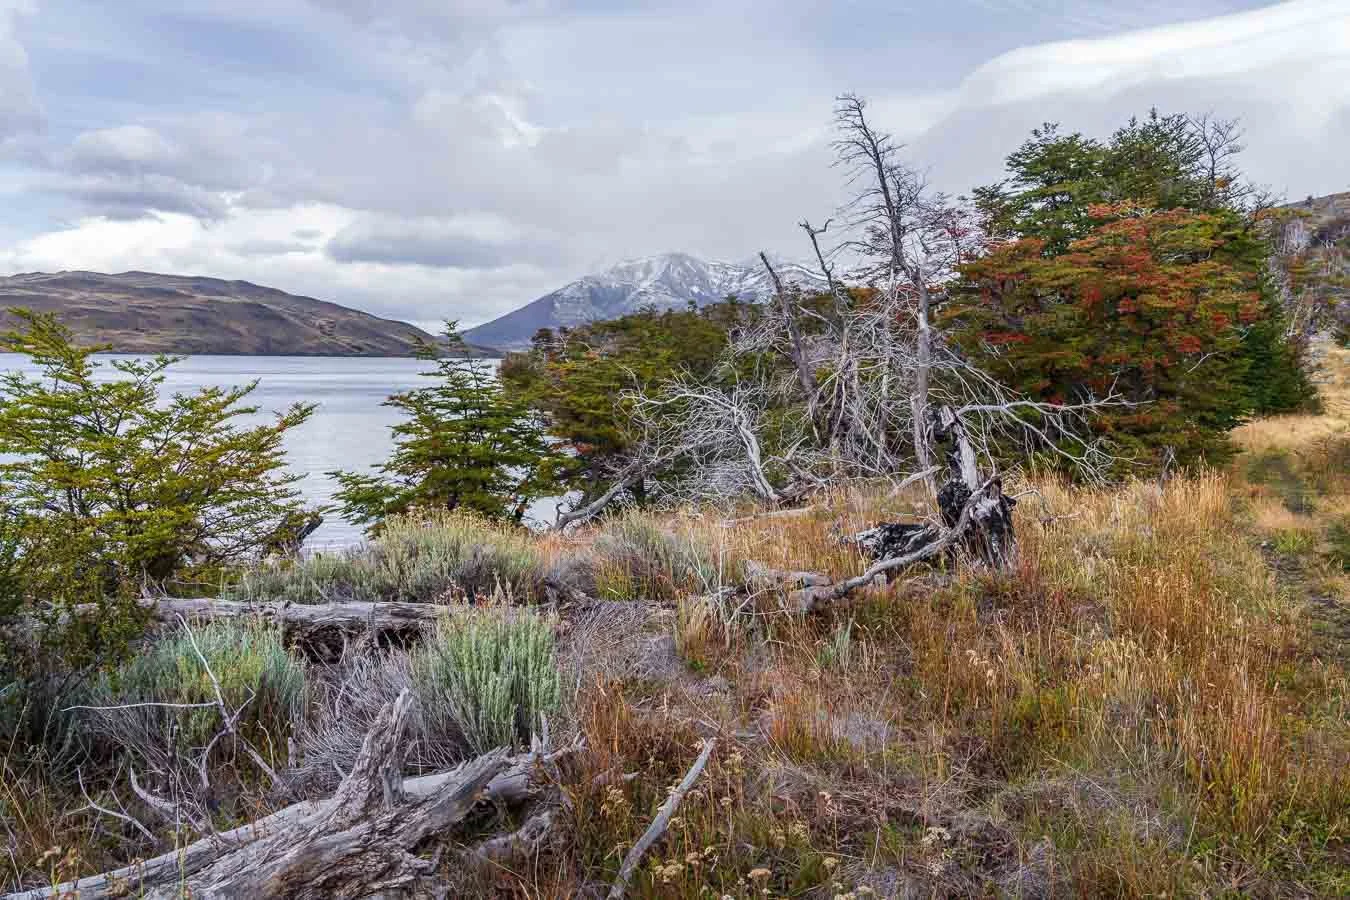
The reason we stayed there our first night is simply because the campsite closes in off-season, that is, from April to mid-October (so be aware of that in case you also want to travel to Patagonia in the less-busy autumn or winter months). Although it’s located outside of the park, the campsite offers an incredible view of the iconic towers. There are also several hiking trails around the laguna, with access points at the campsite. Despite the great location, this campsite appeared to be less frequented, and we were some of the only campers there (we stayed there at the very end of March though which may contributed to the lack of other campers). For those pitching their own tents like us, this campsite offers a relatively protected tent area surrounded by smaller trees and shrubs. The facilities of the campsite were also nice, including a lovely little social hut where you can warm up next to a wood-burning stove and seek protection from the notorious Patagonian winds. The hut is manned during the day/evening and offers a small selection of snacks and beverages and a small menu to order from if you aren’t cooking your own meals. There’s also a designated table for using your camping stoves to cook and plenty of seating for dining. The guys working in the hut were super friendly and even shared a free snack plate with us after our day hike! Overall, we really enjoyed our time here – and all things considered, this stop made for a perfect start to our Torres del Paine adventure.
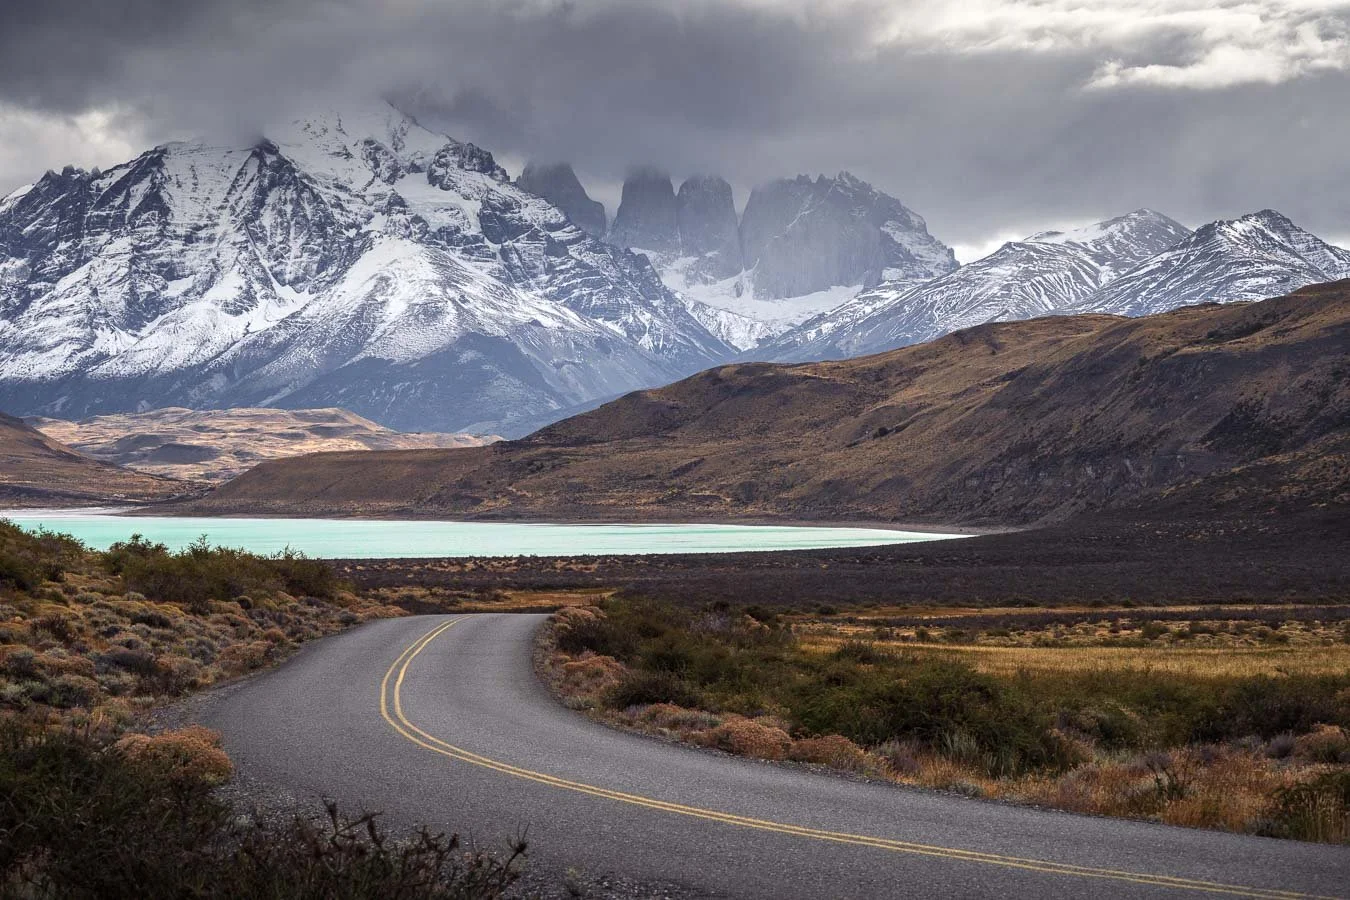
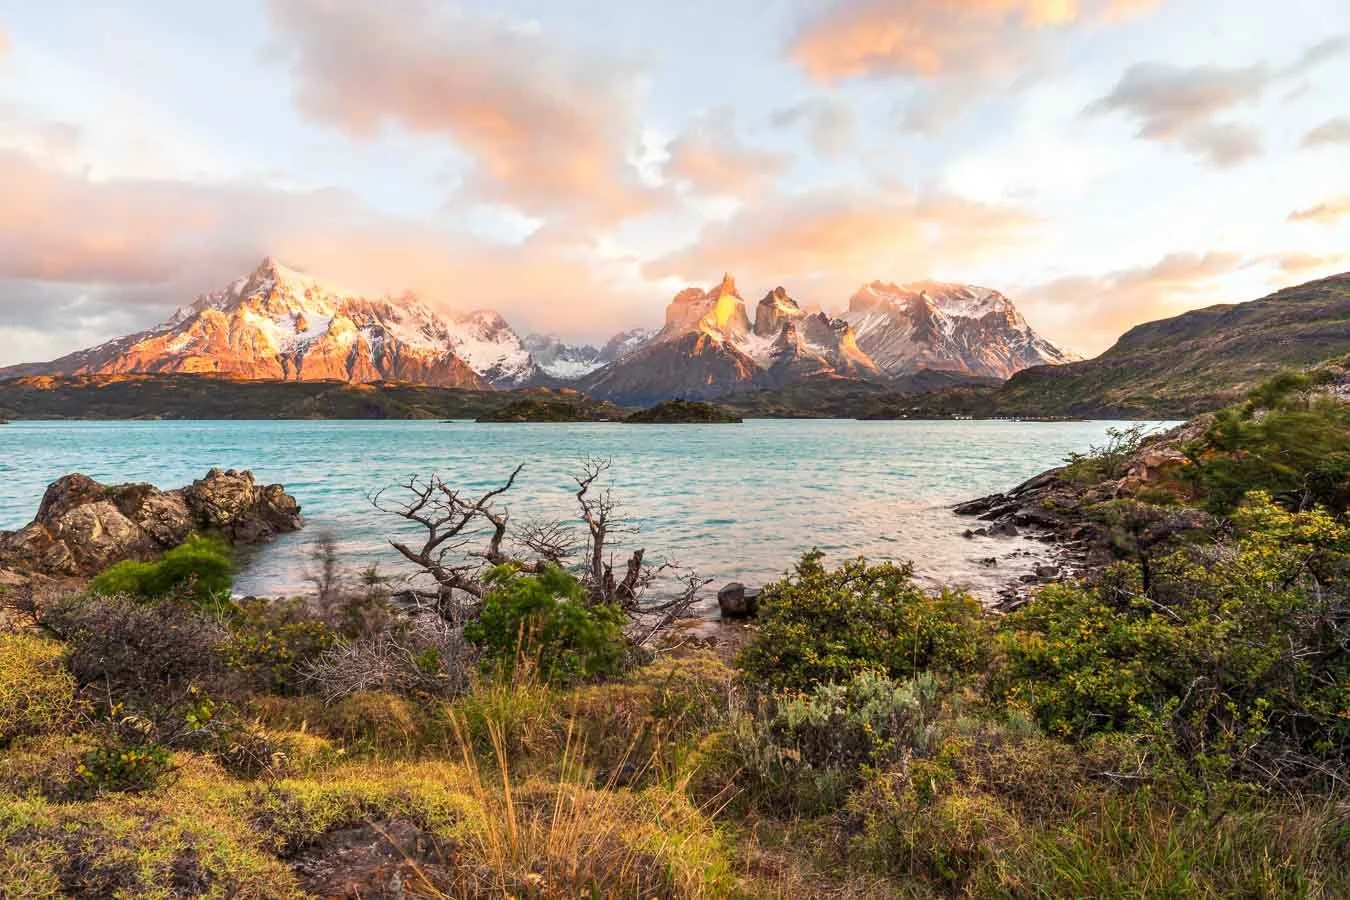
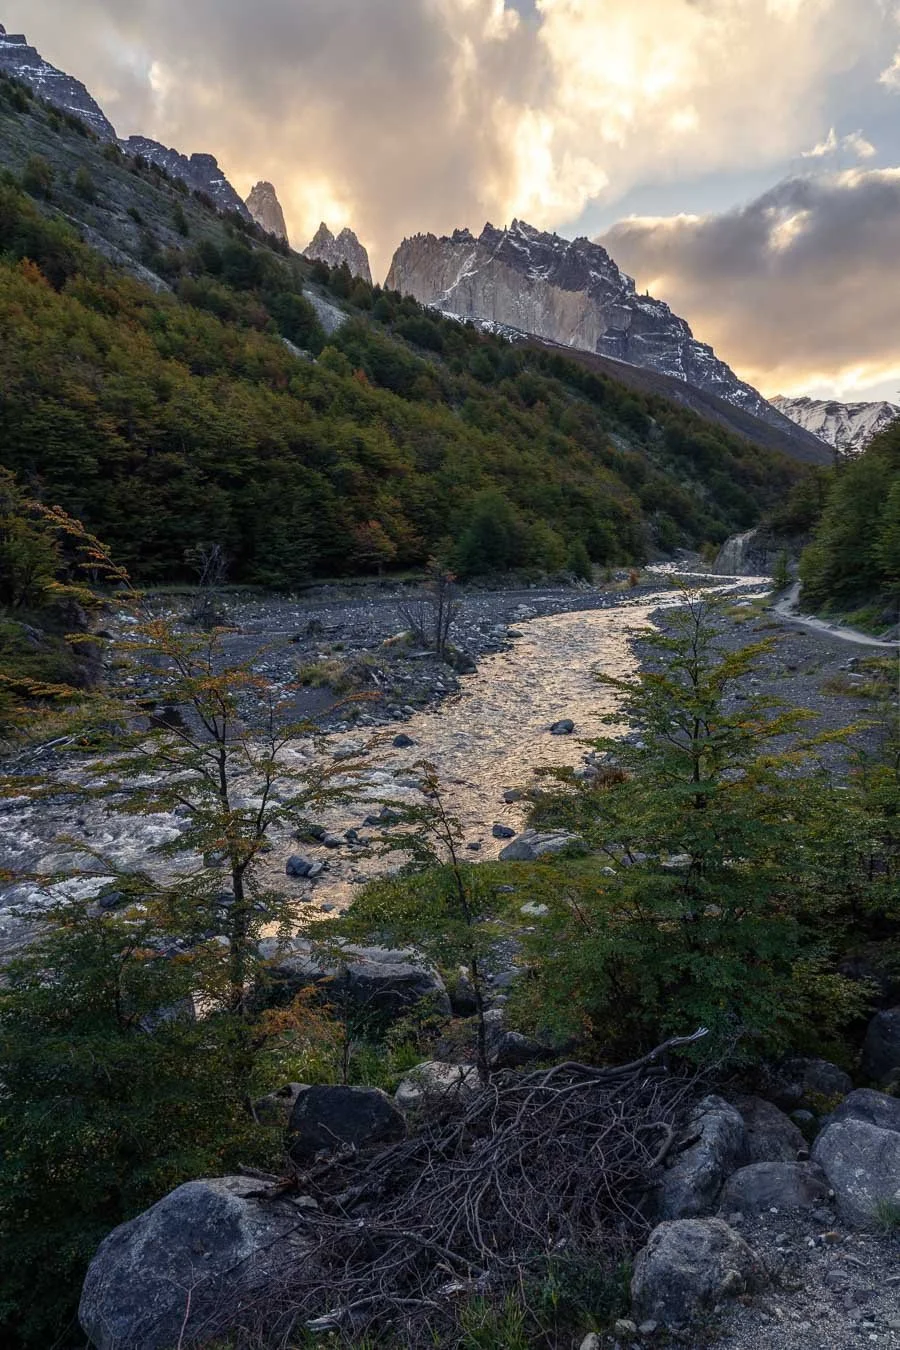
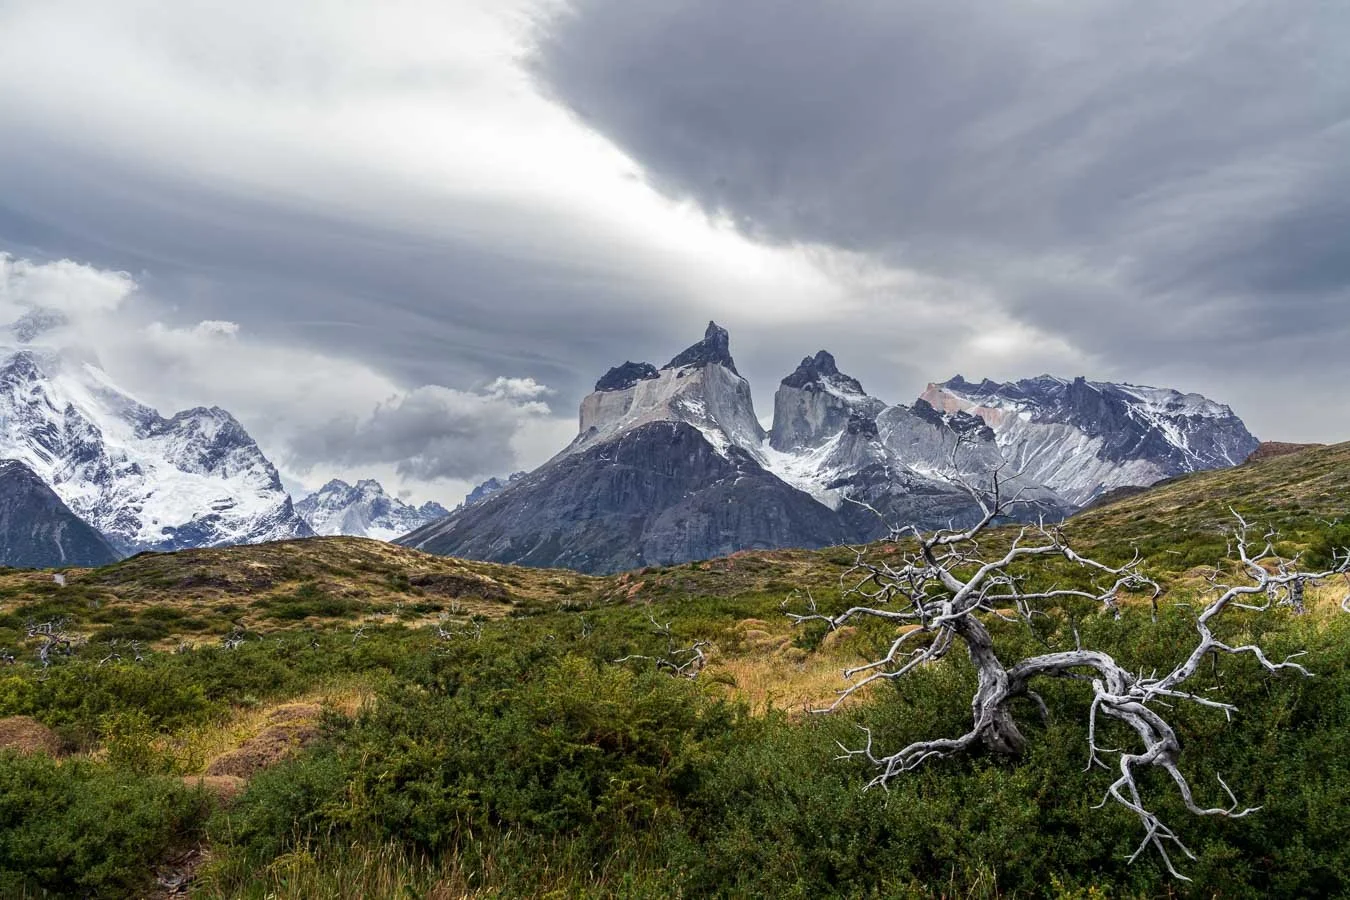
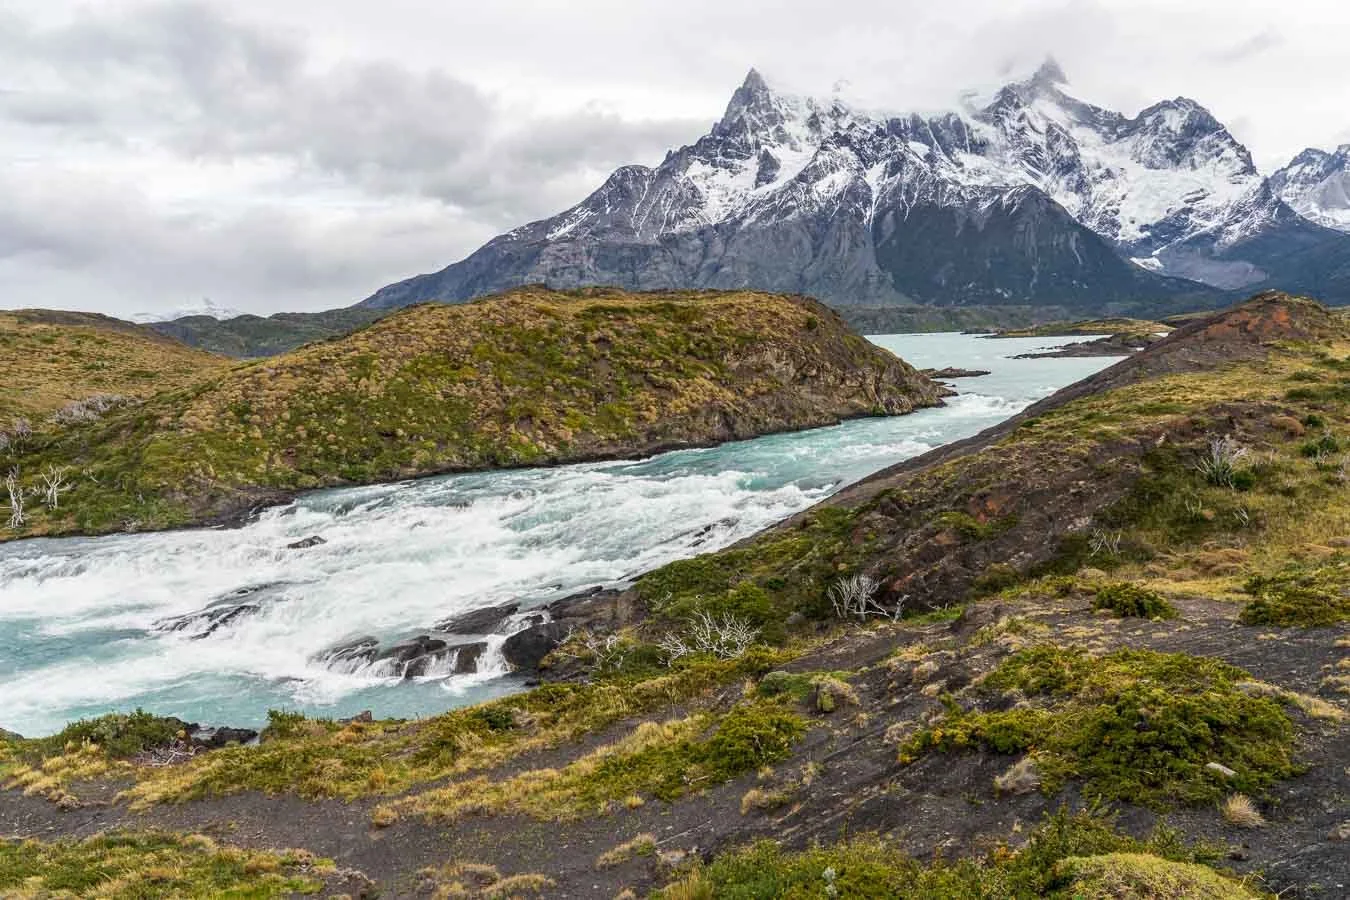
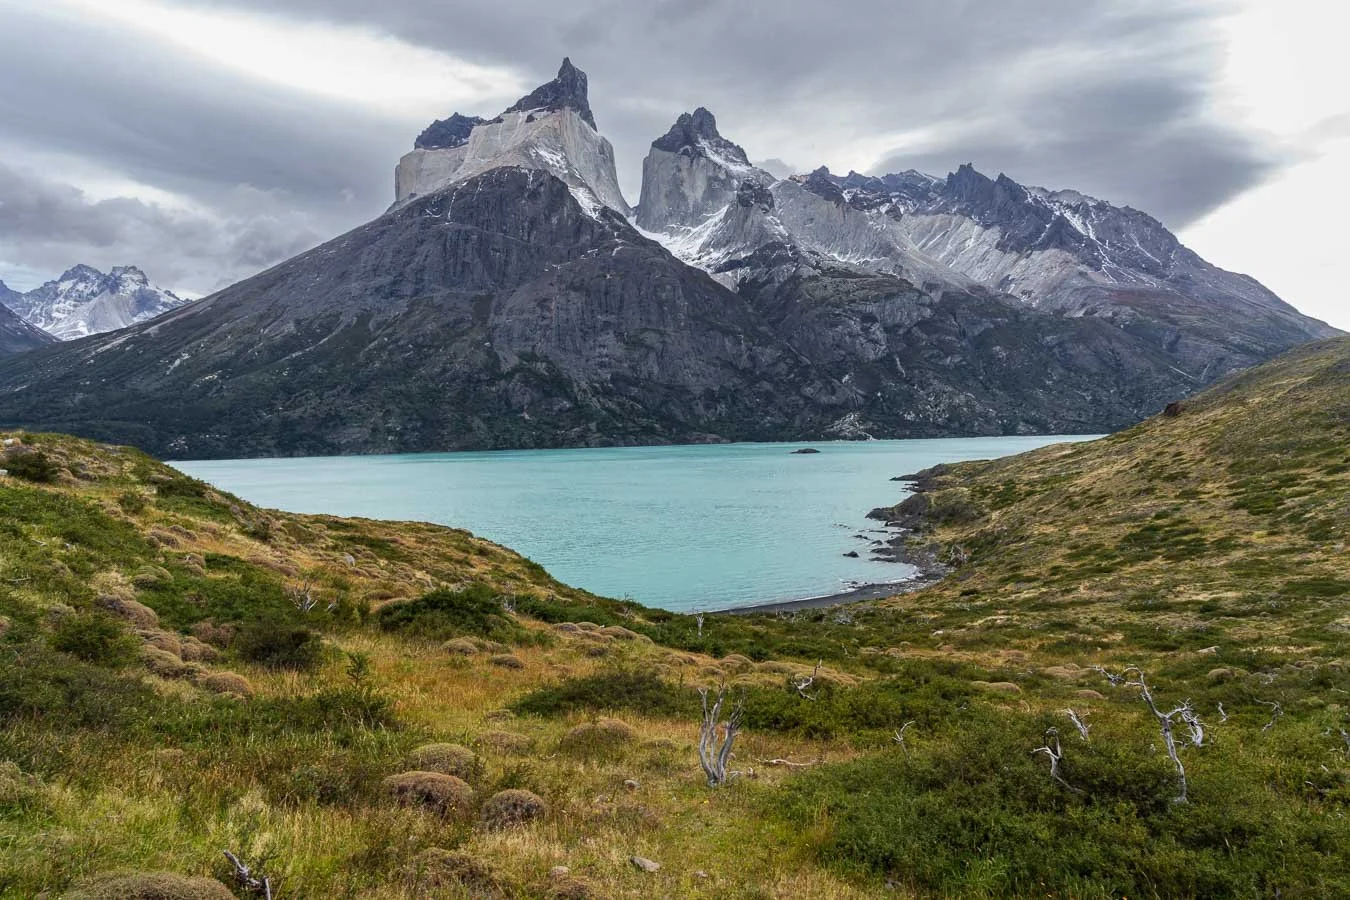
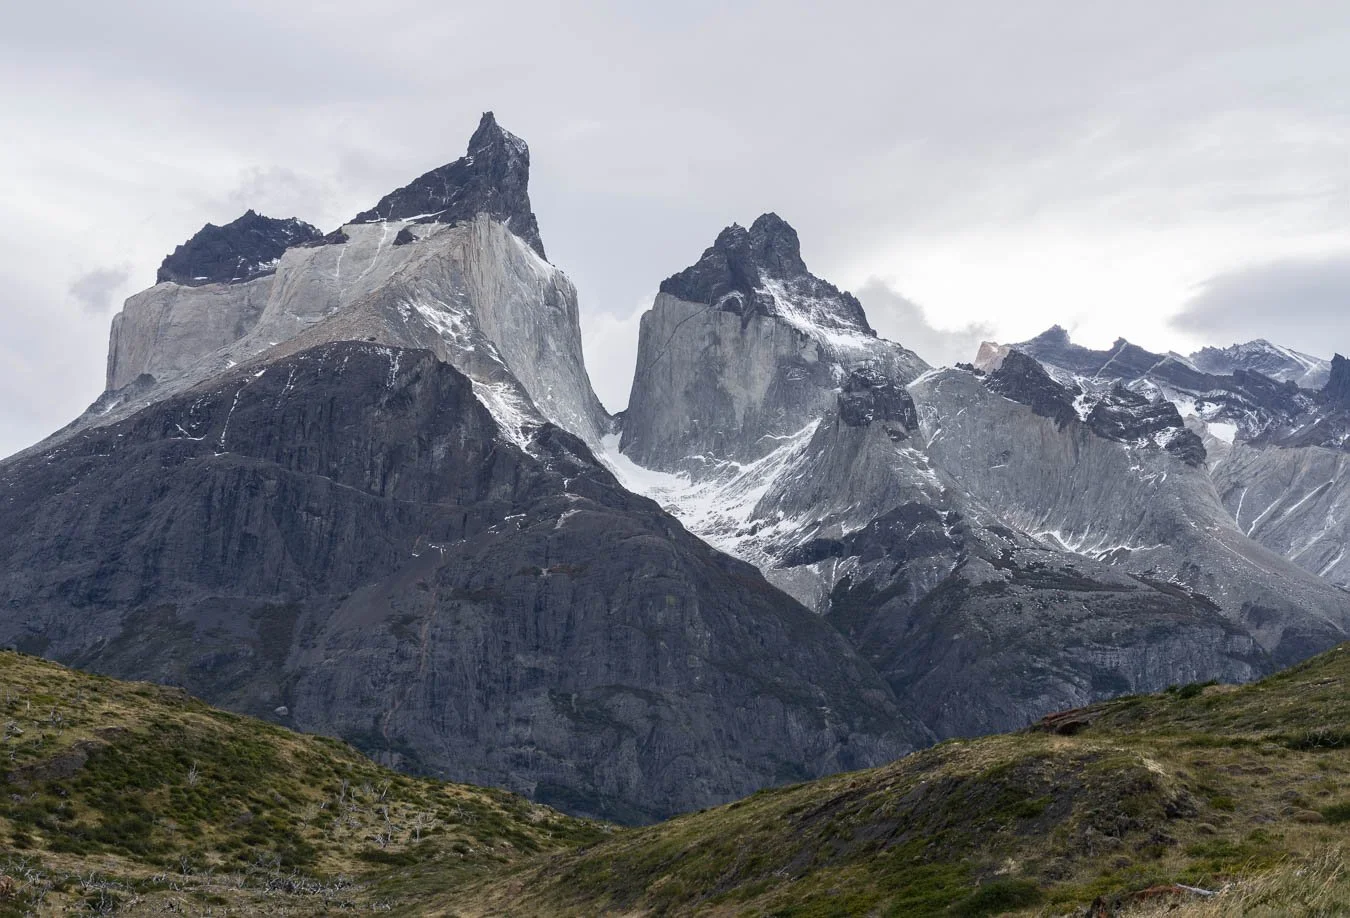
Our next destination was the Camping Lago Pehoé, which is located within Torres del Paine National Park. Keep in mind that you need to buy an online permit to enter the park and the cost is determined by how long you intend to stay there (more below). On the way to the campsite, we passed Laguna Amarga, which is a stunning viewpoint for seeing the towers before we got our first proper glimpse of Cuernos del Paine from up-close which was an experience that is really difficult to put into words.
While the landscape surrounding the Paine Massif is somewhat hilly, it pales in comparison to the height of the adjacent mountains. The sheer size of these peaks cannot be accurately portrayed in photographs. This is truly something you must see for yourself! Along the road to the campsite there are occasional viewpoints where you can park your car to take in the stunning views of the peaks but be prepared for strong winds if you opt to get out of your vehicle.

We chose to stay at the campsite Lago Pehoé for a few days because of its central location within the park (which allowed us to reach the trailheads of several day hikes relatively fast) and the unbeatable views of the Paine Massif from the shores of the lake. The campsite itself was well-equipped, with sheltered tent spots to protect against the wind and a personal picnic table for cooking and dining. It also features a small ‘supermarket’ where you can buy essentials like gas for your camp stove, sanitary items, and snacks etc. but no fresh food. It does, however, have a restaurant where you can eat and it features very large serving sizes. The food is delicious, but of course dining here is much pricier than cooking yourself, especially when staying for a few days.
We interrupted our quiet stay at Camping Lago Pehoé to tackle the infamous hike to the base of the towers of Torres del Paine. The hike spans 20.1 km round trip with 1,014 m of elevation gain. Although it’s possible to complete it in a single day, we opted to break it into two legs to enjoy the sunrise at the viewpoint. We stayed overnight at Campamento Chileno, which is known for its lively atmosphere. This refugio can be busy, so it’s recommended to book in advance, especially if you plan on using their pre-pitched tents and/or purchasing their provided meal options. While pre-pitched tents and prepared meals are available for those who don’t want to carry their own gear, keep in mind that they come at a higher price. However, the refugio also offers snacks/beverages and a few small meal options that can be purchased at specific hours of the day.
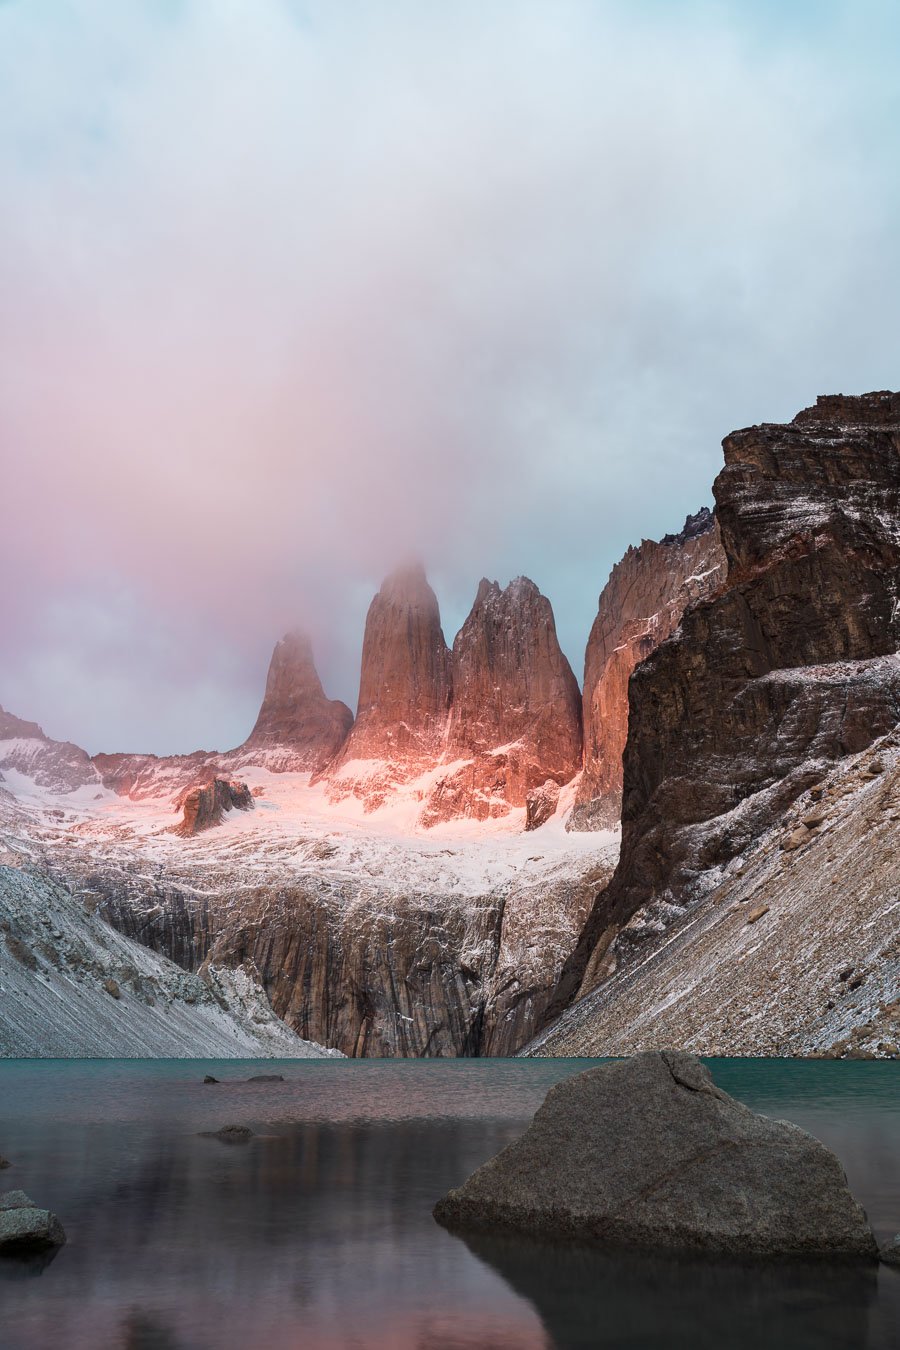
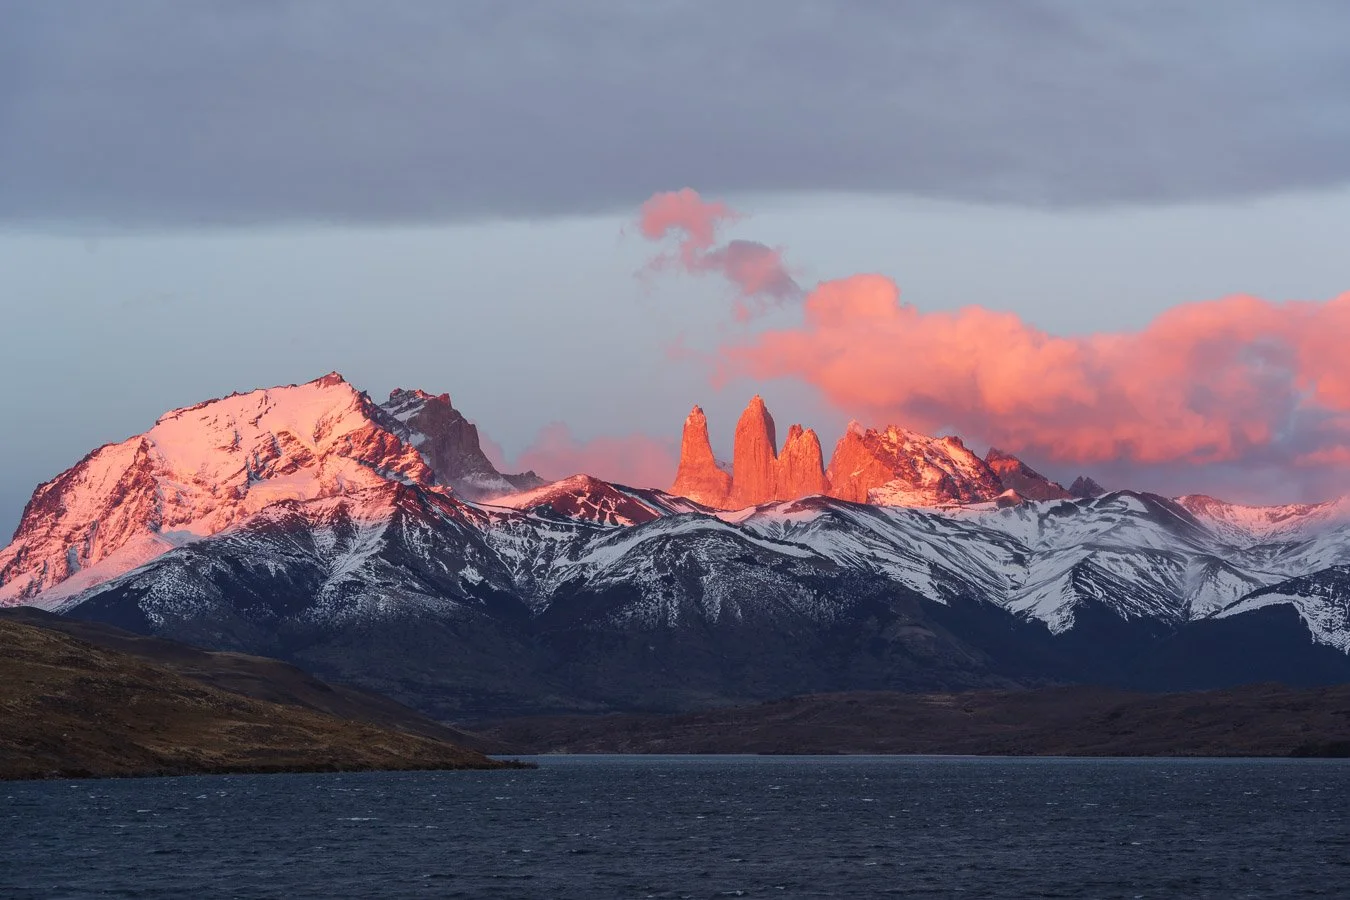
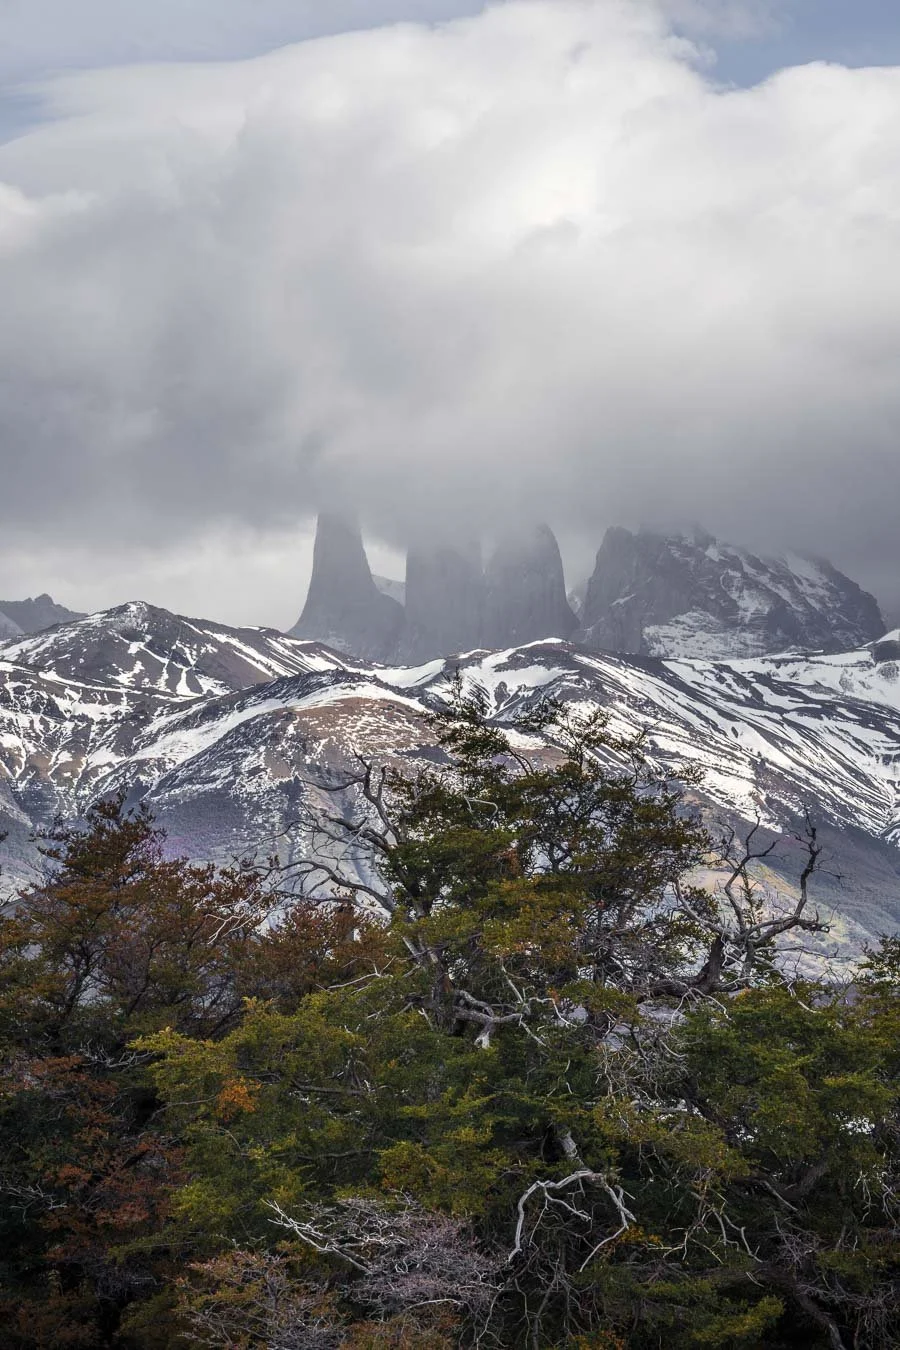
View of the three granite towers of Torres del Paine, eponymous for the national park, as they’re illuminated by the first rays of sunlight.
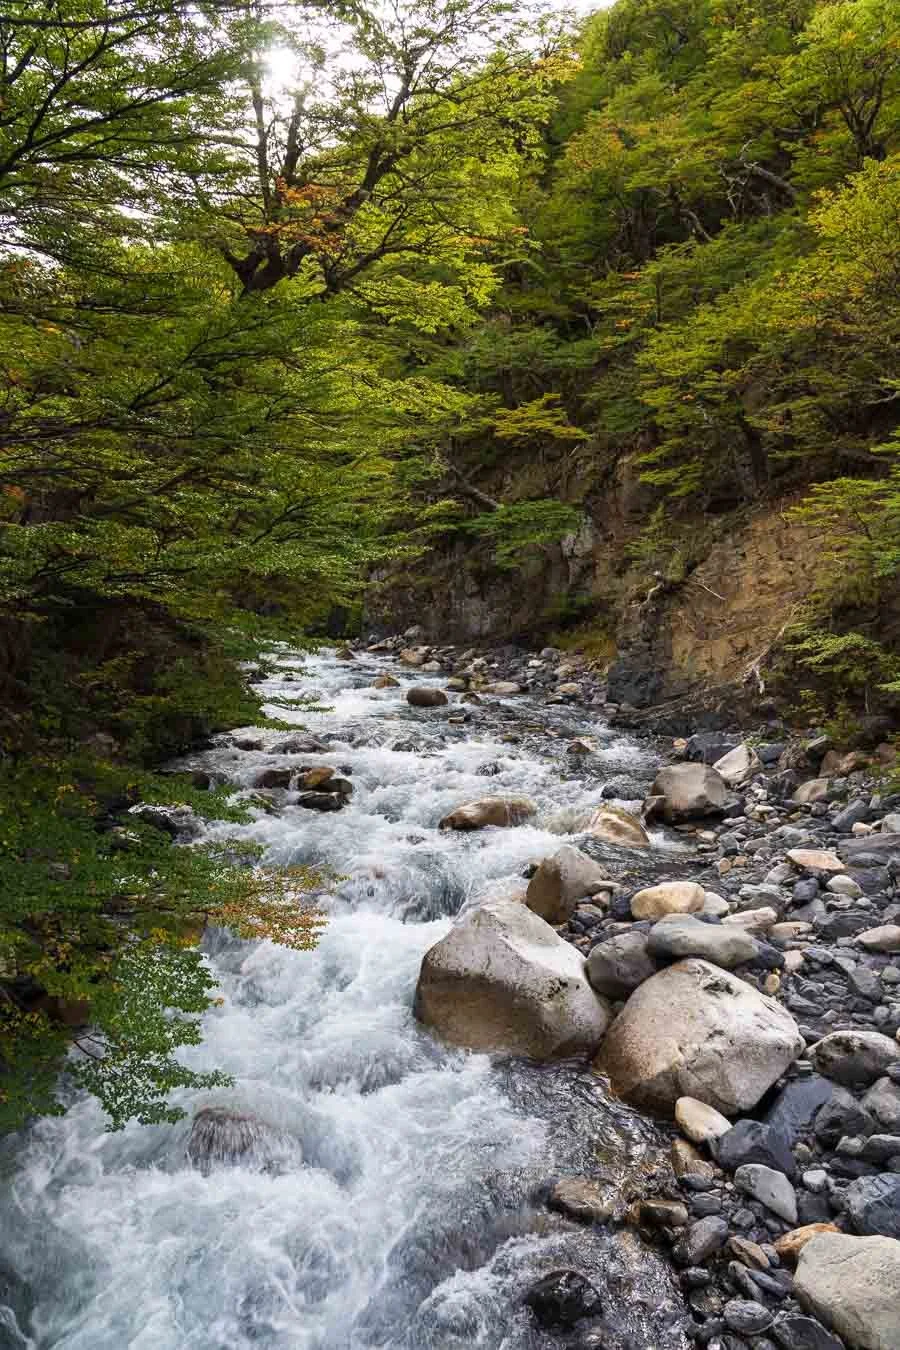
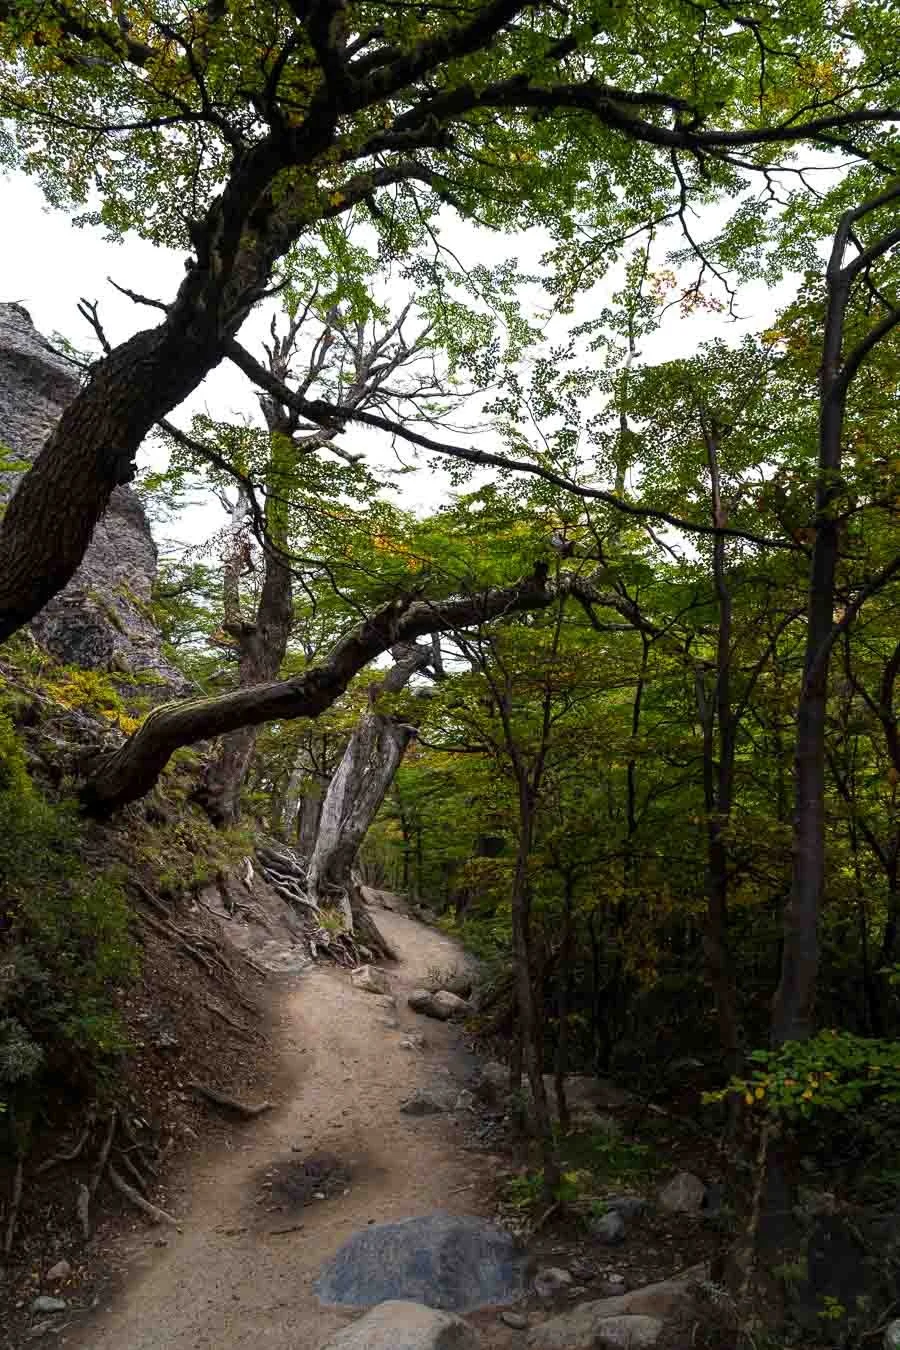
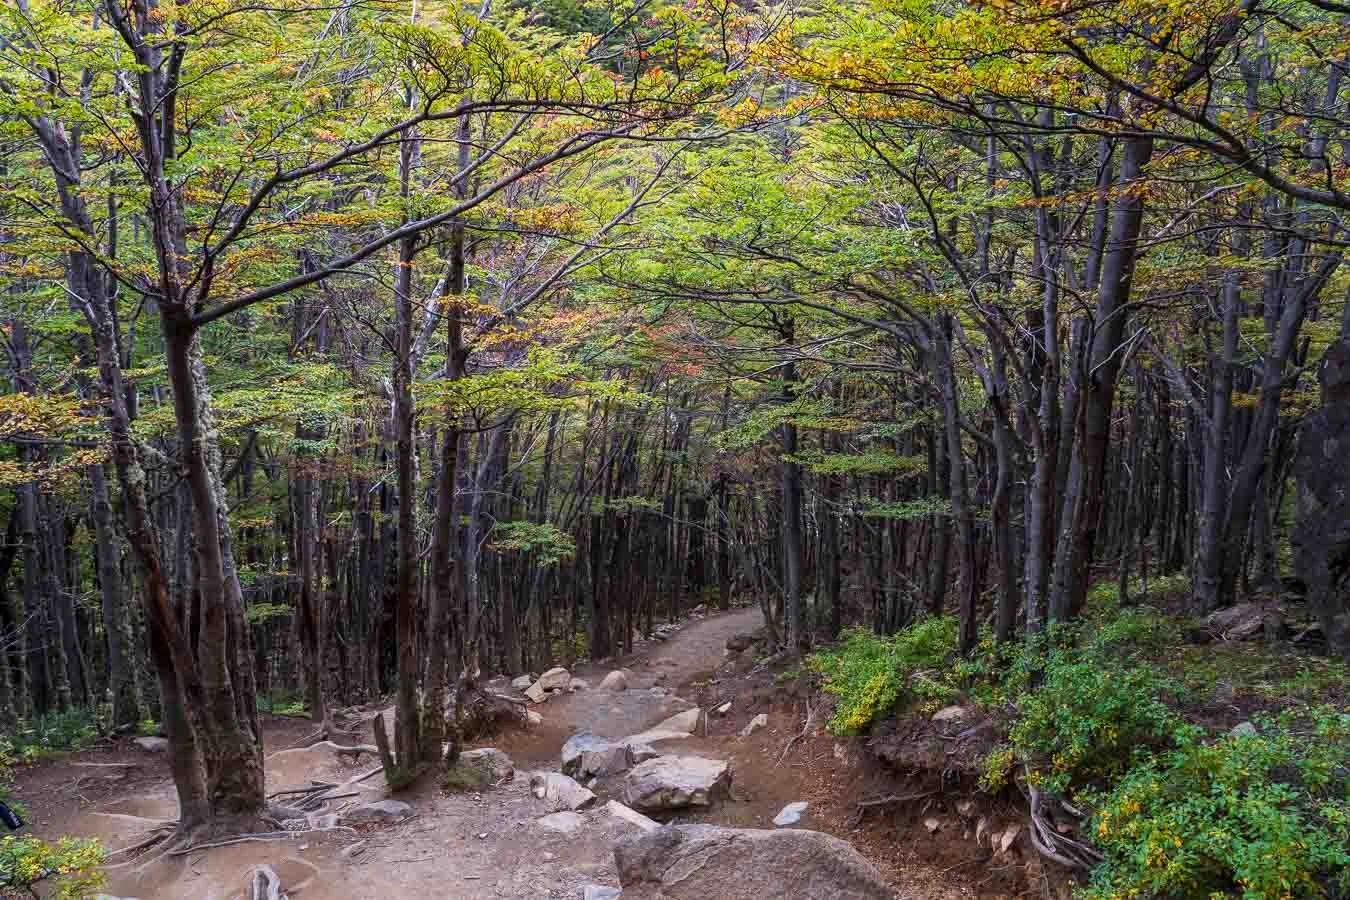
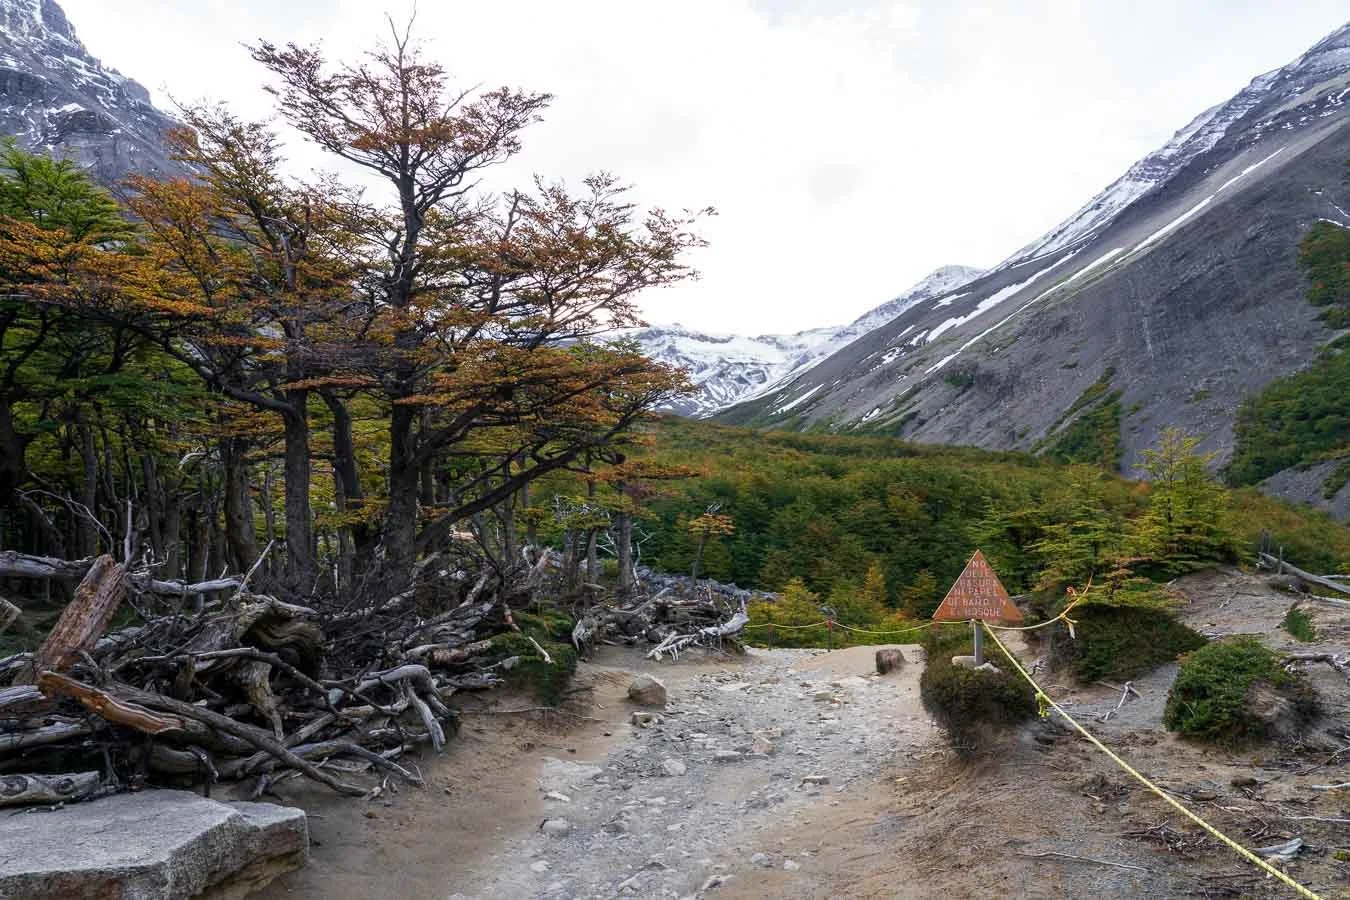
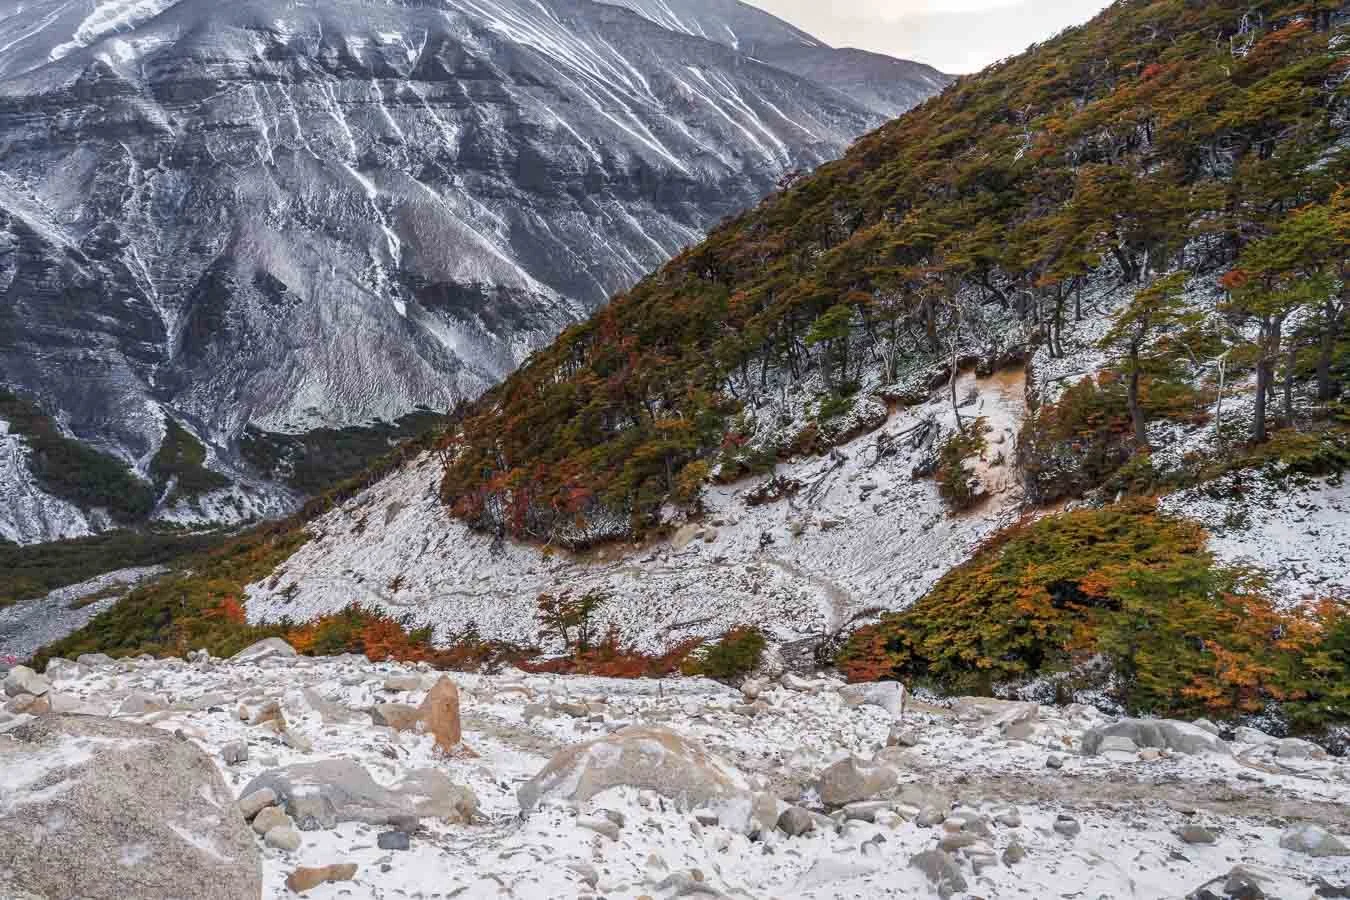
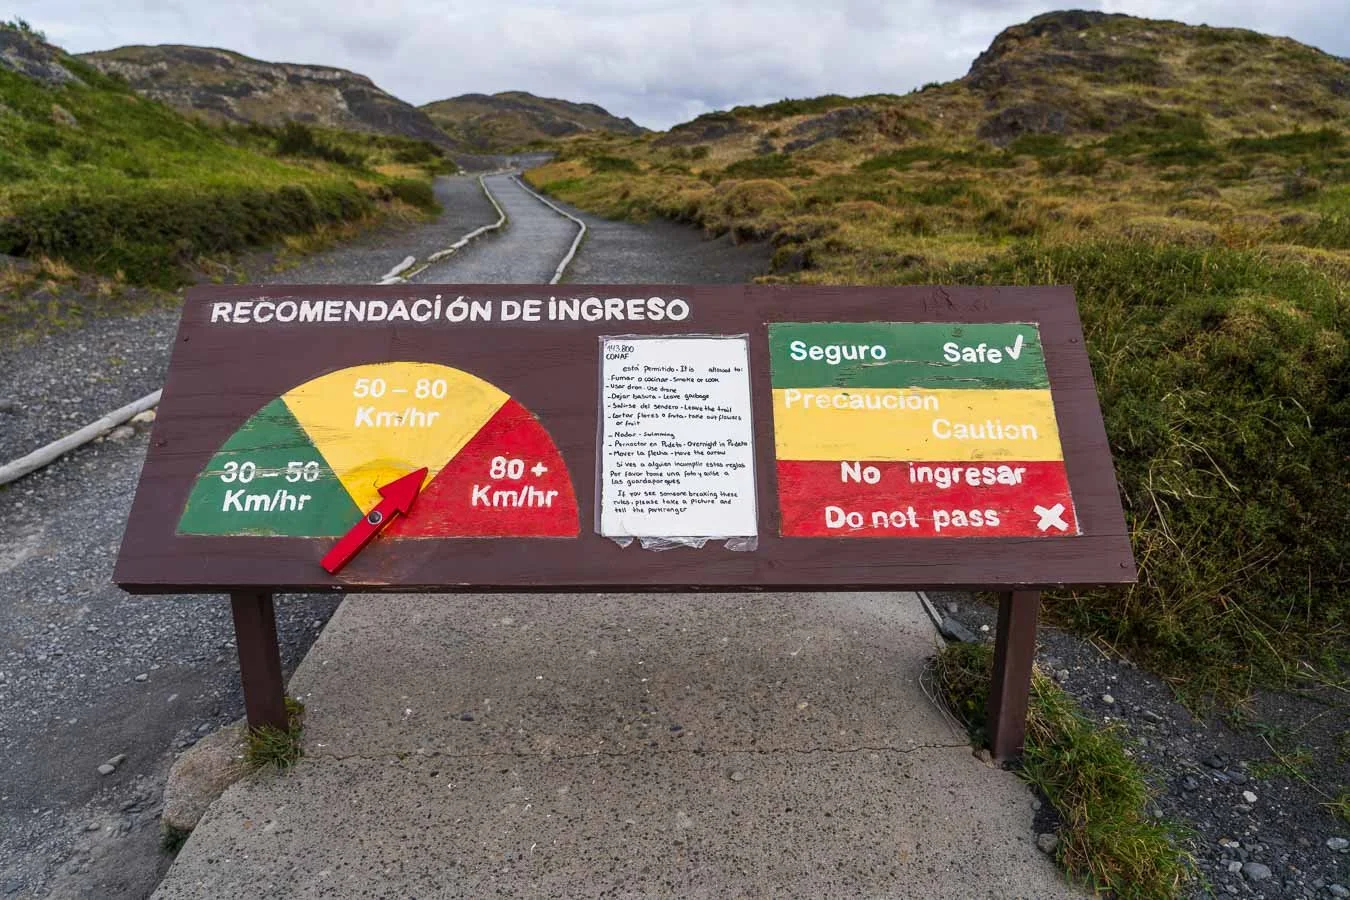
The hike from the trailhead to Campamento Chileno was relatively easy, offering spectacular views of the surrounding plains. The refugio roughly marks the halfway point of the hike to the towers. Hence, it’s a perfect place to break up the base trek. We arrived at the refugio by early afternoon and after setting up camp, explored parts of the second stretch of the trail, which winds through forests and crosses streams, making for a visually diverse experience. Approximately 2 km from the refugio, you’ll encounter a sign indicating that the last point in time to start your ascent to the towers is 3:30 pm – any later and the park rangers will turn you back (time varies by season). We saved this final push for the next morning.
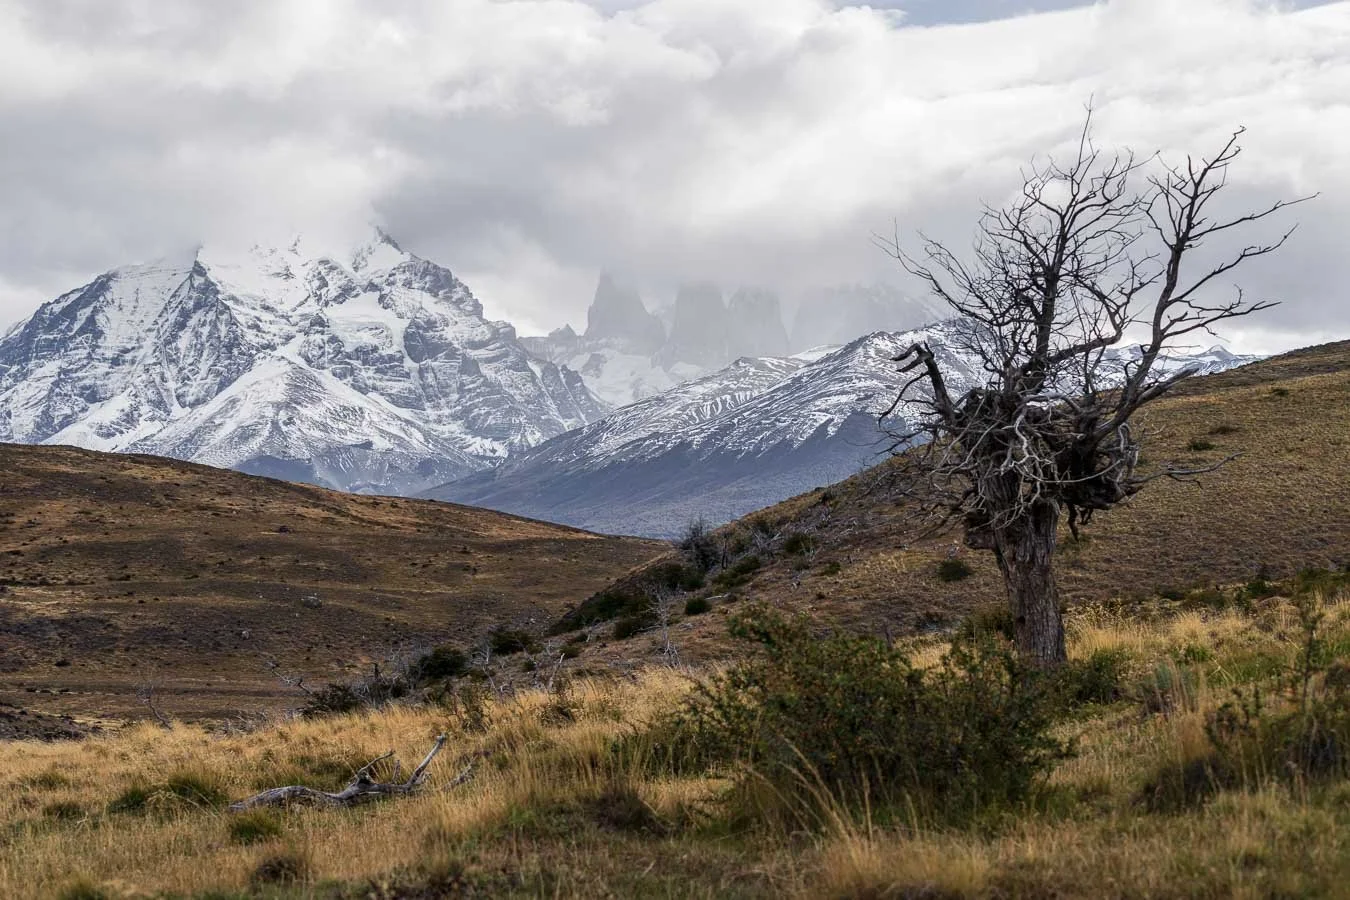
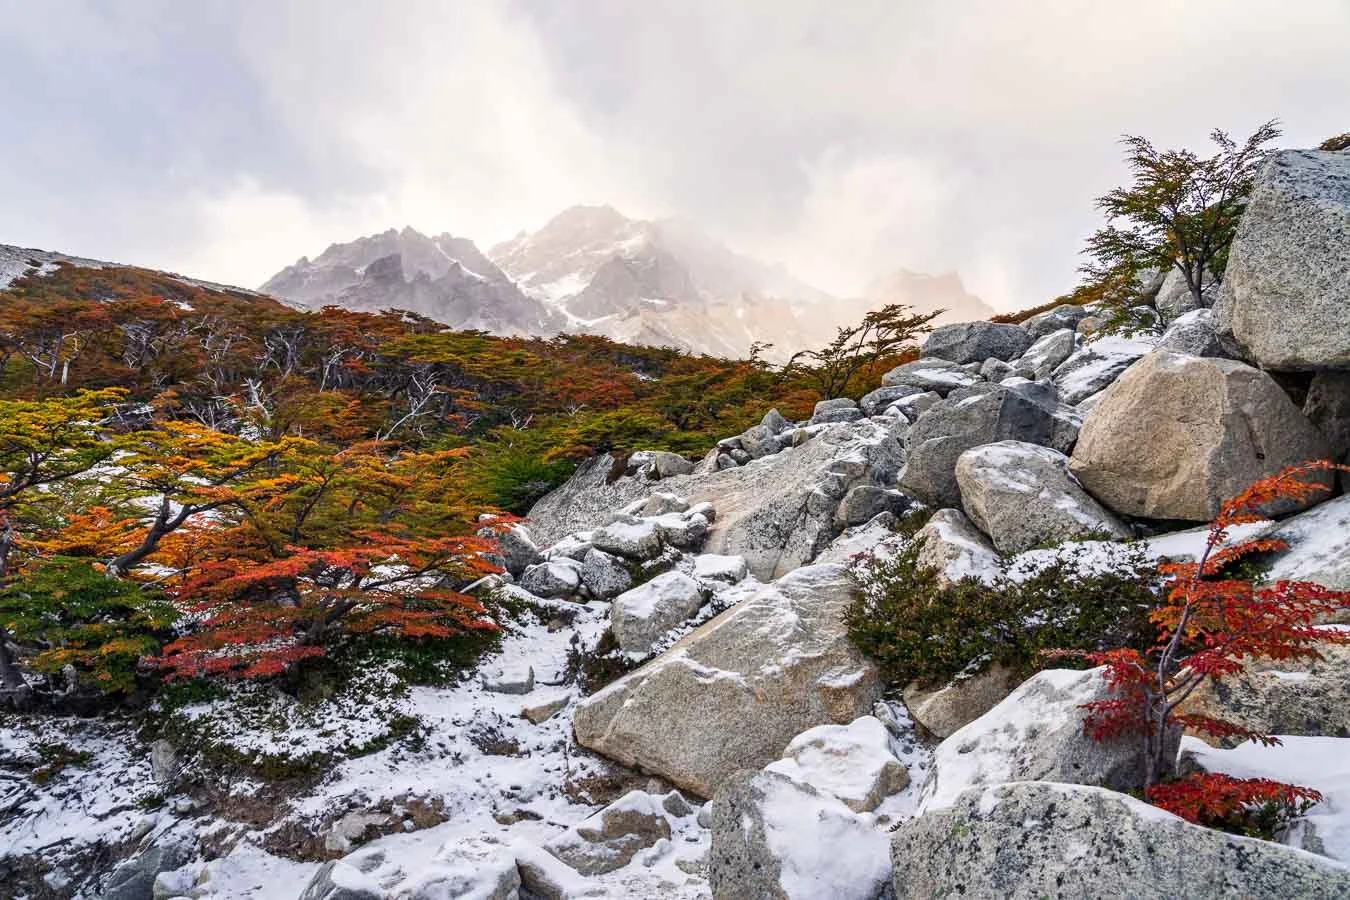
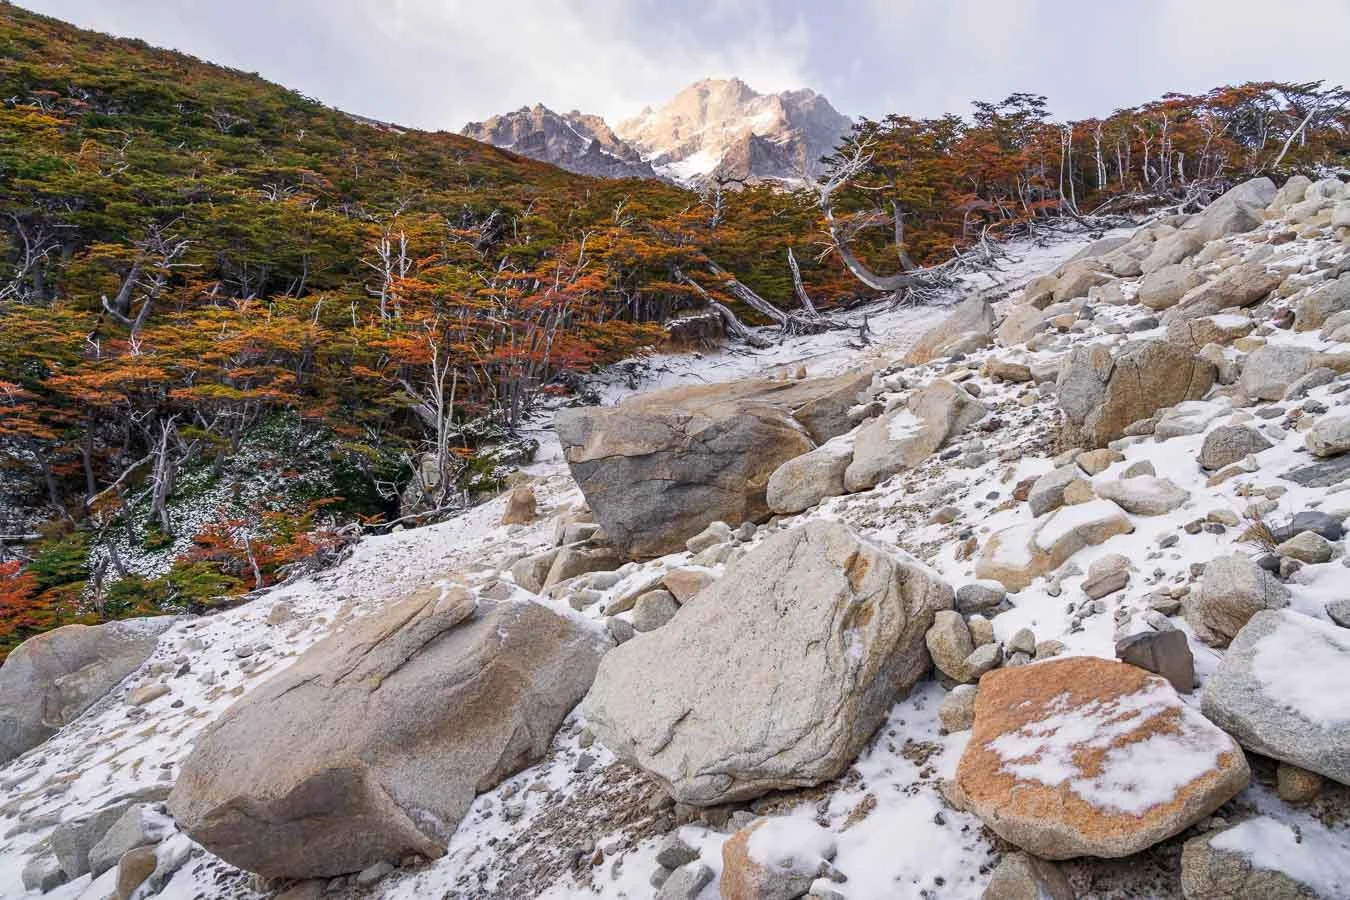
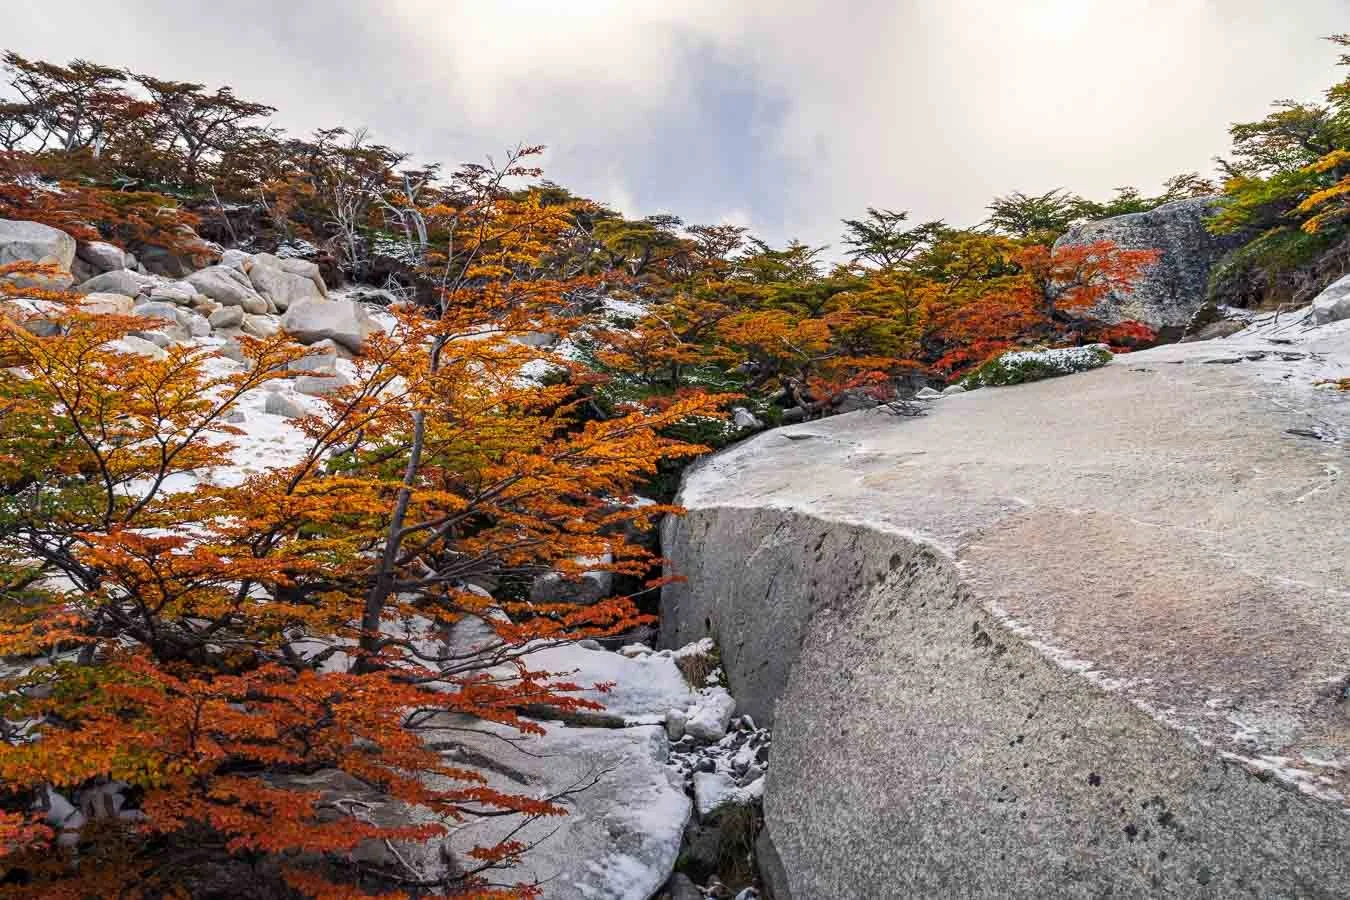
Although daytime temperatures in early April remained relatively mild, we woke up to a light snowfall around 4:30 a.m (keep in mind that sunrise times vary substantially by season, so if you're planning to see the sunrise at the Torres del Paine towers, you might need to adjust your wake-up schedule accordingly). The light layer of snow posed no issue for the first part of the hike through the dense forest. Once we emerged from the tree cover though, the trail became increasingly rocky and technically challenging, with the fresh snow now creating some very slippery slopes. You should bring essential gear such as hiking poles and (various) appropriate layers of clothing. However, you may also consider bringing crampons when going there in fall for your own safety (and definitely bring them in the winter, as they’re mandatory during that season)! The last kilometer of the base trek is a rather steep incline that takes you over larger boulders and makes the ascent quite physically demanding but seeing the sun and its morning glow slowly approach the horizon did boost our motivation considerably to not miss the sunrise at the base of the towers! Unfortunately, the towers were partially shrouded in clouds by the time we finished our ascent. Regardless, seeing them bathed in the morning sun’s red glow was an unforgettable experience. The descent during golden hour was equally magical, with the fall foliage of the Nothofagus trees glowing in the soft light.

We decided to return to Camping Lago Pehoé for two more nights. As mentioned above, this campsite with its prime location offers short distances to the trailheads of several other hikes which grant you epic views of the Paine Massif. It’s a perfect home base if you plan on doing some shorter day hikes in the park.
For instance, two relatively easy yet breathtaking hikes in Torres del Paine National Park close by are the Mirador Cuernos and Mirador Condor trails.
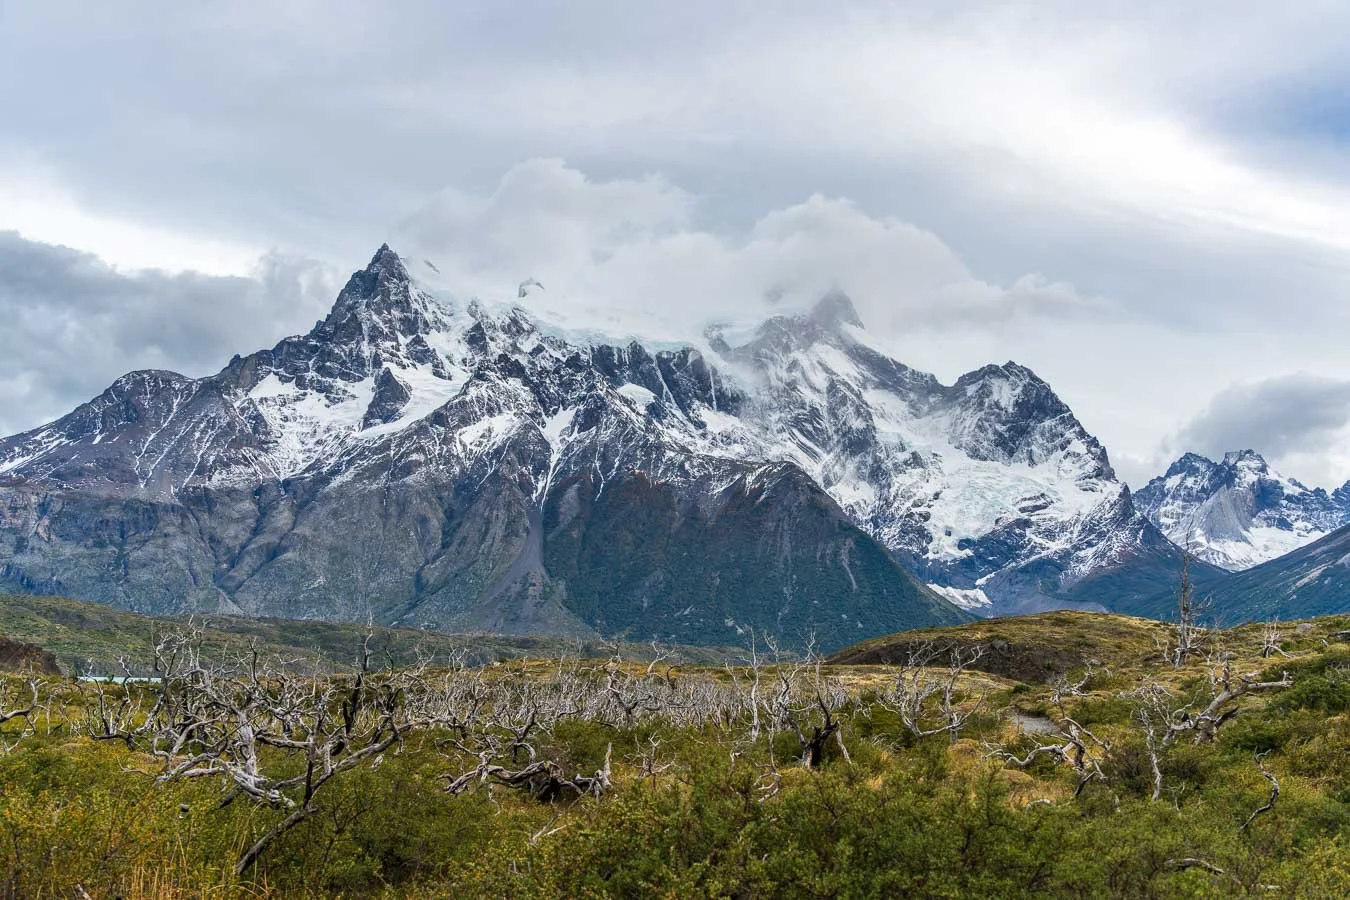
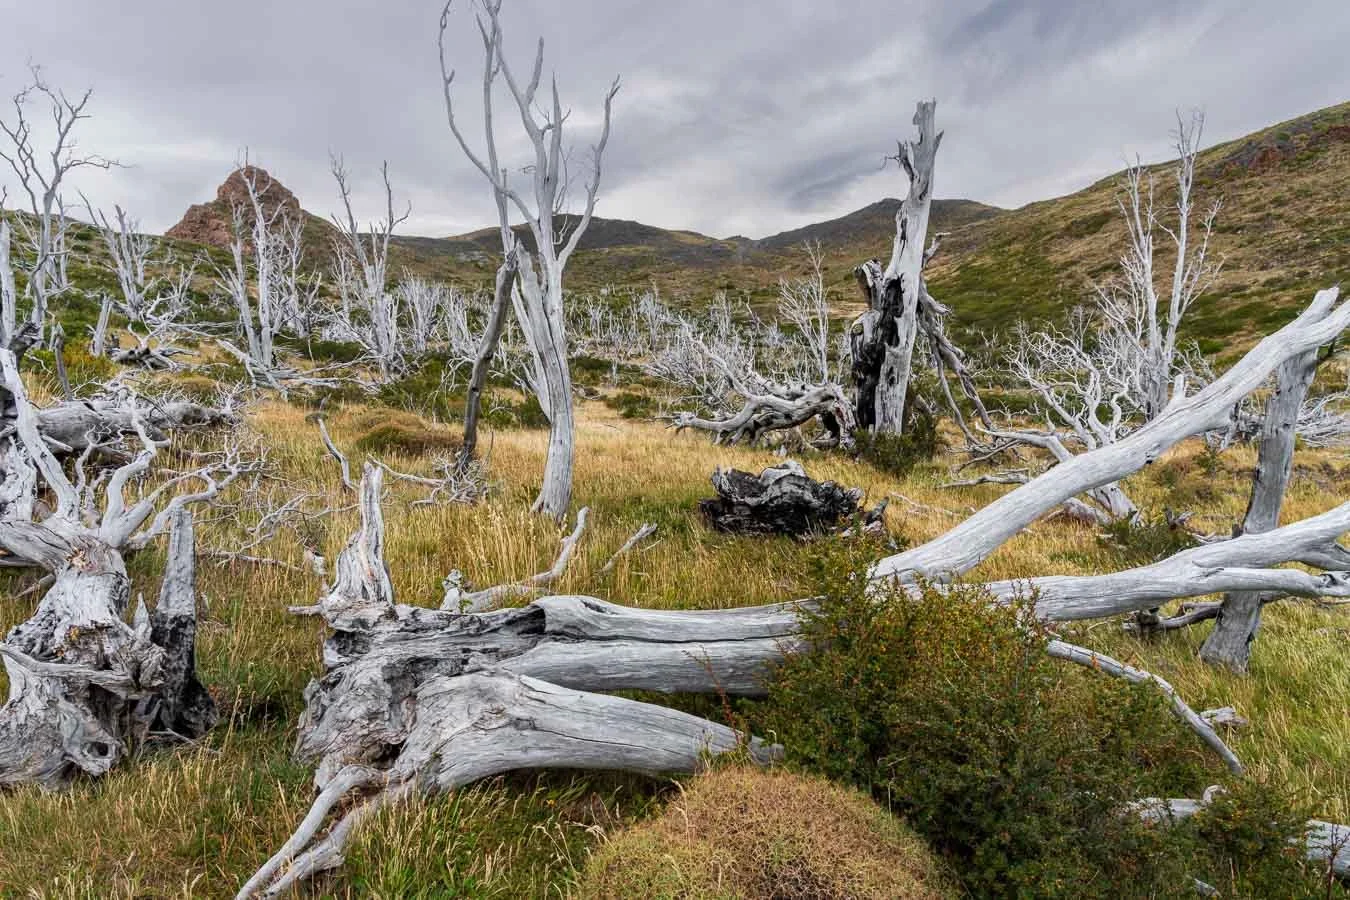
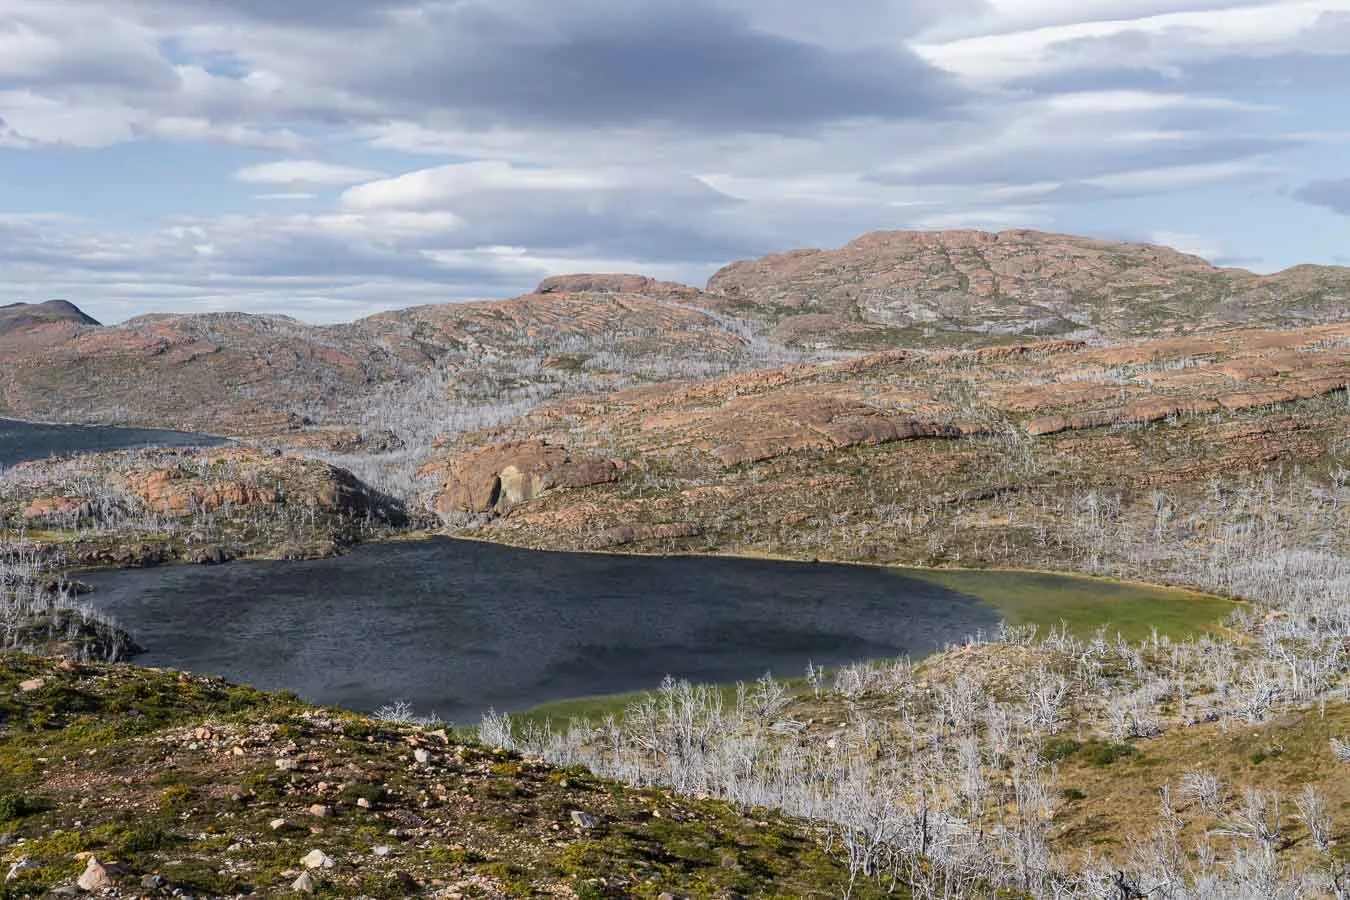
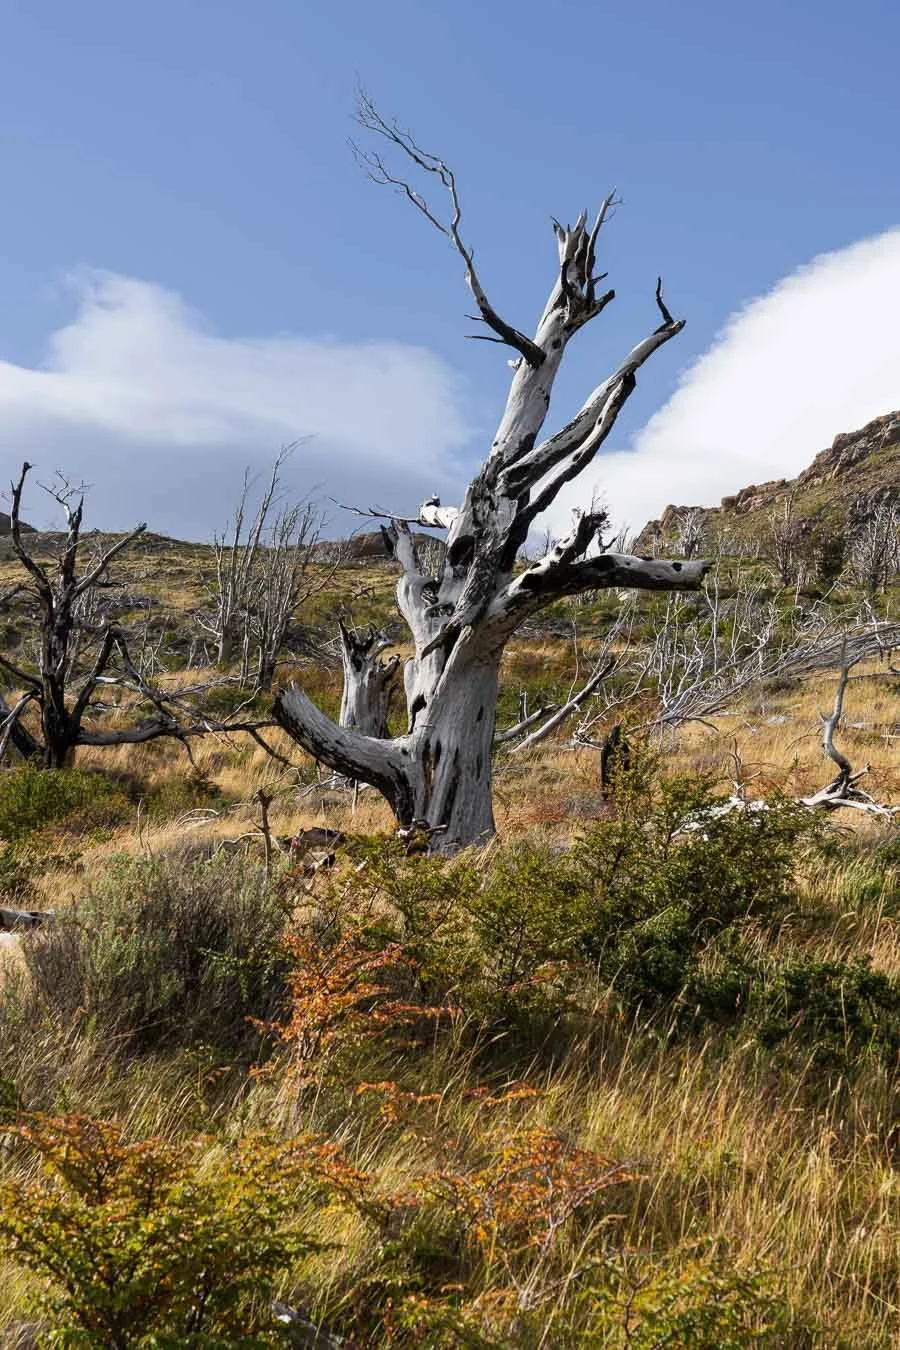
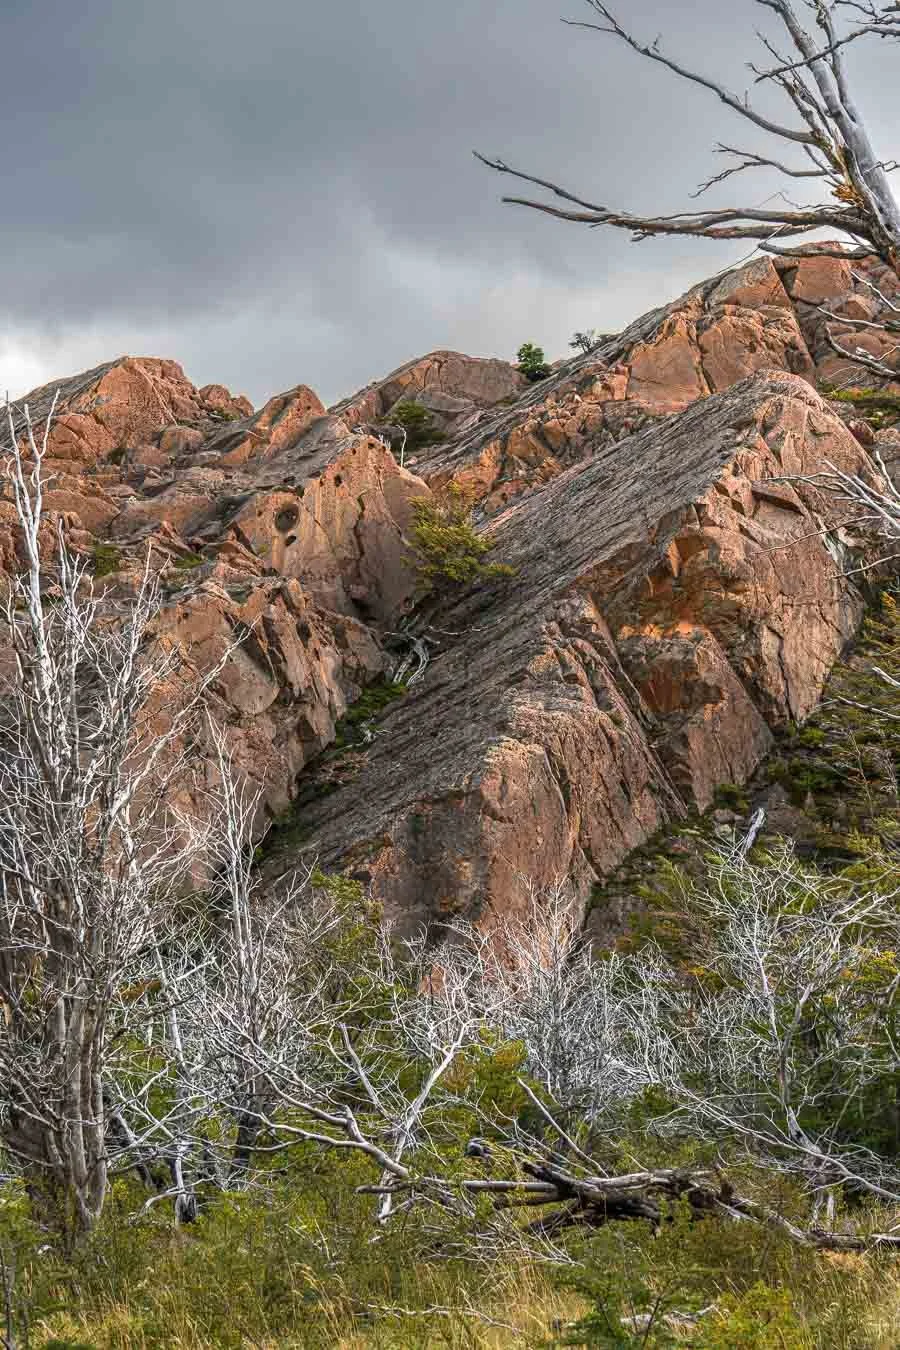
The trailhead to Mirador Cuernos is just a 12-minute drive from Camping Lago Pehoé. This 6.4 km out-and-back trail with a modest 194 m elevation gain will take around 2 h to complete, depending on how often you pause for photos or snacks. The final viewpoint rewards you with an incredible view of the Cuernos Peaks, but what left a lasting impression were the remnants of the severe wildfires from 2005 and 2011. Charred trees stand like sentinels against the backdrop of the dramatic peaks, creating a truly unforgettable scene.

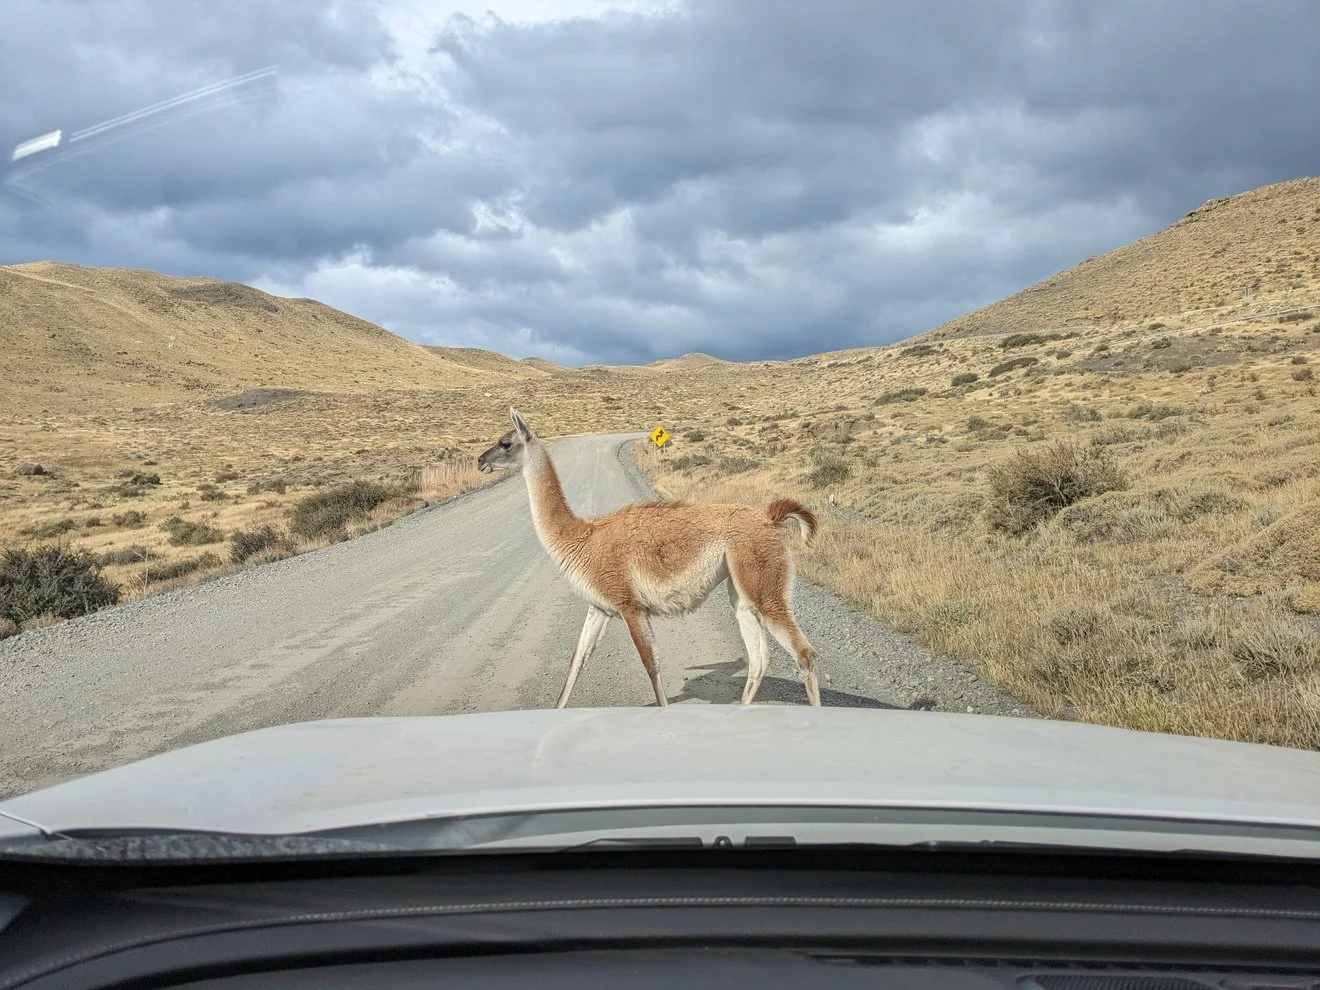
The Mirador Condor trailhead is even closer, just a few minutes walking distance from Camping Lago Pehoé. This 2.4 km out-and-back hike involves a steeper climb with 225 m of elevation gain. The typically strong winds are likely to make this ascent more difficult since the terrain is relatively exposed. When we hiked up, the winds were that strong that moving forward could be a struggle at times (however, wind speeds were particularly high for a few days back then – more below). The panoramic views at the summit were worth the effort though. From the top, you’re greeted with a sweeping vista of the Paine Massif and Lago Pehoé. And if you’re lucky like us, you’ll even see plenty of guanacos on your way up the trail.
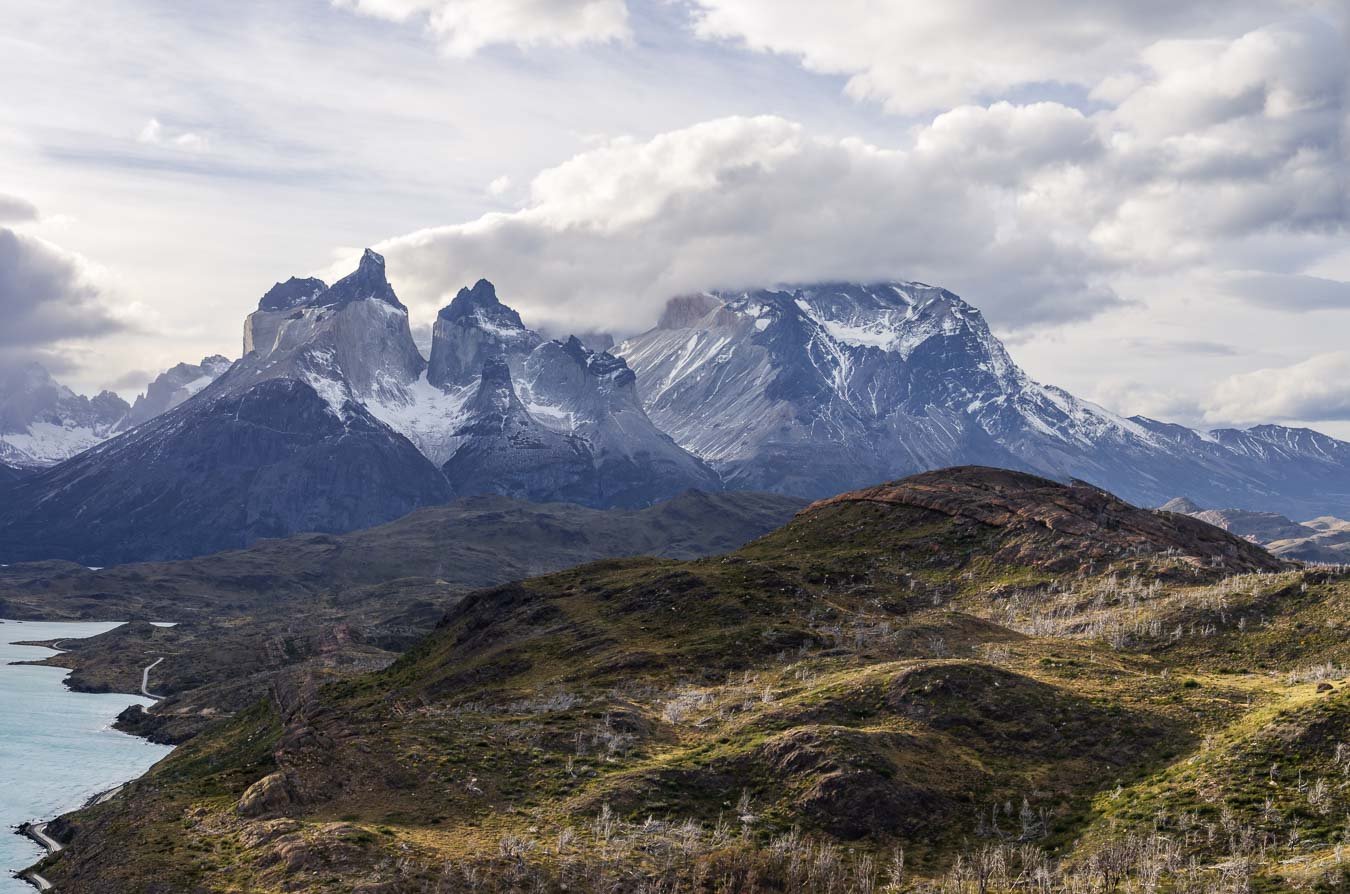

We also used the more relaxed two days at Camping Lago Pehoé for a ‘quick’ grocery run back to Puerto Natales. The trip is roughly 100 km and takes nearly 2 h due to gravel roads with potholes of various severity. Multiply that by two for out-and-back! Ideally, you can avoid such a long restocking trip, but we overestimated the variety of goods of the supermarket at the campsite, at least in terms of food. On the bright side, if you read this post and plan better than we did, you might be able to use that day as a rest day at camp or for additional exploring, rather than restocking. If you do make the trek to Puerto Natales, you still get amazing views of the Paine Massif constantly (either in the rear mirror on the way out or directly in front of you on your way back to the national park) which makes the lost time more tolerable.
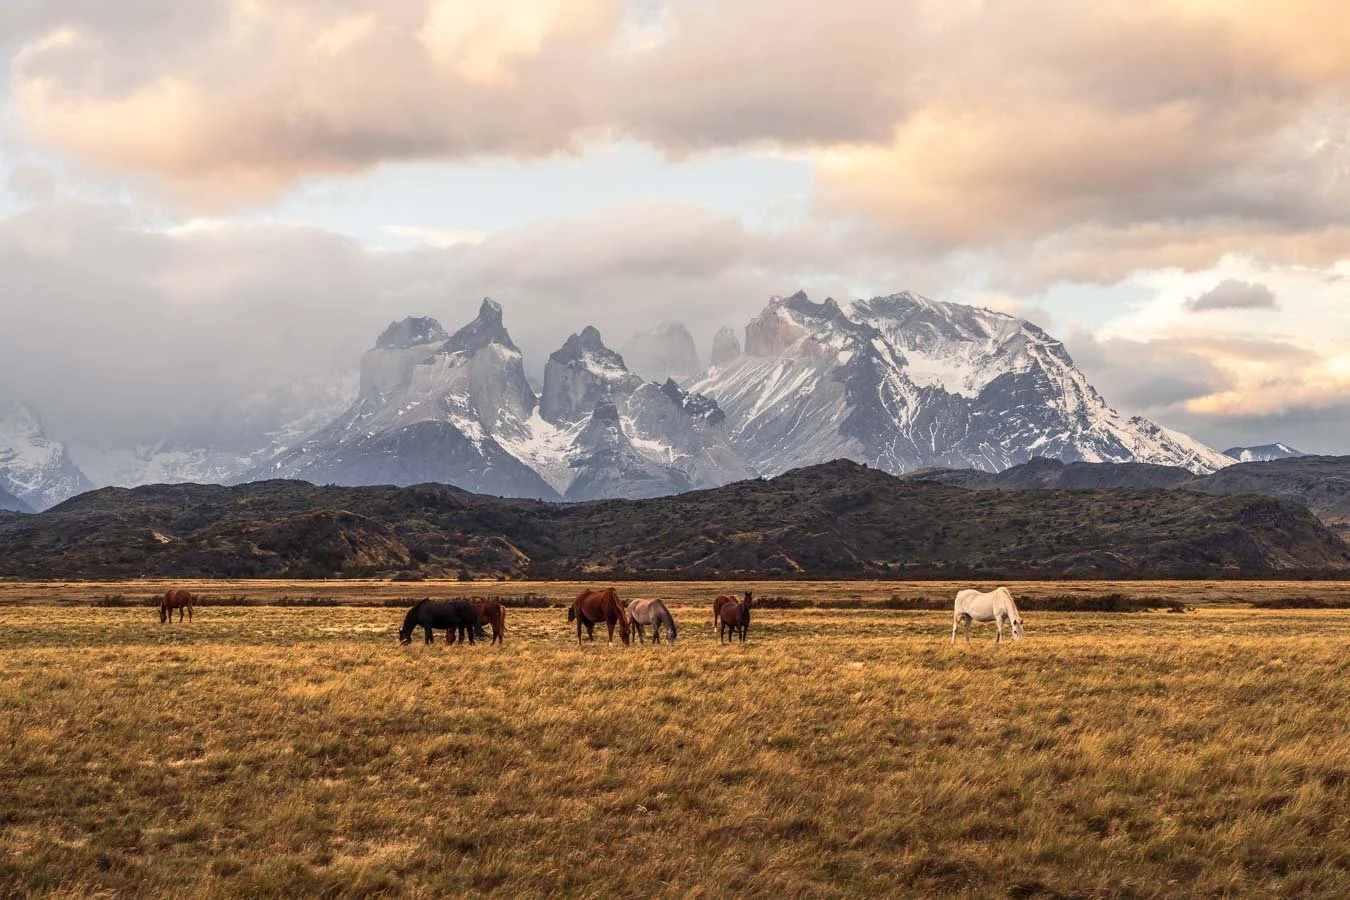
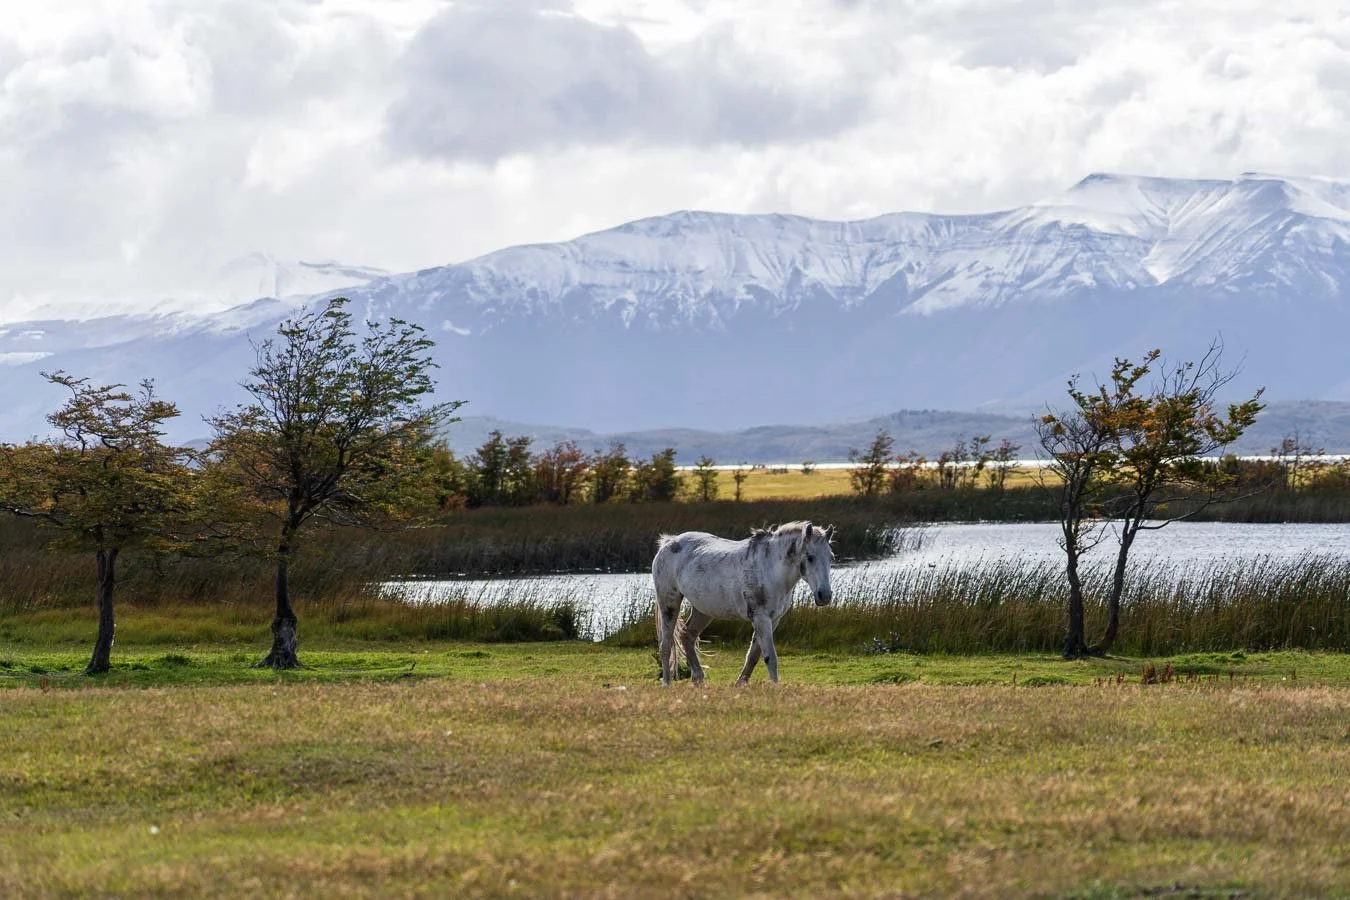
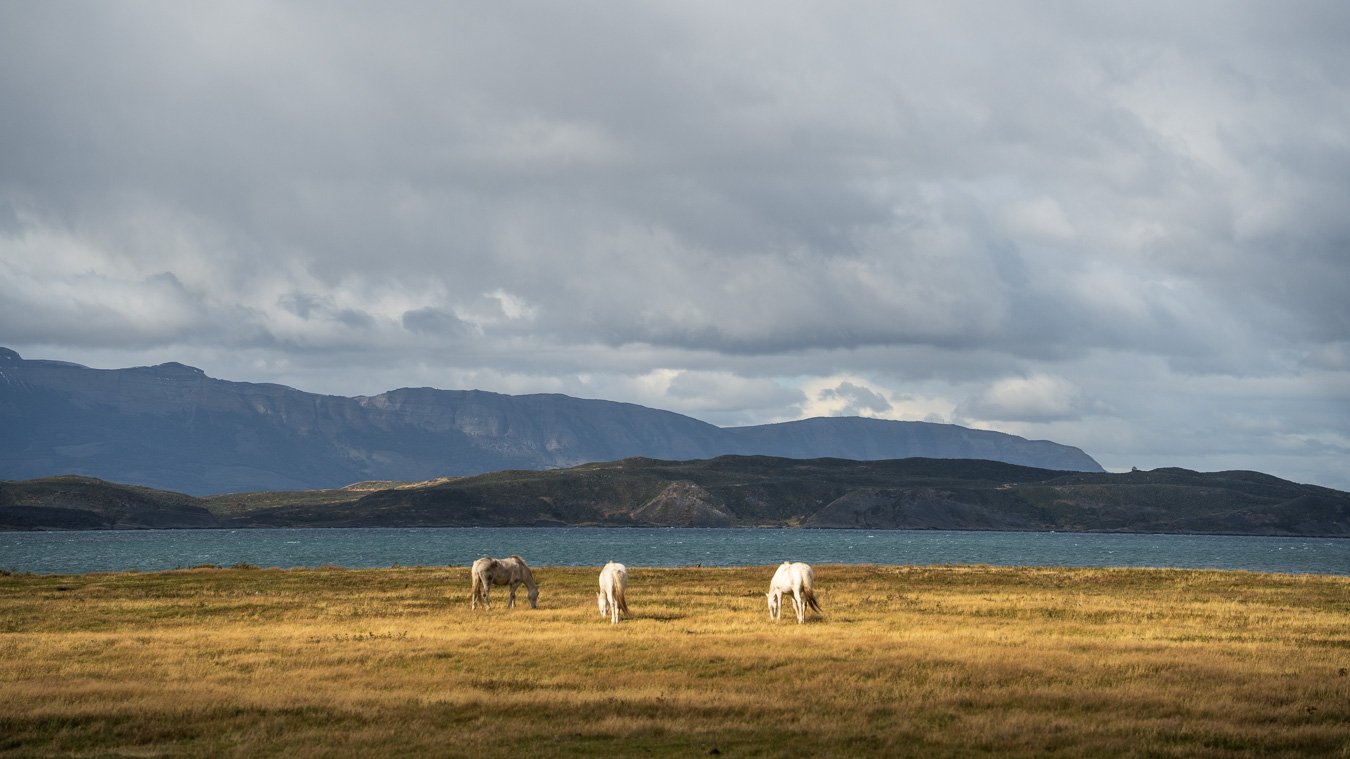
Exploring the outskirts of the national park, for instance road Y-290 in the south, may reward you with a sighting of Patagonia’s unique wild horses, known as baguales, set against the backdrop of Los Cuernos.
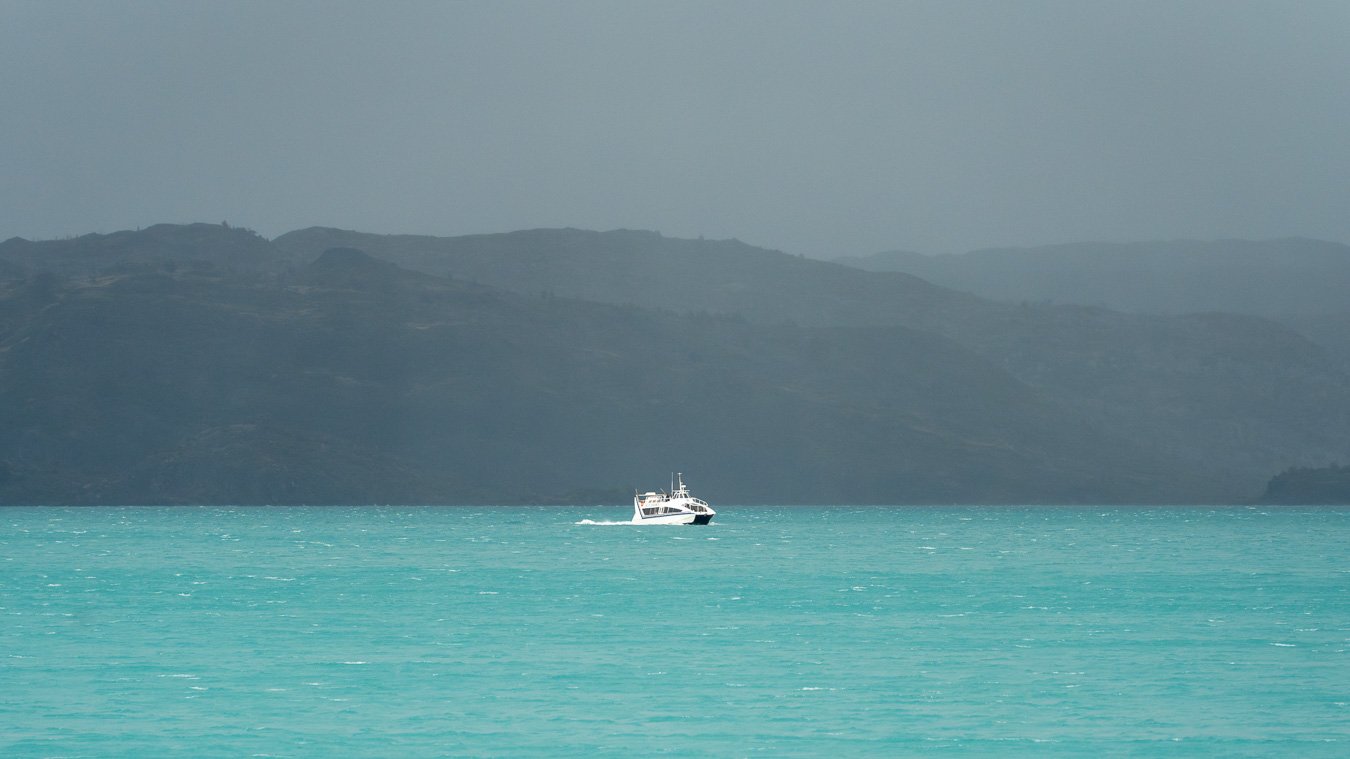
We concluded our time in the Torres del Paine National Park by hiking to Glacier Grey for which we also booked a guided glacier hiking tour. The trail to the glacier begins at the Refugio Paine Grande, which can only be reached via ferry (unless you hike the ‘W trek’ east to west starting at the Refugio Las Torres). The ferry leaves from a dock (Pudeto Pier) which is close to the car park of the hike to the Mirador Cuernos. Please note that you cannot book the ferry in advance and only cash is accepted as payment (contrary to the widespread acceptance of card everywhere else)!
During high-season (summer), the ferry service runs twice in the morning and twice in the evening. However, in the off-season, the catamaran will operate less frequently. Be sure to check the schedule beforehand (see below). While April is supposedly already in the off-season, it was still rather busy inside the park for which reason you should plan to be there somewhat early. The catamaran wasn’t that large, so it’s likely that at some point people might are turned away if capacities are exhausted. This would be especially unfortunate if you are on a tight schedule.
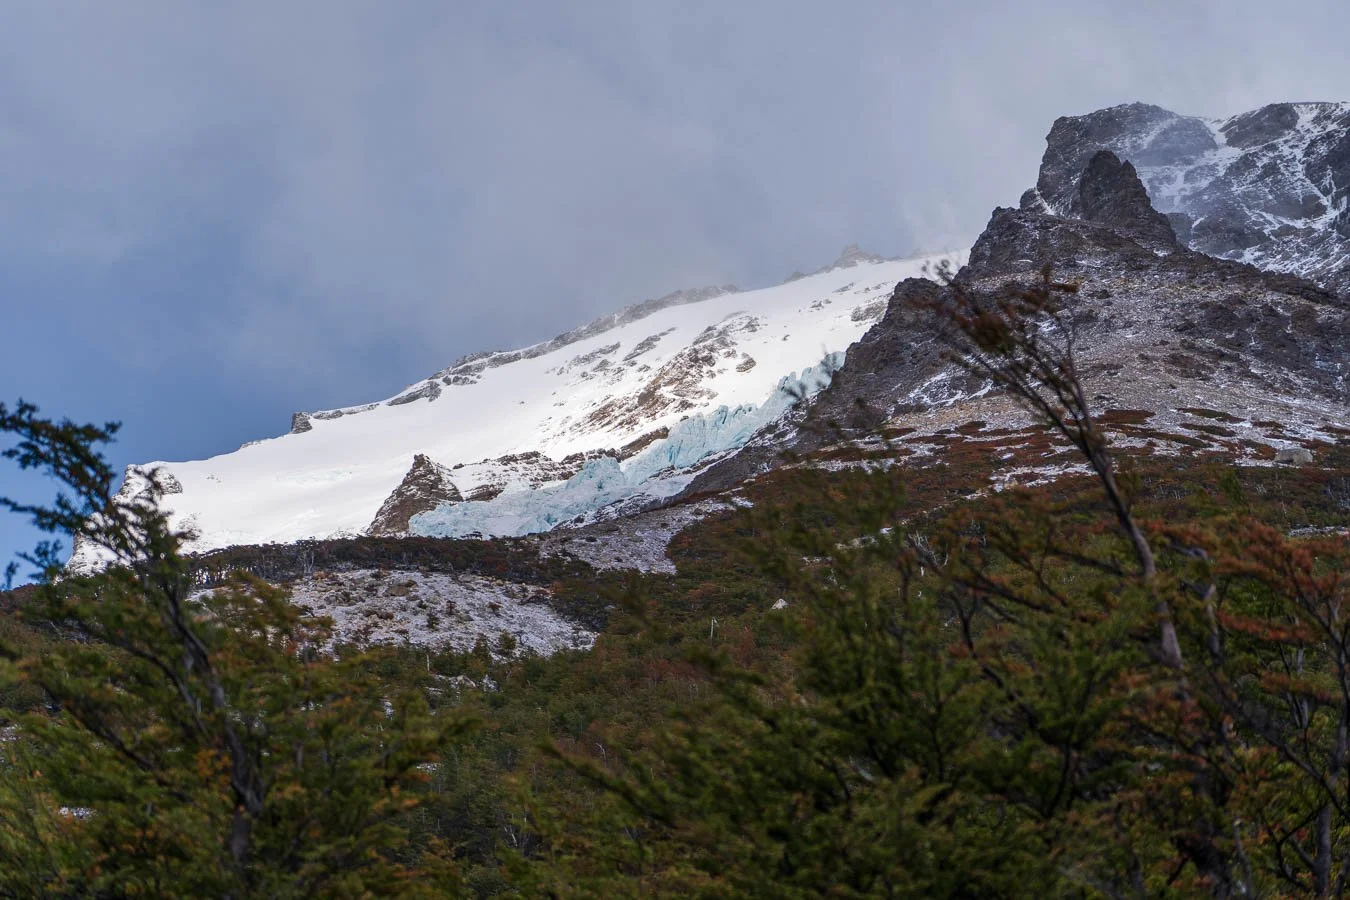
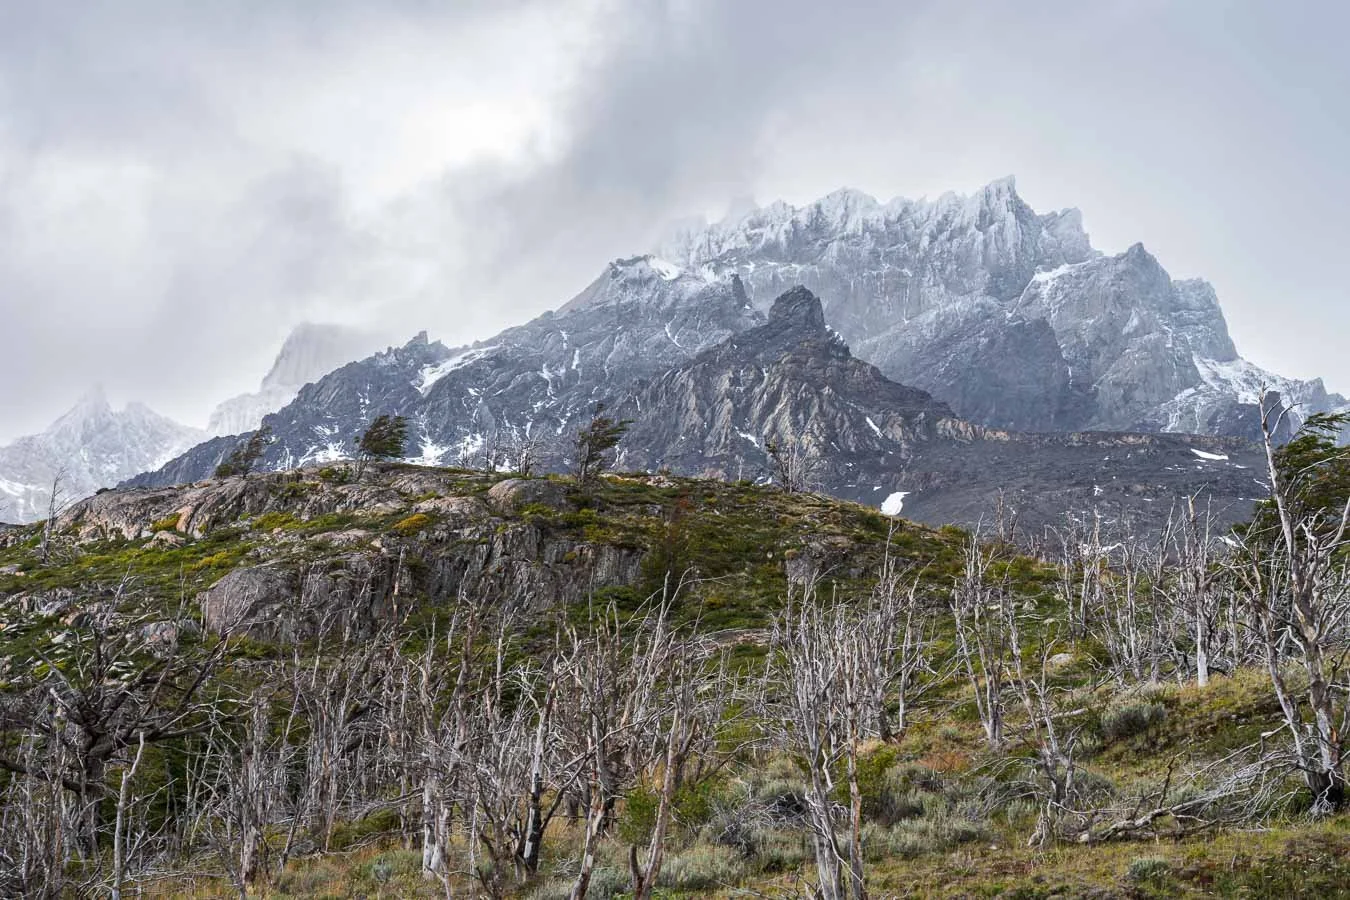
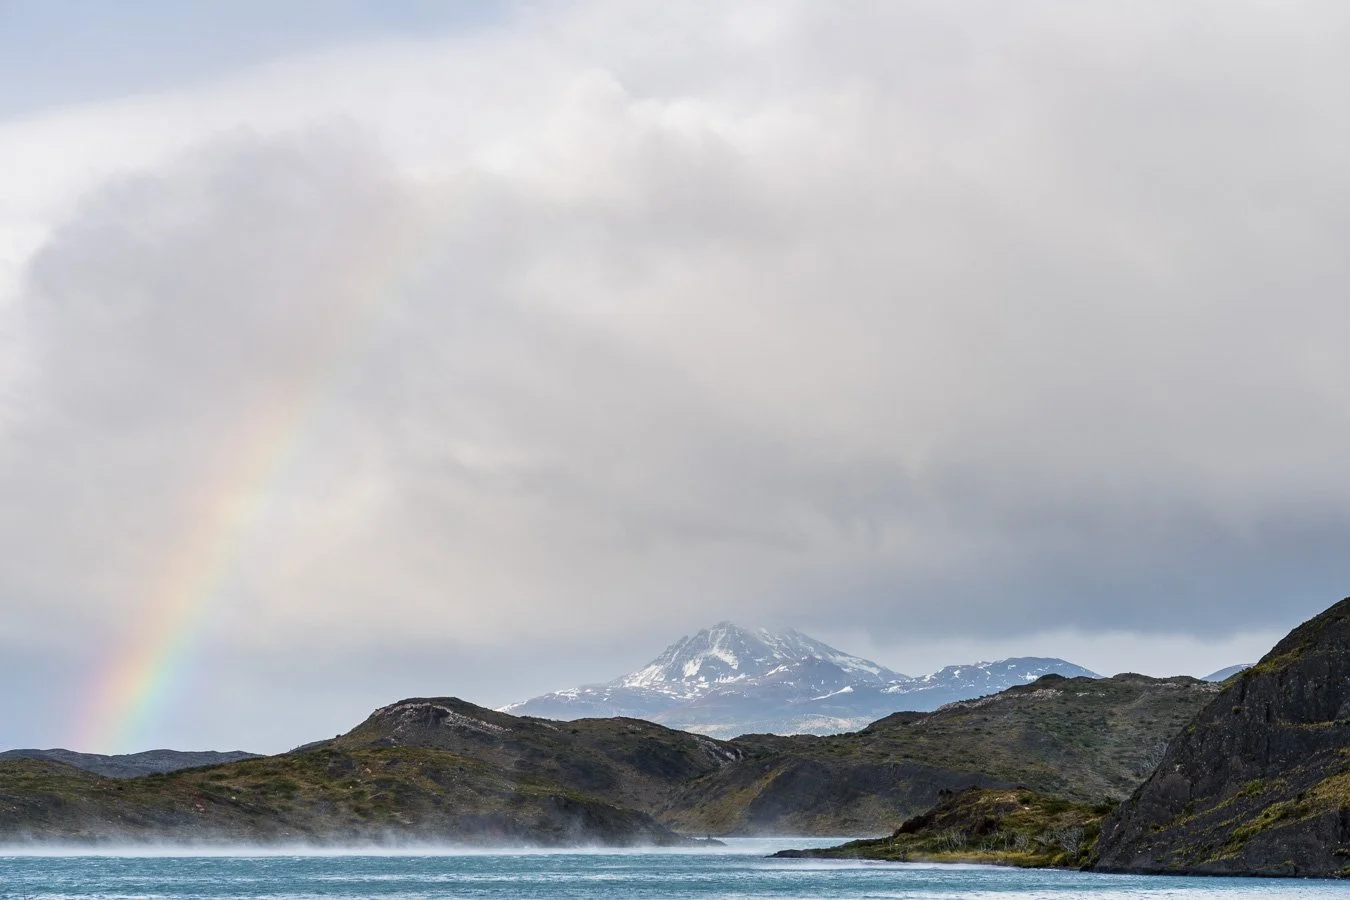
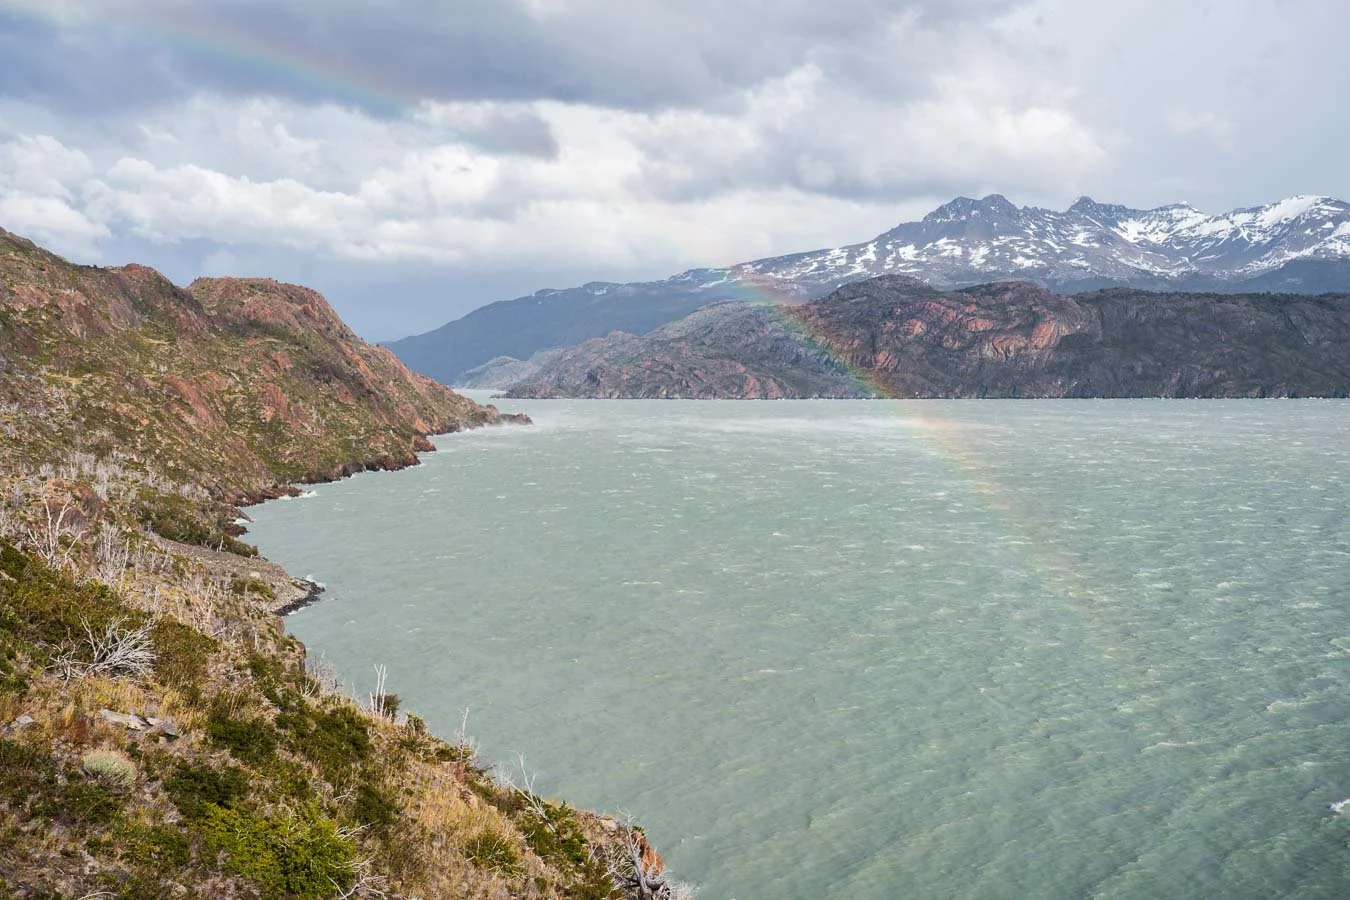
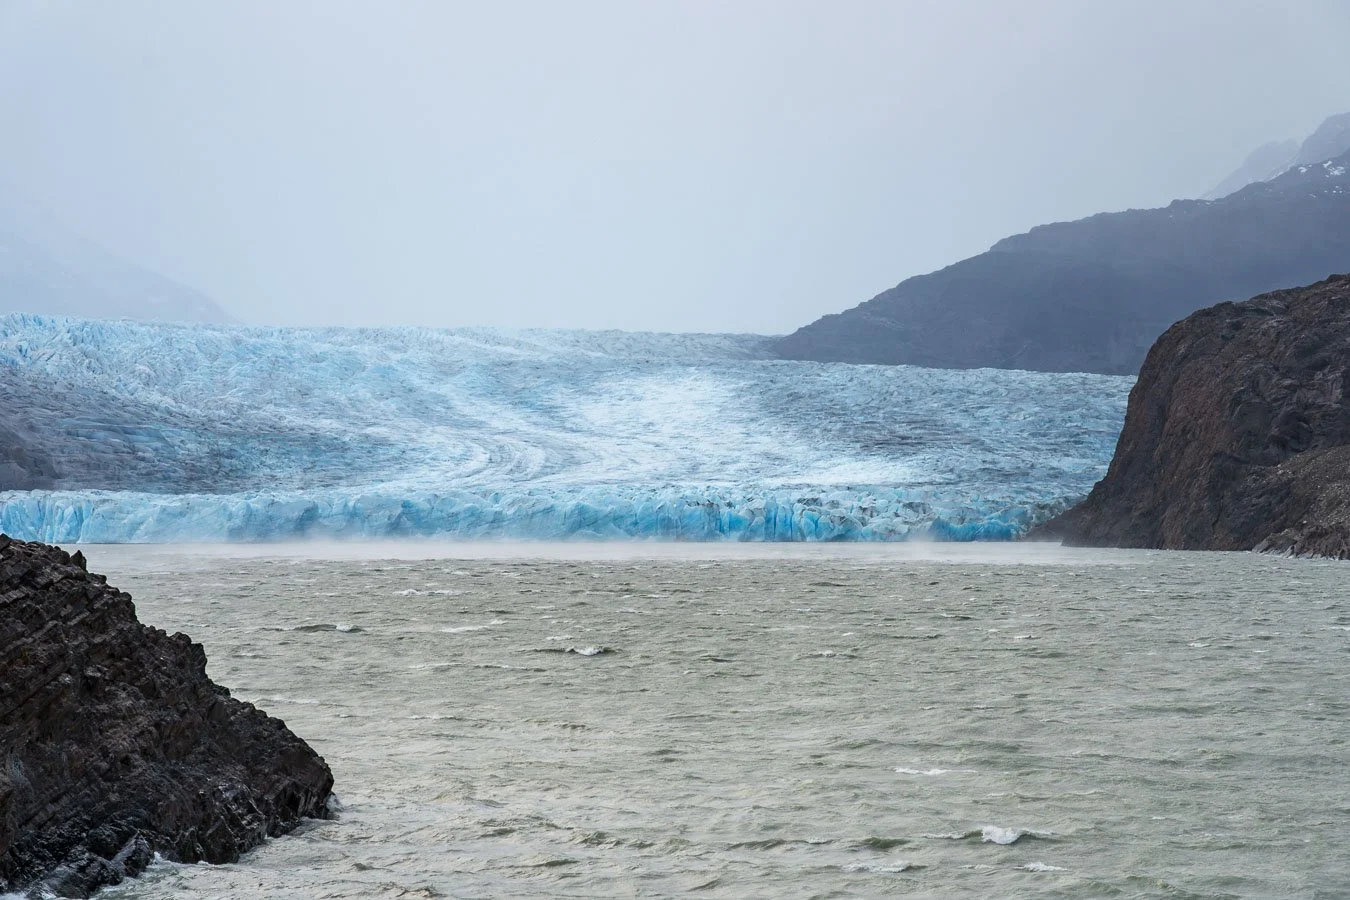
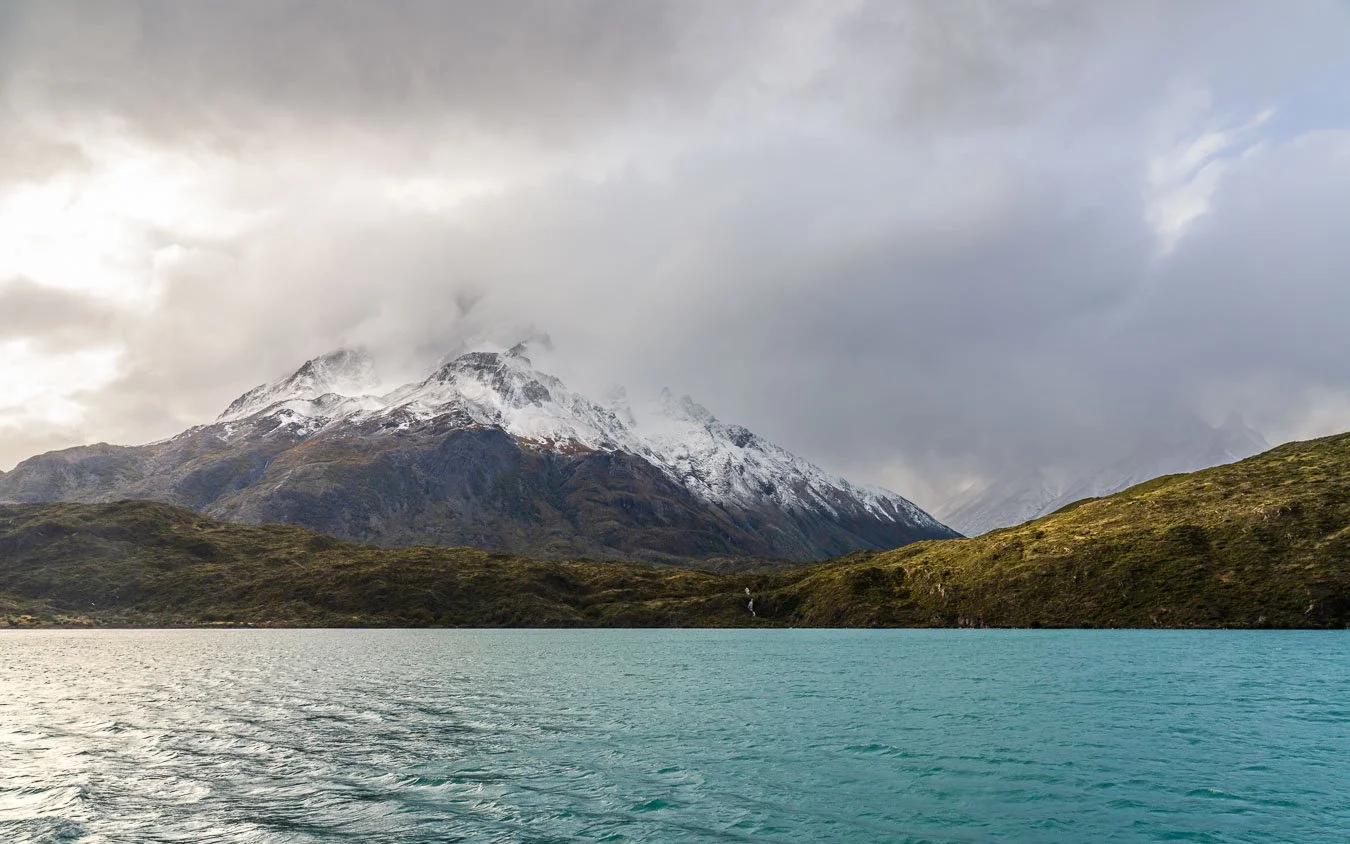
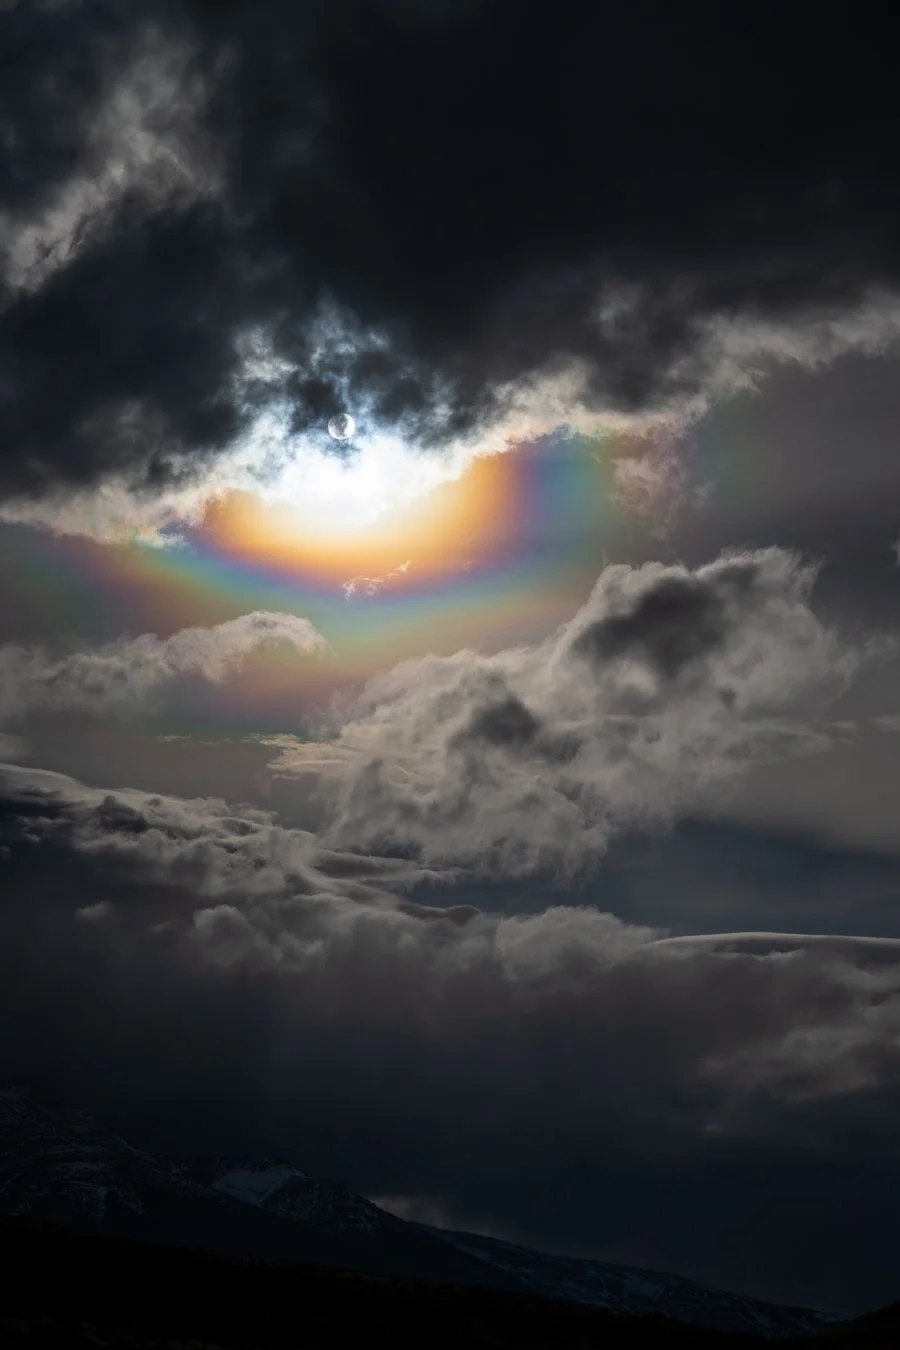
Wind speeds were very high the day we got on the ferry, which made the ride across Lake Pehoé very memorable, but fortunately the service was not cancelled. Once at Refugio Paine Grande, we immediately started the 11.1 km hike towards Refugio Grey, a challenging trail with 633 m elevation gain. The exposed terrain offered little shelter from the gusts of wind, sometimes reaching up to 100 km/h around the time we attempted the hike. Walking through these conditions was difficult from time to time but even more breathtaking, with dramatic cloudscapes and rainbows that formed over the lake from the sprayed water. The high wind speeds and short-lived gaps in the cloud cover also created some dramatic lighting conditions, with beams of sunlight breaking through the clouds and illuminating the glacier and surrounding peaks. This stark contrast between light and shadow in the already dramatic scenery made for some incredible photography opportunities.
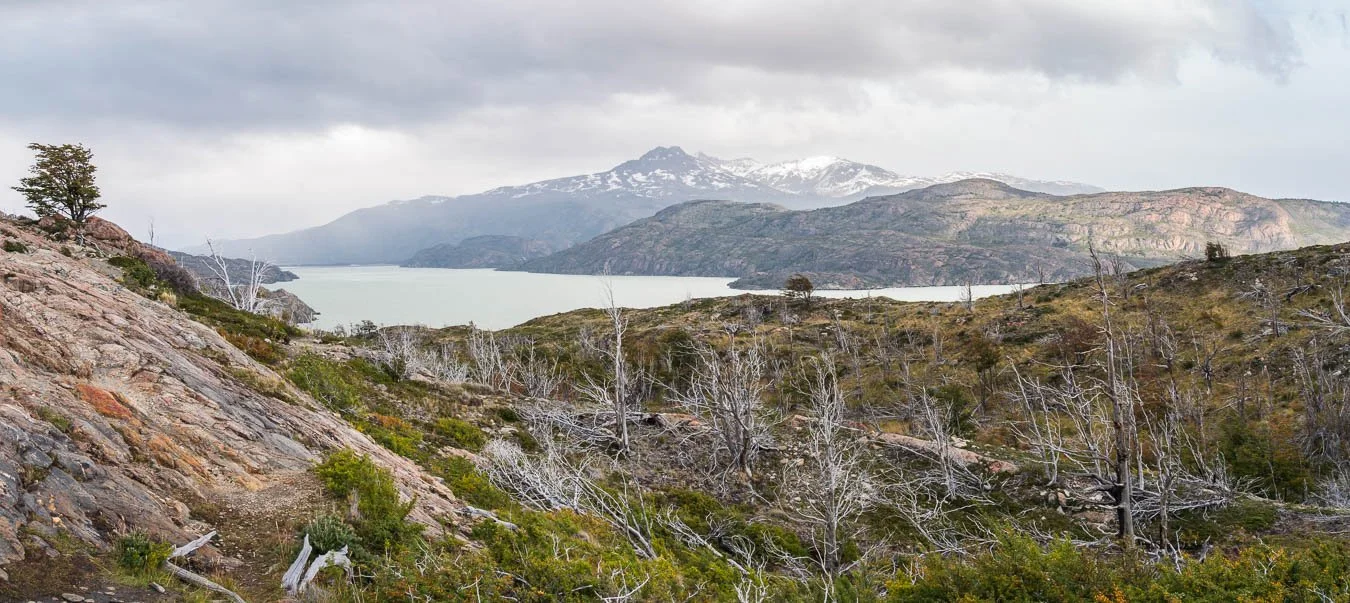
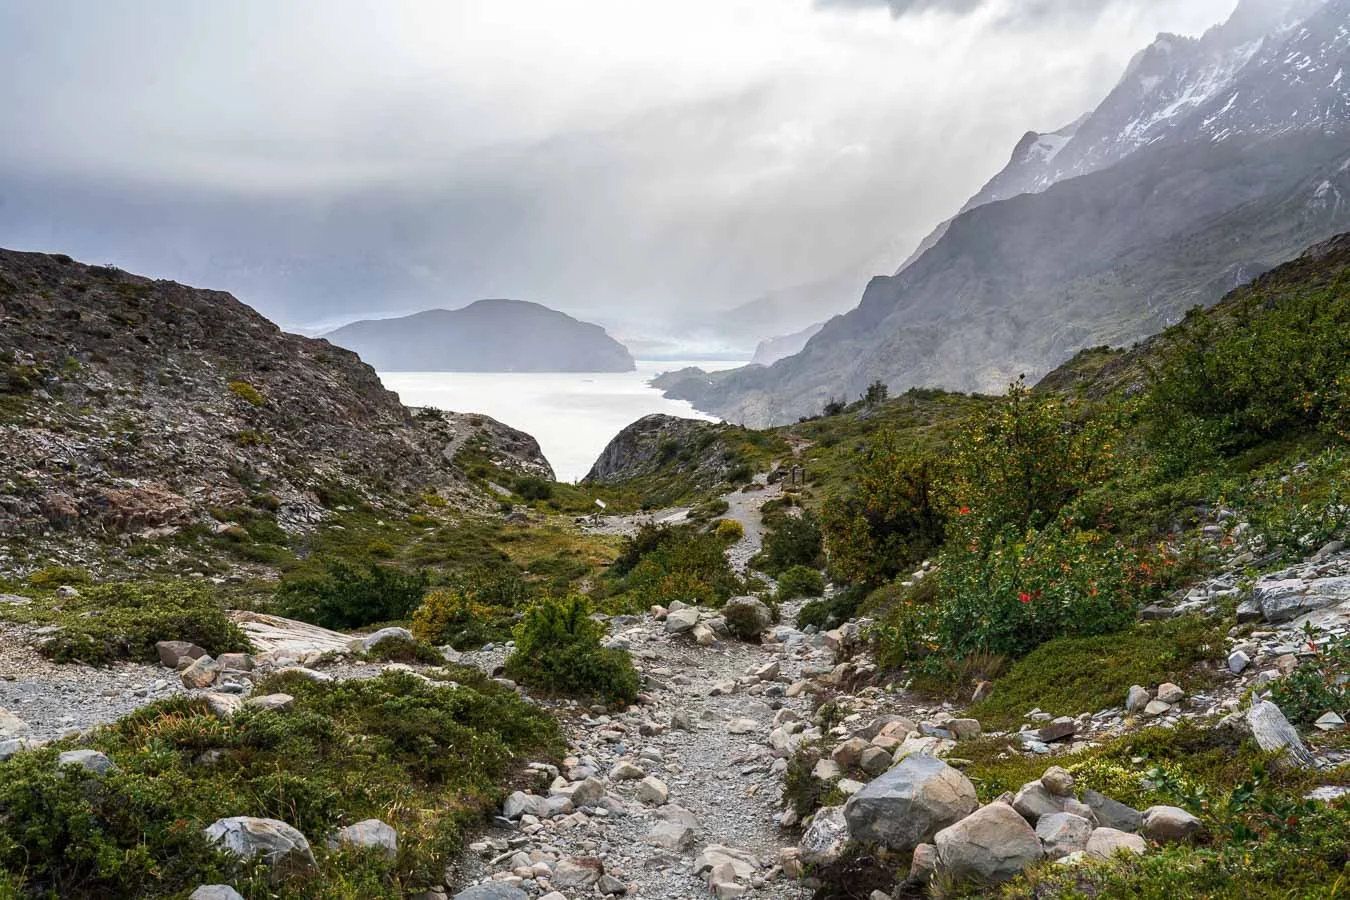
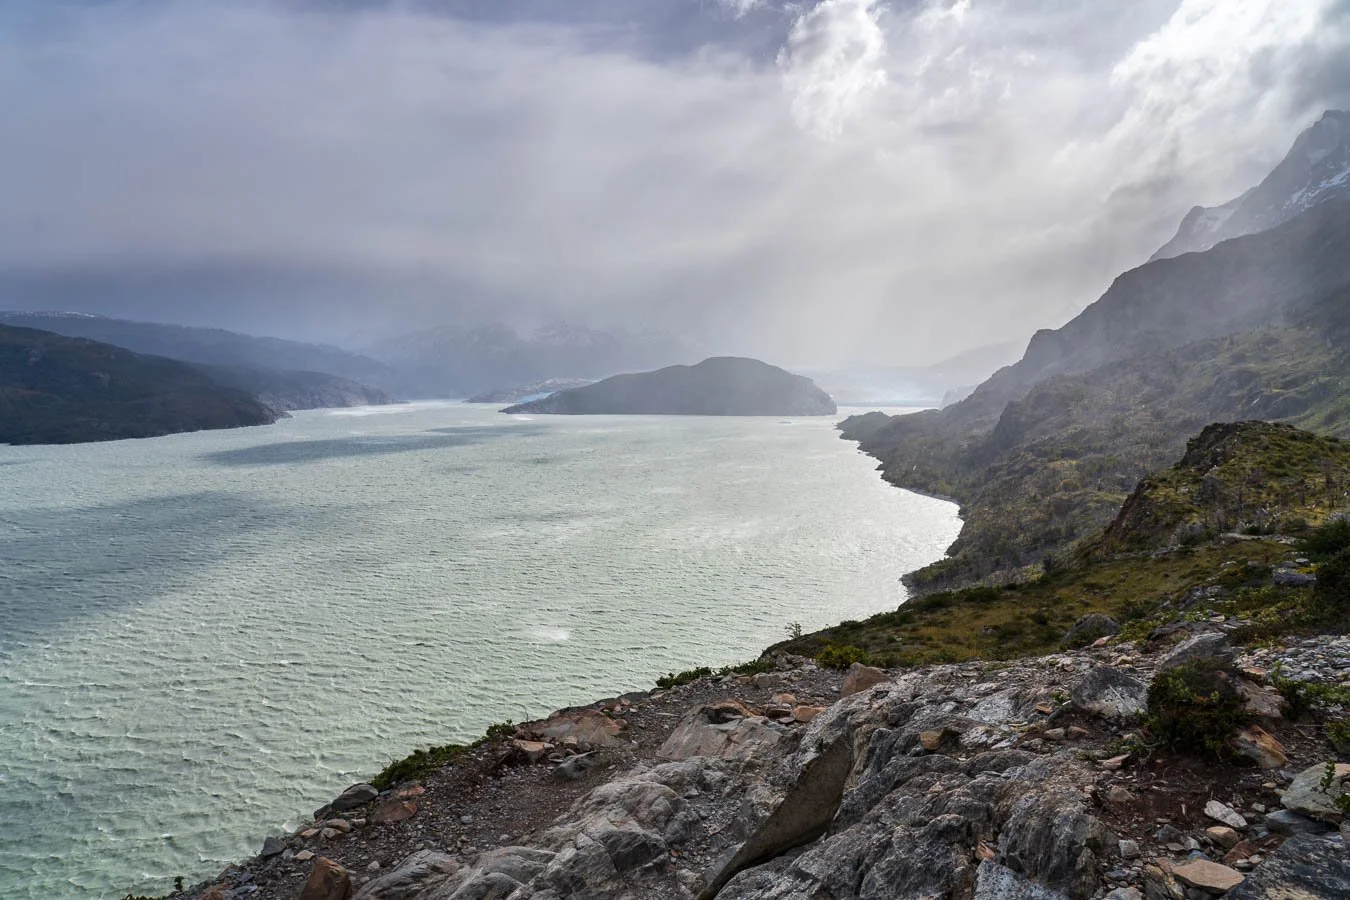
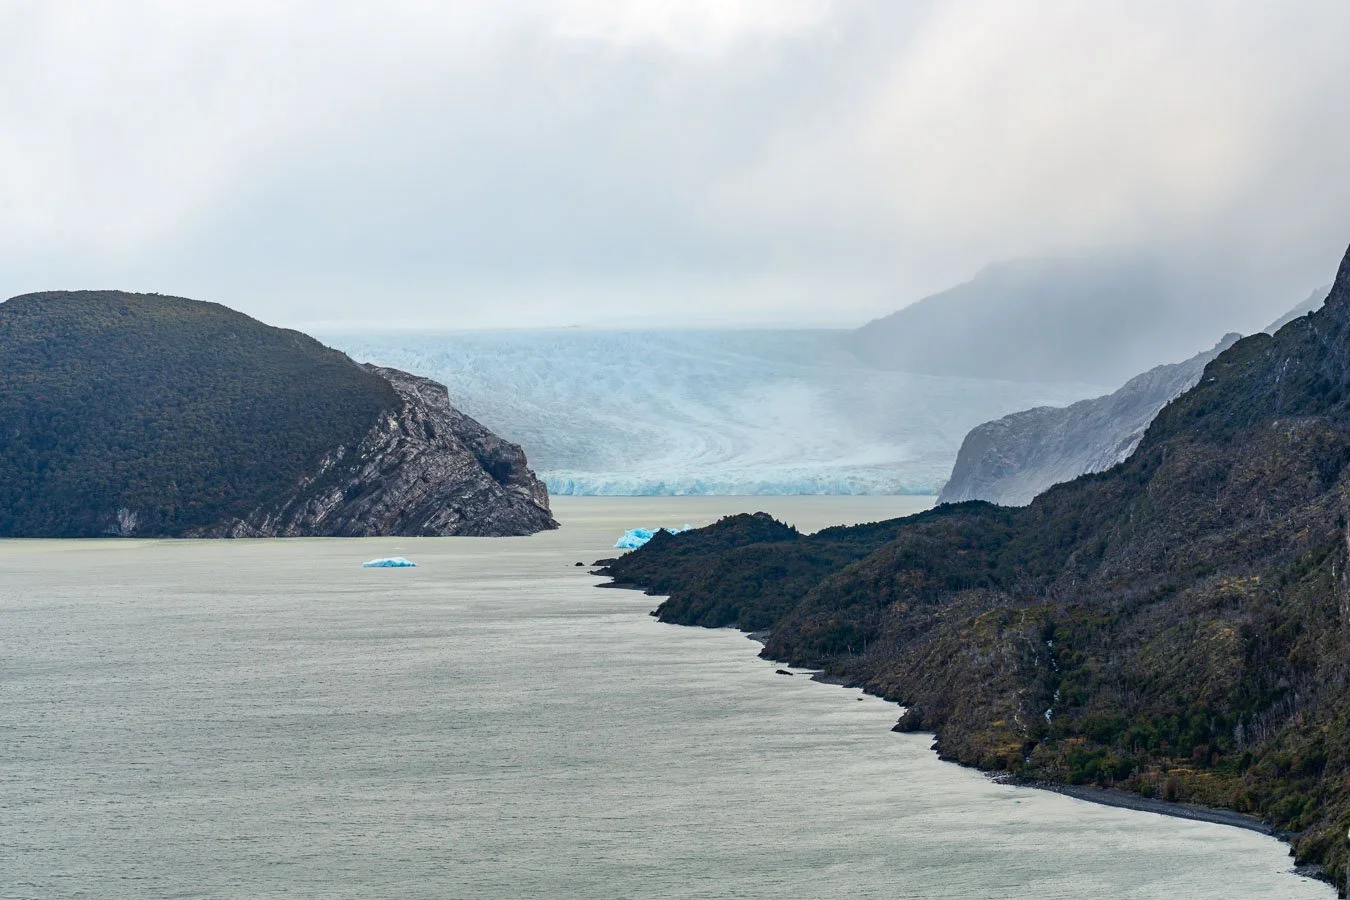
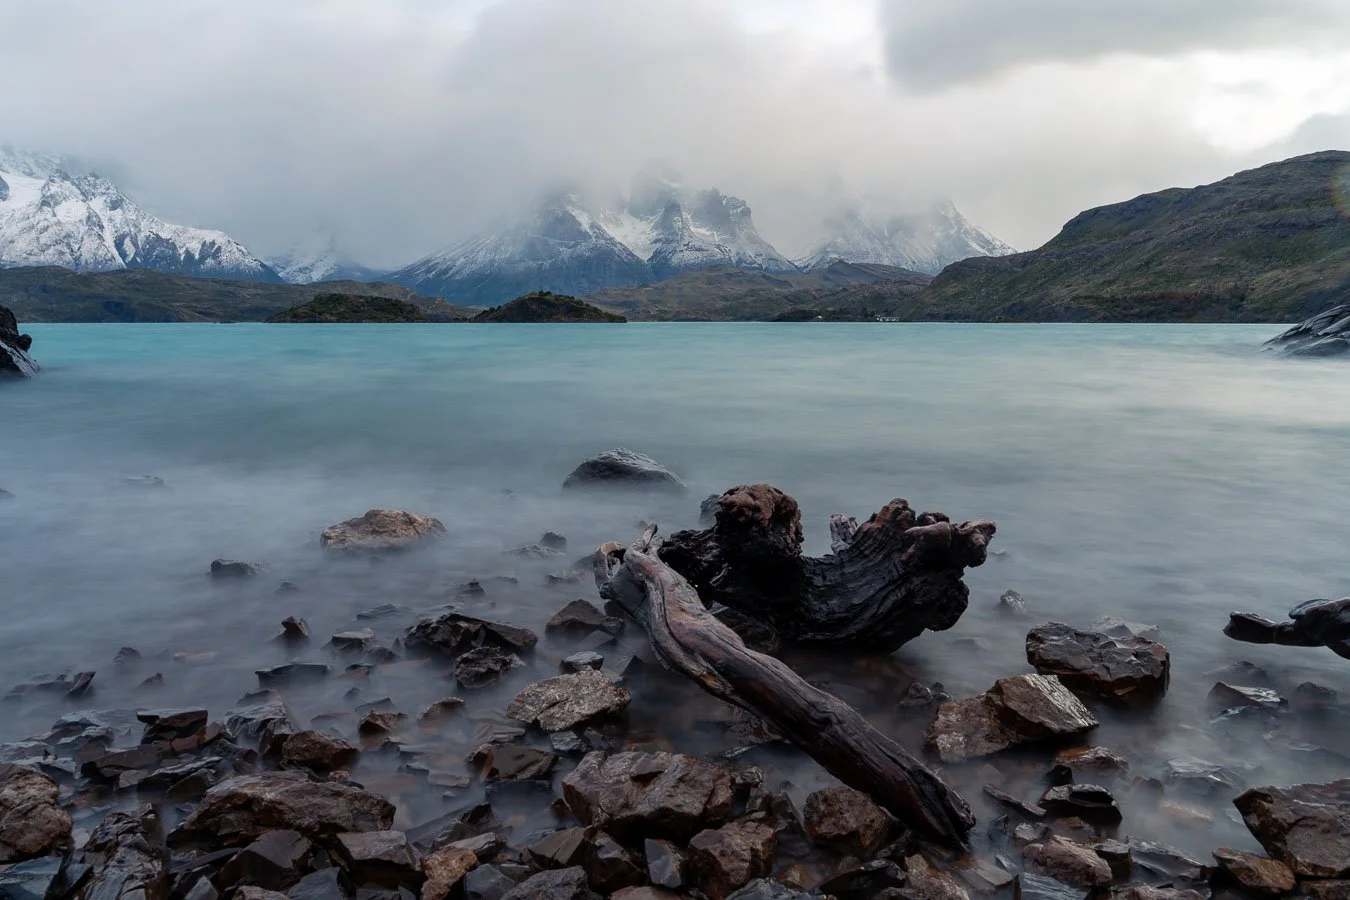
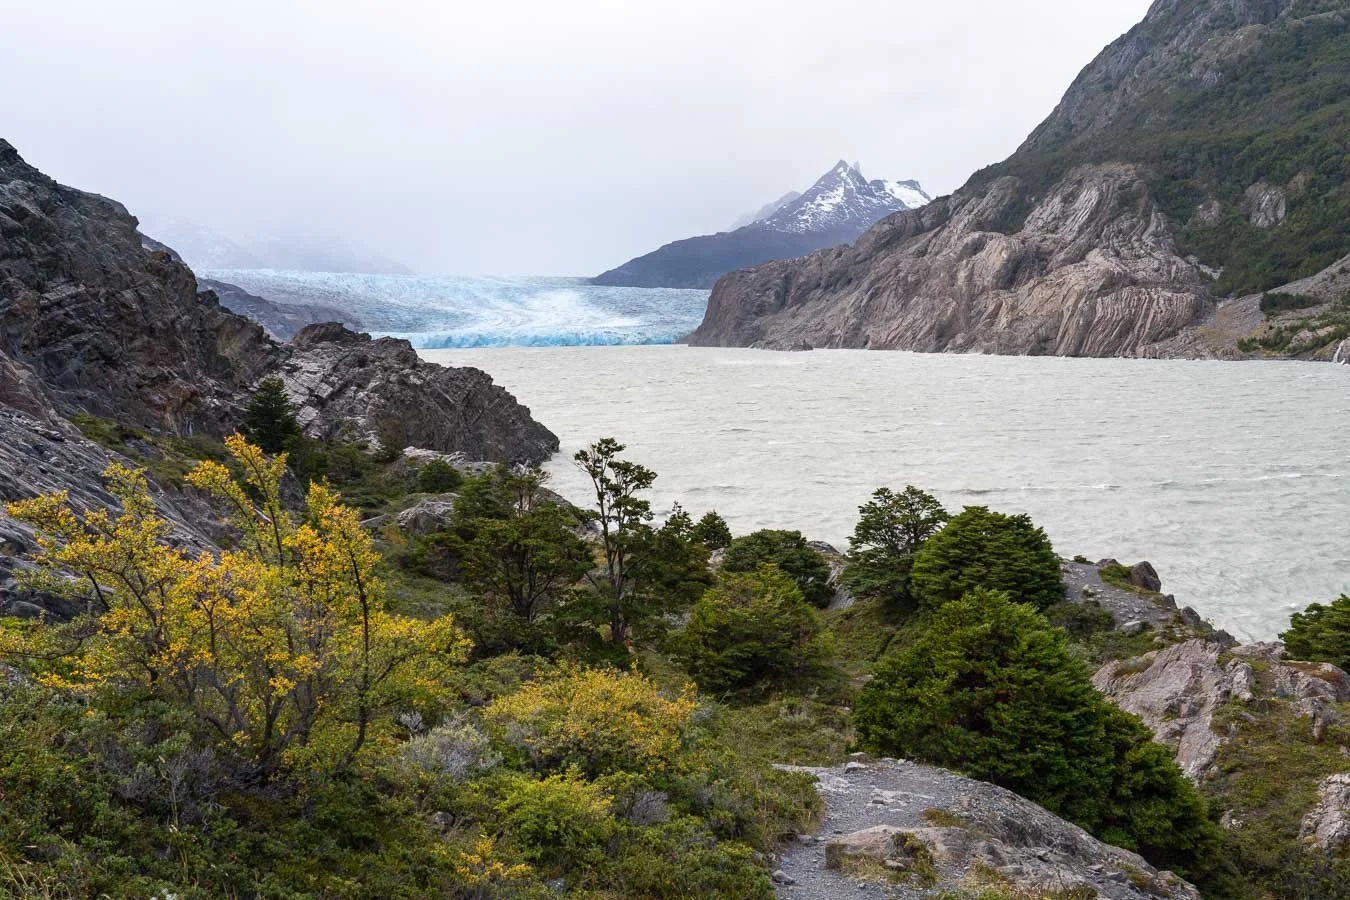
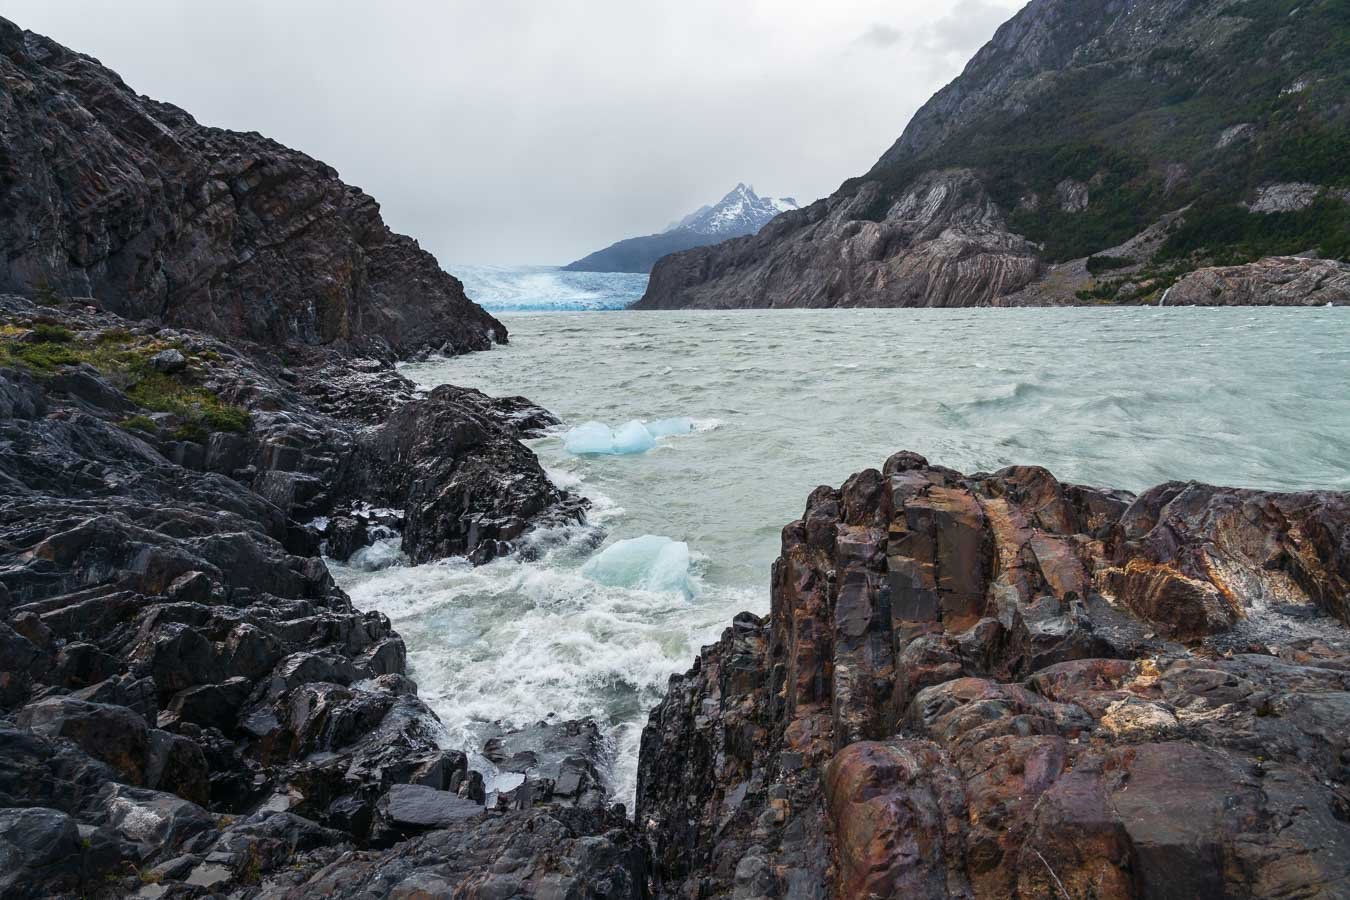
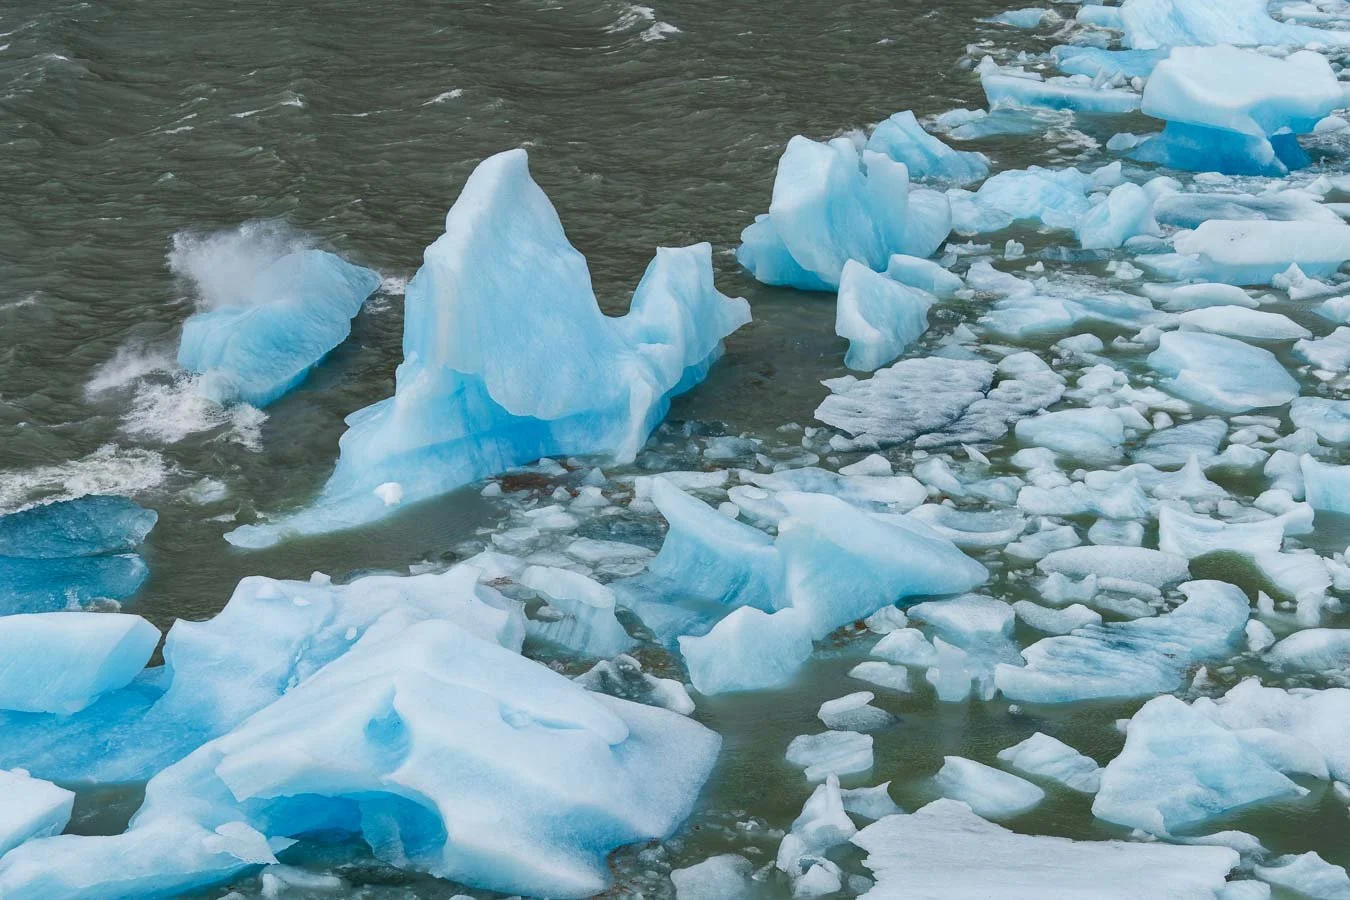
Despite the winds making the hike feel longer, catching the first sight of the glacier was an energy boost. However, it’s important to note that the viewpoint is still a few kilometers away from Refugio Grey, so don’t get your hopes up too early! Once we finally made it to the campsite, we fought to set up camp in the windy conditions. With the tent secured using all the stakes and guy lines we had, we headed out for a quick hike to the Glacier Grey viewpoint, which is just a few minutes from the campsite. From there you can get an even better view of the glacier dipping into Grey Lake and see some icebergs floating around. This was an amazing sight even if we had to fight brutal wind gusts and were sprayed constantly by the water.
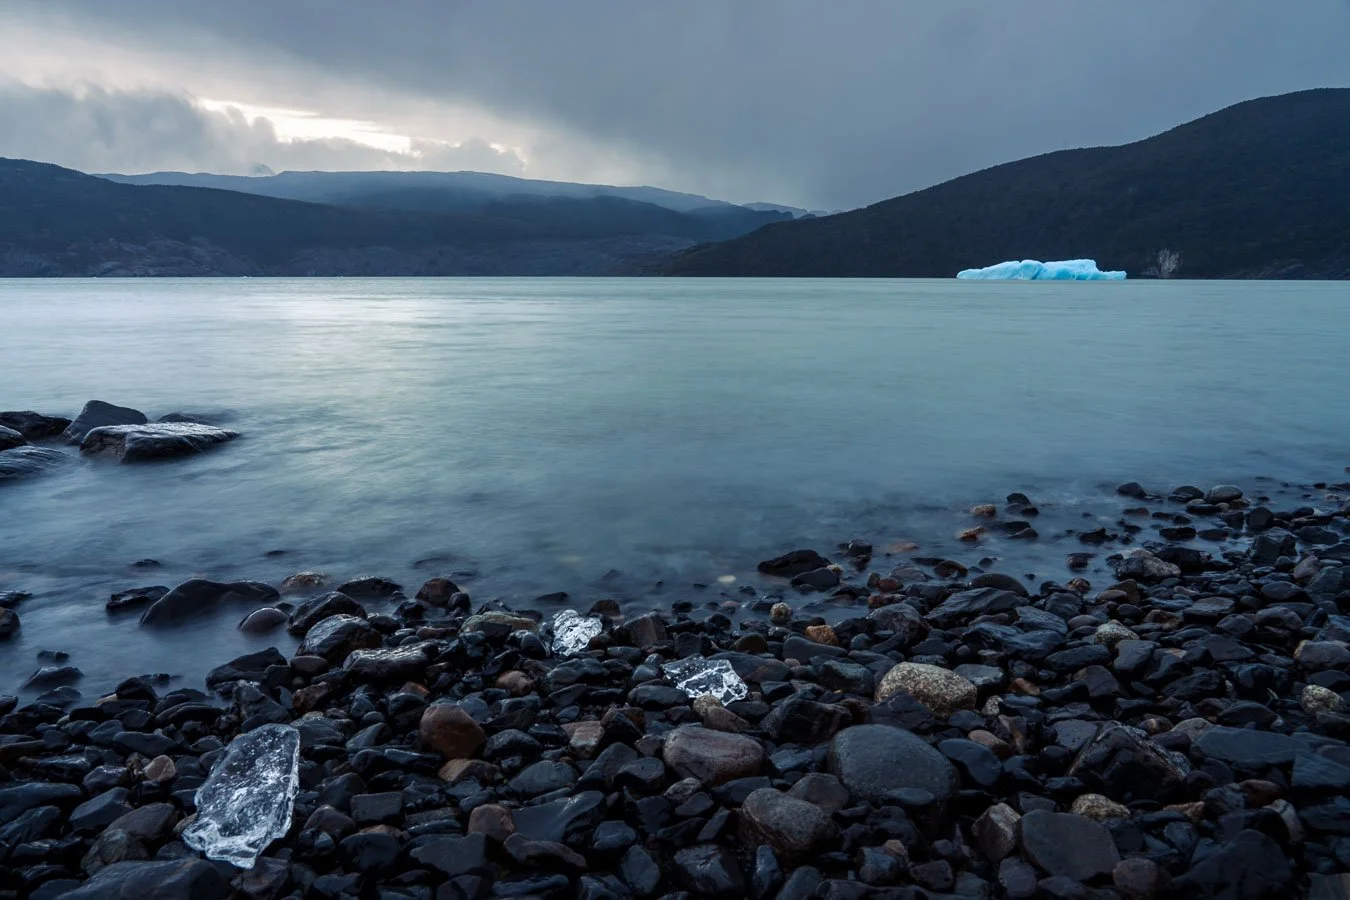
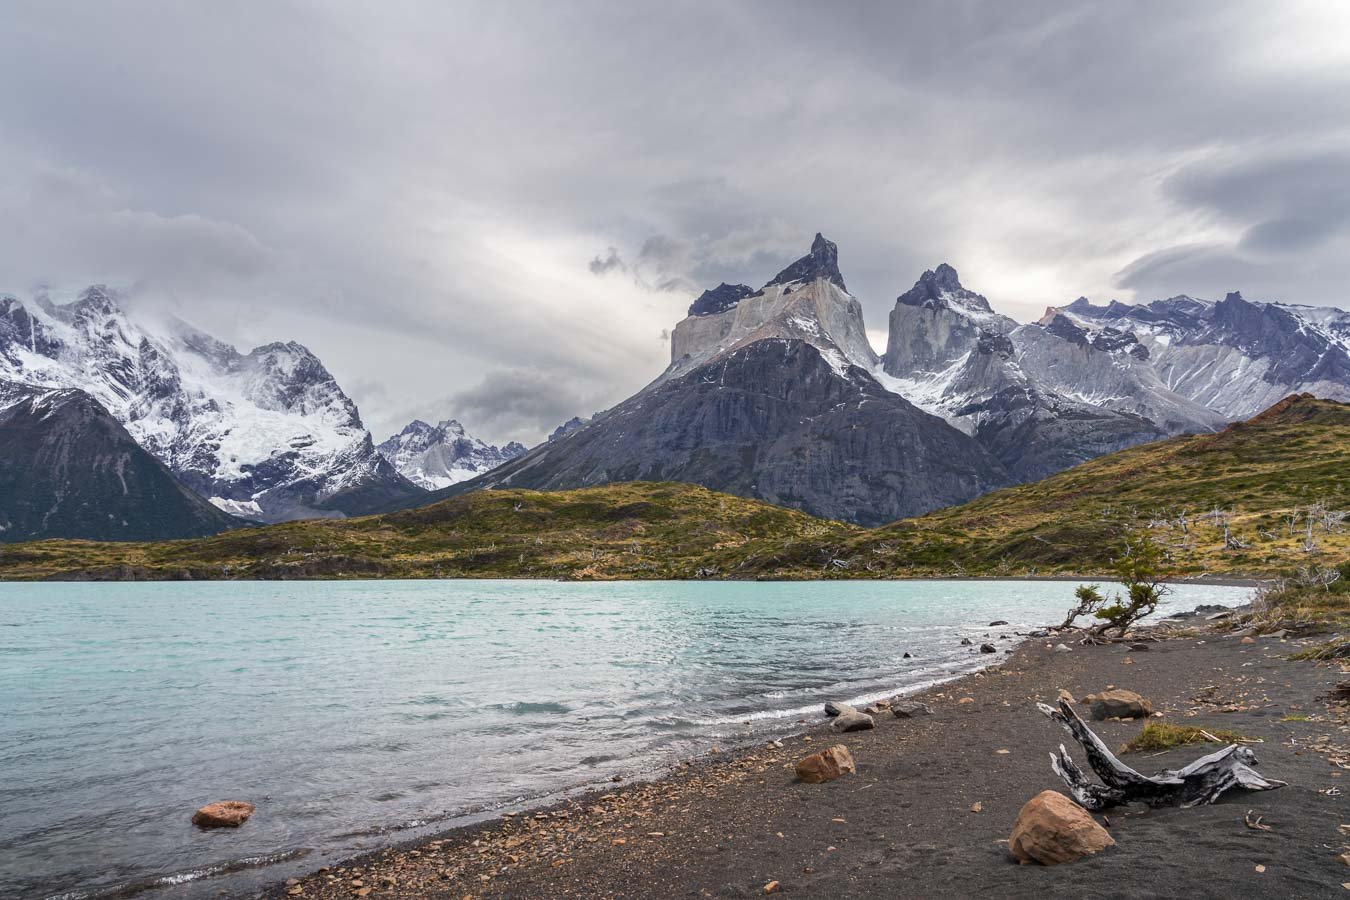
A solitary iceberg floating on Lago Grey.
We were scheduled for an early morning glacier hike (with Bigfoot Patagonia) the next day, but as the winds didn't subside, the tour was cancelled on very short notice. We had to walk to their outpost close to the campsite because we never received a cancellation email (we even bought expensive Wi-Fi access as we anticipated a cancellation). Although disappointing, we made the best of it by watching the sunrise from the shores of Lake Grey next to their outpost where you can spot more icebergs. If you’re set on doing a glacier hike, you may want to stay for two or more nights at Refugio Grey to give yourself some flexibility with the weather. You can always explore the areas closer to the suspension bridge to get better views of the glacier from a more elevated position and, depending on your way back, give you more time to reach the ferry. After enjoying a late breakfast at the refugio, we hiked back to Refugio Paine Grande to catch the ferry to return to our car. Alternatively, you can take a different ferry directly from Refugio Grey, but keep in mind that it drops you off at a different location (Lago Grey Hotel), which wouldn’t have worked for us since our car was parked at the dock at the Refugio Pudeto.
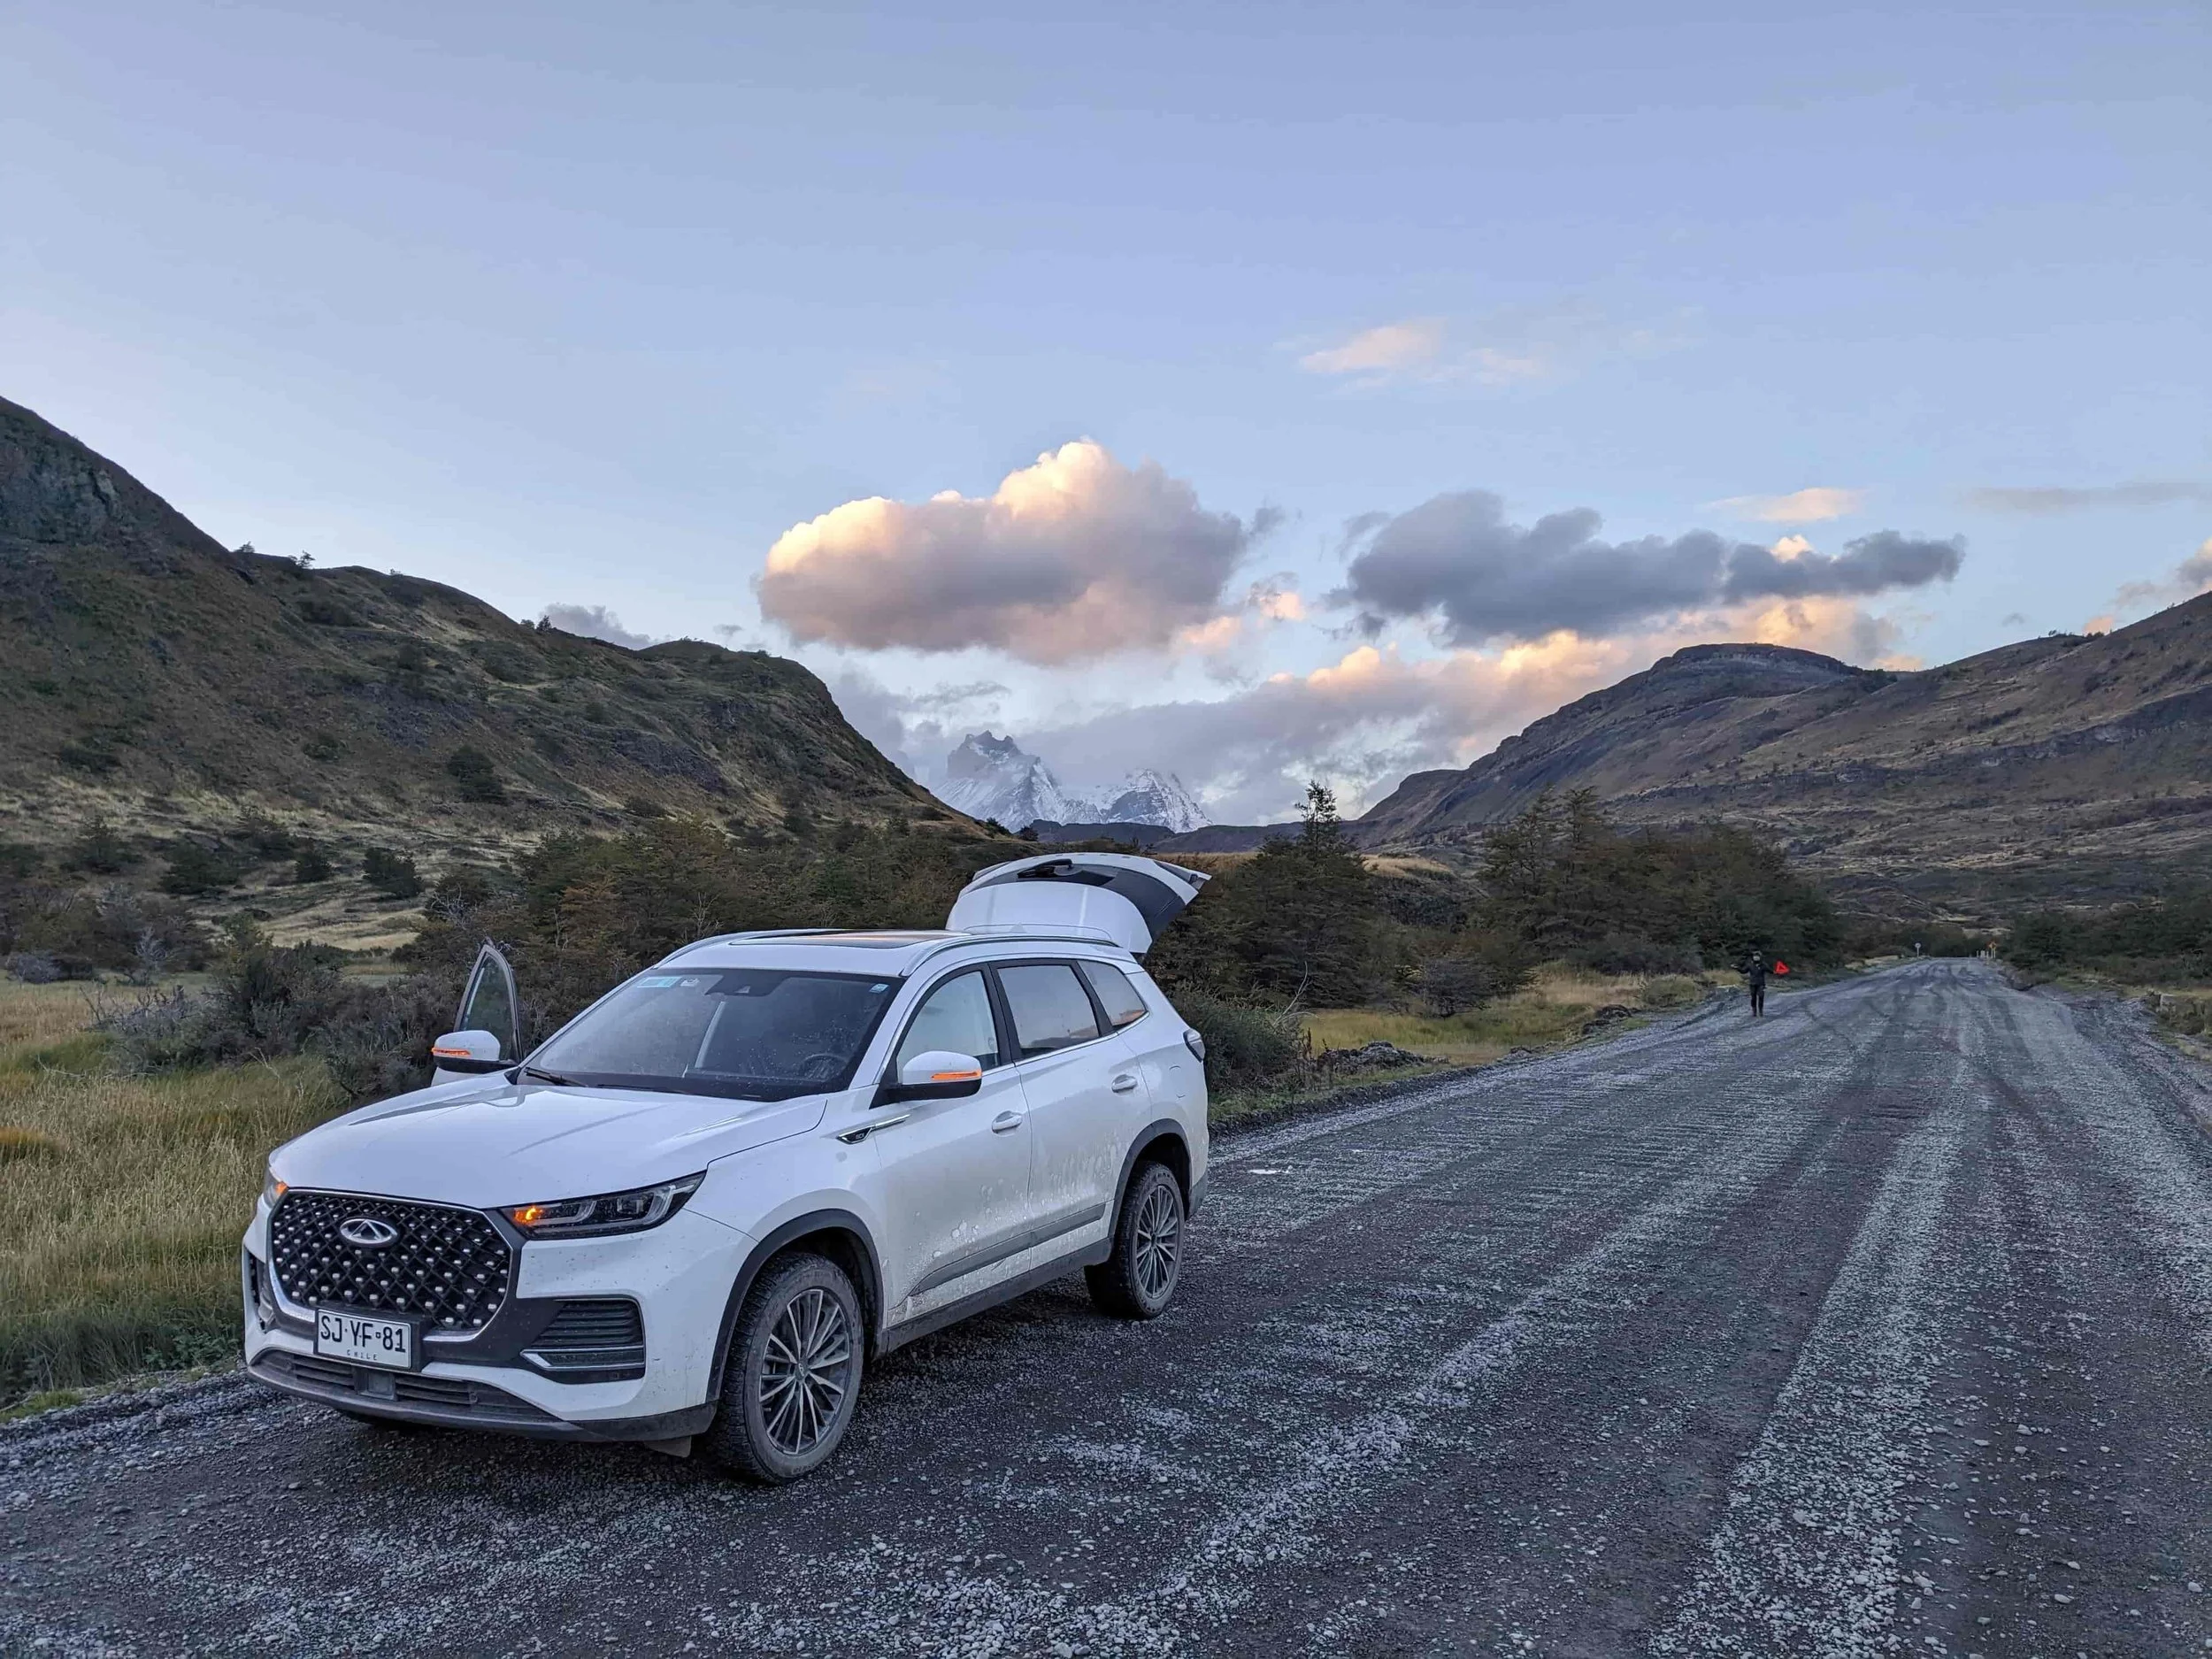
Changing tires with the Paine Massif as a scenic backdrop.
With our plans for Torres del Paine National Park (more or less successfully) checked off, we began our journey out of the national park back to Puerto Natales. From there, we planned to tackle the second part of our trip, the Argentine side of Patagonia after a night at Hostel FACTORIA with a hot shower and food. However, as we’ve said earlier, Patagonia sometimes has different plans than you do. The gravel roads had seen some heavy rain, leaving them muddy and very soft. As such, getting too close to one of the larger potholes sent us sliding into a rock hidden inside it – and thereby sent our back passenger tire into early retirement. Even worse, we were in probably one of the most inconvenient places imaginable to get a flat tire, that is, on one of the curviest parts of a road that had turned from gravel to fairly soft mud. We had nowhere to safely pull the car over for a tire change so we were forced to drive a short distance to a flat portion of the road.
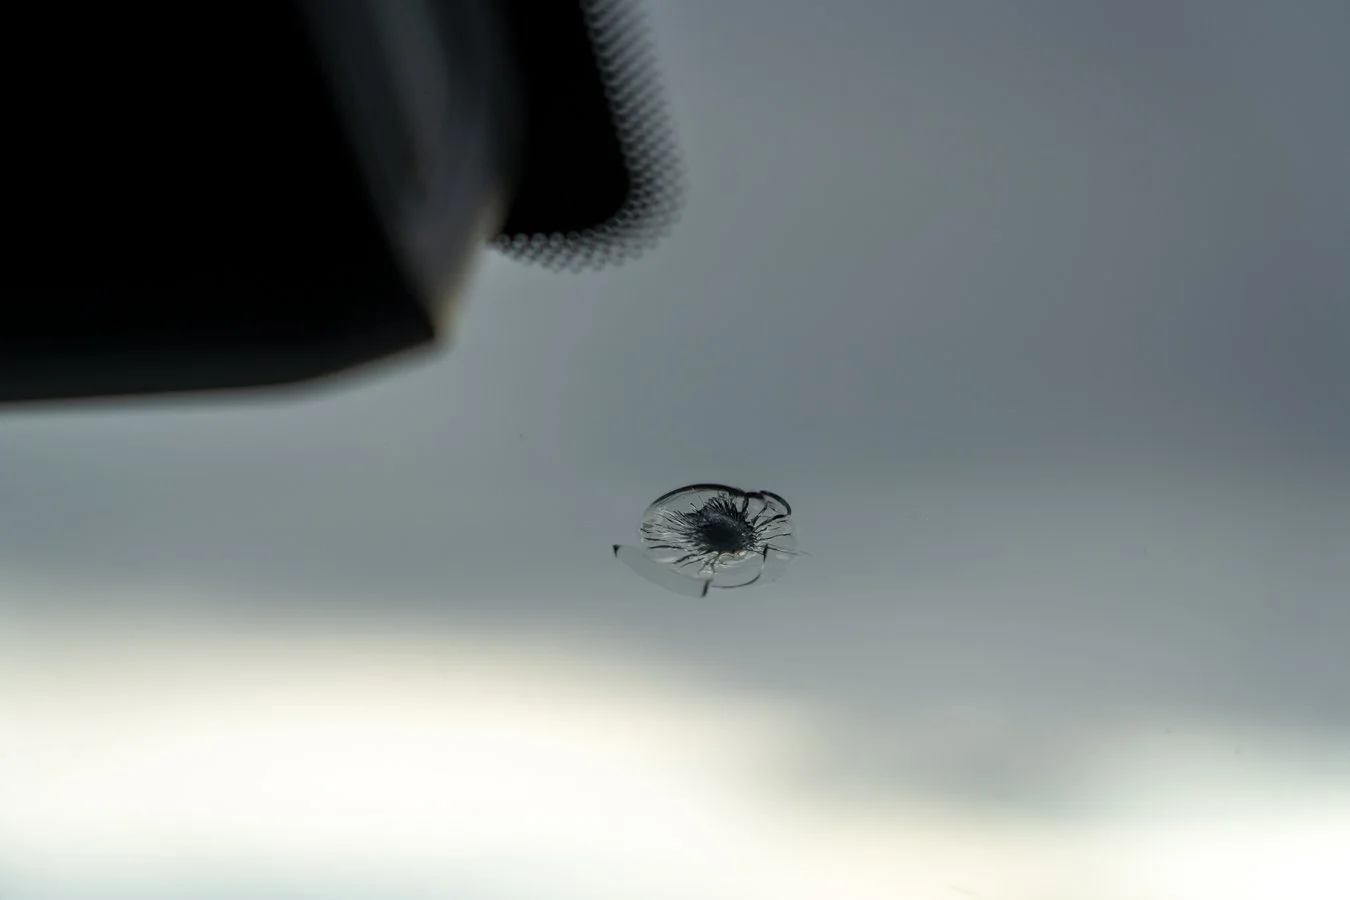
Disclaimer: You should never drive on a flat tire – except to move the vehicle to a safe spot off the road to change it or wait for roadside assistance! But if you’re stuck in a dangerous location with no cell reception, sometimes exceptions have to be made. If that’s the case, drive very slowly to stay in control and avoid damaging the rim.
We weren’t keen on driving hundreds of kilometers on a spare tire that looked like it barely qualified as a legal tire replacement for our large SUV, so we got in touch with the local Europcar office in Puerto Natales the next morning. They were able to schedule a tire replacement the same day (thankfully this was all very uncomplicated and impressively fast). The rest of the day we spent exploring the town once more and recharging for the second half of our Patagonian adventure.
Los Glaciares National Park
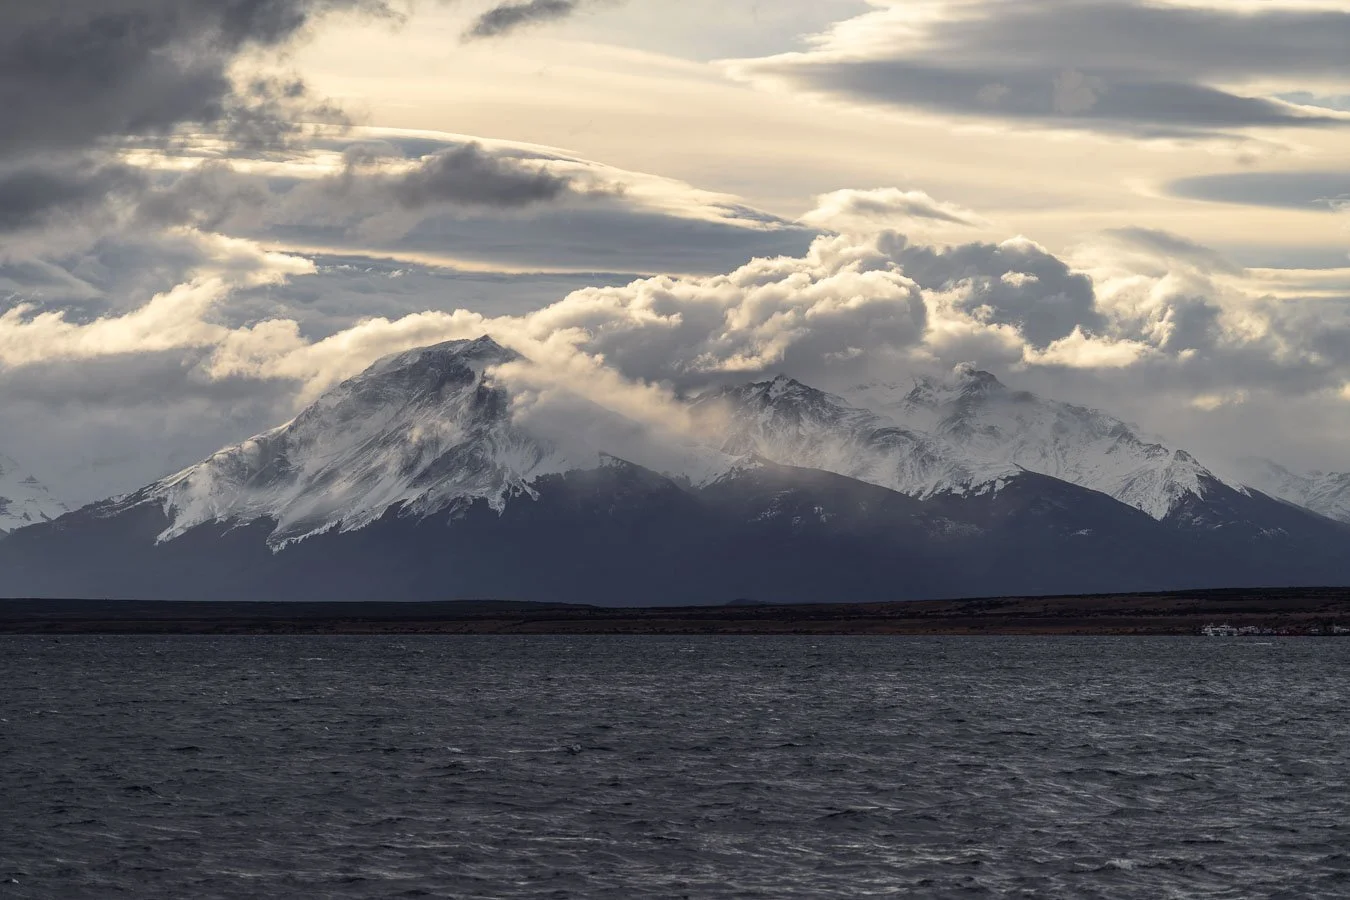
After getting our new tire, we began our journey to Los Glaciares National Park. The closest border crossing is between the localities of Cerro Dorotea (Chile) and Rio Turbio (Argentina), respectively. That morning, we encountered another unforecast and somewhat heavy snowfall, which left the higher-altitude roads near the border covered in a significant layer of snow. Driving became quite precarious as our rental car's tire grip left a lot to be desired. For those planning a similar trip during seasons when snow is forecasted, be sure to confirm the type of tires on your rental, as you'll need to reach out to the company for a border crossing permit anyway.
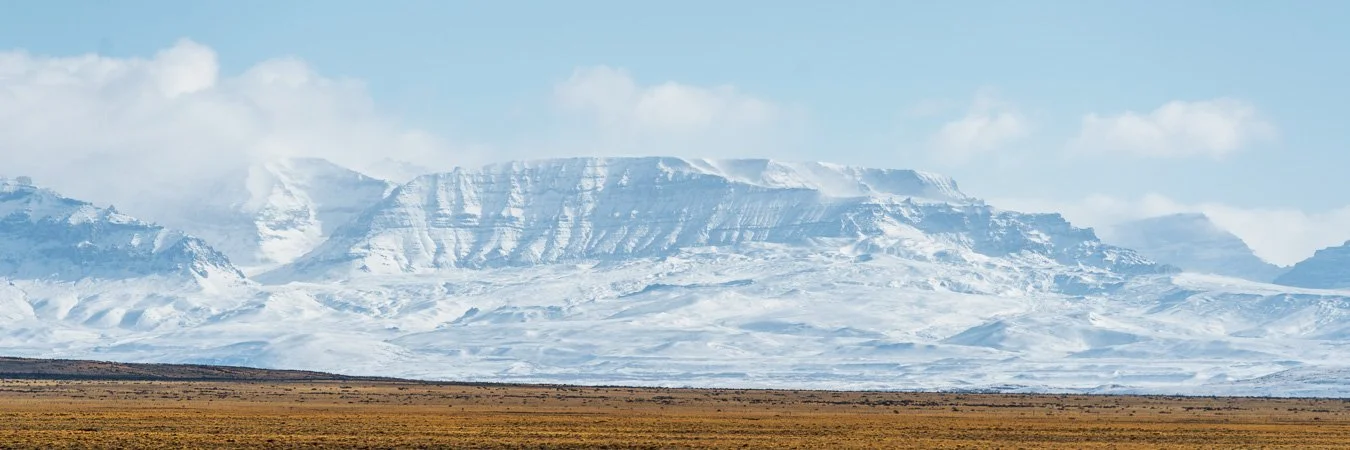
The views along RP7 somewhat make up for the poor road conditions.
After navigating the snowy roads at a pace comparable to that with the flat tire, and clearing both the Chilean and Argentine borders, we reached lower altitudes where the roads were clear. From there, we headed toward El Chaltén. A word of advice: be cautious with Google Maps recommendations. While RP 7 (Ruta Provincial) may seem like a shortcut, it's unpaved and in poor condition in several sections. Even with a four-wheel drive (4WD) vehicle, it is a very bumpy ride and you will be forced to slow down often.
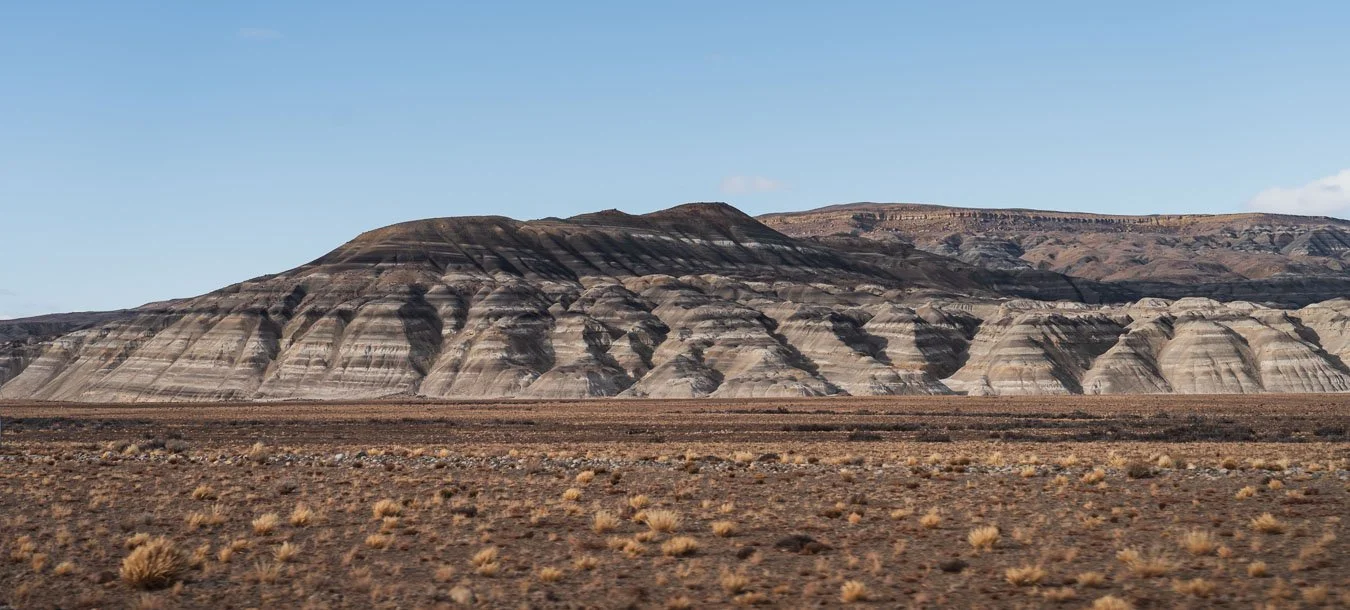
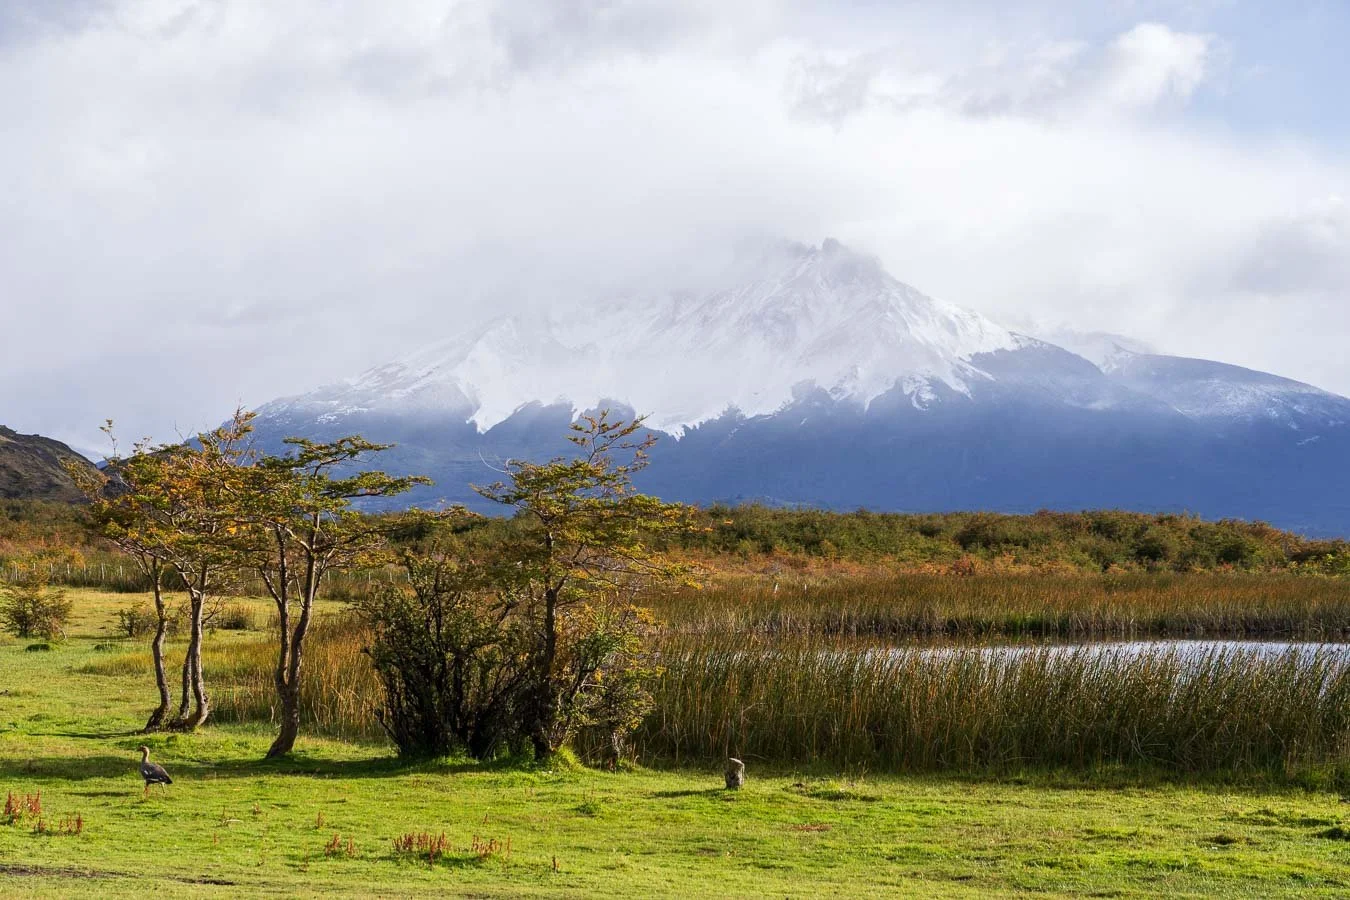
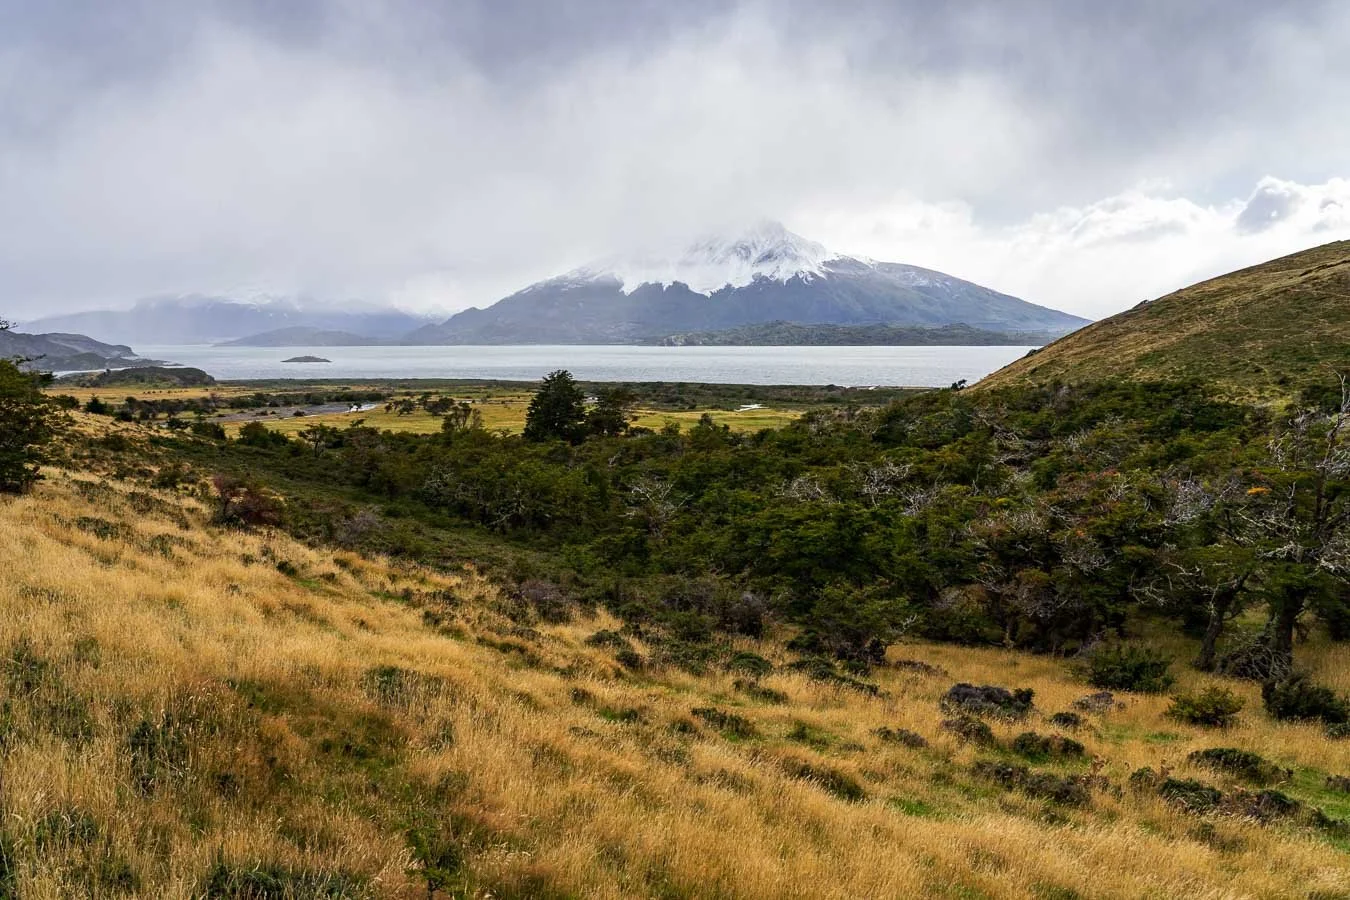
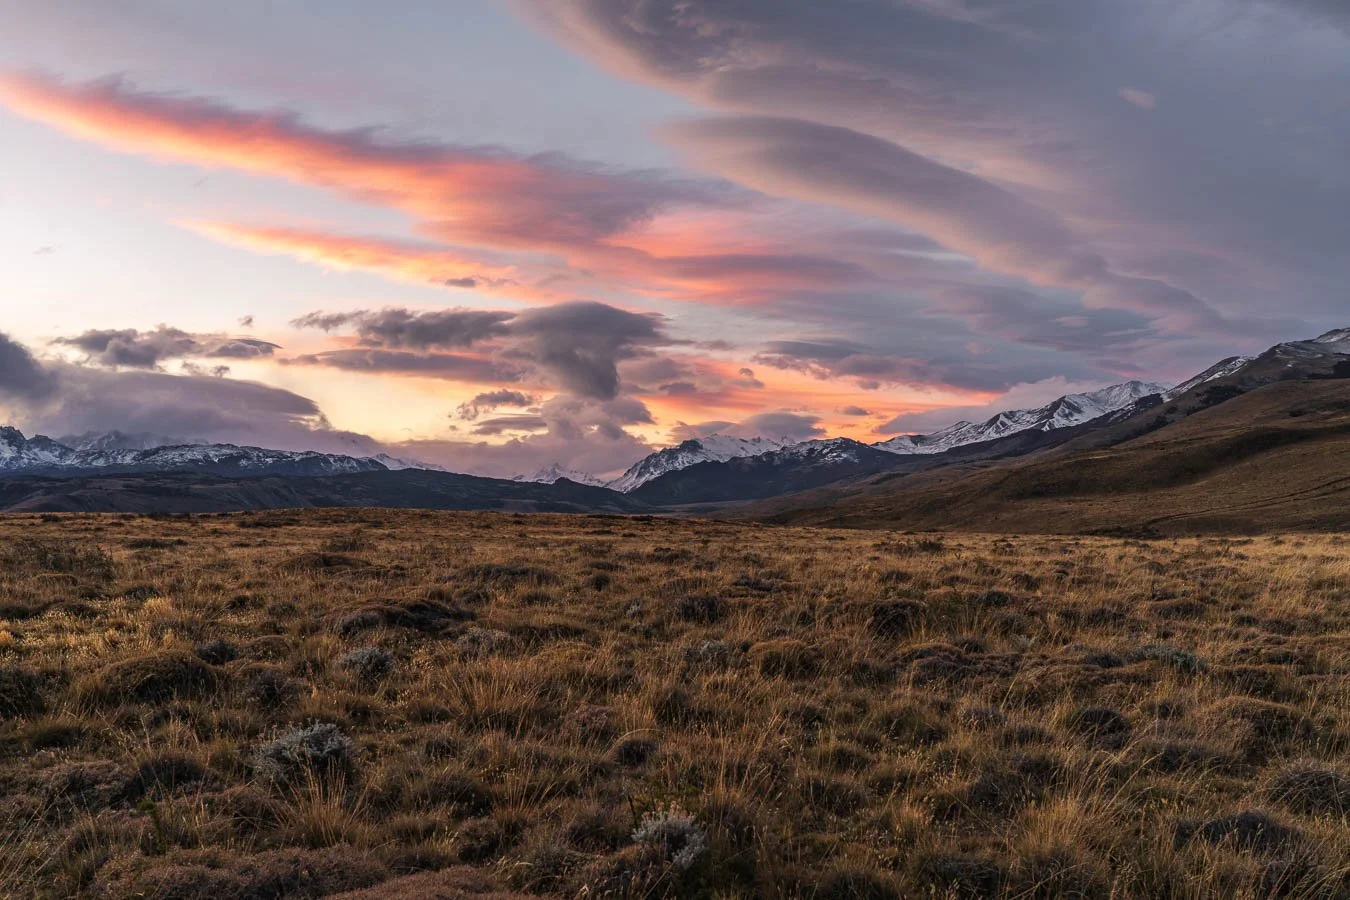
Landscapes on the Argentine side of Patagonia are notably more arid, as they lie on the drier eastern side of the Andes.
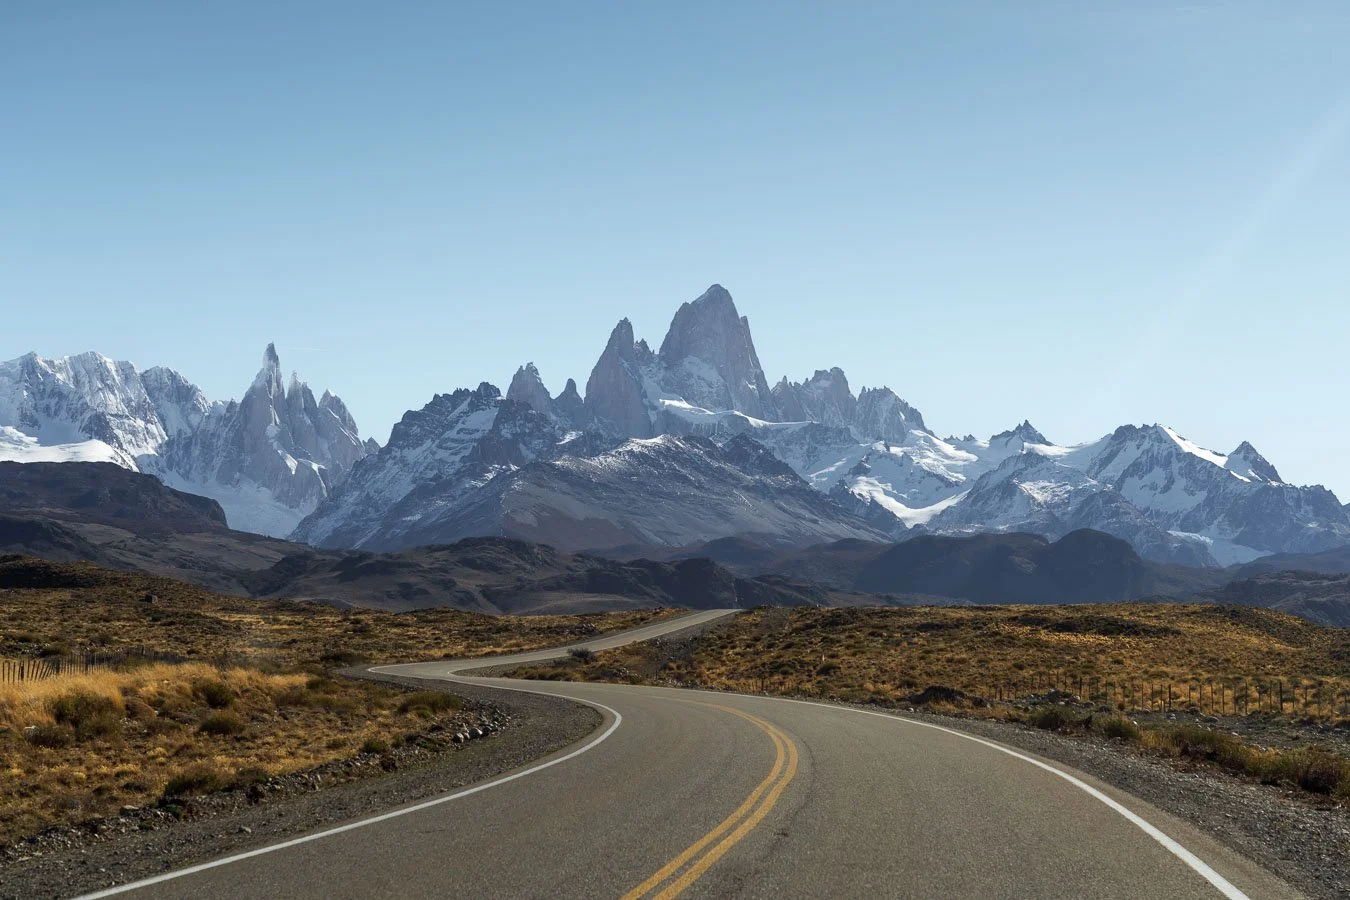
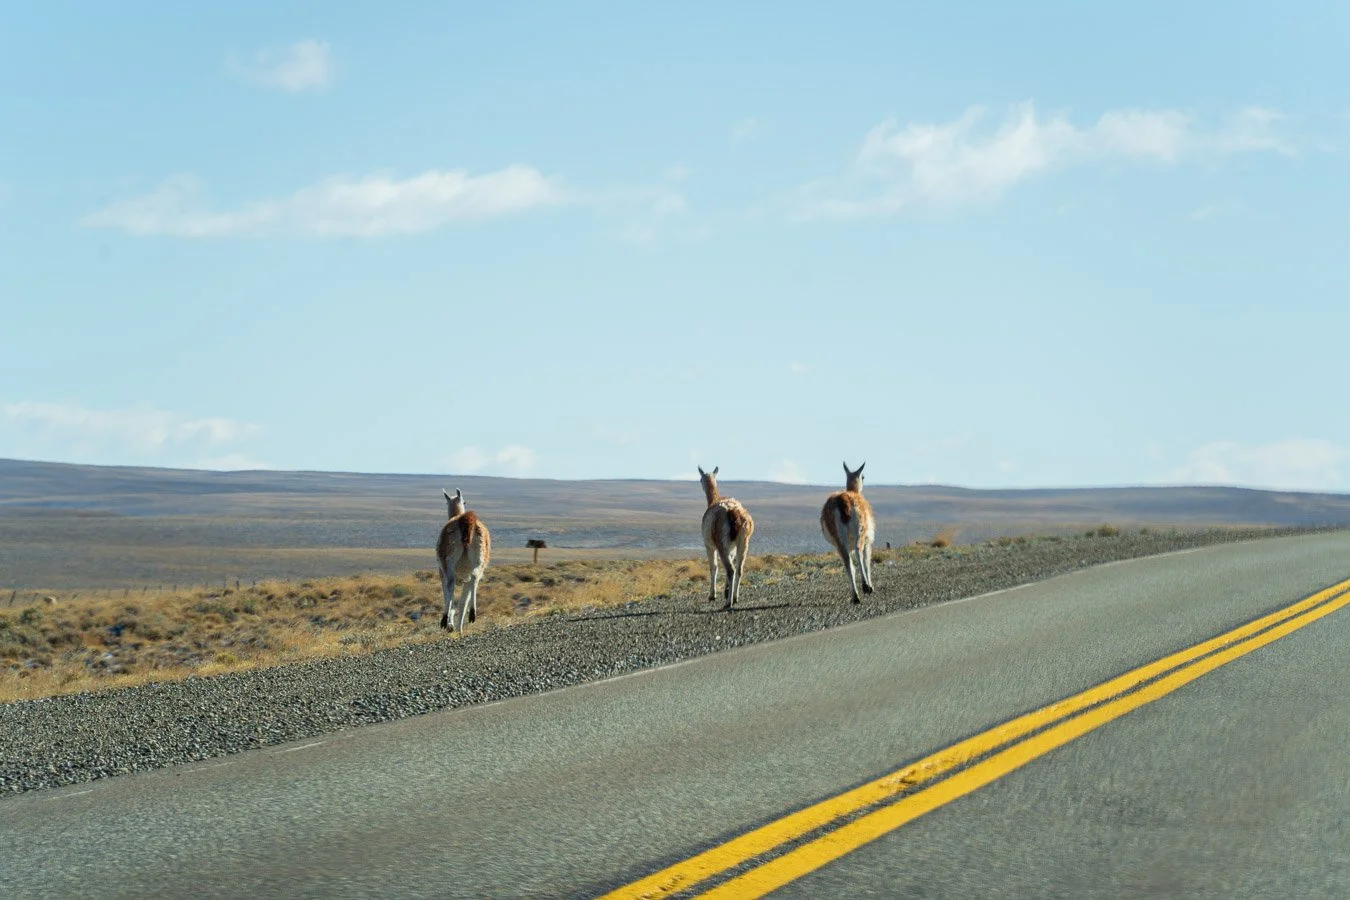
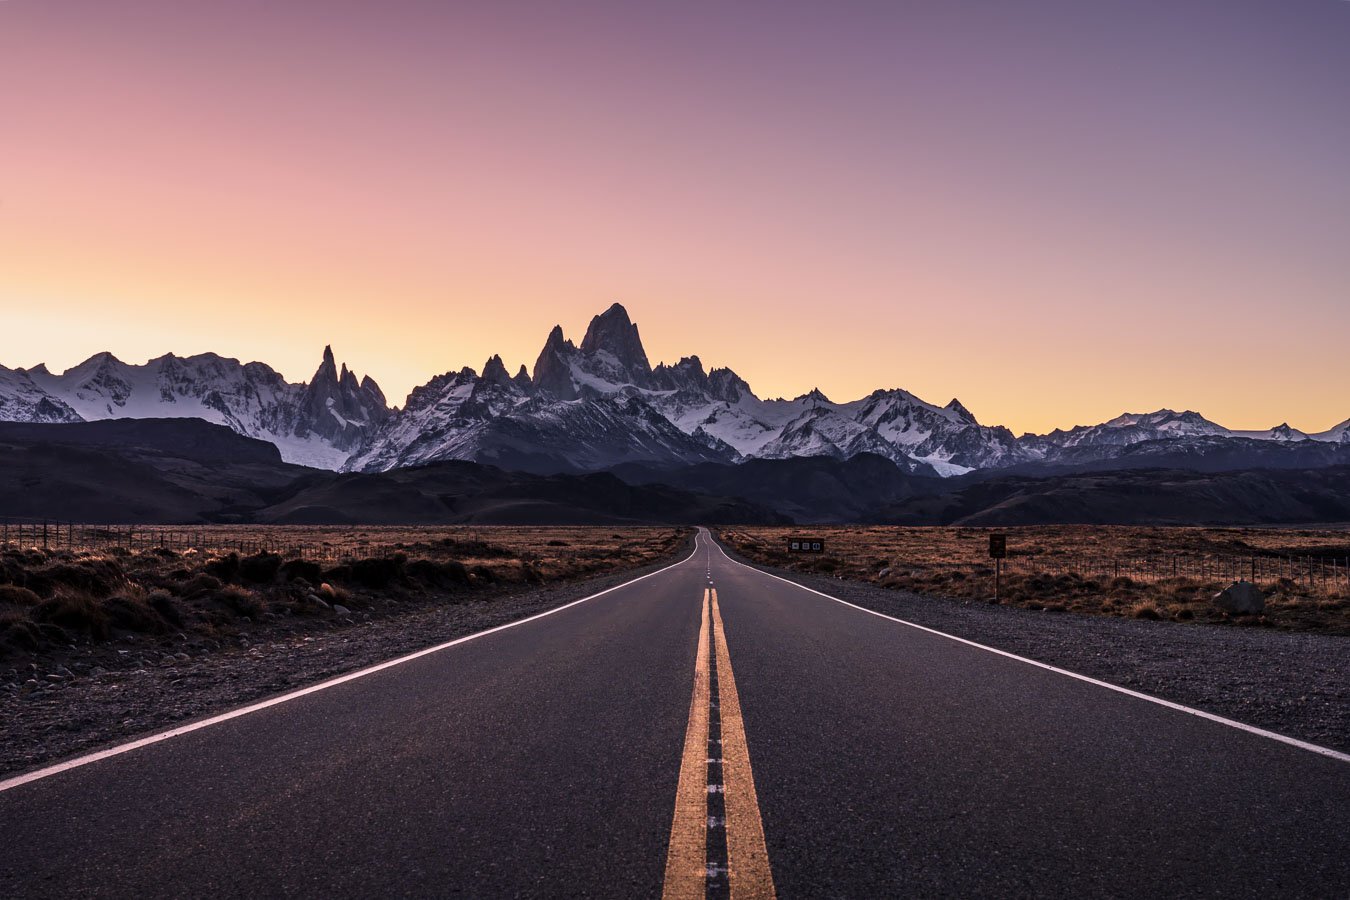
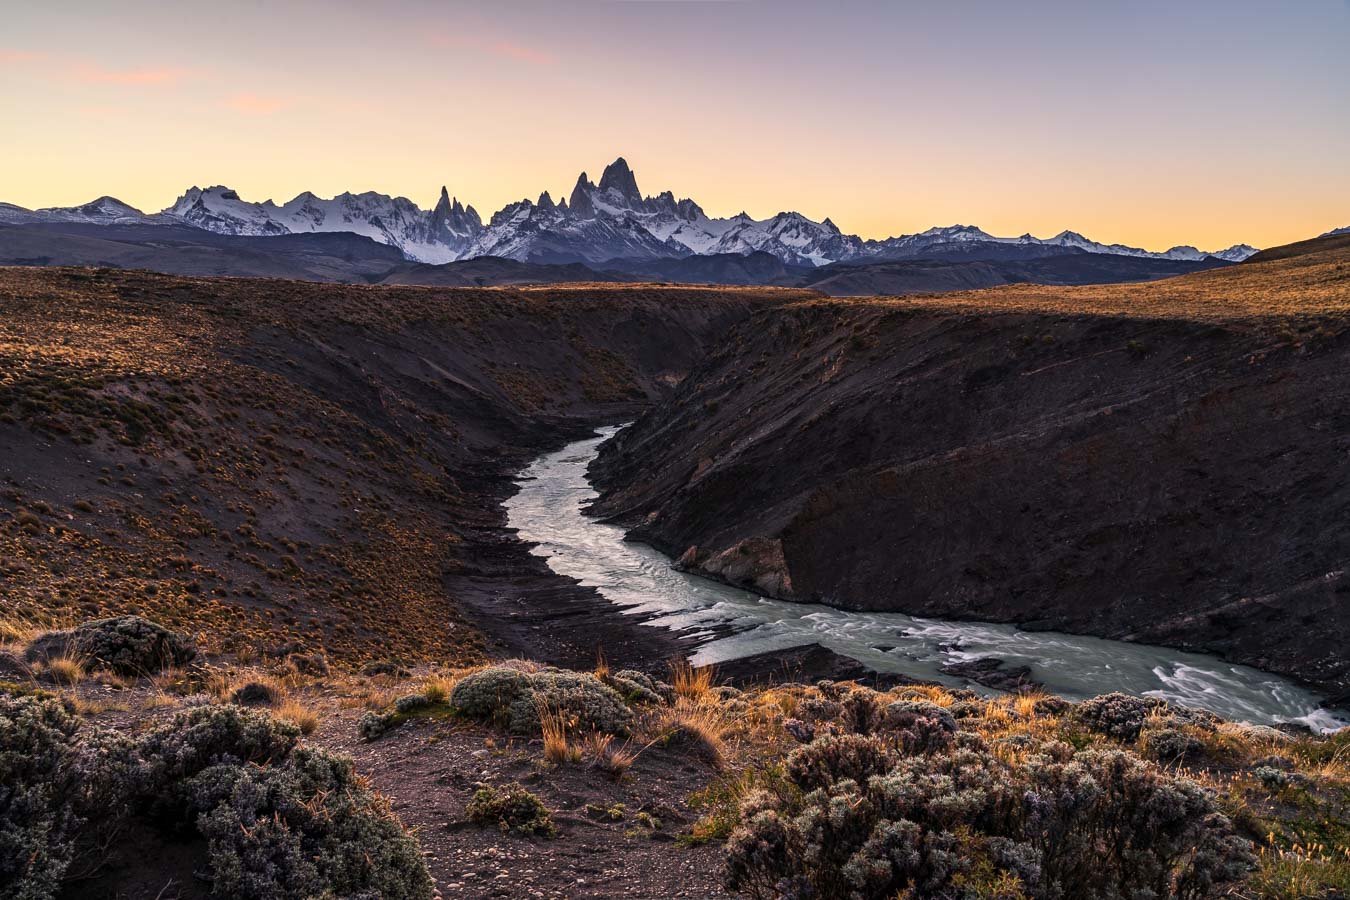
Taking the slightly longer but paved RN40 (Ruta Nacional) via Esperanza is a better option, as you'll maintain consistent speeds and potentially even save fuel by using cruise control due to the lack of traffic. Along the way, keep an eye out for guanacos, which are quite comfortable getting close to the road. After roughly 6 h and 20 min covering aound 420 km from Puerto Natales, we arrived in El Chaltén. The last few kilometers are stunning, with Fitz Roy (and Cerro Torre) appearing on the horizon and growing larger as you approach the town.
Initially, we planned to stay one night at a hostel before camping in the national park for sunrise hikes to Laguna de los Tres and the Fitz Roy viewpoint. However, due to the delay caused by the tire incident and the extraordinarily stormy weather during our last days in Torres del Paine that left our tent trenched in mud, we toned down our initial ambitions. We instead found a small apartment in El Chaltén, which turned out to be a great decision. The town has a cozy, laid-back atmosphere with several good cafés, bakeries, and restaurants where you can relax and refuel after your hikes.
One of El Chaltén's many advantages is its proximity to several trailheads, which are accessible right from the edge of town. This is a notable contrast to the more spread-out Torres del Paine, where some trailheads require lengthy drives or even a ferry. Additionally, there is (used to be) no fee to enter Los Glaciares National Park – apparently booths were installed at the trailheads to the Mirador de Cóndores and Sendero Fitz Roy where you have to pay a fee to access the trails (more below).
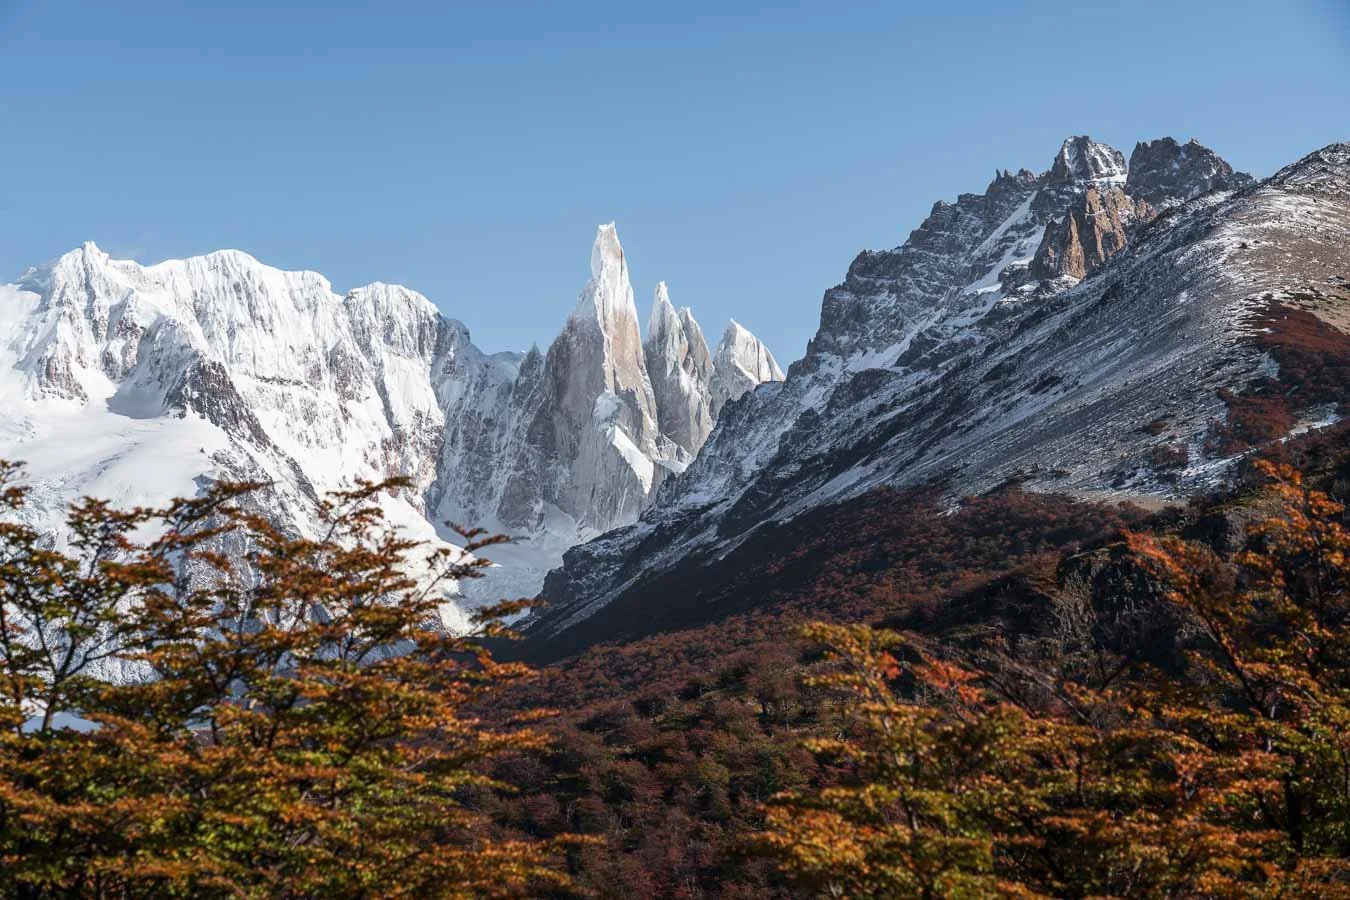
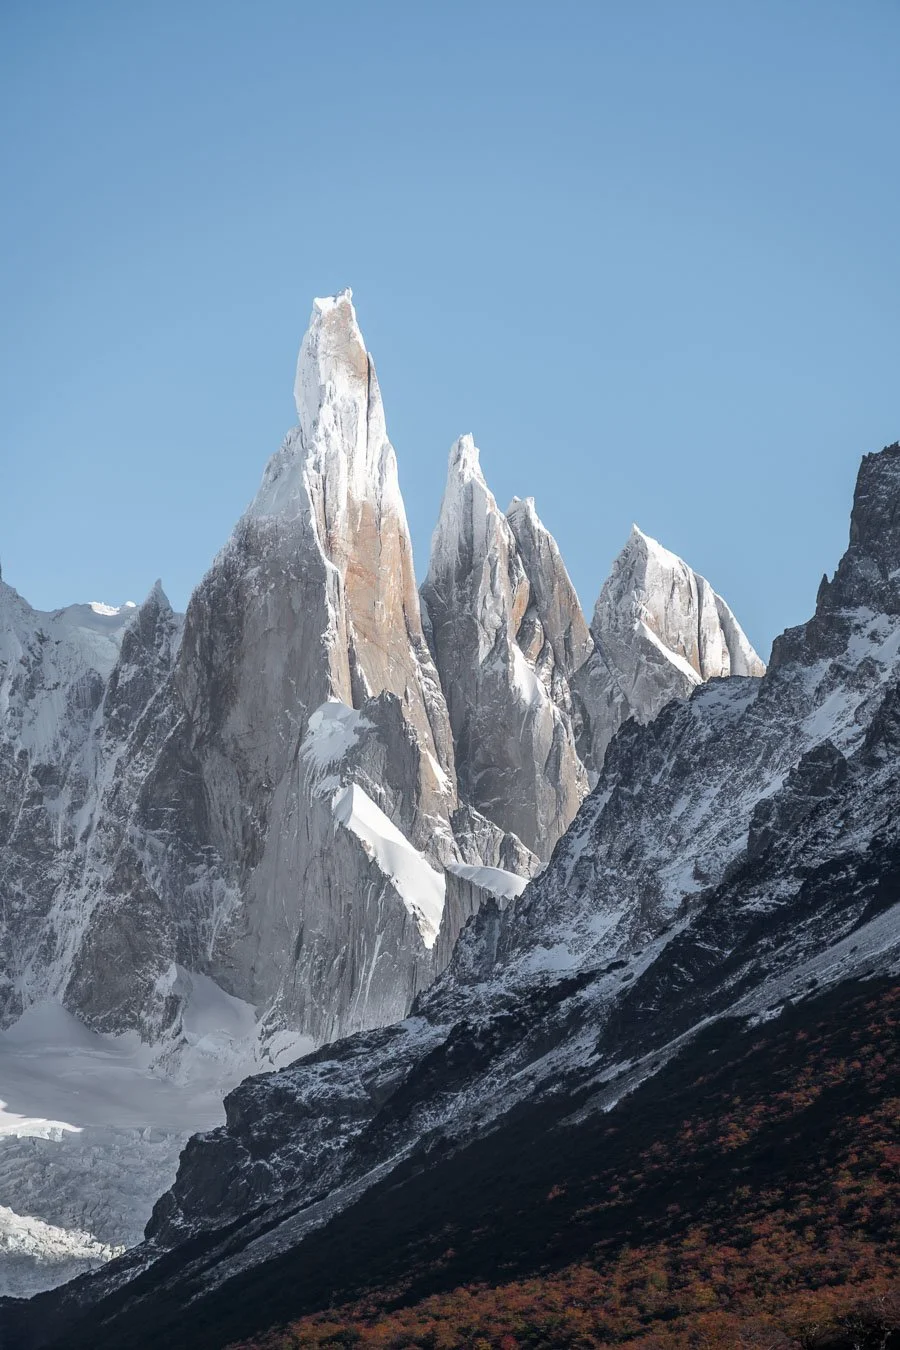
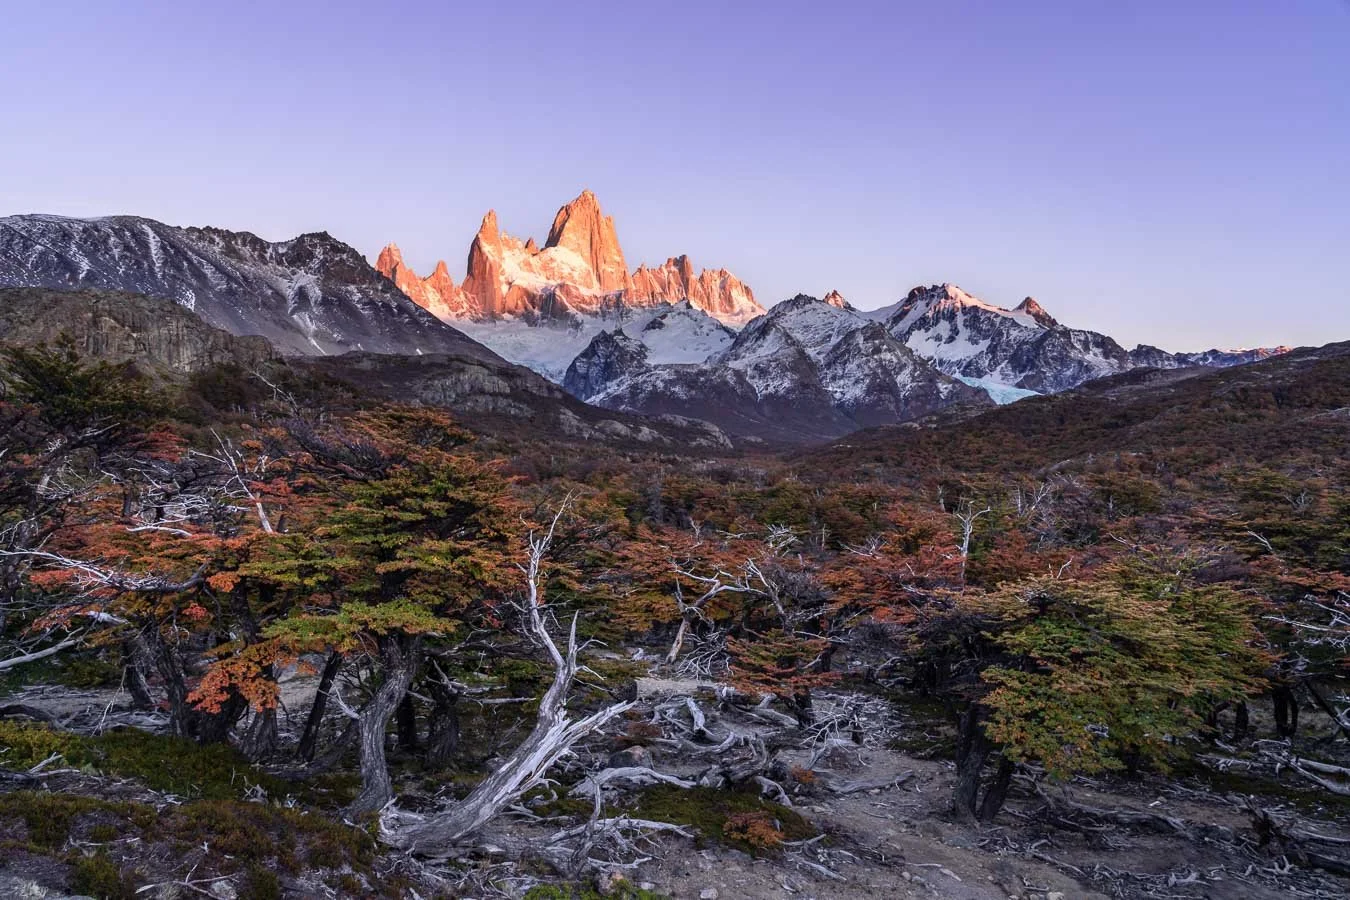
For instance, the trailhead for the hike to the viewpoint Mirador Cerro Torre is within walking distance from town. It’s a relatively short and manageable 6 km round trip with 228 m of elevation gain. Along the way, we were treated to incredible views of both Fitz Roy and Cerro Torre. The fall foliage, with its vibrant yellow and red hues, made the entire scene even more stunning.
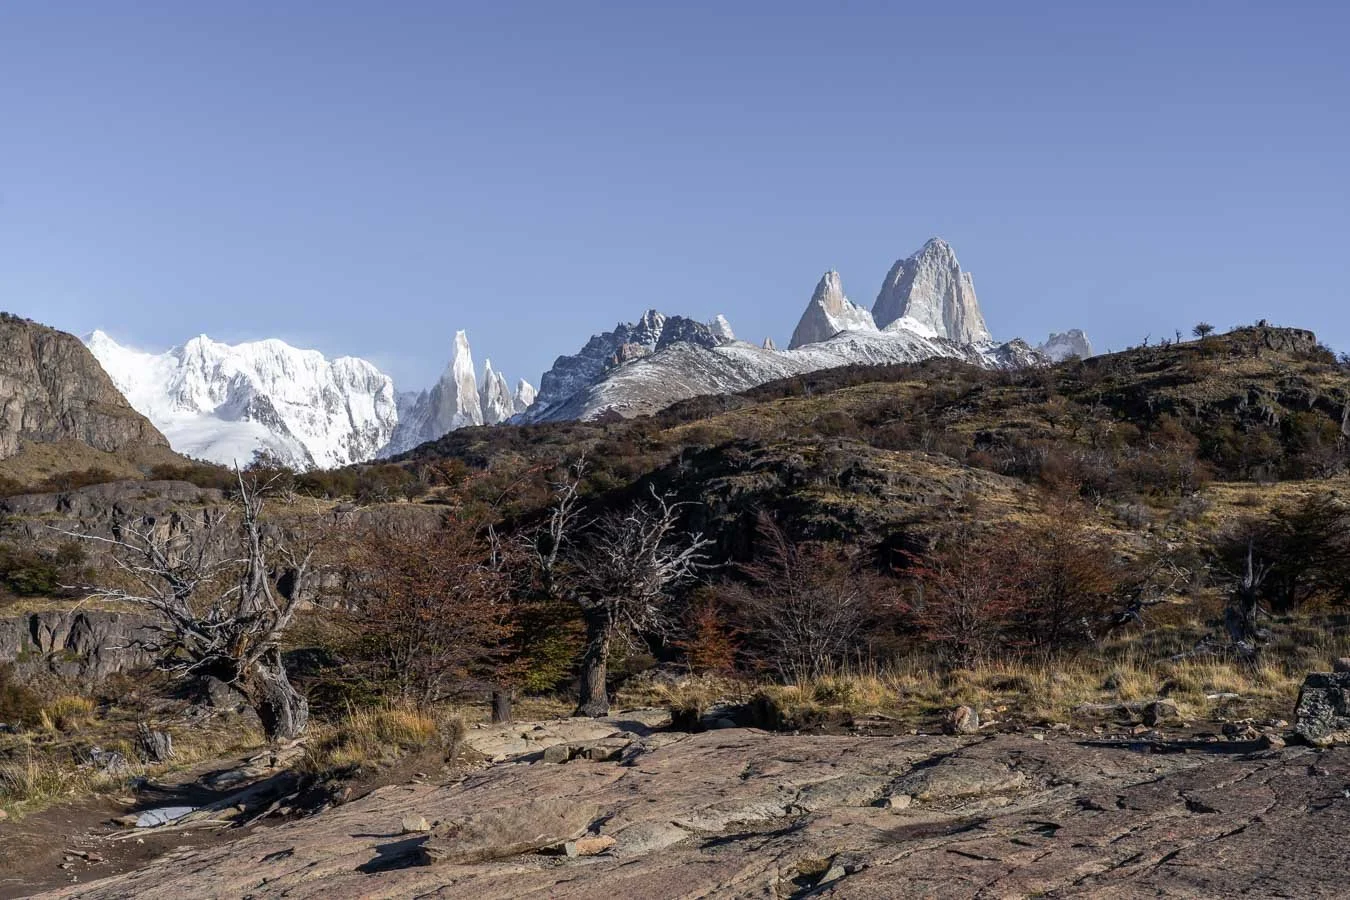
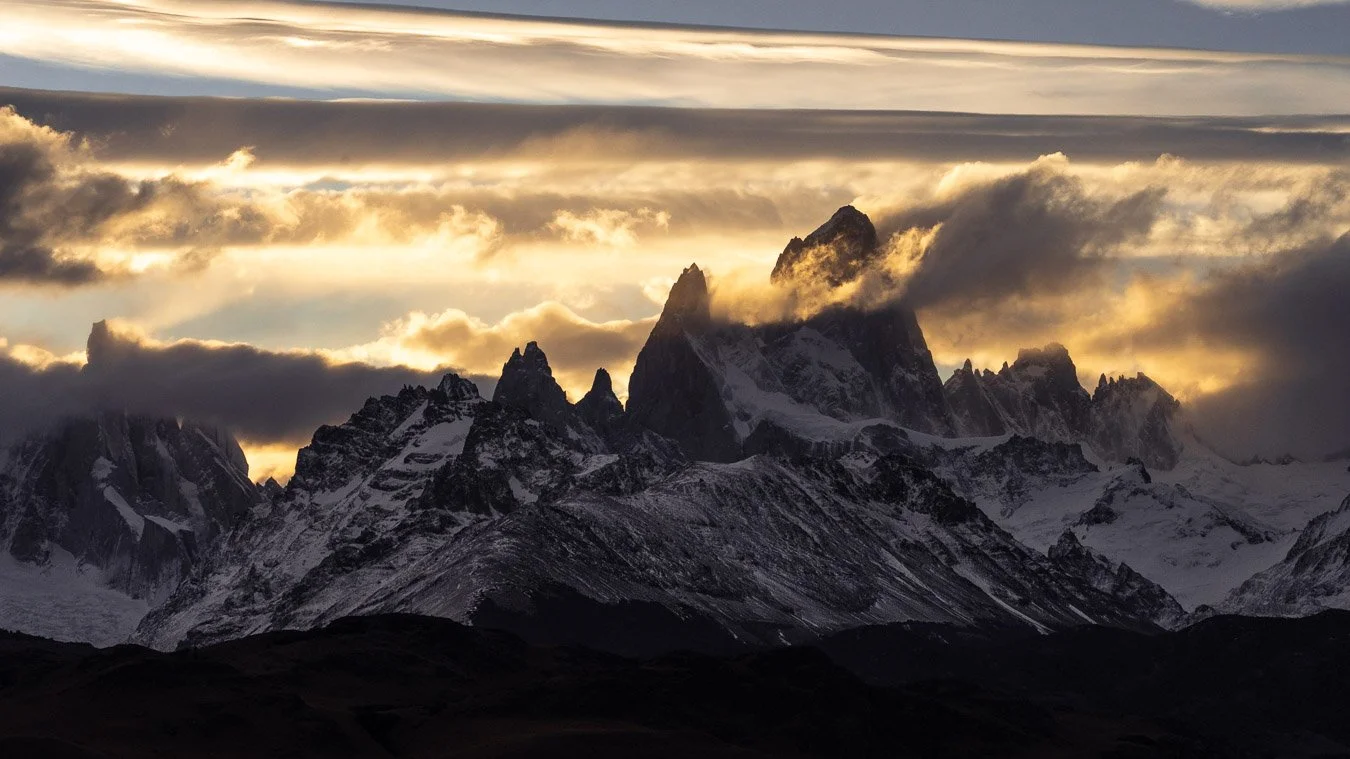
In the evening, we drove to one of the nearby viewpoints out of El Chaltén for a clear view of Fitz Roy and Cerro Torre at sunset. We were fortunate to have sunny, warm weather throughout our stay, and the sunset views were truly unforgettable. Just as the sun dipped behind the mountain range and we were about to leave, the sky transformed into stunning shades of yellow and purple which looked absolutely surreal!
View of the iconic Fitz Roy from a nearby viewpoint just outside El Chaltén.
The next morning, we headed out early for the Mirador Fitz Roy hike, hoping to capture the peak illuminated by the morning sun with fall foliage in the foreground. The hike is relatively steep (8 km round trip with 750 m of elevation). However, the trail itself is well maintained and we reached our viewpoint faster than expected. After scouting the area, we settled in to wait for the sunrise.


For those seeking more of an outdoor adventure, the full hike to Laguna de los Tres is a fantastic option, though it covers 22 km round trip with 1068 m of elevation. If you’d prefer to break it up, camping at one of the park’s campsites, like Poincenot, is a good alternative.
That afternoon, we ventured out of town again, this time in search of semi-wild horses roaming the plains around Fitz Roy. Unfortunately, we weren't successful in spotting any, but the journey was still enjoyable as you always have a nice view of Fitz Roy.
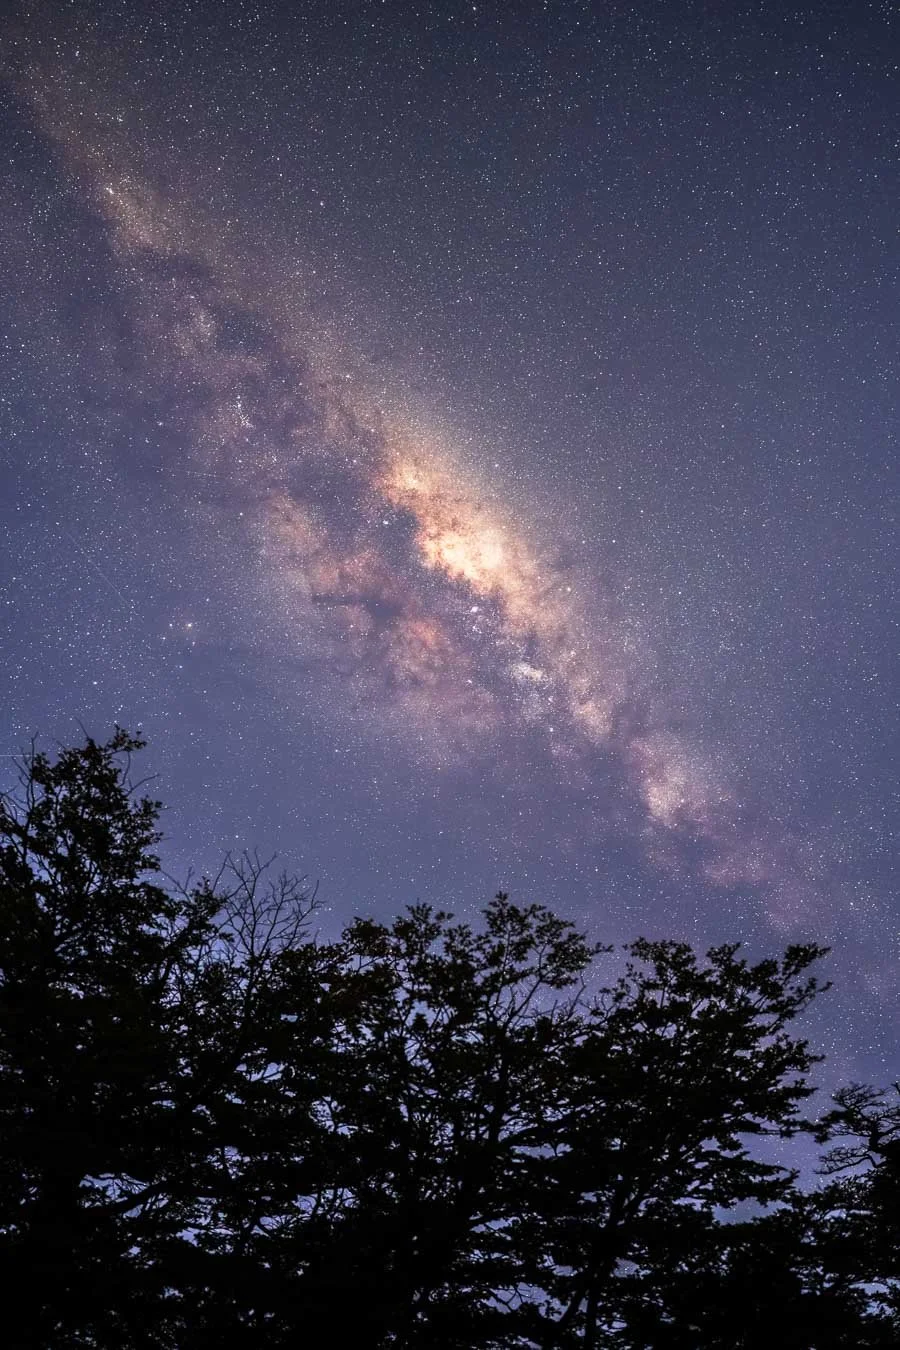
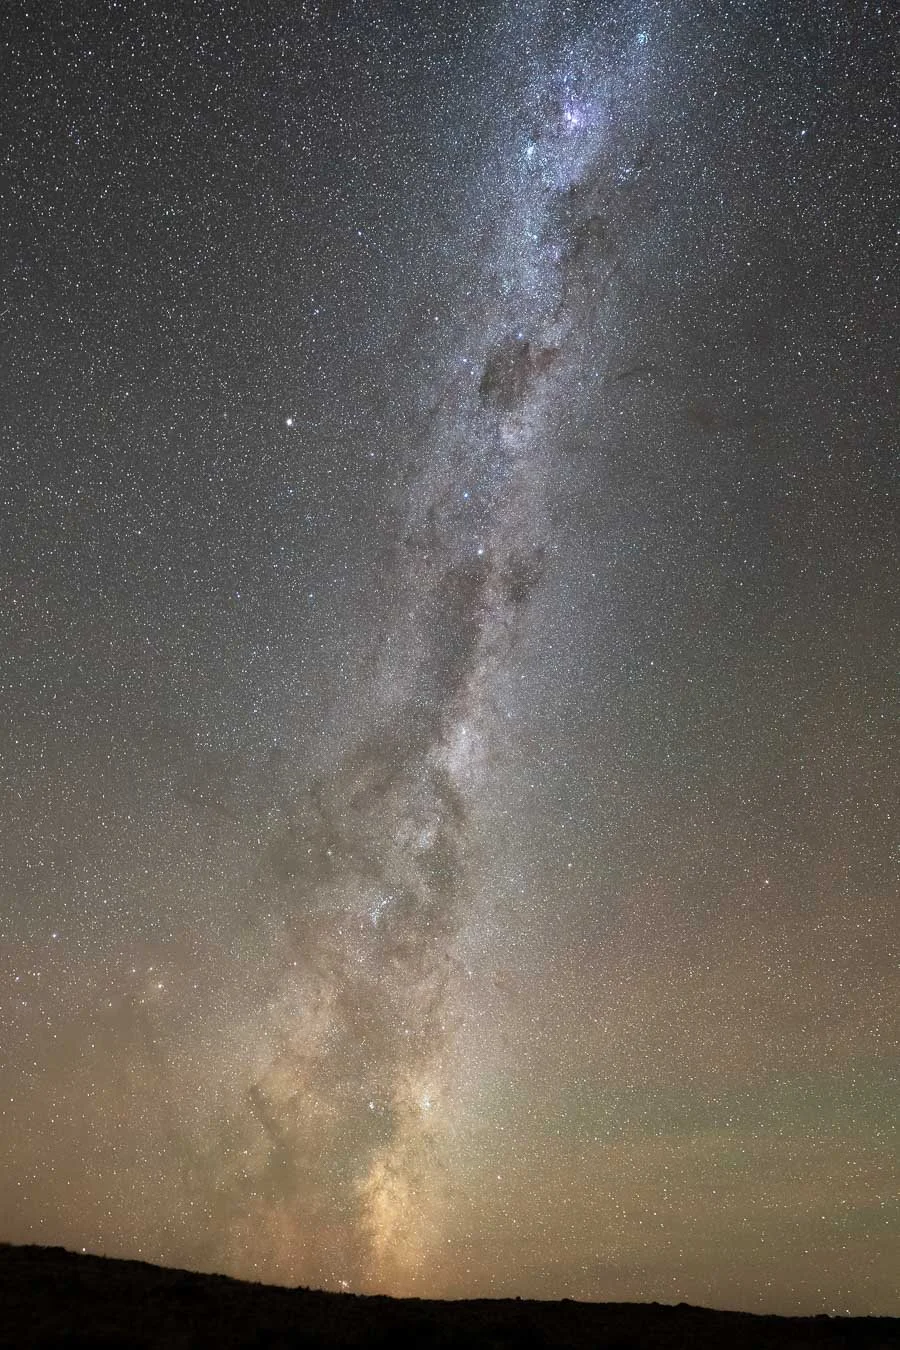
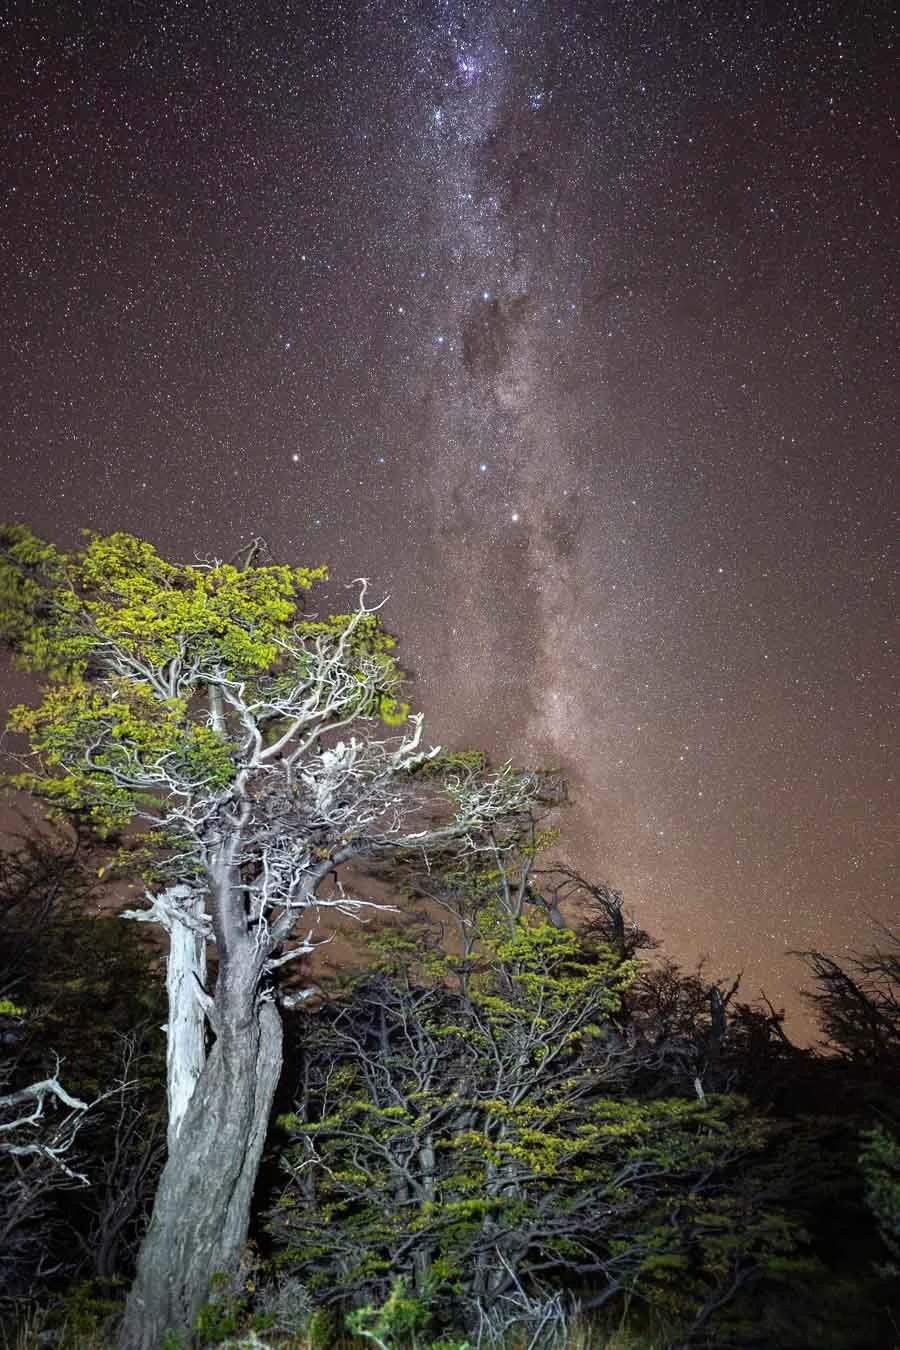
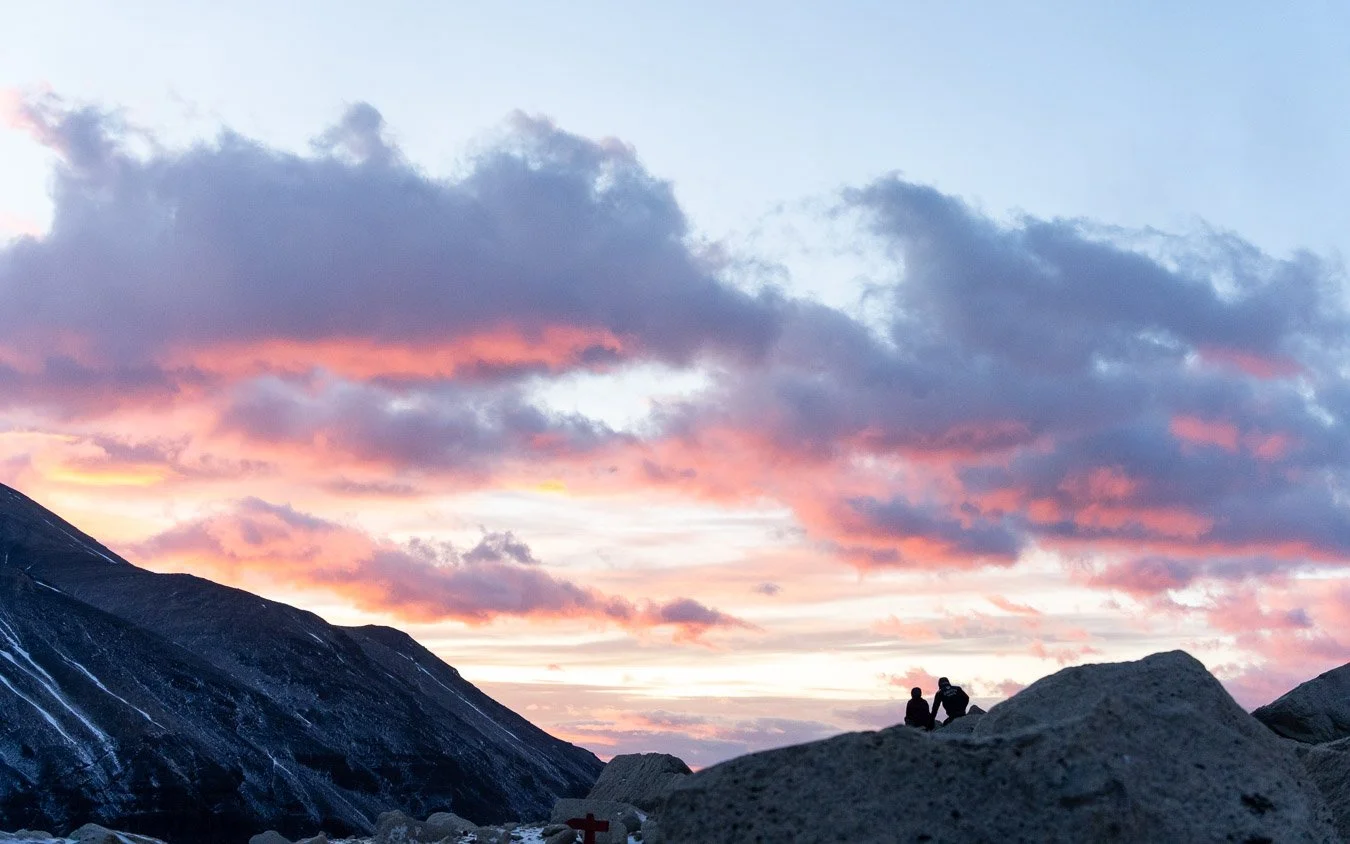
Later, after dinner, we made the most of our final night in El Chaltén by finding a dark spot to view the Milky Way once more. For instance, the car parks at the various viewpoints or more open areas within the national park offer excellent stargazing opportunities.
The following morning, we began our return journey with a stop in El Calafate. Our plan was to visit the Perito Moreno Glacier in the afternoon. However, after some concern over potential road conditions near the glacier (and the risk of further damaging our cracked windshield), we opted to spend a relaxed afternoon in El Calafate instead, picking up souvenirs for family before dinner.
The next day, we embarked on the 500 km drive back to Punta Arenas, which takes about 7 h (when accounting for the border crossing and fuel stops). We arrived in the late afternoon, had one last dinner, and returned our rental car at the airport the following morning – thus concluding an incredible first Patagonia adventure.
Planning & Preparation Advice
The most essential question to ask yourself before going on a Patagonia adventure is: What do I want to get out of this trip? Your goals will likely also depend on how much time you have and the budget you have available.
Is your trip purely about hiking and immersing yourself in nature? Or do you want to balance outdoor activities with photography? If your focus is purely on hiking, the W trek or the O circuit in Torres del Paine is a no-brainer. These well-marked trails highlight the park’s most iconic views and provide a structured, multi-day experience.
However, if you're interested in capturing stunning views of the Los Cuernos peaks or the Paine Massif from different perspectives, you may want to adjust your itinerary. The park offers dozens of breathtaking hikes that provide epic vistas, often with less effort in terms of distance or elevation. These alternative routes may also give you a more immersive wilderness experience, away from the crowds that tend to flood the W trek and O circuit during peak season. For photographers, choosing shorter day hikes allows more flexibility to capture the right light and weather conditions, whereas the structured itinerary of the W trek or O circuit may limit your opportunities, as you're required to reach your next campsite each day (since wild camping is strictly prohibited in the national park).
To add on that, avoiding the peak season by going later during March or April will not only result in less busy trails (the popular trails will still see many tourists) but will also create a stunning scenery as the foliage of the native southern beech trees to Patagonia will turn yellow to red rendering the dramatic landscapes even more stunning!
Moreover, staying in hostel or private rooms at the various campsites along the W trek may feel less ‘adventurous’ compared to pitching your tent at lesser-known campsites in the park. In other words, an exciting outdoor experience isn’t exclusive to the popular W trek or O circuit.
To conclude, while the W trek and O circuit are undoubtedly extraordinary and showcase some of Patagonia's most iconic views, for photographers or those seeking a quieter, more personalized experience, other routes may offer alternative perspectives, fewer crowds, and more freedom to explore Torres del Paine in your own way. Ultimately, the best itinerary depends on your personal goals – whether you're looking to photograph unique landscapes, avoid crowds, or find the perfect vantage point of the Paine Massif.
This challenge is less pronounced on the Argentine side, particularly in El Chaltén. The town itself acts as a base camp for a variety of trails, all leading to spectacular viewpoints. The trailheads are conveniently located right on the edge of town, making logistics much simpler for both hikers and photographers.
We spent about two weeks in Patagonia (not including travel time, which can add up to four or more days depending on where you're coming from). This timeframe is definitely enough to explore the highlights of both national parks. However, if you're pressed for time and just want to experience the most iconic hikes – like the Base Las Torres hike in Torres del Paine or the Laguna de Los Tres hike in Los Glaciares National Park – you could fit them in within a week. You might mix in shorter hikes or stop at viewpoints to make the most of it.
That said, you’d miss out on many equally beautiful spots that are less popular but just as stunning, if not more so. The real magic of Patagonia often happens in those unexpected moments – when the weather shifts, clouds create dramatic lighting, or the scenery surprises you in ways you couldn't have planned for. You won’t quite get that same sense of immersion if you rush through it.
We personally did dedicate a few more days to Chile, as we picked up our rental car there and several of our planned activities like the glacier hike etc. took place in Torres del Paine National Park. However, hiking one of the glaciers isn’t exclusive to Chile, as you can alternatively do a guided tour on the Perito Moreno Glacier near El Calafate in Argentina. Hence, there is no real guideline to how long you should stay on each side but it probably all comes down to your personal plans. Both the Chilean and Argentine side offer more than enough activities for both short and longer stays.
Transportation Considerations
Your transportation options – whether to rent a car or rely on buses and shuttles – will also depend on your plans. A rental car offers flexibility, allowing you to visit specific viewpoints or trailheads at the best times for photography or hiking. You can also stop at panoramic viewpoints along the road. In our case, renting a car and doing two two-day hikes (leaving the car at the trailhead and staying at campsites along the W trek) while camping at vehicle-accessible sites the other nights worked perfectly. It struck a good balance between flexibility and cost.
Fitz Roy at sunset, viewed from one of the observation points along the Río de las Vueltas, just outside El Chaltén.
While there are shuttle and bus services that stop at scenic points, they limit your time at each spot and often include other tourists, which might detract from a more immersive experience. However, if your main focus is hiking the W trek or the O circuit, a rental car could be unnecessary, expensive, and even impractical (especially for the W trek, as it doesn’t loop back to its starting point). There’s ample transportation between the trailheads and Puerto Natales, making public transport or an organized shuttle service a more practical choice for these treks.
If you plan to cross the border between Chile and Argentina with a rental car, you’ll need to arrange a special permit in advance. Be sure to contact your rental company at least a week before picking up the car to confirm they allow cross-border rentals (preferably sooner). We booked with Europcar, which permitted this but required us to upgrade to a 4WD and premium insurance (which, thankfully, covered all the damage we did to the car without complaints). The permit comes with an additional fee (203 USD by the time we requested the permit), and there’s also a higher security deposit. Whether this is worth it depends on your priorities and budget.
For those planning to combine some lesser-known hikes with the W trek or the O circuit, a mix of car rental and public transportation might be a good compromise. For example, you could rent a car for a few days to explore off-the-beaten-path parts of Torres del Paine but use buses or shuttles for getting to and back from the W trek (or O circuit) as well as getting from Puerto Natales to El Chaltén and back. You also have the option of flying out of El Calafate (aside from Puerto Natales or Punta Arenas), offering even more flexibility.
Campsite Bookings and Accommodation
When it comes to camping along the W trek, two companies manage the campsites: Vertice Patagonia and Las Torres Patagonia. Booking your campsites well in advance through their websites is highly recommended, as spots tend to fill up quickly, especially in the popular summer months (January and February). Even during less crowded months, campsites like Chileno can get booked out early.
While we didn’t hike the full W trek or O circuit, our experience with these companies was positive for the portion of the W trek we did cover (Vertice for Refugio Glacier Grey & Las Torres Patagonia for Camp Chileno). However, because we also stayed at some of the more remote campsites, we don’t have extensive experience with either campsite operators.
In contrast, camping in Los Glaciares National Park (Argentina) is generally free (as of early 2024), though the campsites are more rudimentary in exchange. This makes Argentina a slightly more budget-friendly option for campers. There are also campsites in El Chaltén itself (offering more amenities), which were closed by the time we went there (April).
Park Fees and Flights
Torres del Paine National Park requires an entrance fee, which varies depending on the length of your stay. You can check the latest prices here. Los Glaciares National Park in Argentina used to be free to enter, but certain trails apparently require a fee now (beginning mid-2024), and prices for foreigners are quite high (up to ~ 45 USD for a day pass) – more info here.
We flew to Patagonia via Santiago de Chile to Punta Arenas (through Lufthansa and LATAM), where we picked up our rental car. Puerto Natales also has a regional airport, which could be a good option if you plan to spend some time in Santiago (or Puerto Montt) before or after your Patagonia trip. Car rentals are available in Puerto Natales as well, so there's no need to go to Punta Arenas unless you specifically want to visit spots like Isla Magdalena for penguin sightings or if that works better (is cheaper) with your airline.
I hope this gives you a good foundation for planning your own adventure!
Recommendations & Lessons Learned
The most essential lesson when traveling in Patagonia is to be prepared for the unexpected, especially when organizing everything yourself since you don’t always have someone to assist you. As one of the last great wilderness areas, Patagonia is known for its unpredictable and often extreme weather conditions. While some of this advice may seem basic, the region’s growing popularity makes it worth emphasizing.
First and foremost, bring (or rent) appropriate gear for your planned activities. Layered clothing, including waterproof and windproof outer layers and pants, is key. Good hiking boots, hiking poles, and even (mini) crampons are advisable, especially if you're visiting during autumn or winter. If you're camping, waterproof gear becomes even more critical, as you’ll have fewer opportunities to dry your clothes. The right equipment not only makes your experience more enjoyable but also significantly safer in bad weather.
Be prepared for last-minute cancellations. Due to unpredictable winds and weather, many activities may be canceled with little warning. For example, both our glacier hike and penguin tour were canceled due to high winds. While the cancellations were understandable, it was still disappointing. If certain activities are particularly important to you, consider building extra time into your itinerary to accommodate potential rescheduling – whether on the same day or the following day, depending on availability. If you’re camping, it might be wise to budget for the possibility of upgrading to a hostel/private room if the weather turns especially extreme.
For those relying on the catamaran transfer in Torres del Paine National Park, be sure to allow extra time. Our catamaran left ahead of its scheduled departure, which might not be a one-time occurrence. Additionally, since the boat is relatively small, arriving early ensures you secure your spot.
On a positive note, our experience with Europcar was excellent. We incurred no additional costs for a cracked windshield or a flat tire, since we reported our incidents within 24 hours via the provided link. When we needed a tire replaced, a mechanic in Puerto Natales took care of it on the same day, even though it was a Sunday (coming from Bavaria, that is a miracle)!
Damaging a tire can happen anytime, especially if you are driving a lot on the gravel roads. While the majority of the gravel roads are in good condition, some larger potholes (and rocks) can appear unexpectedly due to the frequent harsh weather conditions. Consequently, don’t speed and stay alert when driving. Make sure you’re familiar with your rental car's spare tire and jack. It is also beneficial if you have used a jack before or at least know how to operate one before you go. When we got our flat tire in the national park, finding a level and sufficiently dry stretch of road was actually a real challenge, given the hilly terrain in Torres del Paine National Park and the ample rain in the preceding days. To make matters worse, the bolts of the tire were screwed so tightly, that loosening them with the issued lug wrench made the previous odyssey of finding a suitable spot to change the tire feel like a walk in the park.
In case you run into more serious car trouble, Europcar offers 24-hour support, but mobile reception is often spotty at best. For true emergencies, a satellite communicator (like those from Garmin) could be a good investment, especially if you’re planning to explore the less-traveled areas of the park.
In case you skipped the previous chapter or just to reiterate – do yourself a favor and avoid RP7 and use RN40 instead, even though Google Maps wants you to take RP7. While taking RP7 technically results in a shorter route, the severity of the potholes on some parts of the road forces you to drive so slowly that taking the longer route via the paved RN40 is faster, less stressful, and probably also more fuel-efficient as you can cruise-control for the majority of the time due to the little traffic. Guanacos will be the predominant reason why you would have to interrupt your cruise-control.
Speaking of fuel, plan ahead! There are no petrol stations within Torres del Paine National Park. The nearest one is about two hours away in Puerto Natales (roughly 2 h and 100 km). Between Puerto Natales and El Chaltén, fuel stations are limited, so make sure you start your trip with a full tank. If you do this, a single refueling stop along the way, such as in Esperanza, should suffice.
Also, download offline maps and dictionaries before your trip, unless you’re comfortable communicating in Spanish. While English is widely spoken, especially by younger people, there were still moments when we had to rely on Spanish, such as at the Lago Pehoé campsite. Offline maps can also be a lifesaver for navigating both roads and trails. Campsites in the national park offer Wi-Fi, though it’s rather expensive – but perhaps that is an incentive for you to truly disconnect from the online world and instead connect to nature!
Grocery options are limited in the more isolated parts of Torres del Paine. So if you want to avoid relying solely on campsite restaurants (if available) and also don’t want to live on basic rudimentary meals and snacks like ramen noodles or biscuits etc., you will have to bring adequate amounts of food when entering the national park. Alternatively, dedicate a bit of time to restock at some point. Again, this is less of an issue on the Argentine side in El Chaltén as the town serves as starting point for many trails and has a few supermarkets that makes resupplying much easier.
By following these recommendations and learning from our mishaps/experiences, you’ll hopefully be better prepared for your Patagonian adventure!
Conclusion
This post turned out longer than expected, but if you enjoy the outdoors and crave adventure, Patagonia will not disappoint!
For us, visiting Patagonia was an epic journey – easily one of our greatest adventures, if not the greatest (so far). The scale and beauty of both Torres del Paine and Los Glaciares National Park are absolutely stunning, yet each is distinct in its own way. This makes a road trip across both the Chilean and Argentine sides very compelling.
In Torres del Paine, the dramatic peaks of the Paine Massif are, unsurprisingly, the main attraction, rising sharply from the plains with an almost otherworldly presence. The surrounding landscape, however, is just as captivating. Vast, arid plains stretch out below the mountains, their rugged beauty accentuated by the lack of large vegetation, providing a strong contrast to the windward, lusher areas closer to the mountains, which are covered in unique, wind-sculpted vegetation, most notably the iconic twisted Antarctic southern beech trees. In the fall, their golden and red foliage further enhances the region’s already dramatic charm. The many charred trees still standing, remainders of past wildfires, add a somber touch, creating a moody atmosphere that’s especially striking when the mountains loom under stormy skies. Despite its popularity, Torres del Paine retains a sense of raw wilderness, largely thanks to its remote location.
In contrast, Los Glaciares National Park, particularly around El Chaltén, is more accessible. The town itself is charming, with a resort-town vibe reminiscent of European alpine villages or places like Queenstown in New Zealand. After the isolation of Torres del Paine, it’s a nice change of pace, with plenty of cozy cafés, bakeries, and restaurants – perfect for recovering after hikes to the legendary Fitz Roy or Cerro Torre. Additionally, the weather on the Argentine side was noticeably more forgiving during our visit. While it was still windy, conditions were generally warmer and drier (thanks to the rain shadow effect of the Andes) than in Torres del Paine. You could easily spend several days in El Chaltén, enjoying the town and the many nearby hiking trails, or opt for a camping experience deeper in the park.
We definitely hope to return one day to once again experience the dramatic peaks of the Cordillera del Paine, as well as Fitz Roy and Cerro Torre. Next time, we might also explore some of Patagonia's less-trodden paths, perhaps venturing north to places like the Cochamó Valley.
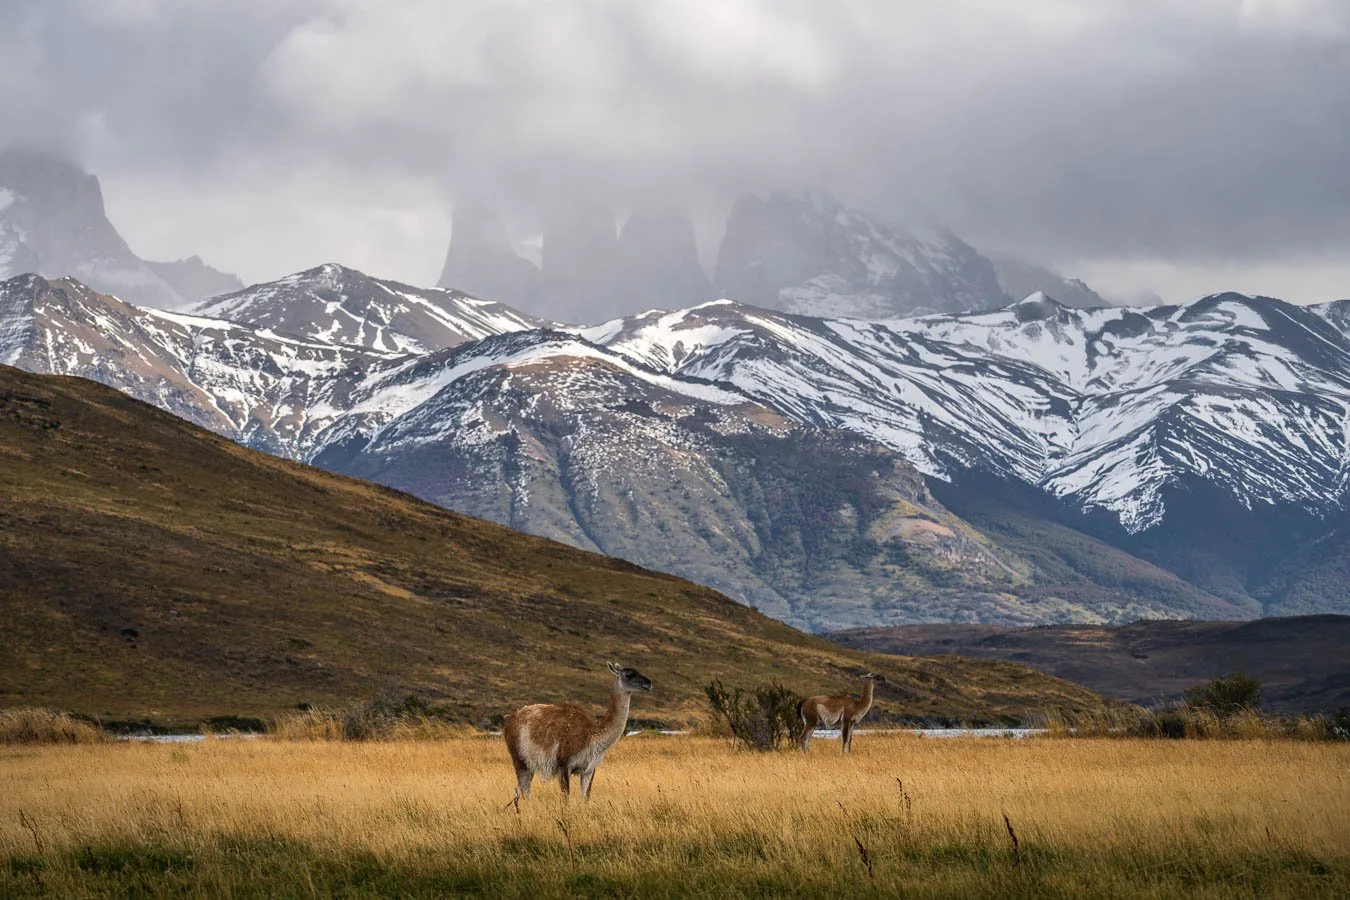
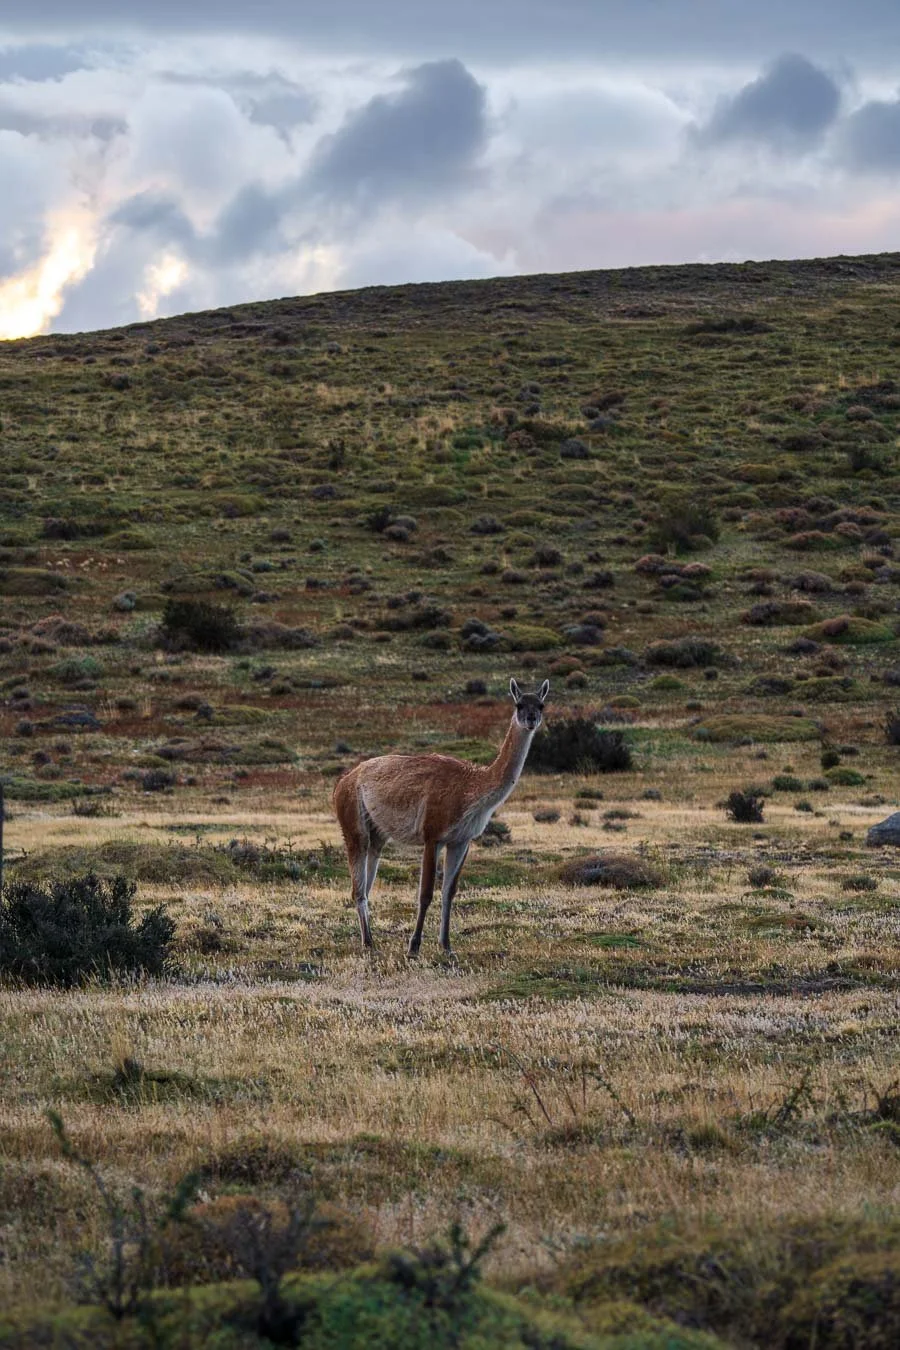
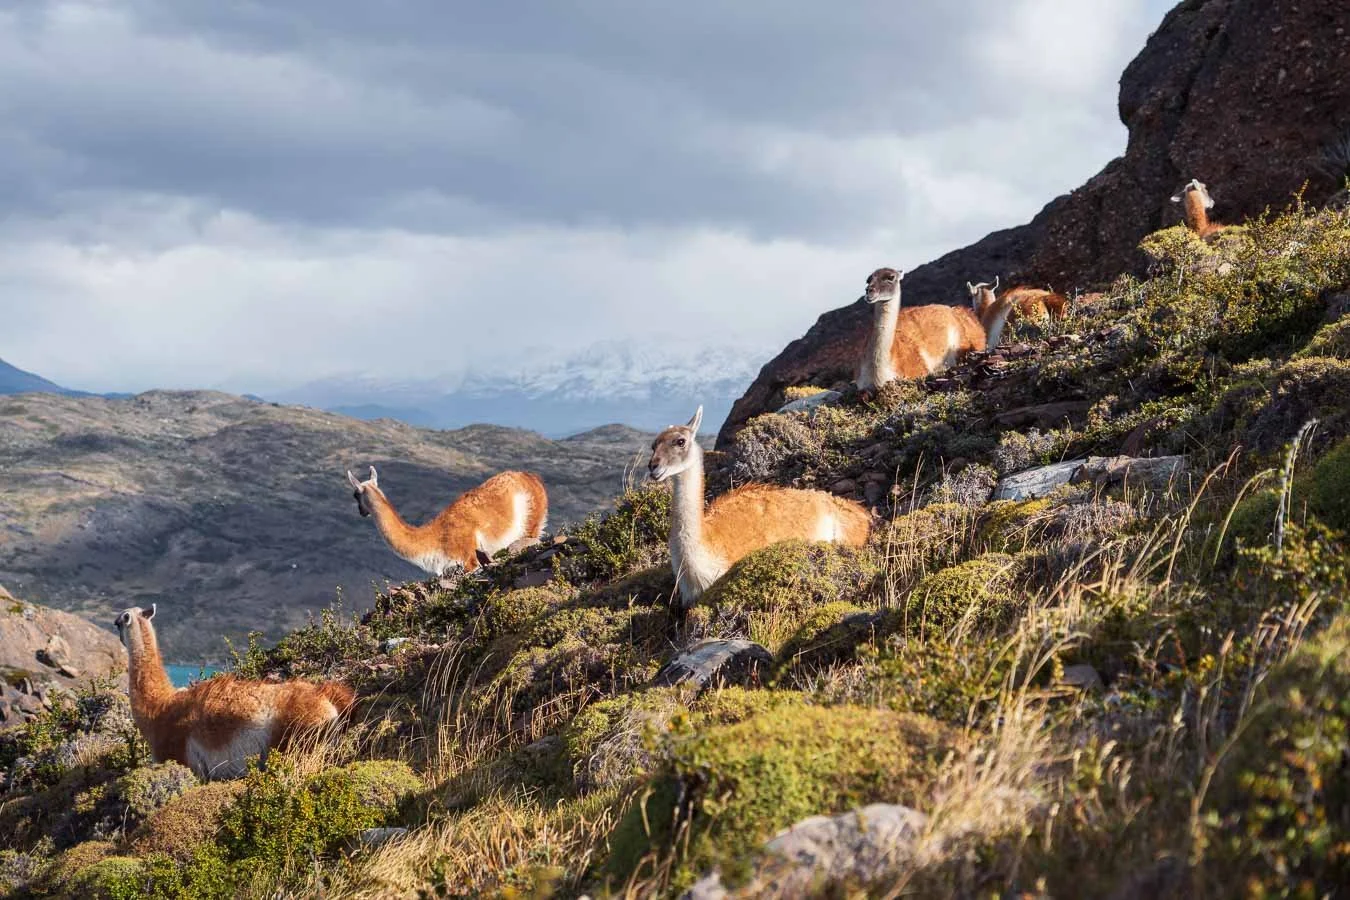
Guanacos roam the plains near Laguna Azul, set against the stunning backdrop of the Torres del Paine towers in Chile.
Additional Content
Youtube video (highlighting the wind speeds):
Useful Links
Here are some links and resources to assist you in planning your own Patagonia adventure!
Torres del Paine National Park – Chile
Los Glaciares National Park – Argentina
Map of the entire national park
Detailed map showing trails & campsites in the national park around El Chaltén
Accommodation Recommendations
Punta Arenas – Innata Hostel
Puerto Natales – El Sendero & Hostel FACTORIA
El Chaltén – Meraki Lofts
El Calafate – Folk Hostel
Other Links
Wind speeds (also available as an app)
Map
For the best viewing experience, exploring this website on a desktop browser is recommended.
Due to the large number of featured photos, the images are somewhat compressed. For higher-quality versions of selected pictures, visit the photo gallery!
If you enjoyed this blog post and want to see more content beyond Patagonia, explore the blog posts from other journeys around the world!
And in case you have more questions about the itinerary or anything else, feel free to get in touch here!