Laugavegur – Iceland
Otherwordly Landscapes
Hiking the popular Laugavegur trail in the Highlands of Iceland
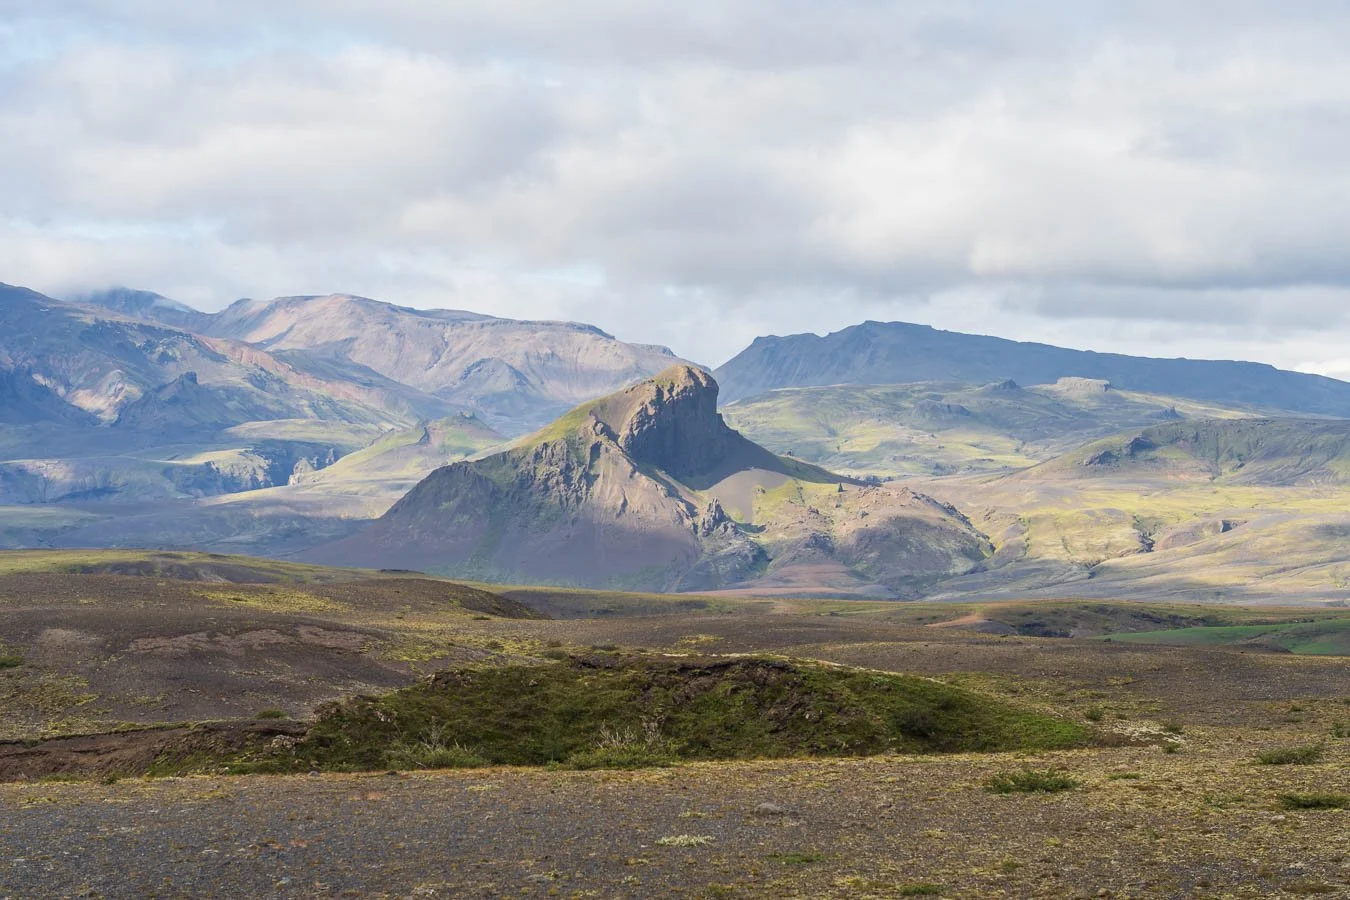
Despite being a relatively compact country, Iceland is densely packed with dramatic and varied landscapes, ranging from active volcanoes, jagged basalt columns, black sand beaches and deserts, steaming geothermal fields, to vast glaciers, and the countless rivers and waterfalls that spill from them. After all, it’s called the ‘Land of Fire and Ice’ for a reason. Many of the most popular sights can be reached by driving the Ring Road around the island, which is a convenient way to see a lot in a relatively short time and get a first proper impression of the country. To really understand how wild, remote, and raw Iceland can feel, though, you need to leave the coast and head into the Highlands. This interior region is shaped by lava fields, rhyolite mountains, black sand deserts, and glacier-fed rivers – a stark, mostly untouched volcanic landscape that feels hostile yet mesmerizing. Because conditions are harsh, the Highlands are only accessible during the warmer summer months. You can explore them either with a 4x4 on the F-roads or on foot. One of the most famous ways to do the latter is the Laugavegur trail (not to be confused with the shopping street of the same name in Reykjavík). Laugavegur, which means ‘hot spring trail’, runs roughly 55 km between the geothermal area of Landmannalaugar in the north and Þórsmörk in the south and is often listed among the most beautiful multi-day hikes in the world. This is the route we chose.
In this post, we share our experience on the Laugavegur, along with practical tips and insights from along the trail. Before we get into the details of our journey, here’s a short overview to help you navigate the post and jump straight to the sections that interest you most.
Overview
Itinerary | Planning | Recommendations | Conclusion | Links | Map
Itinerary
We started our trip by flying into Keflavík International Airport and taking the transfer bus to Reykjavík. Our plan was to stay in one of the many hostels for one or two nights, so that we have enough time to pick up supplies we couldn’t bring on the plane, and to also have a relaxed day in the city before setting off on the multi-day Laugavegur trail.
Originally, we wanted to combine the Laugavegur with the Fimmvörðuháls trail, which connects the waterfall Skógafoss on the south coast with Þórsmörk, the southern end of Þórsmörk. In theory this gives you one long, continuous traverse from the coast into the Highlands. In practice, however, delayed baggage forced us to stay in Reykjavík longer than expected, so we had to adjust our plan and ‘only’ hike the Laugavegur part. Although that was quite unfortunate, Icelandia (the company which we booked our bus tickets with) was very accommodating and changed our highland bus tickets on very short notice without extra fees – both the date (because of the delay) and the final destination (to Þórsmörk instead of Skógafoss)!
Day 0 – Reykjavík to Þórsmörk and the Orange Loop
Once all our gear finally arrived, we caught the highland bus from Reykjavík to Þórsmörk. The ride takes roughly 3–4 hours, depending on the route and stops. We left early in the morning and arrived around noon.
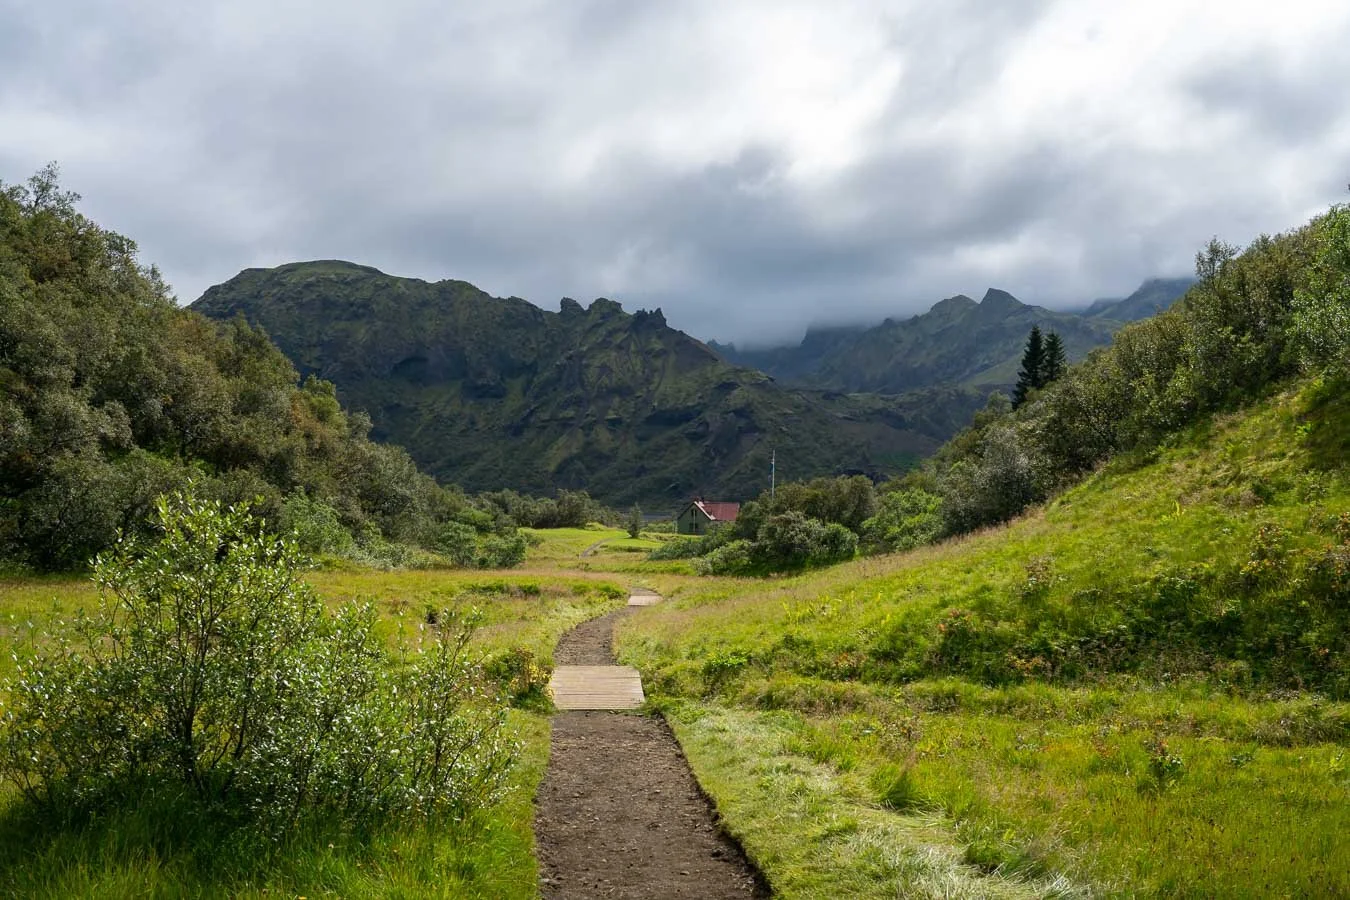
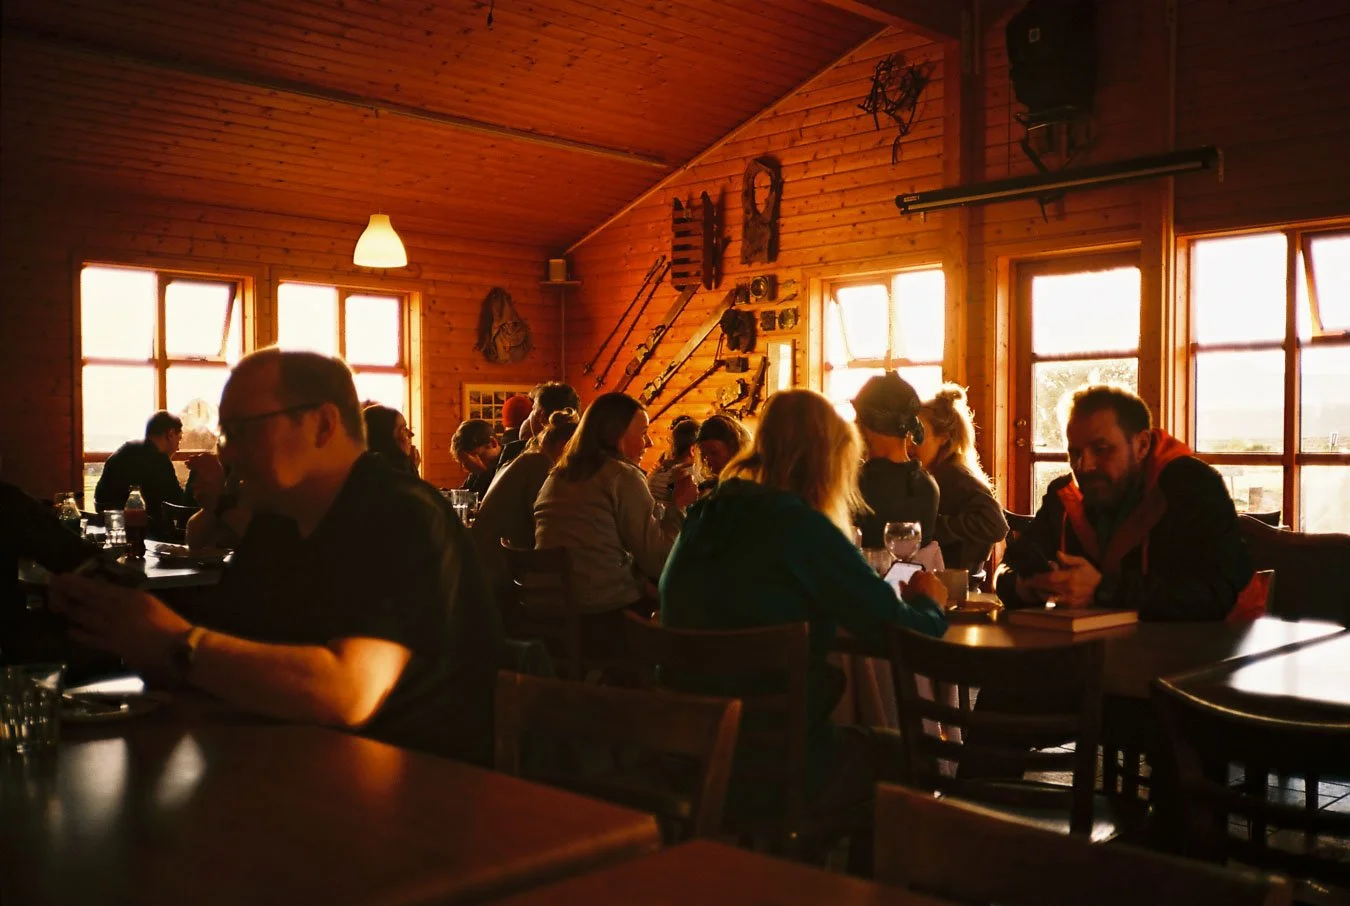
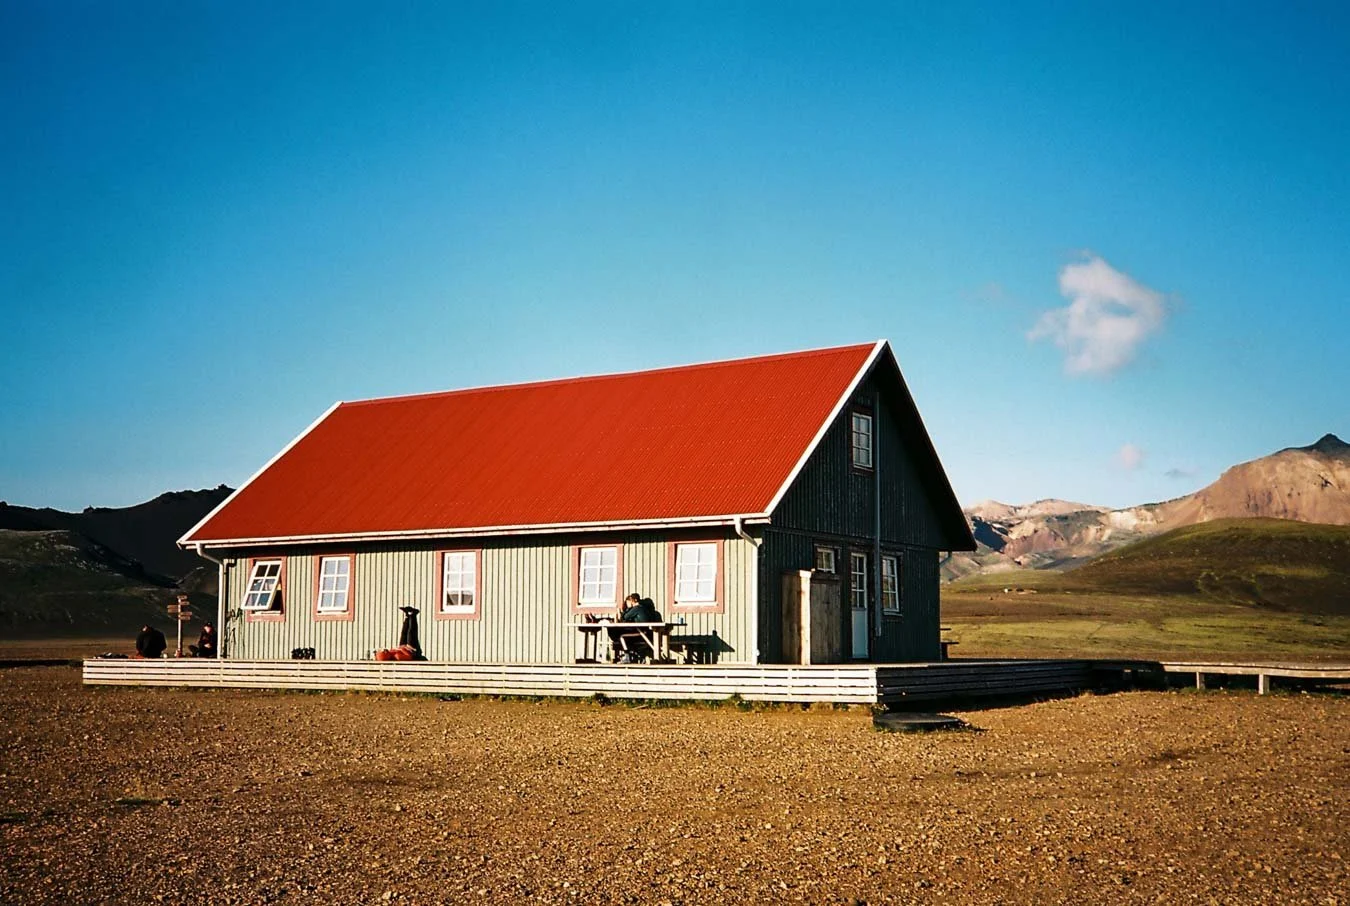
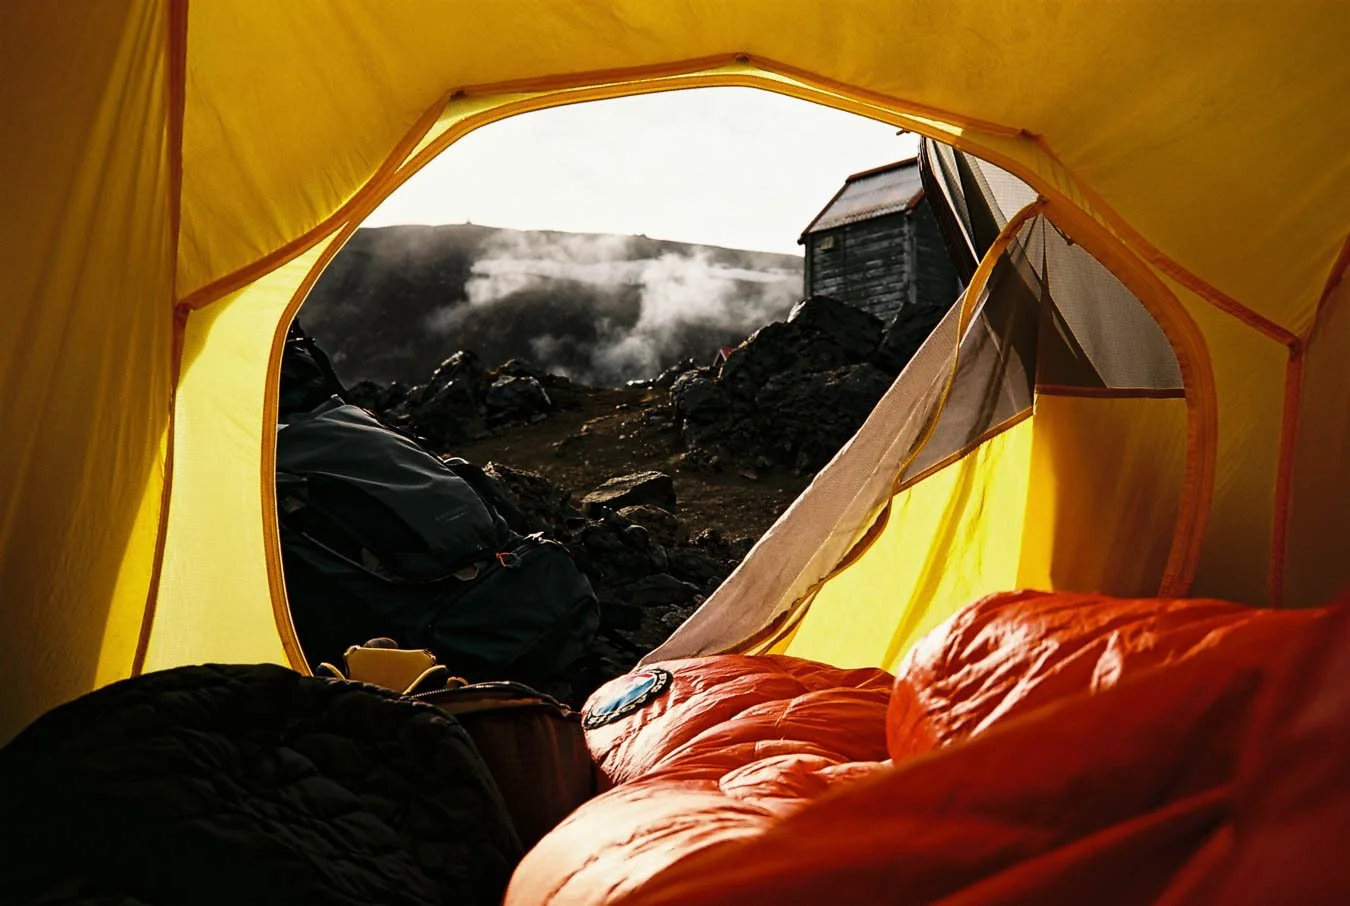
There are three main stops/campsites in Þórsmörk; we got off at the first one, namely the Volcano Huts campsite. This is the most developed campsite in the area, with a service building, dining facilities, lounge spaces, hot showers, and even a sauna. If you camp in a tent, you can either buy lunch and dinner in the main dining area or cook your own meals in a smaller self-catering hut. There is also Wi-Fi in the main building, which is handy if you forgot to download offline maps or want one last check-in before you disappear into the Highlands (as mobile reception on the actual Laugavegur can be patchy).
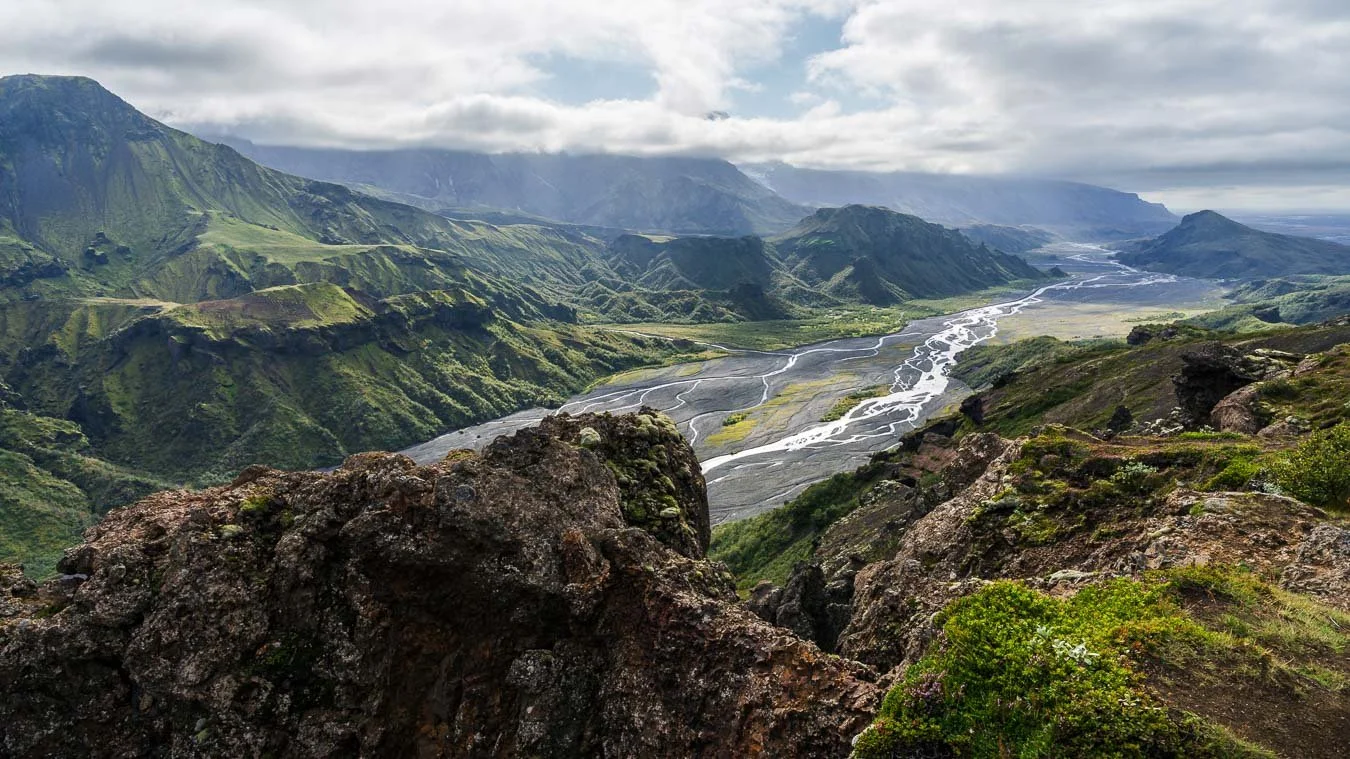
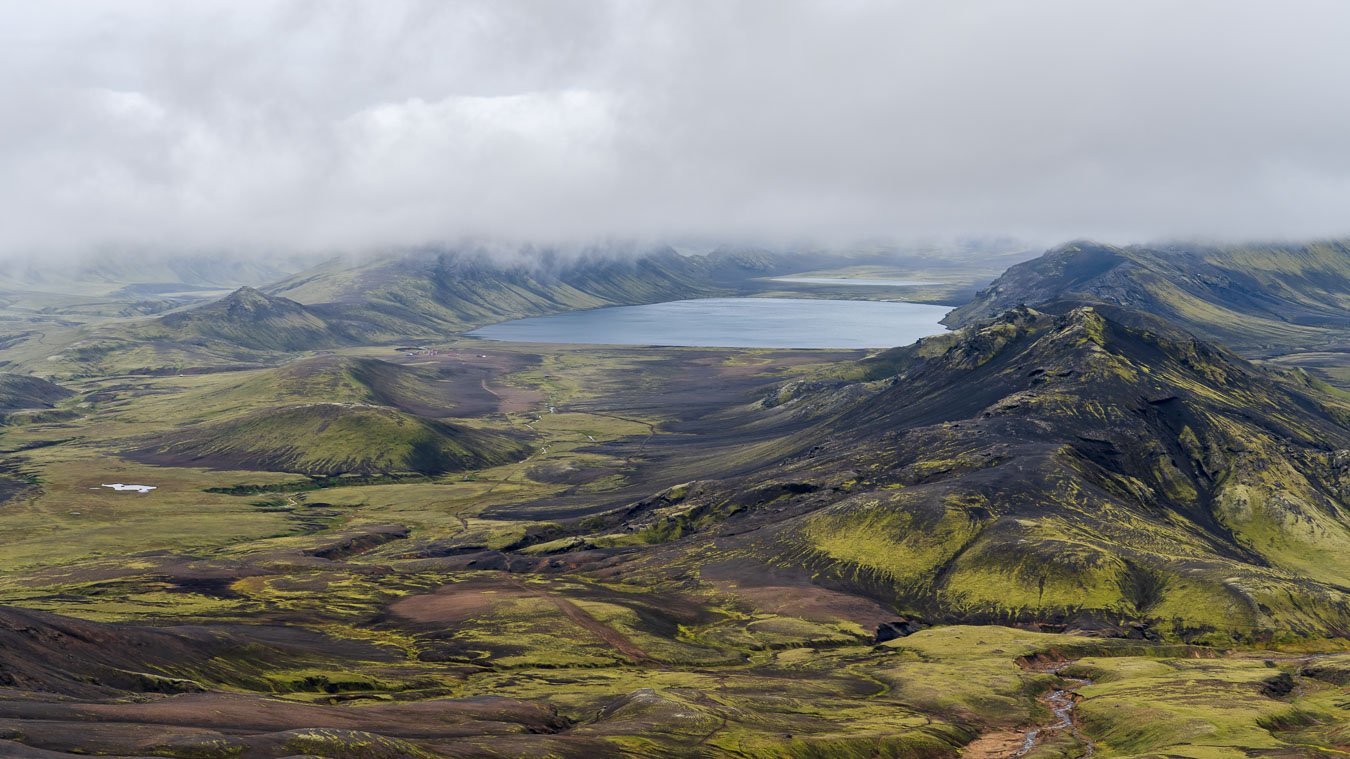
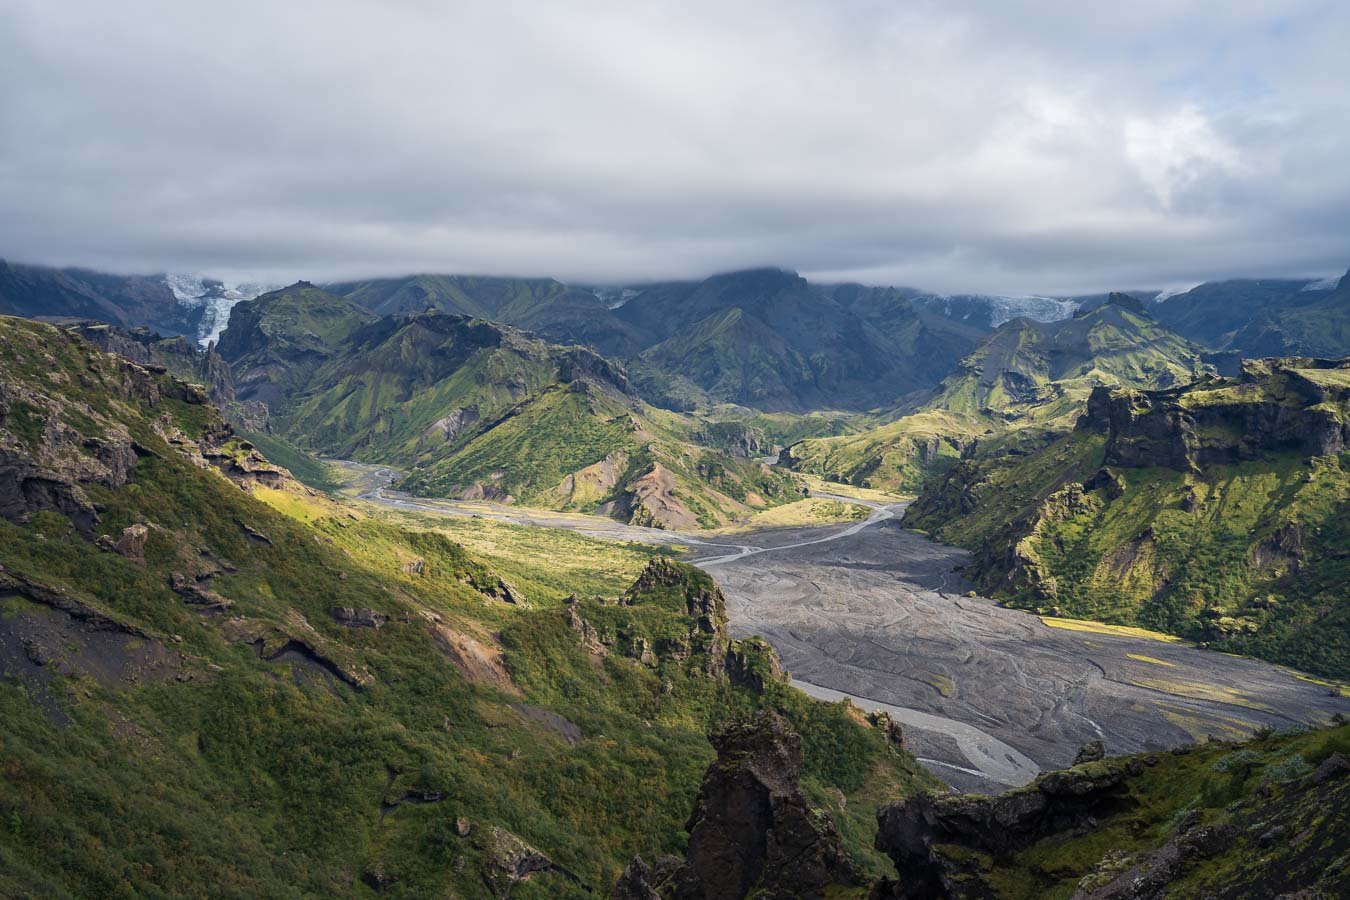
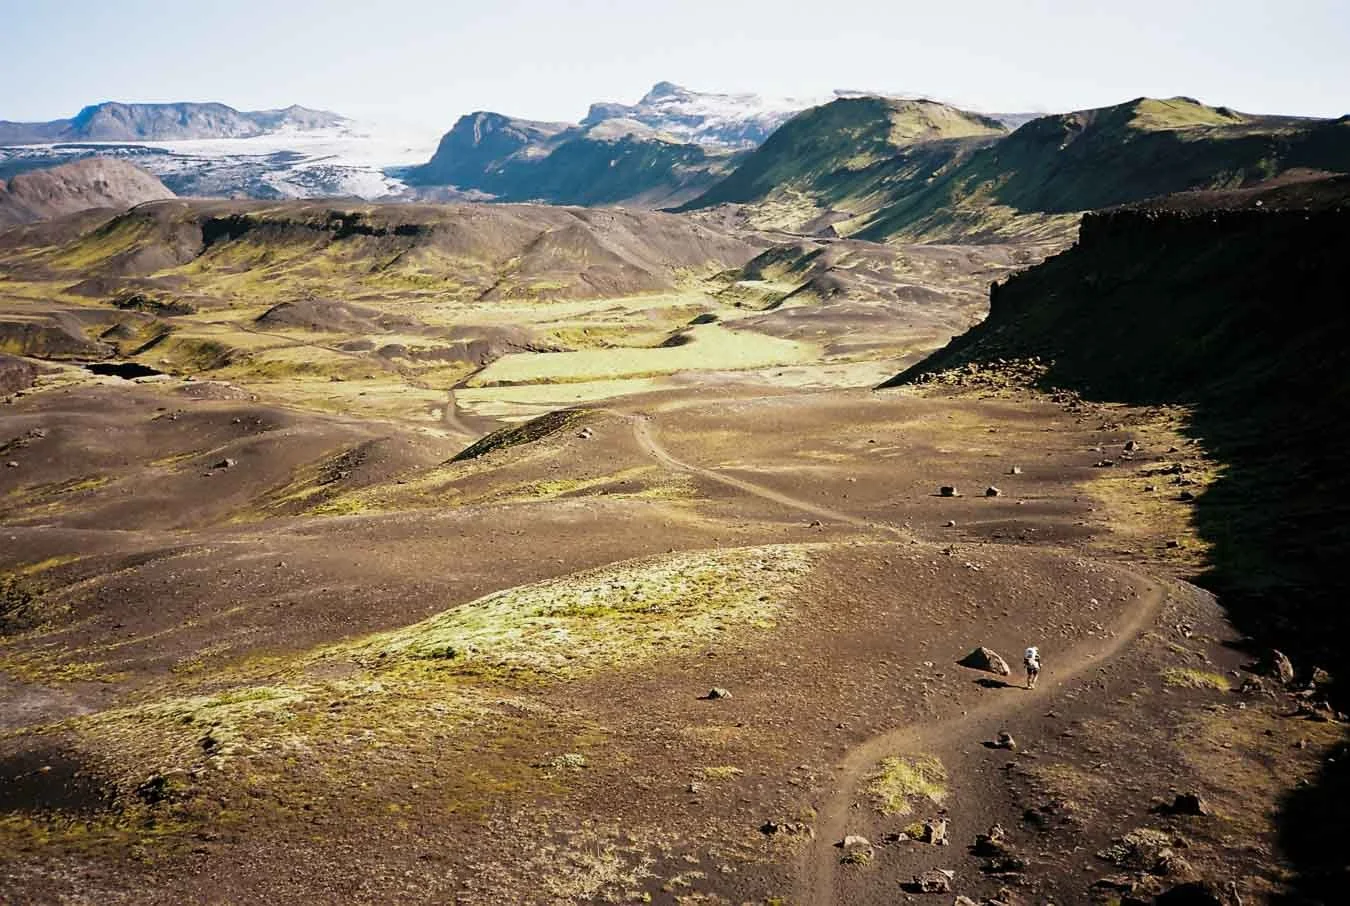
After checking in and pitching our tent, we headed out on the longest available day hike from Volcano Huts, the so-called Orange Loop. It starts directly at the campsite, is about 13 km long with roughly 500 m of elevation gain, and is a superb introduction to the Þórsmörk area. The warden at Volcano Huts recommended hiking the loop anticlockwise. That way, you tackle the steepest and trickiest section on the way up rather than descending it, and if you decide you don’t like the exposed part, you have a much shorter distance to backtrack. If you’re a reasonably experienced hiker and walk at a normal pace, you can comfortably finish the loop before dinner, even with a midday start after setting up camp. The trail first follows the glacial river Krossá between the mountain ridges of the Þórsmörk valley (strictly speaking, only one ridge is actually called Þórsmörk, but we’ll use the name for the whole area here) before climbing up towards the Valahnúkur viewpoint. From there, you overlook the braided river cutting through steep green and black slopes, with imposing glaciers and waterfalls tumbling down in the far distance.
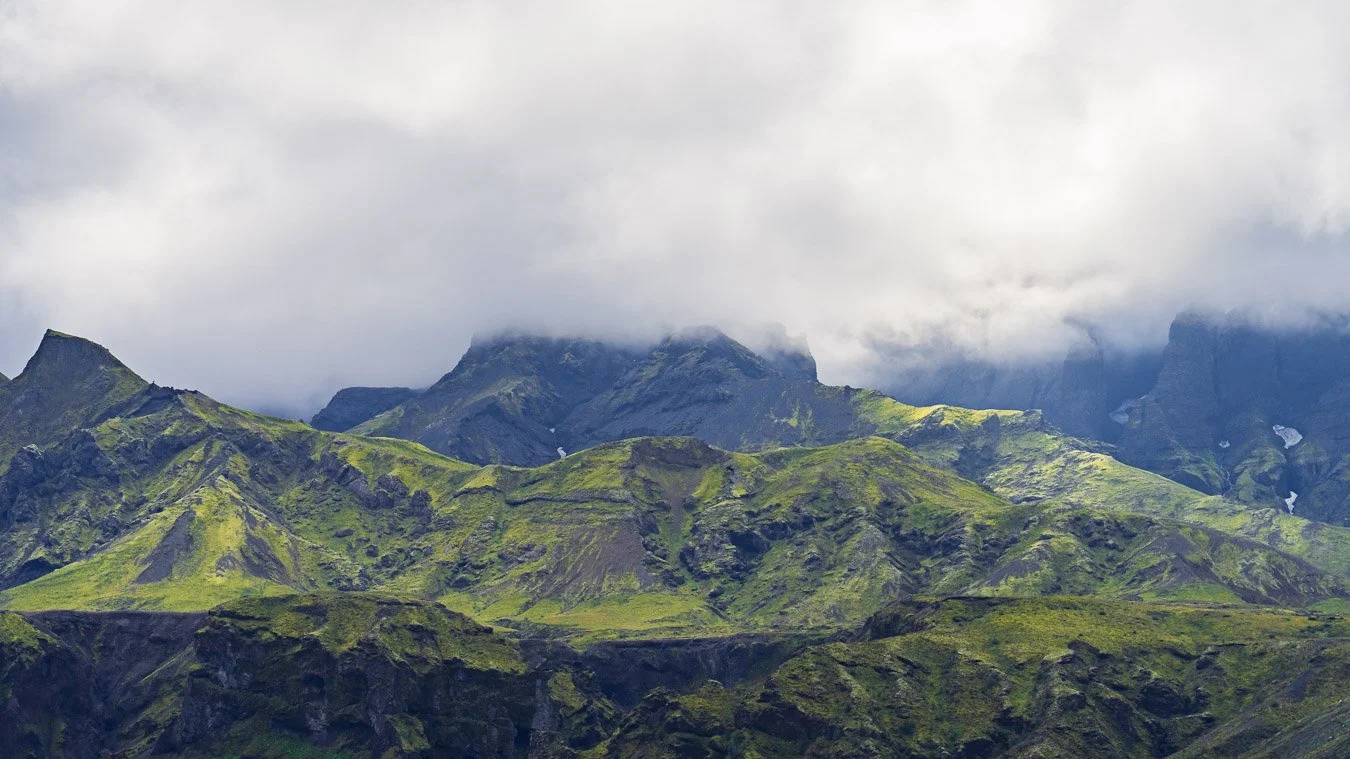

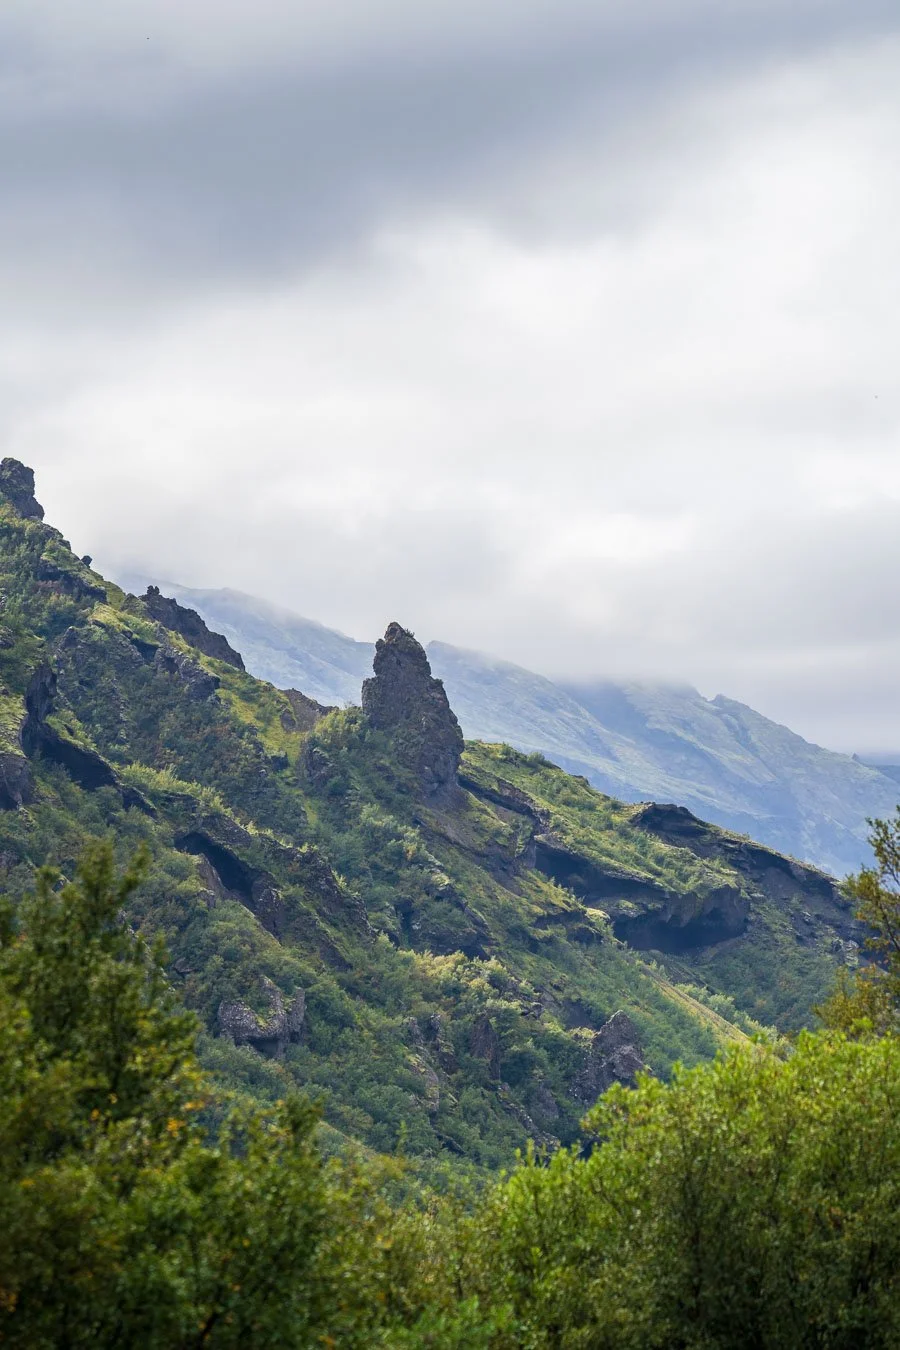
The loop then continues around the mountain and eventually descends back towards the junction where the path had split earlier to form the loop. From this higher section you can already see the wide plains and rolling hills you’ll cross on your first Laugavegur segment the next day. There are also a few additional points of interest along this stretch, most notably the mountain Rjúpnafell, for which another trail branches off at some point – but hiking that would either need an earlier start or an extra day or two in Þórsmörk.
After getting back, we had dinner and a drink in the dining area, sorted our backpacks for the next day, and tried to get some decent sleep so we’d be ready for the actual Laugavegur trail starting the following morning.
Day 1 – Þórsmörk to Emstrur
In principle, you can divide the Laugavegur however you like. Most people hike it in four days. If you go very light and fast, you can compress it into three or even fewer days (people actually run an ultramarathon along the Laugavegur). We wanted to maximise our number of sunrises and sunsets and to really take in the changing landscapes, so we stuck with the ‘regular’ four-day version.


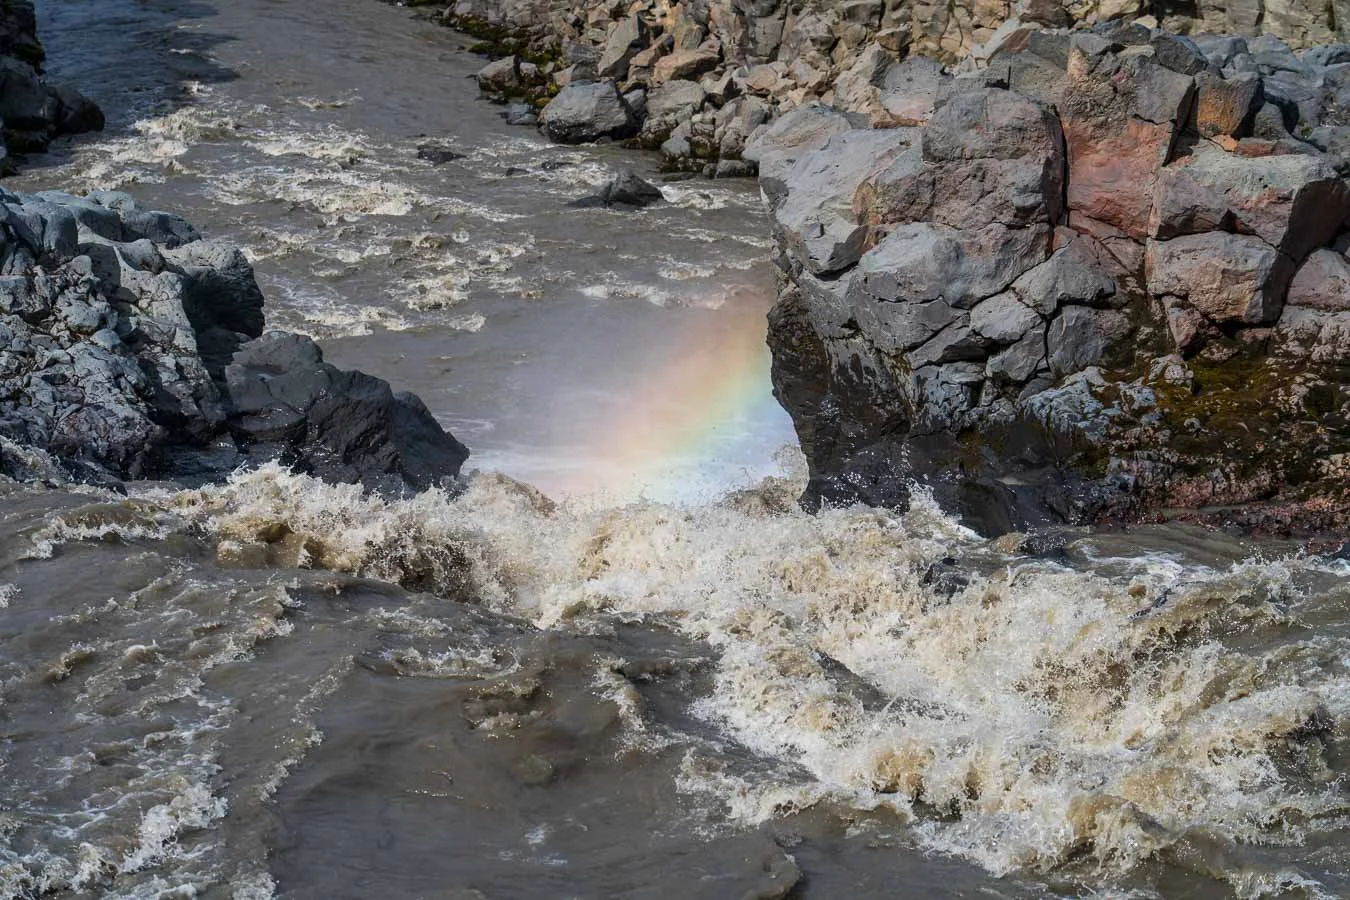
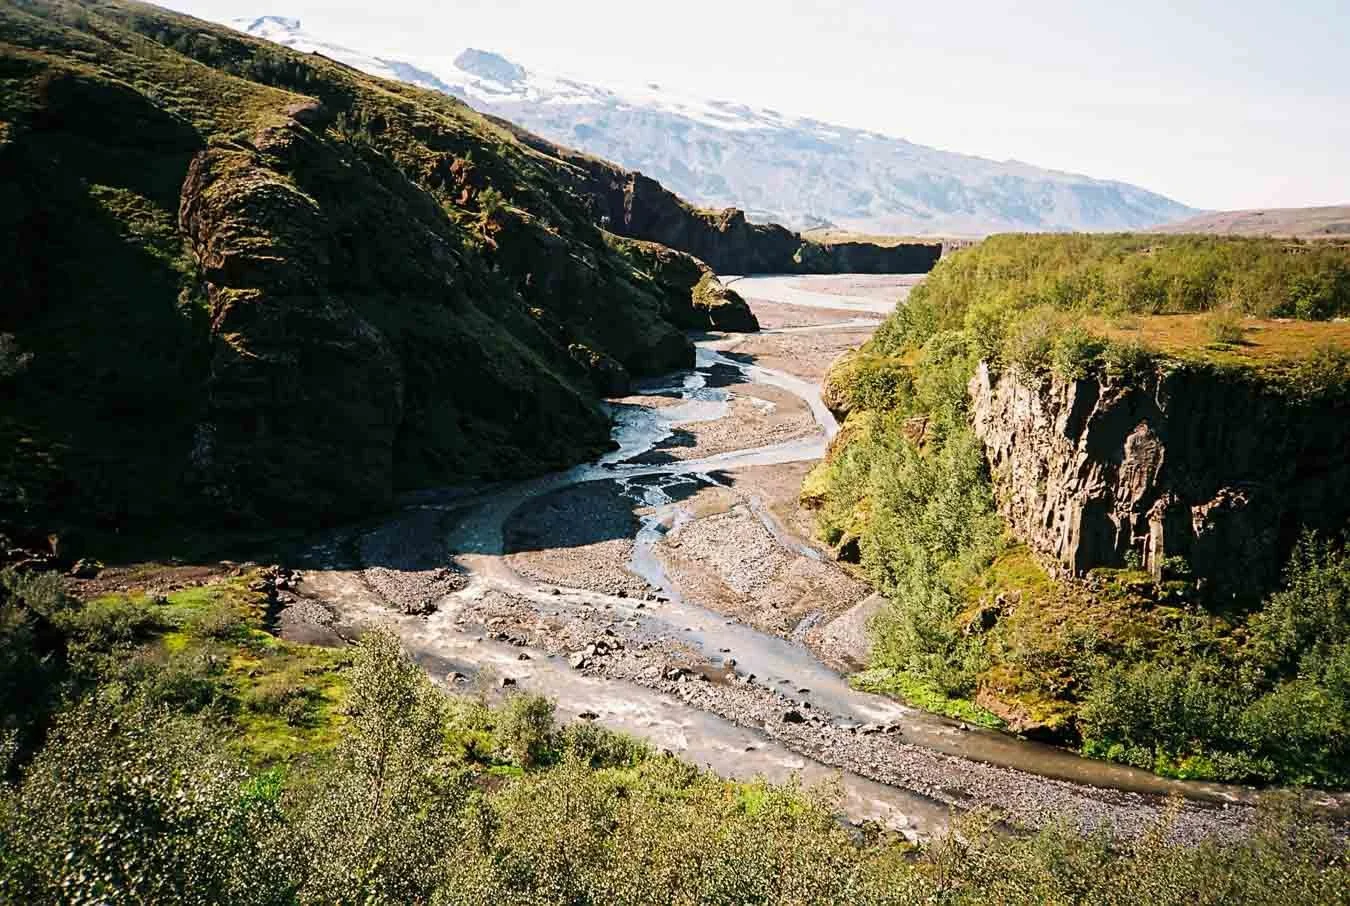
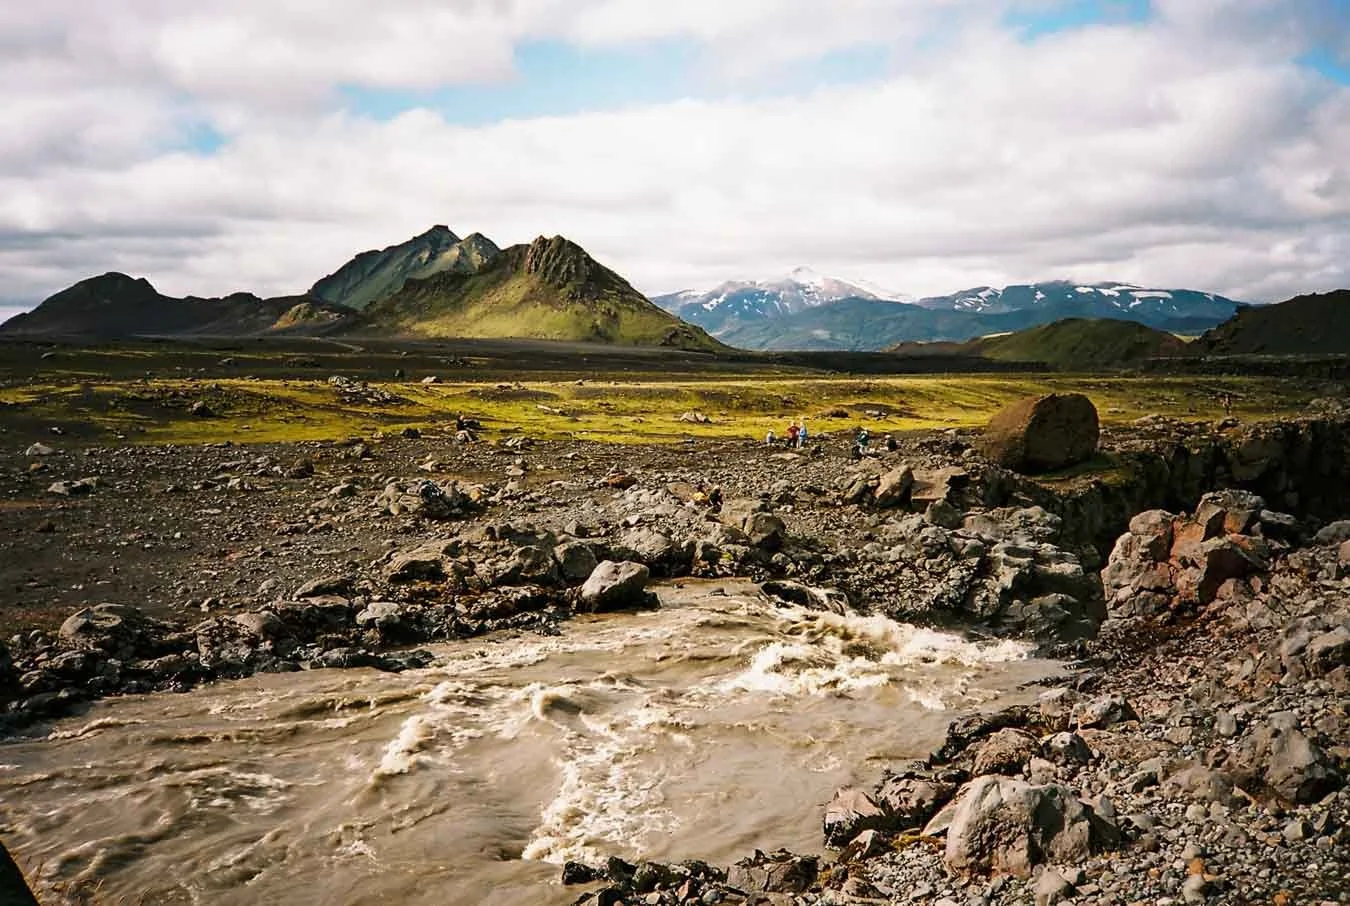
Our first stage took us from Þórsmörk to Emstrur, about 16 km in length with roughly 450 m of elevation gain. After a short climb out of the valley, the trail drops into what qualifies as ‘lush forest’ by Icelandic standards, following streams and smaller rivers down to the first major river crossing of the Laugavegur. Hiking south to north, you reach this crossing early in the day. That’s an advantage, as water levels generally tend to be a bit lower in the morning, even though the water is still absolutely freezing.
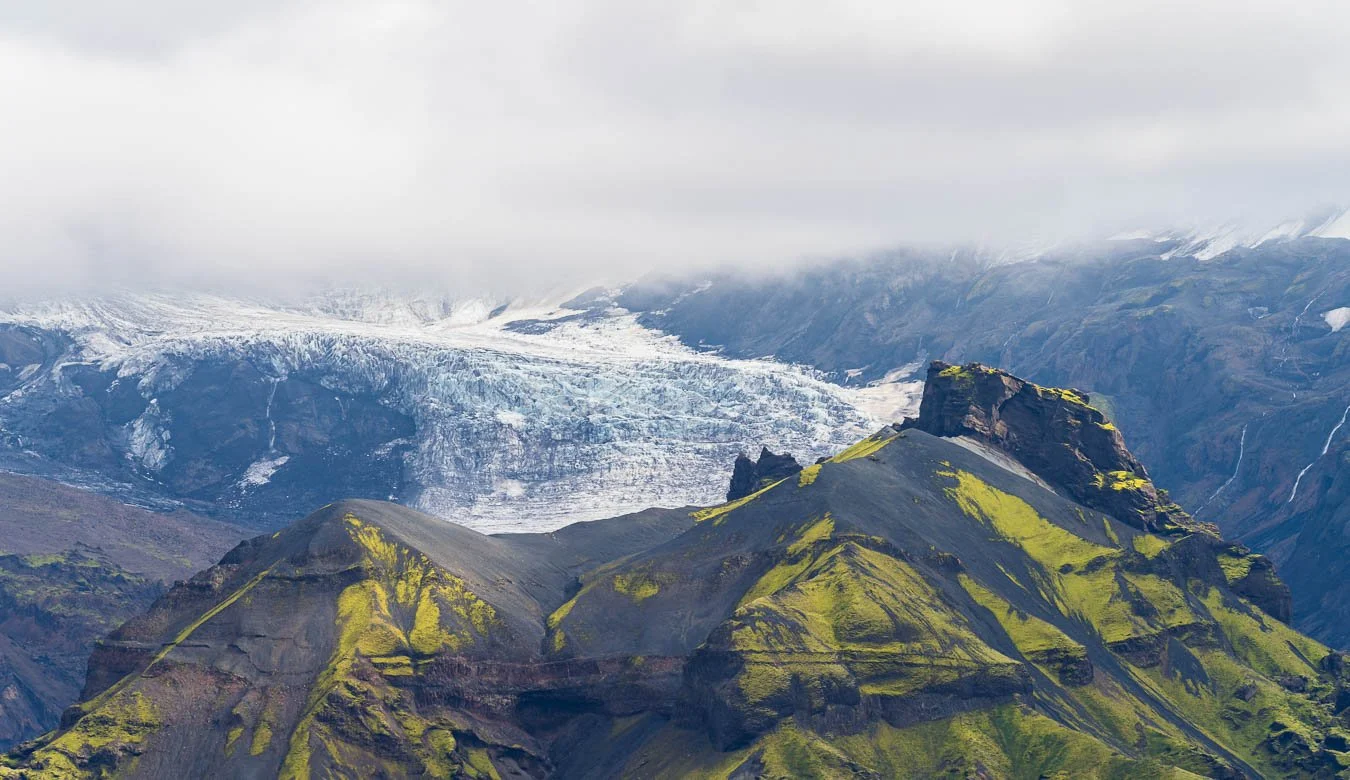
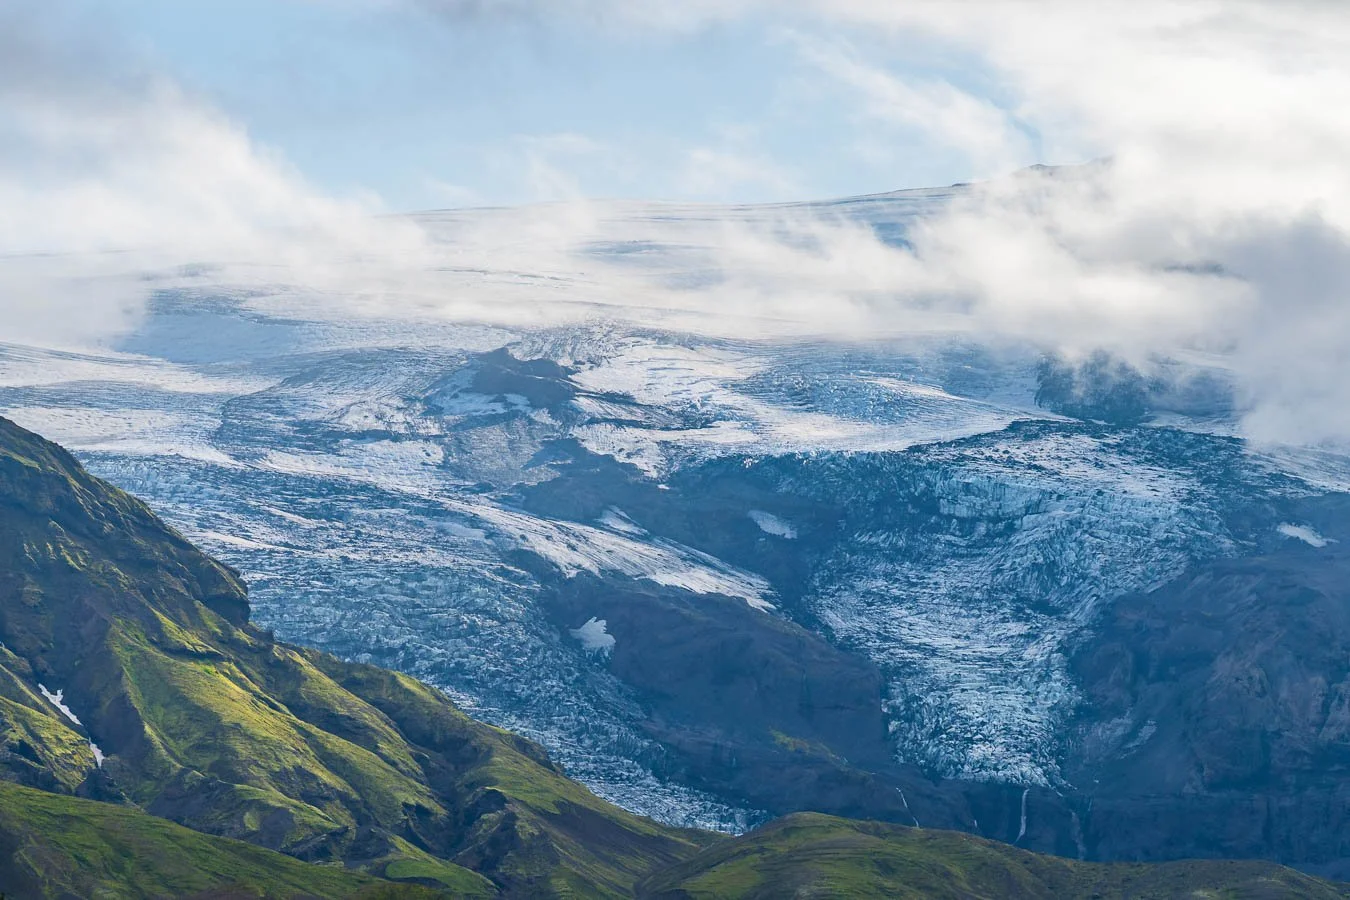
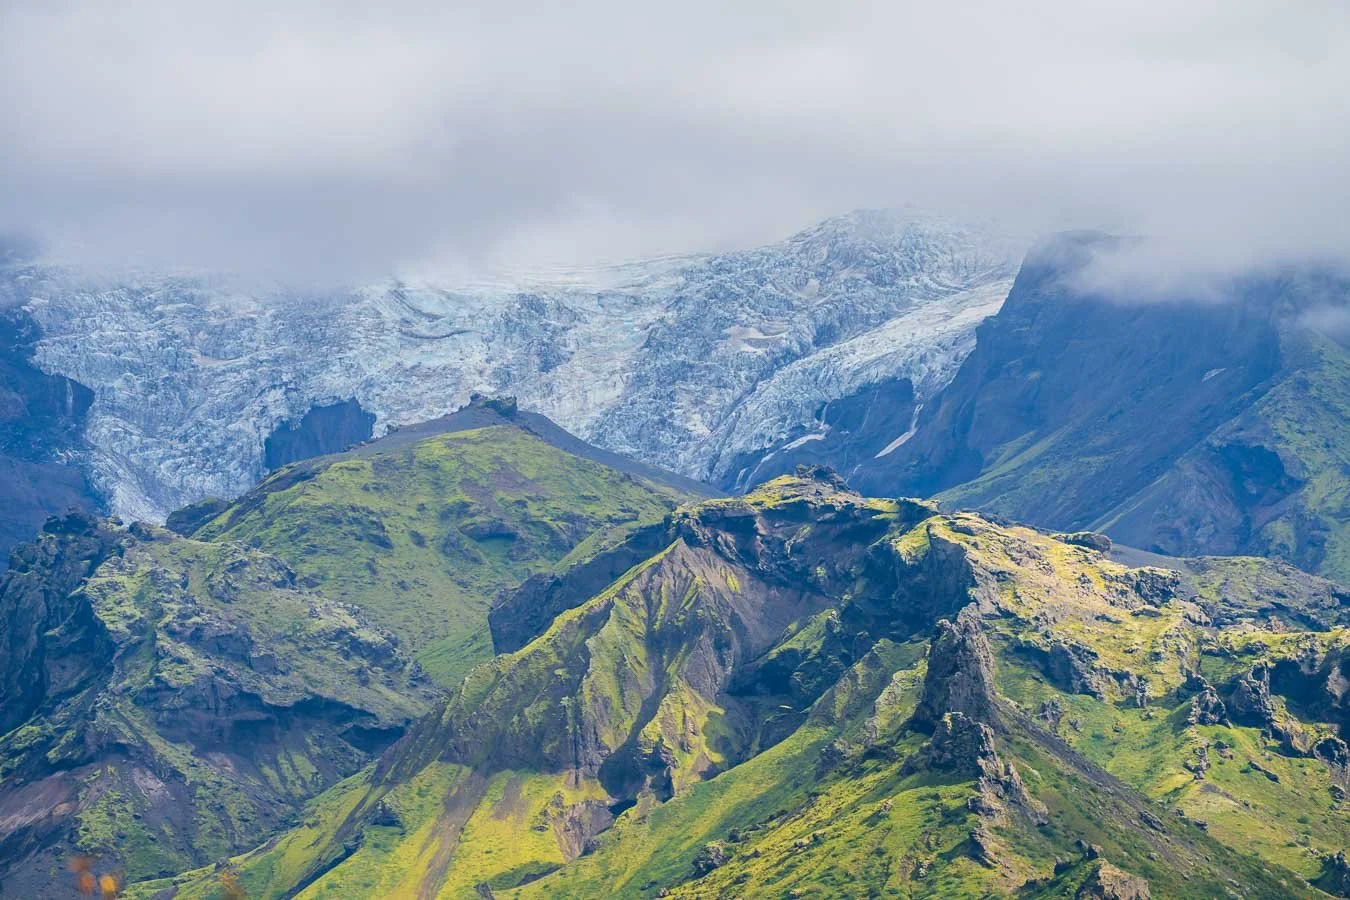
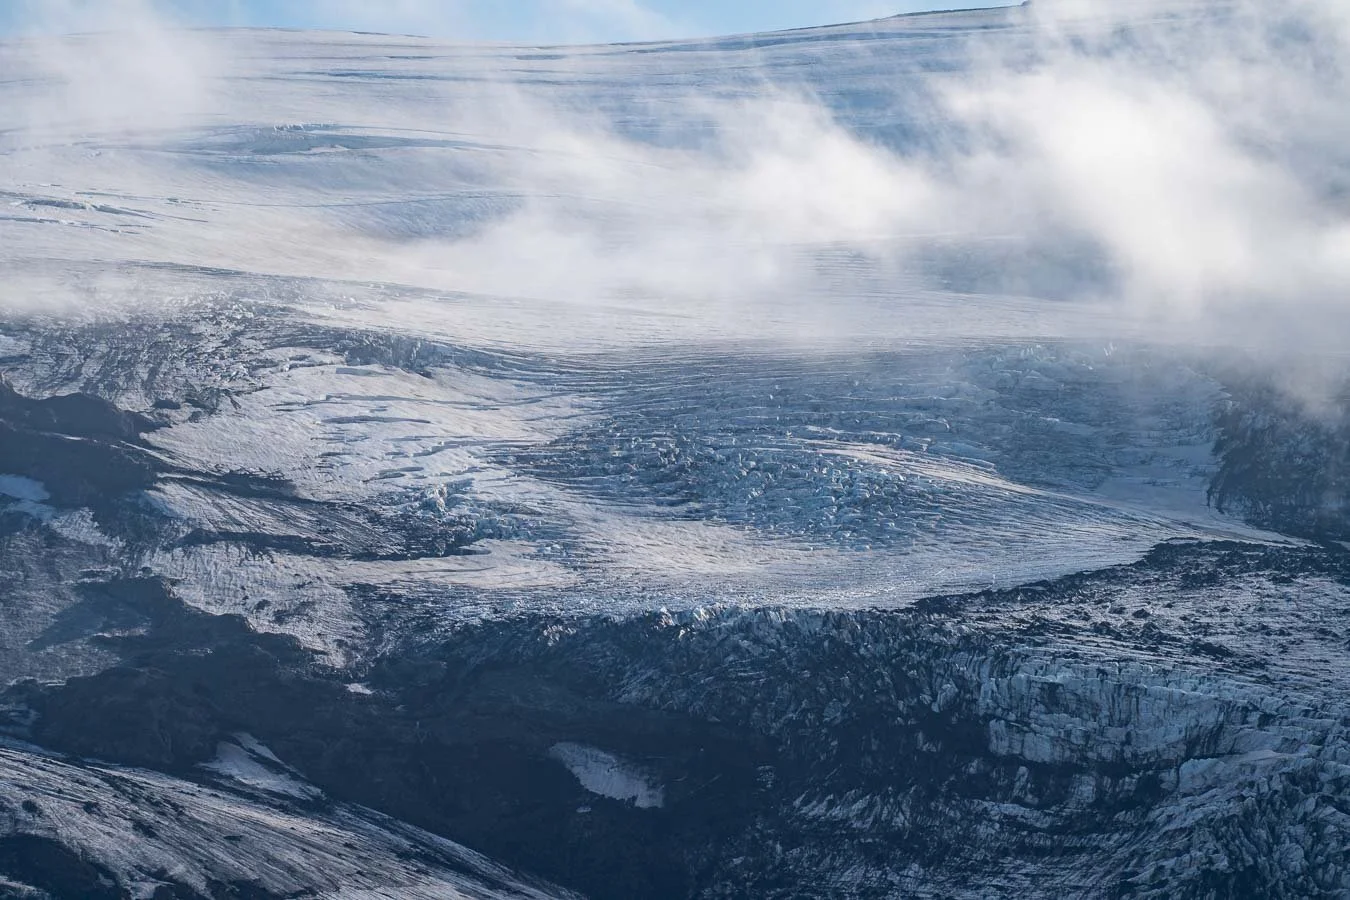
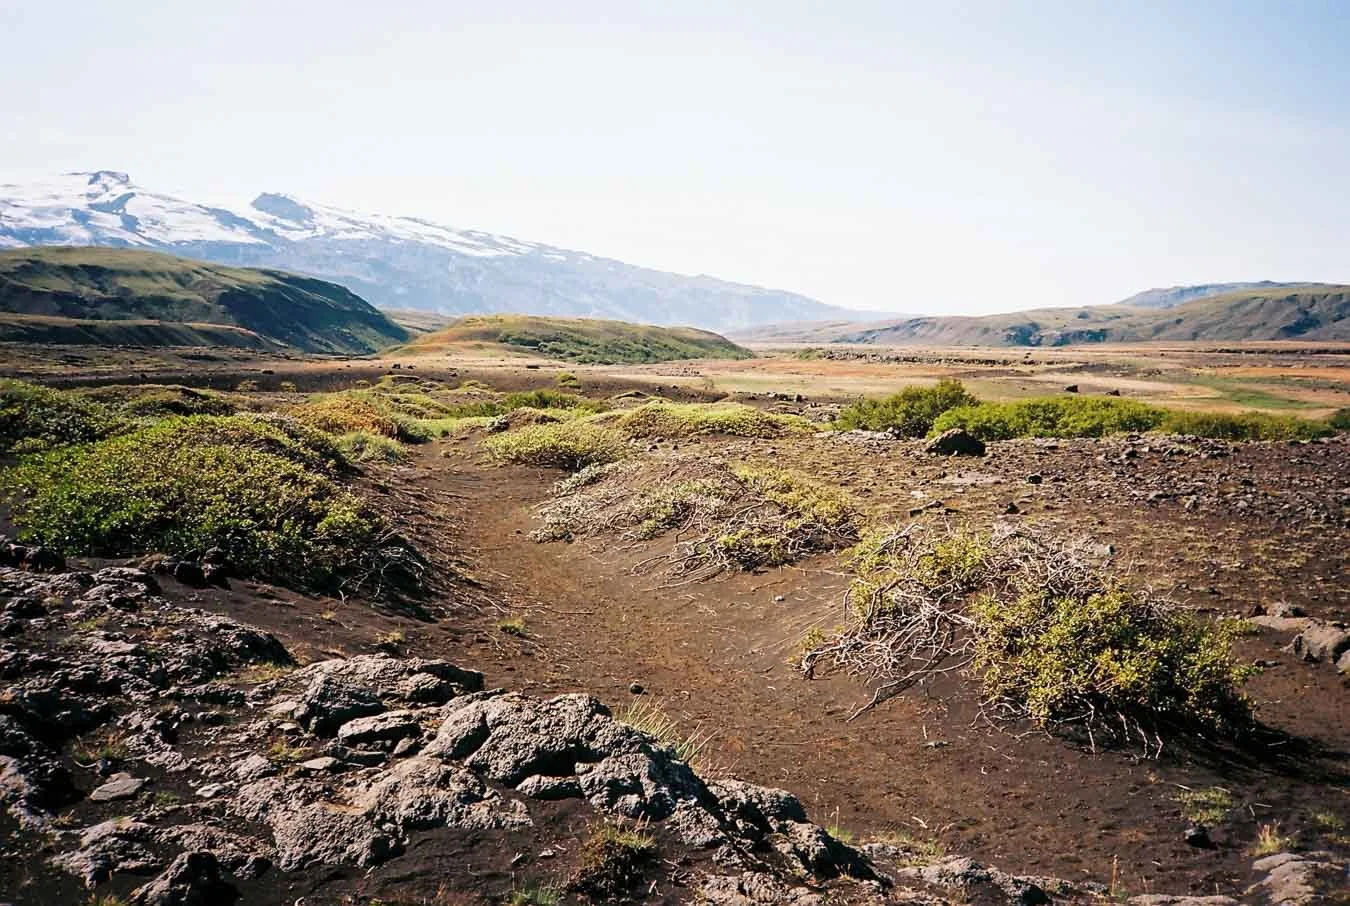
Once across, the trail gradually climbs to higher, more open ground. The vegetation thins out and the landscape shifts to broad elevated plains of dark volcanic sand and scattered moss, with glaciers and ice caps stretching along the horizon, rendering it one of the most impressive parts of this section.


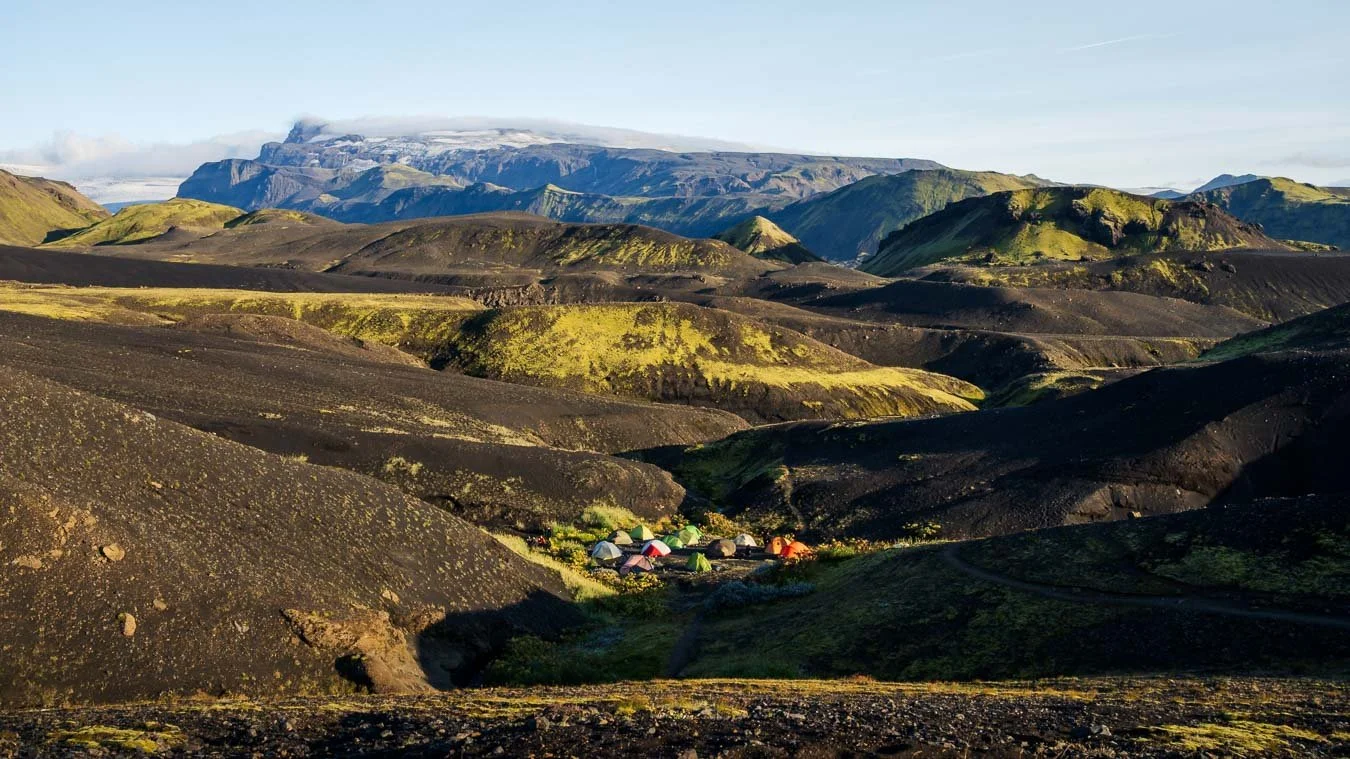
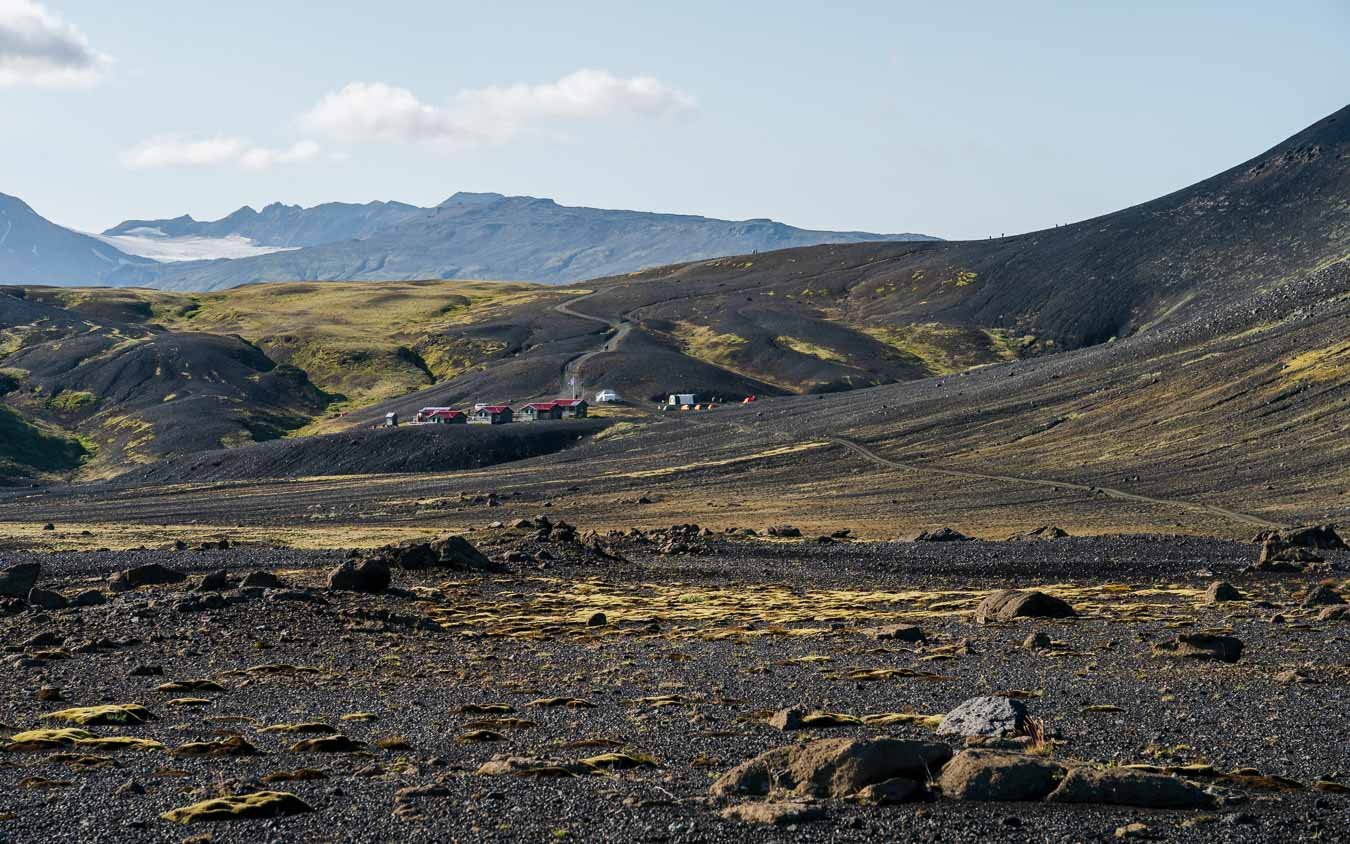
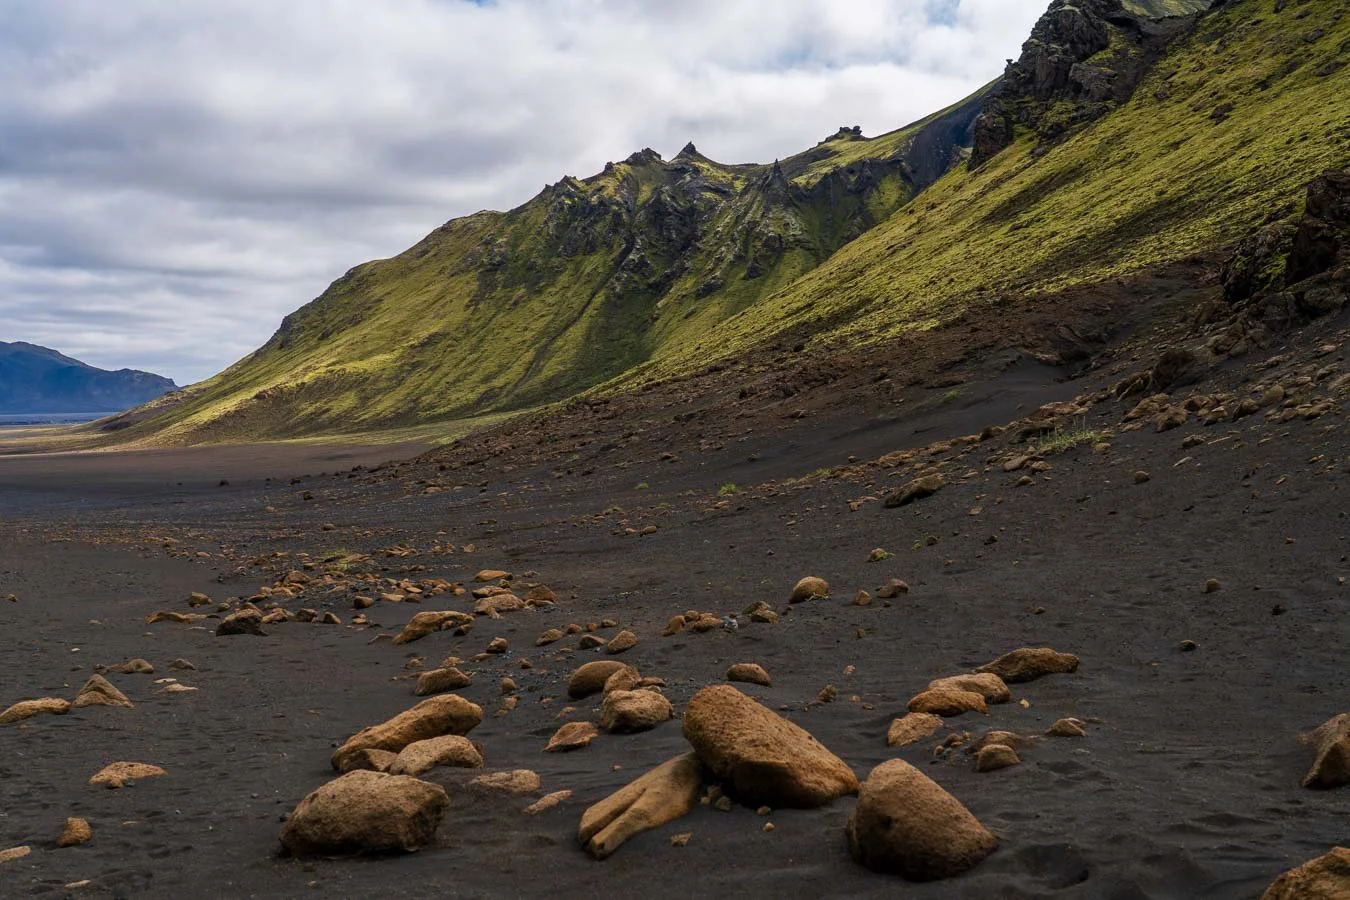
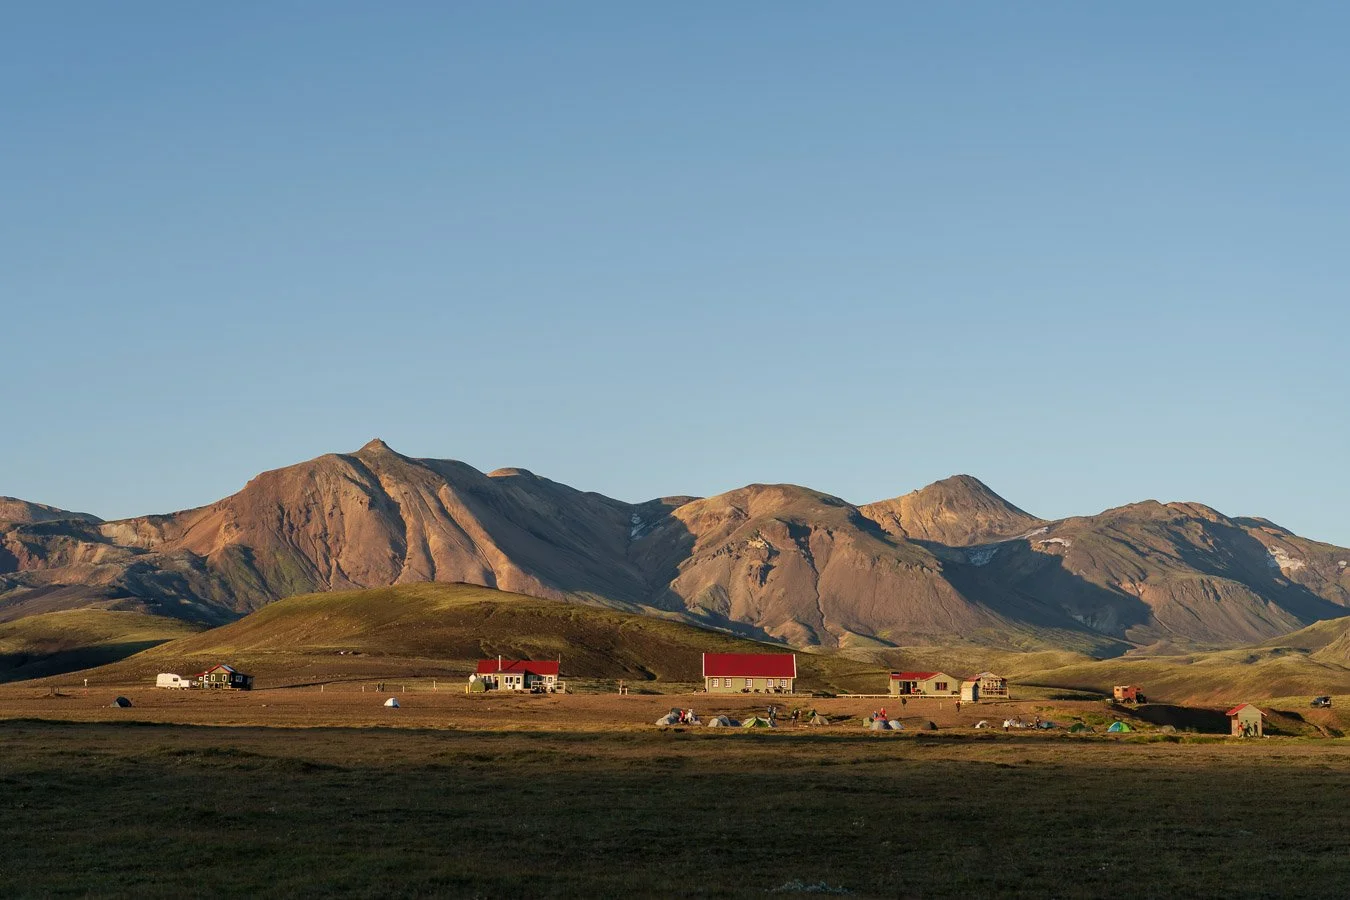
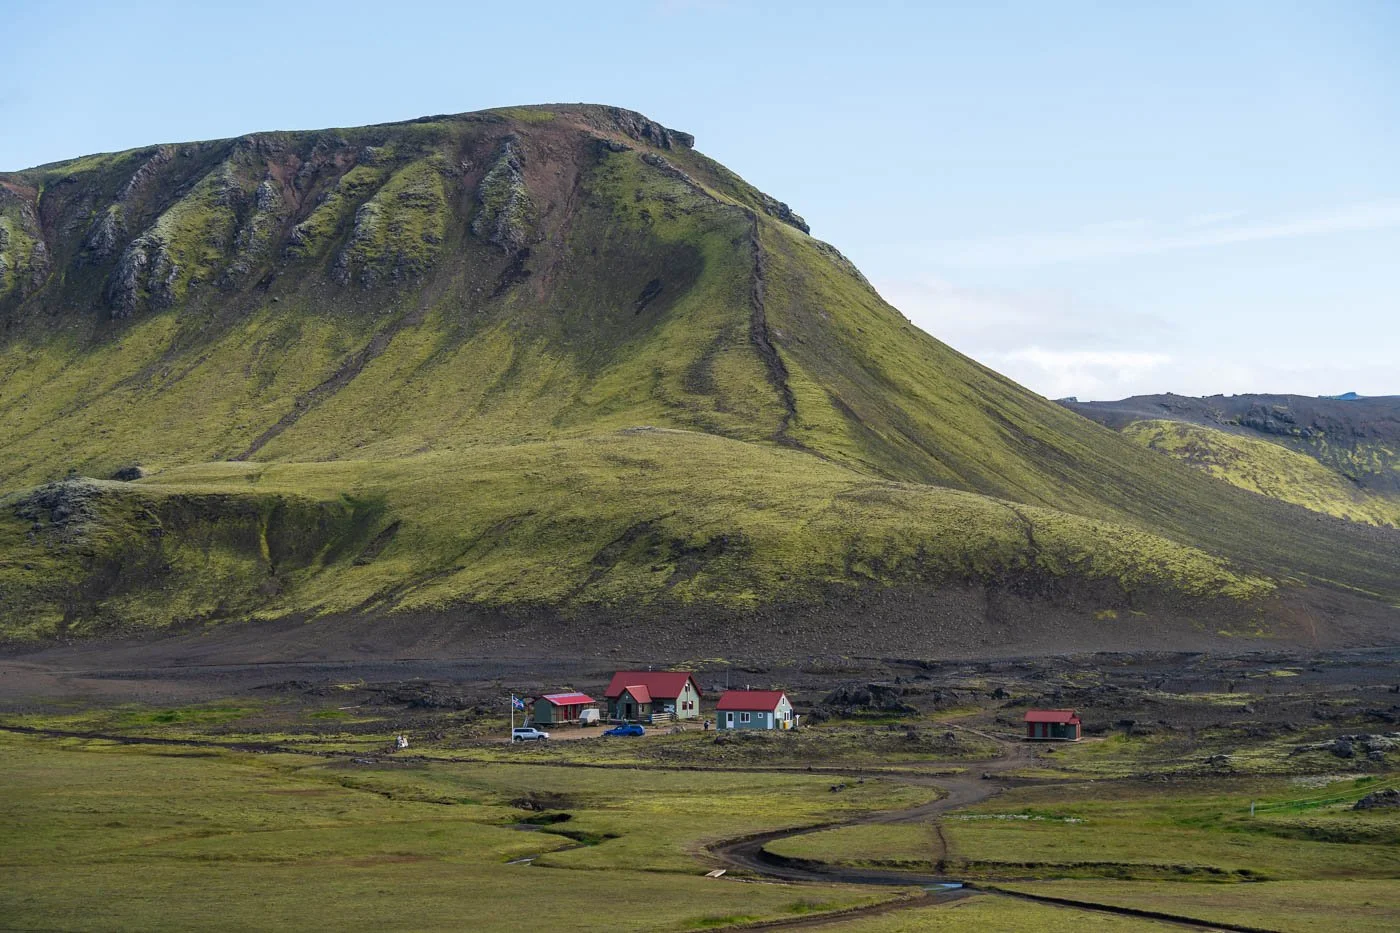
Eventually, after a final, longer and steeper ascent compared to the rest of this section, you reach the Emstrur area and the campsite. It is beautifully situated above a network of ravines and ridges of black sand and rock, with glaciers once again visible in the distance. While the campsite is beautifully located, it is also exposed. When we were there, it was extremely windy. This forced everyone to pitch their tents in lower spots, using small hollows and dips between the ridges for shelter. The downside is that you have to walk quite a bit more uphill to use the facilities, since the toilets, showers, sinks, and cooking hut are all higher up (near the sleeping hut and warden’s hut) than most of the more protected tent pitches. The facilities themselves are good, with hot showers available for a small fee. As everywhere along the trail, you are expected to carry out all of your trash.
Day 2 – Emstrur to Álftavatn (via Hvanngil)
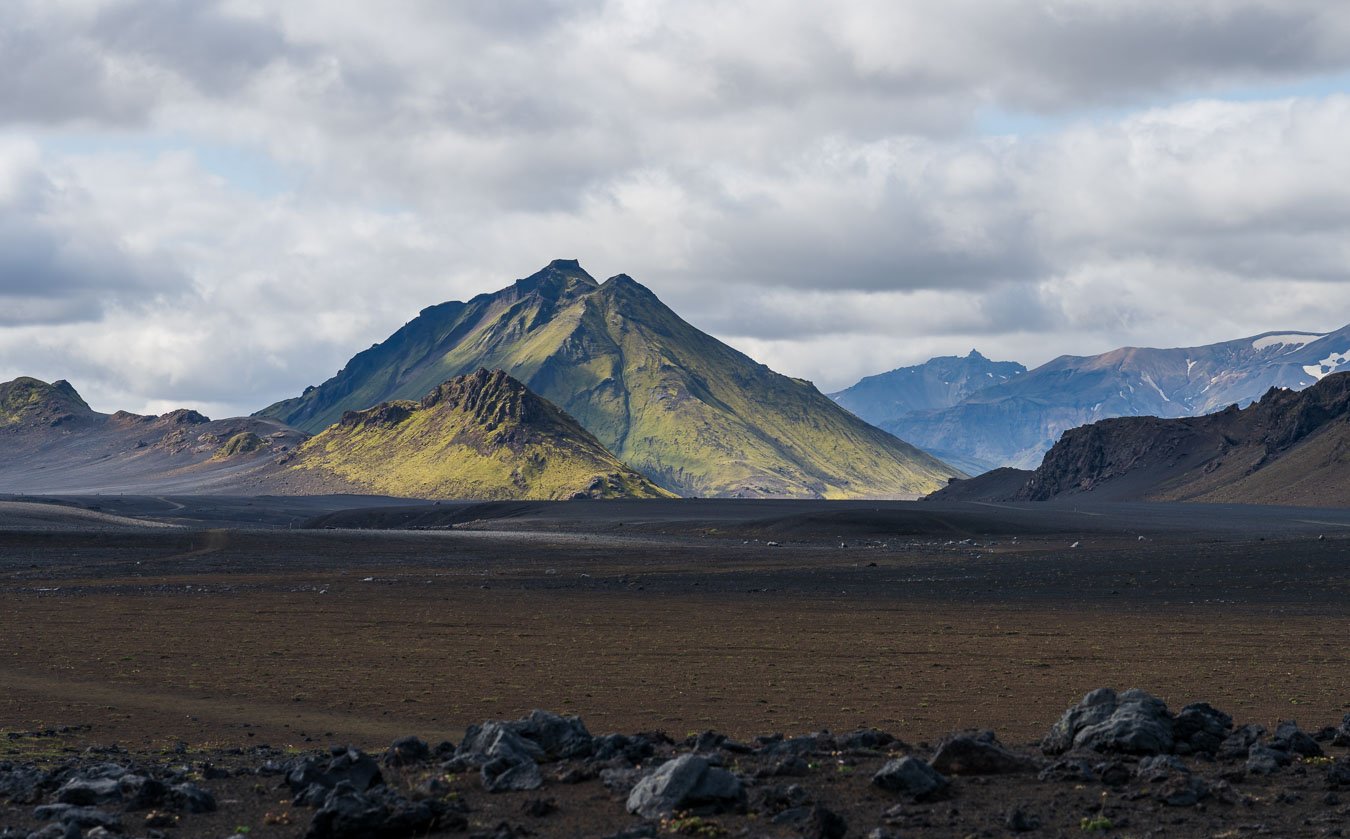
The next morning we continued towards Álftavatn. This section is about 16 km long with roughly 500 m of elevation gain. After a short but fairly steep climb out of Emstrur, the trail mostly crosses relatively flat glacial outwash plains, with distant mountains and glaciers forming a constant backdrop.
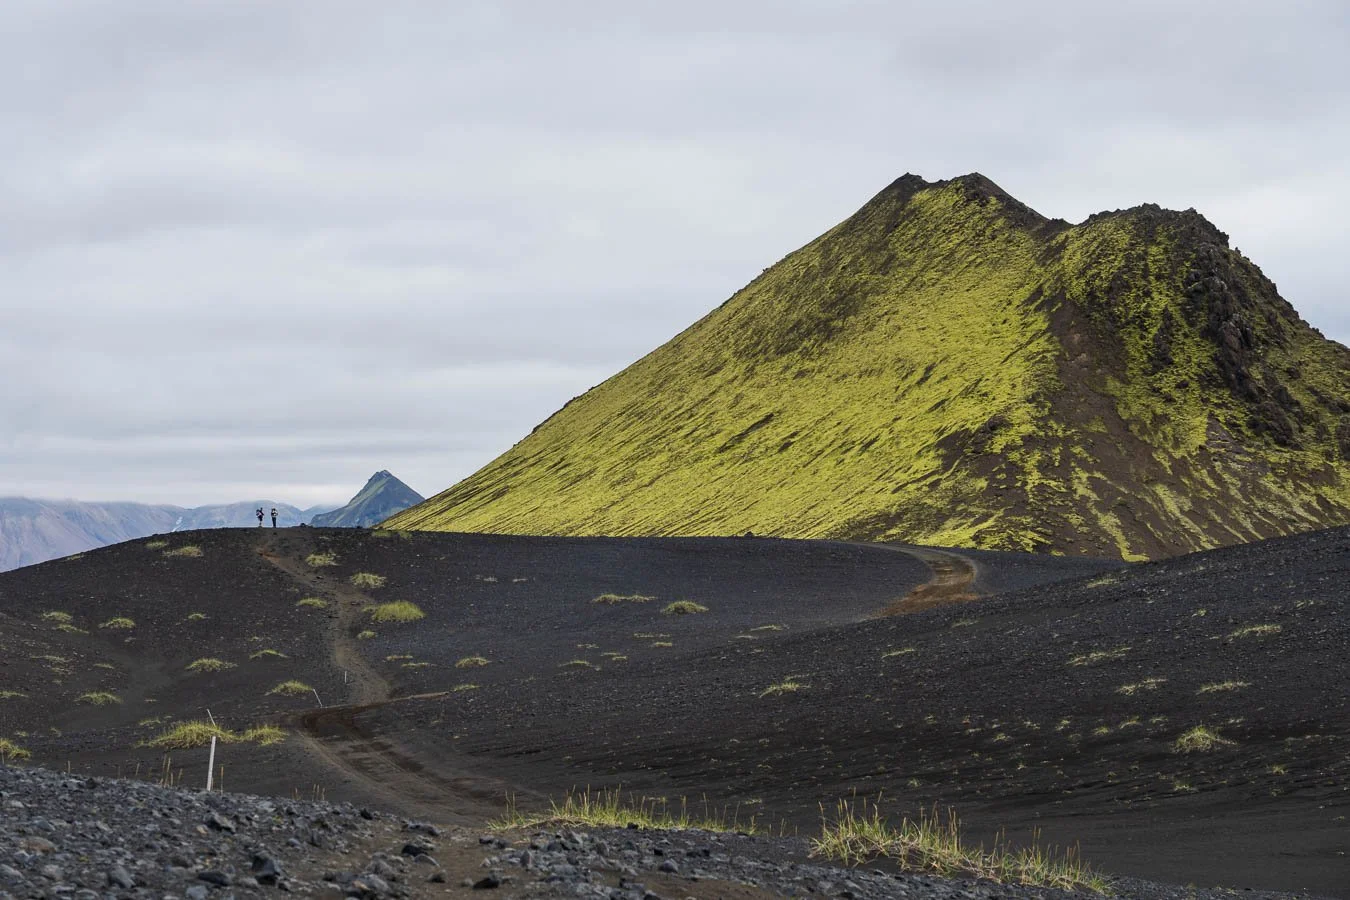
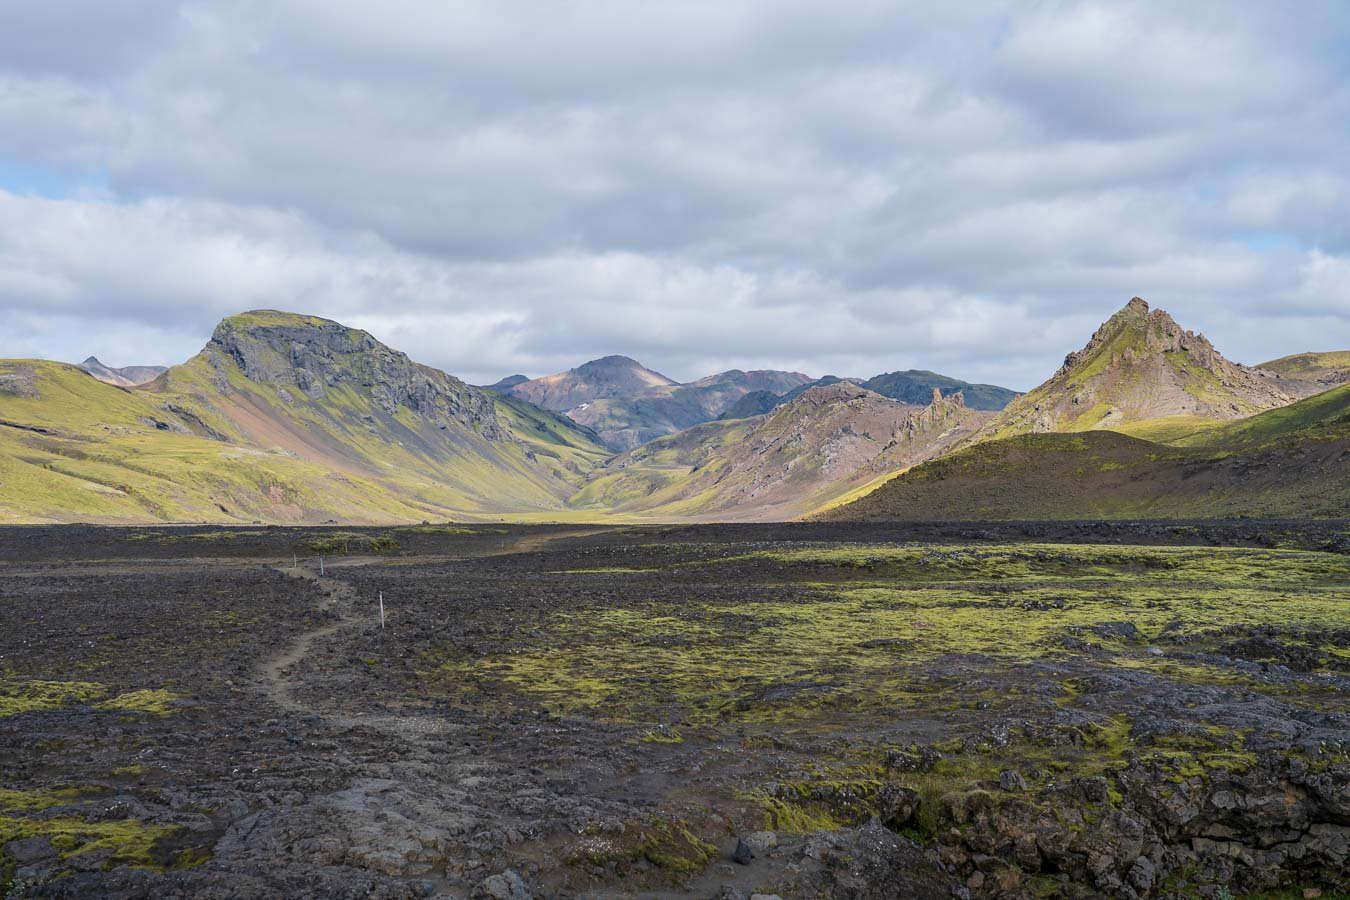
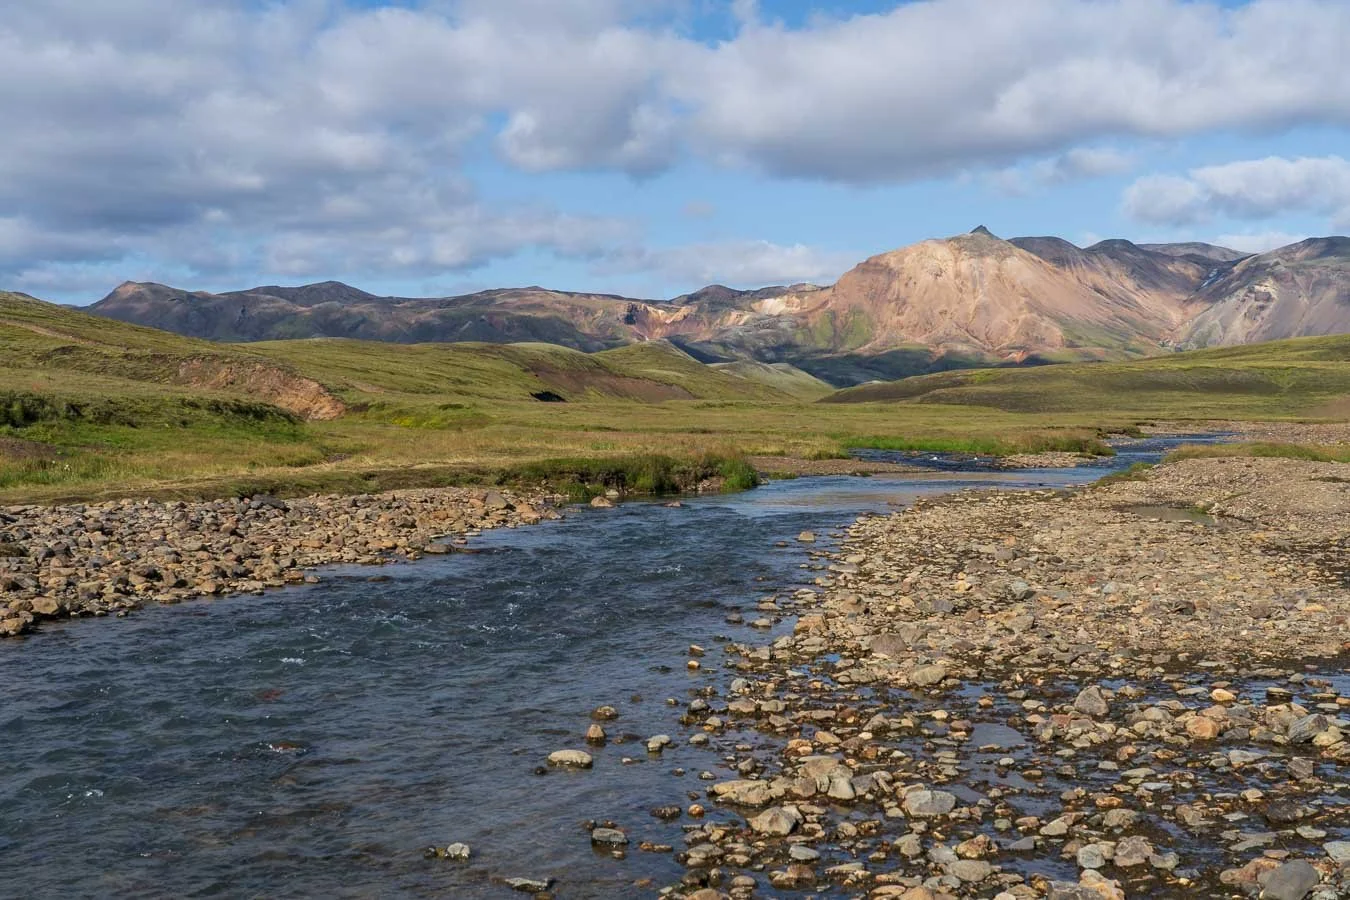
On this stretch you have two river crossings, both narrower than the big one on Day 1, so they are usually straightforward to wade through in normal conditions. You can either camp at Álftavatn (as we did) or at the earlier Hvanngil campsite, which is just roughly 12 km from Emstrur. We only took a break in Hvanngil though to make coffee and noodles before continuing the remaining 4 km to Álftavatn. If you are hiking south to north, staying at Álftavatn spaces out the campsites more evenly and means you have a shorter day to the next campsite, which is convenient given that the following section involves noticeably more elevation gain than the earlier ones. If you are hiking in the opposite direction (north to south), Hvanngil can make more sense, as it lets you cover a bit more distance after reaching Álftavatn.

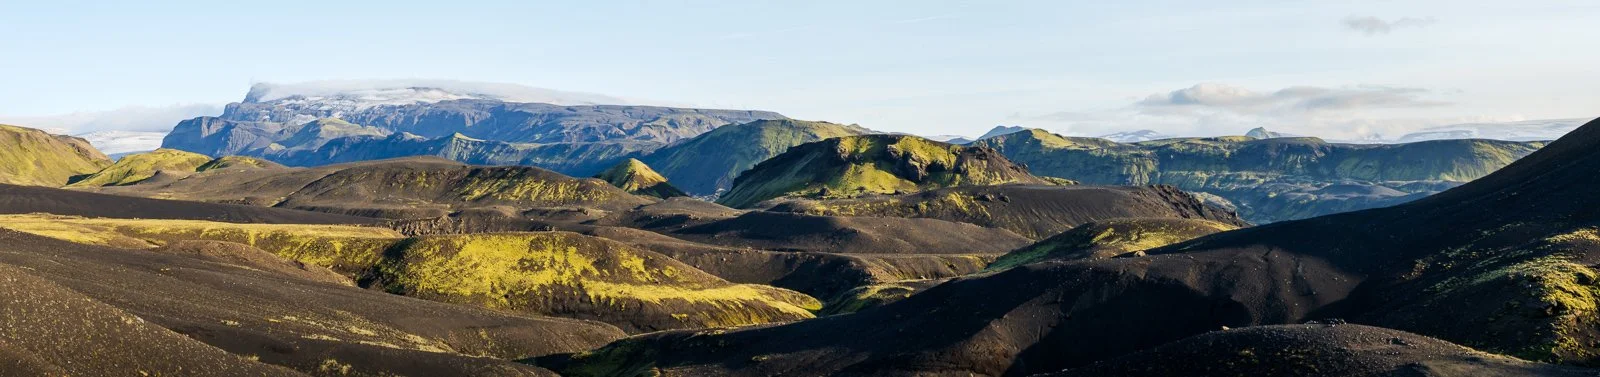
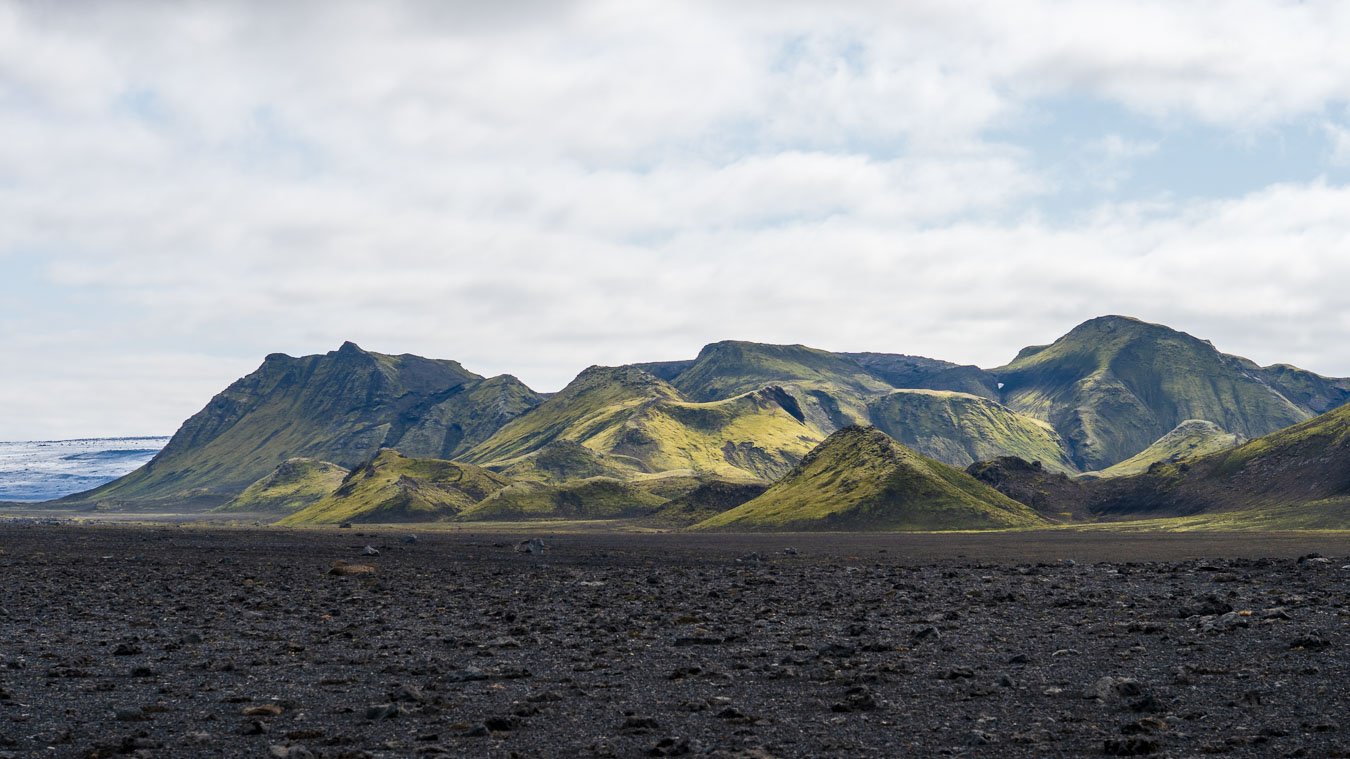
Panorama of the moss-covered hills surrounding the black sand plains along the Laugavegur segment between Emstrur and Álftavatn / Hvanngil.
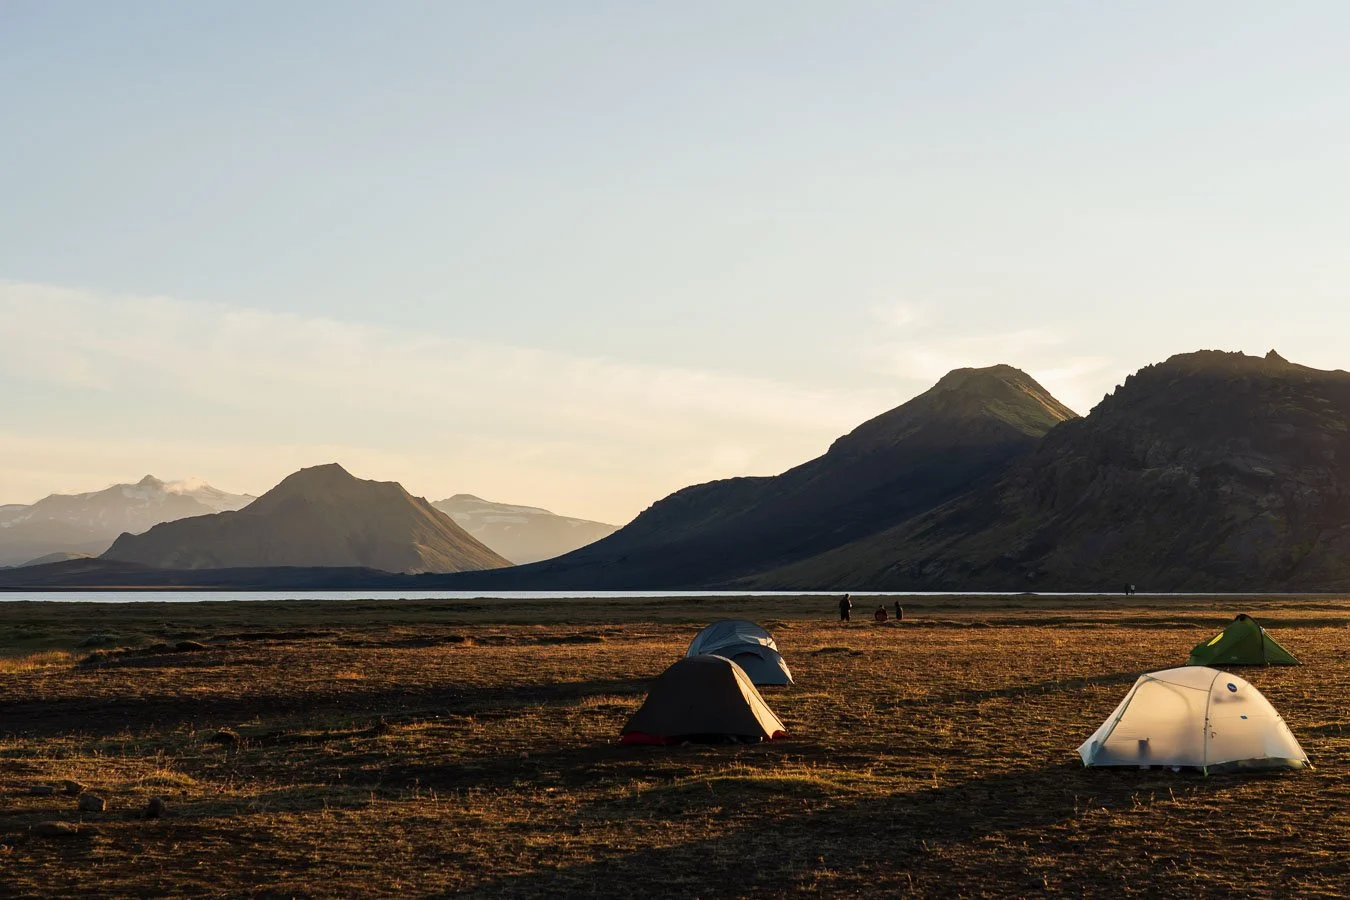
Álftavatn itself is a very scenic place to spend the night, nestled between rugged hills and next to a lake surrounded by vivid green patches of grass, especially along the streams feeding into it. Hvanngil, by contrast, sits in more barren surroundings, but with dramatic lava formations and ridges all around.


Day 3 – Álftavatn to Hrafntinnusker
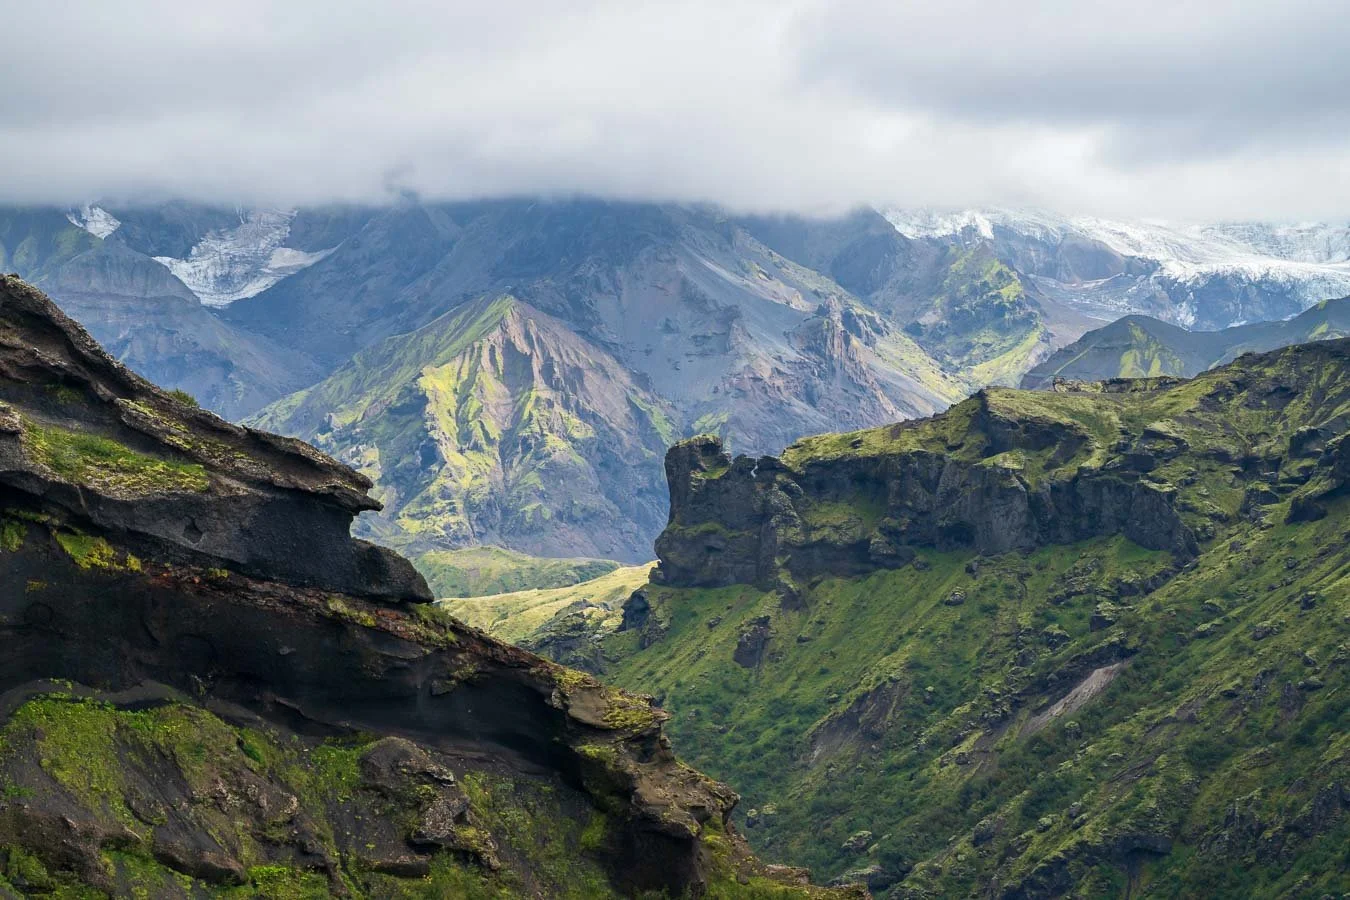
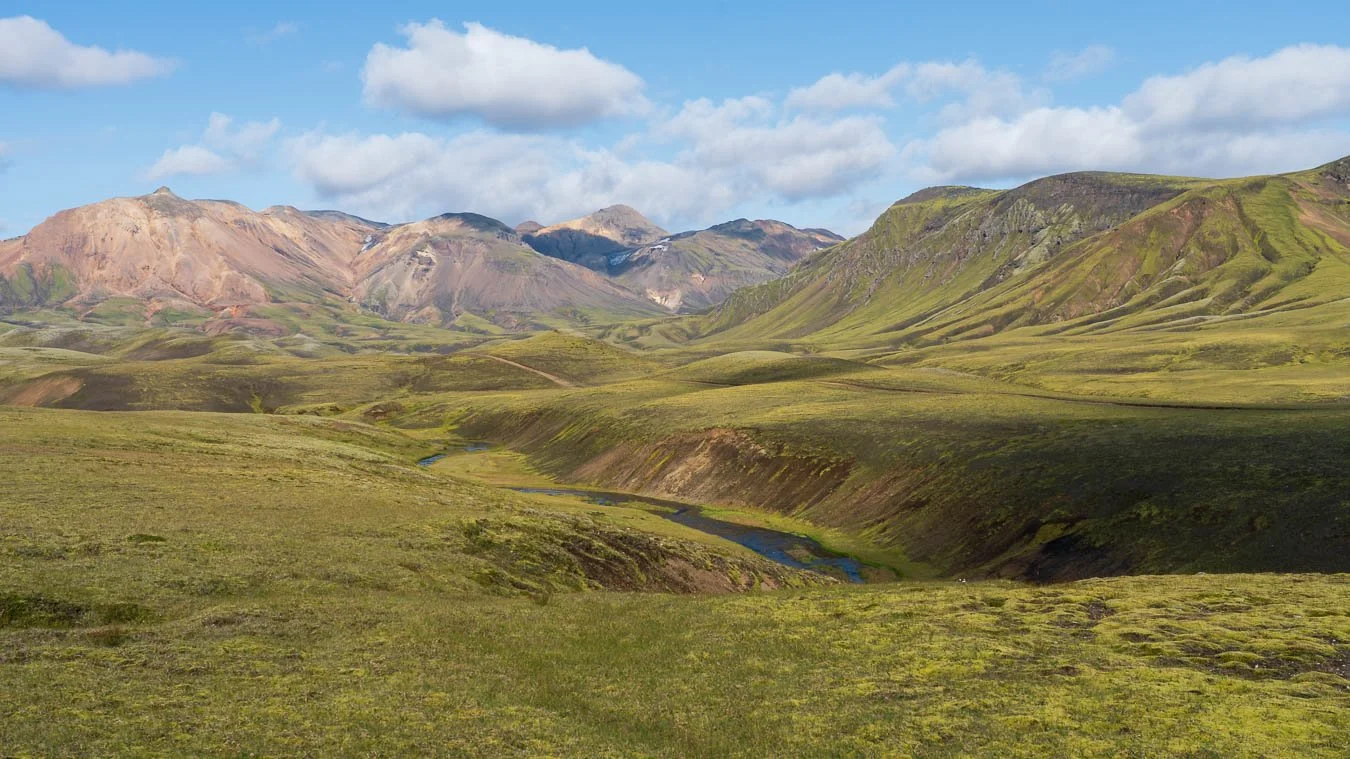
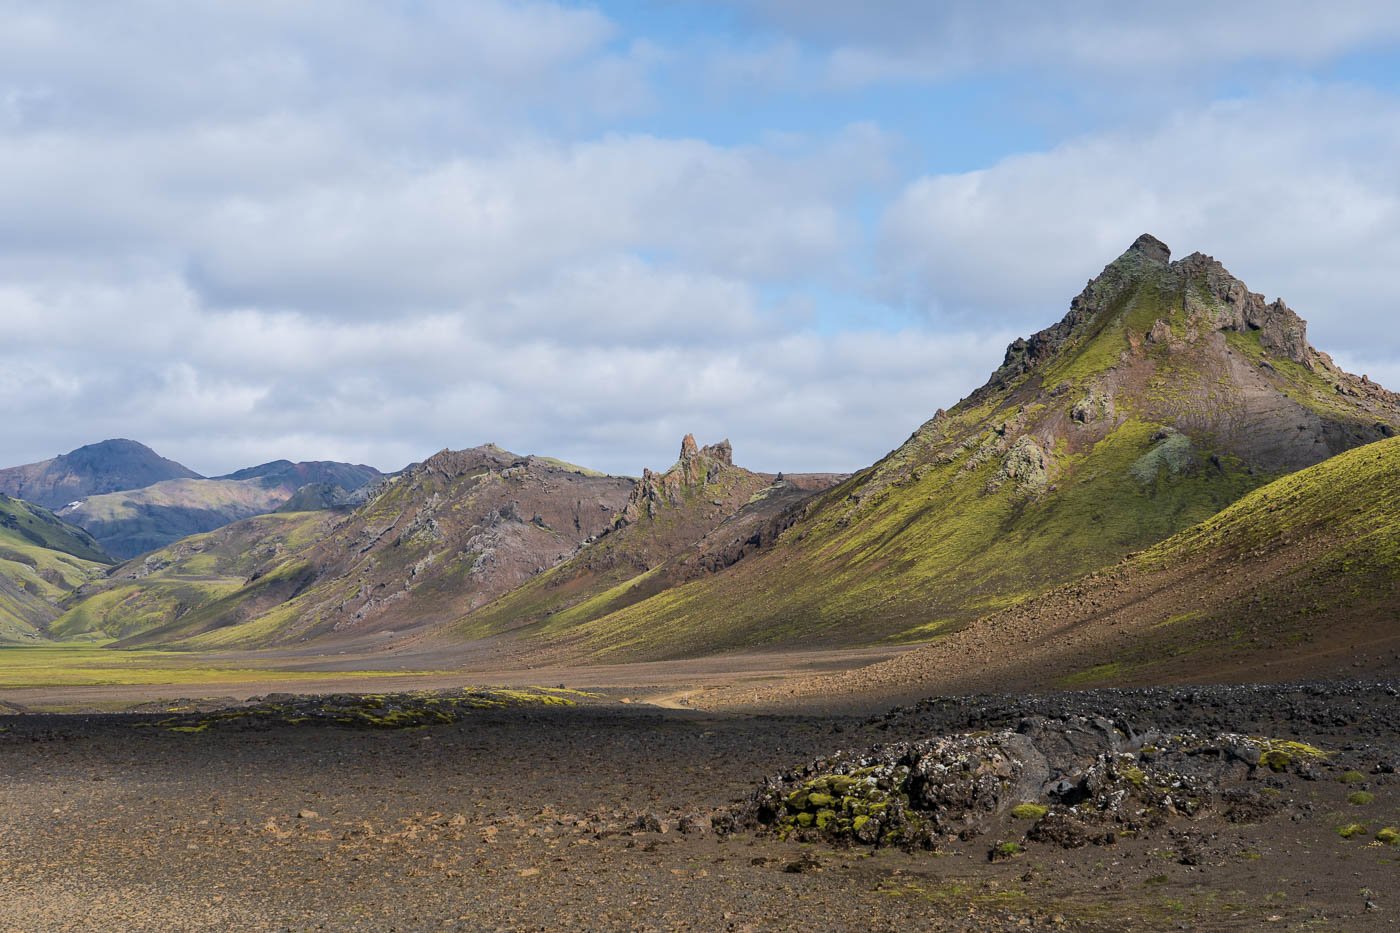
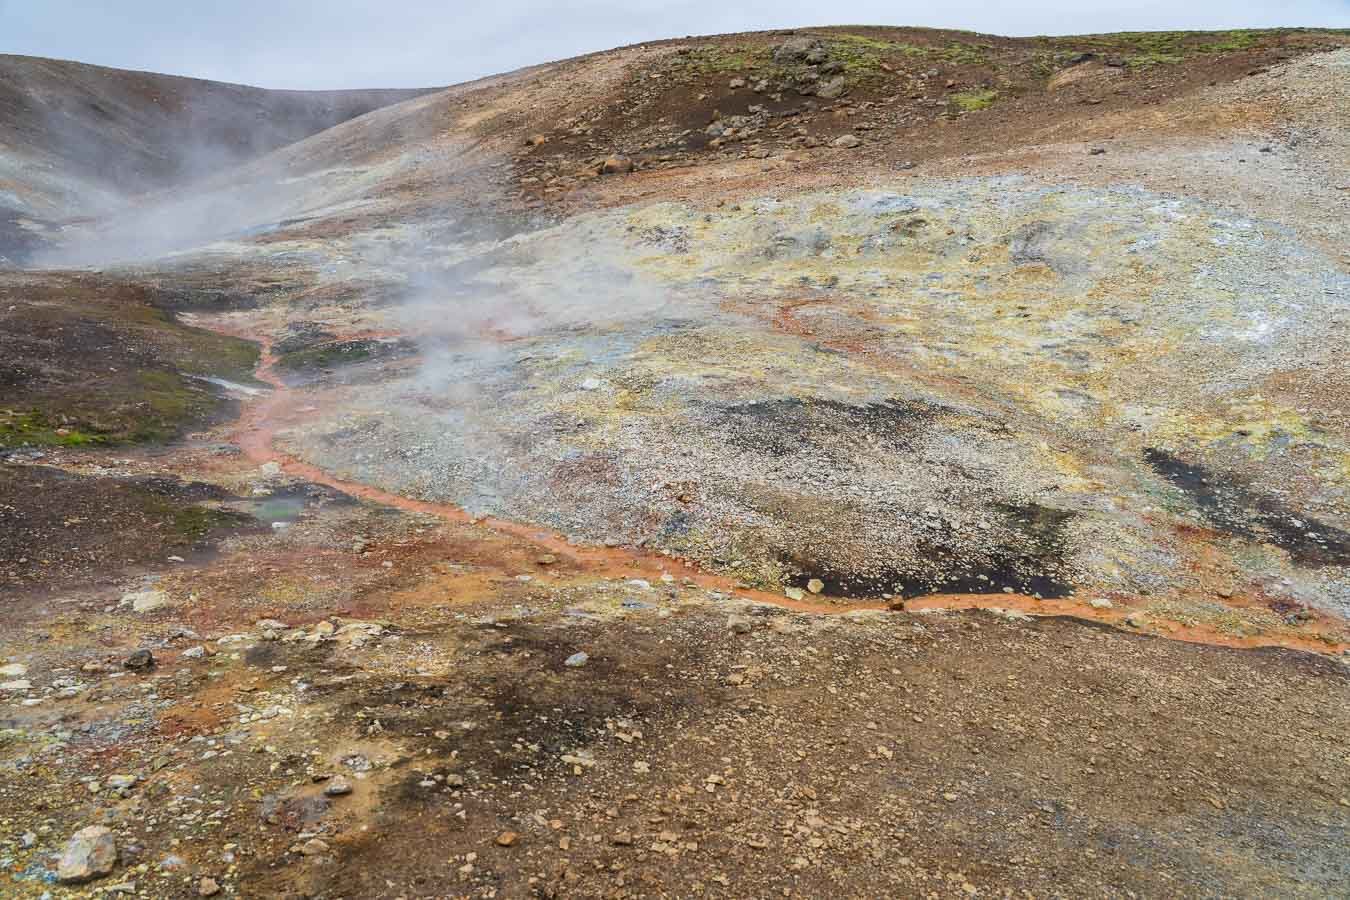
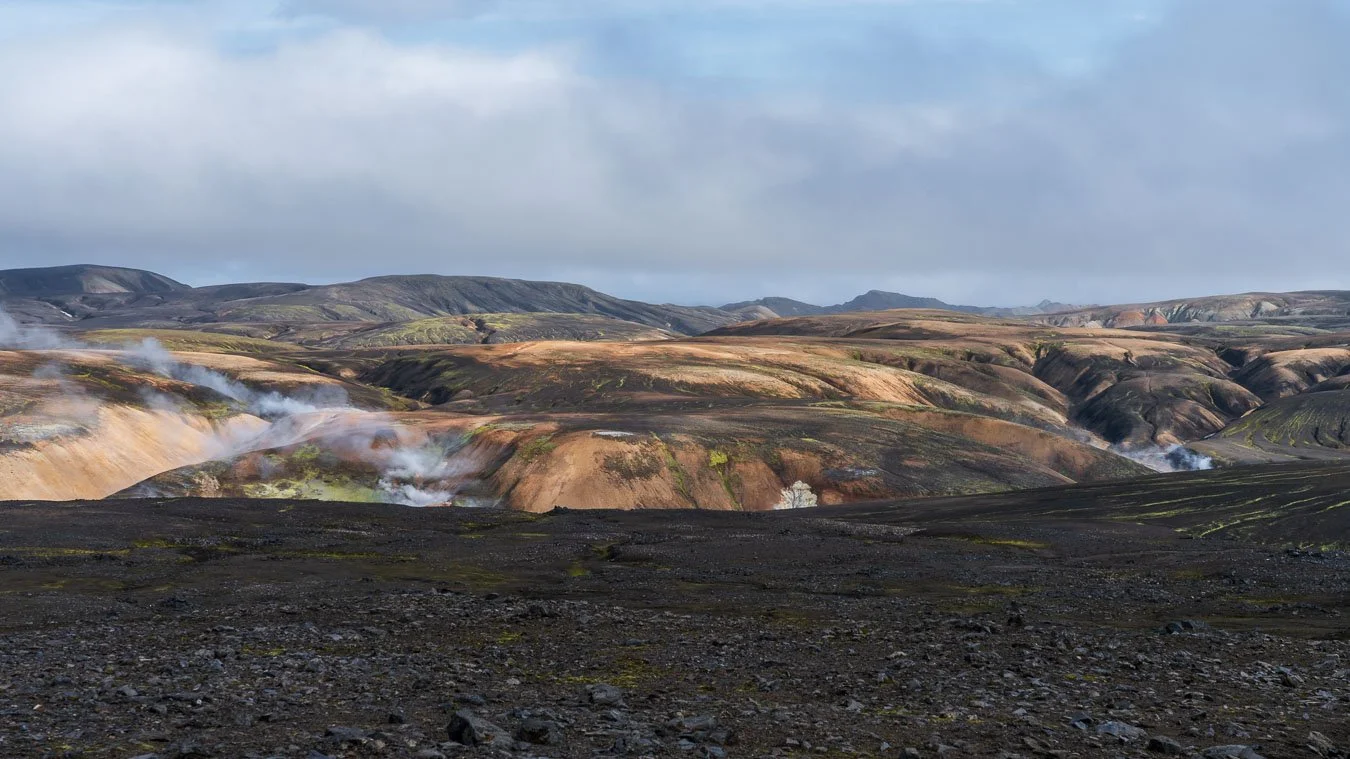
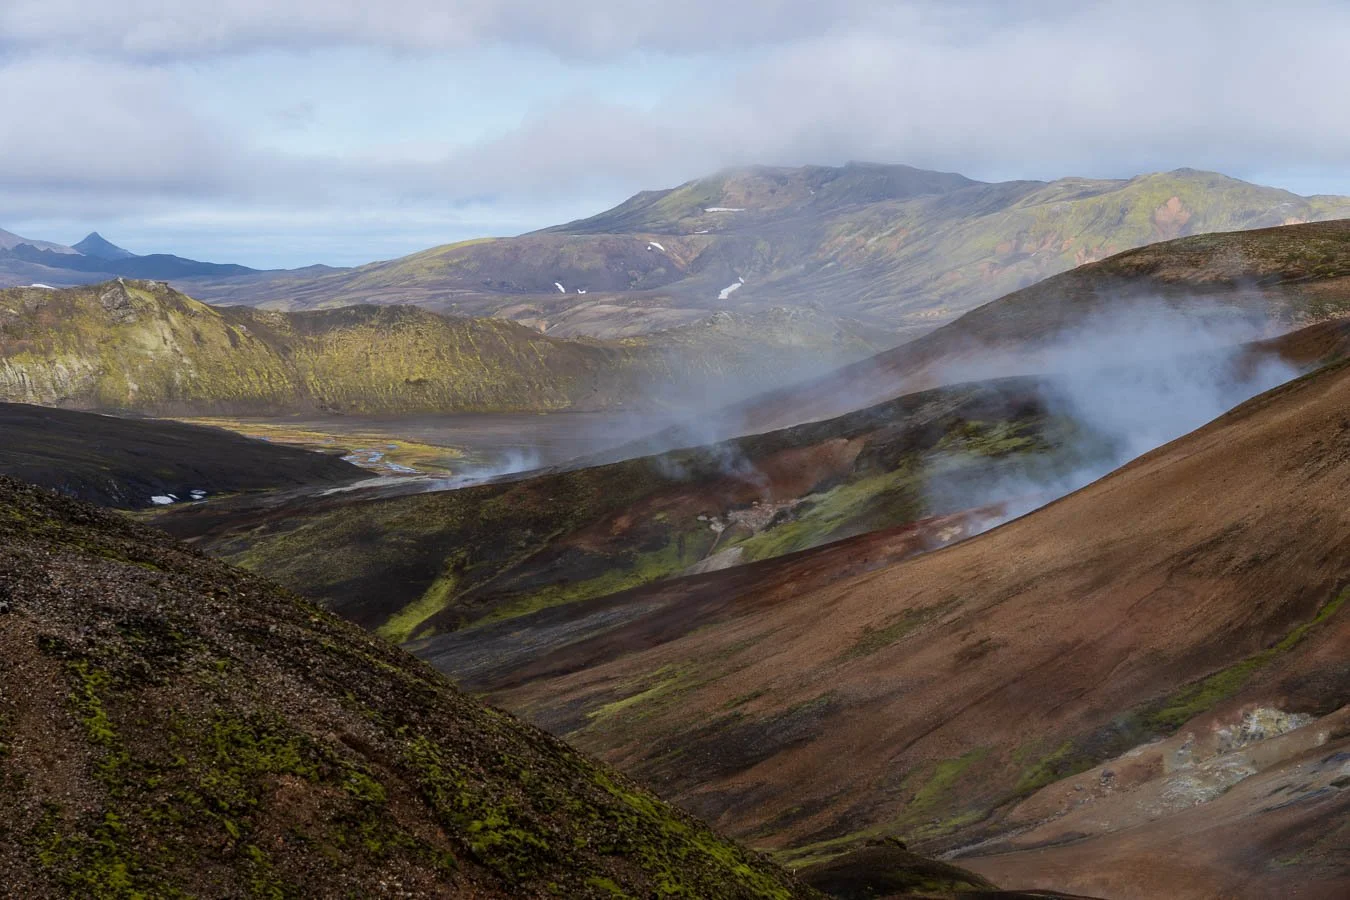
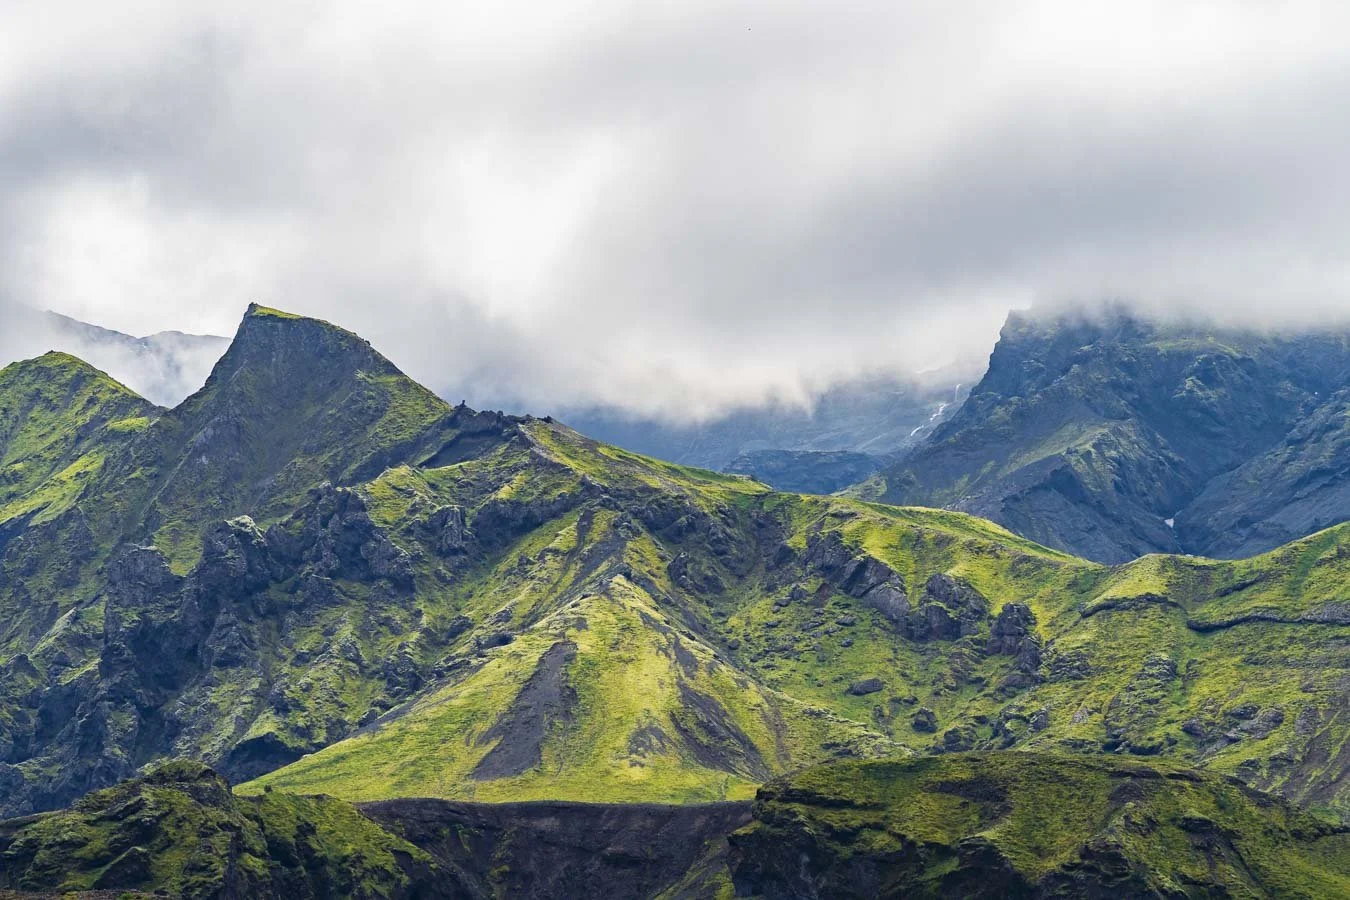
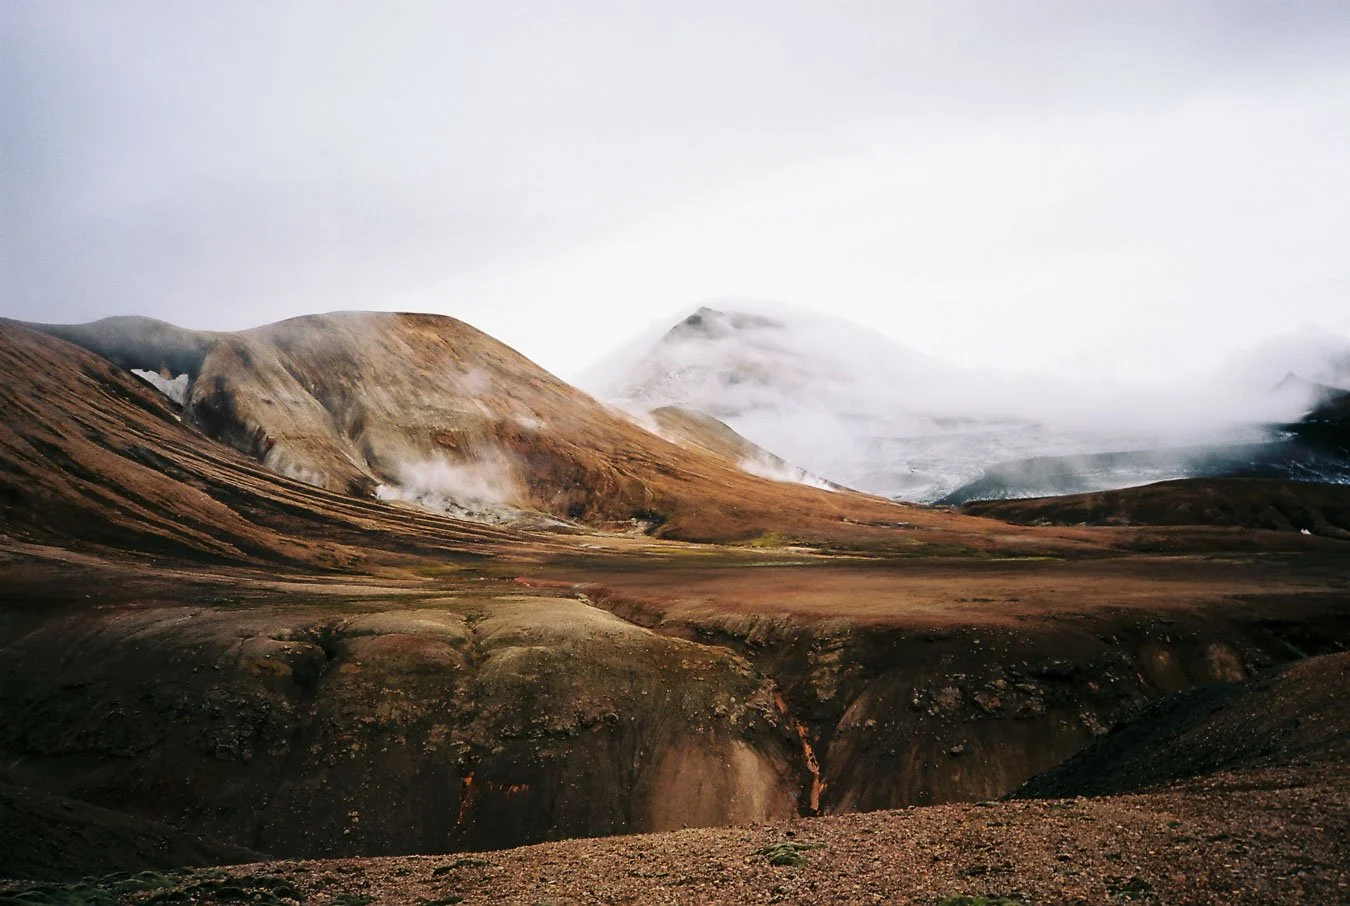
When we left Álftavatn for Hrafntinnusker (this segment is 11.3 km with about 750 m of elevation gain), the morning was unfortunately completely fogged in. While this definitely added to the atmosphere, it also took away some of the wider views. After another river crossing and a steep ascent roughly halfway through the stage, the landscape began to change. Green moss and meadow sections slowly gave way to a much more barren, hostile-looking geothermal area.
View towards Lake Álftavatn after the long, steep ascent on the Álftavatn–Hrafntinnusker section of the Laugavegur trail. On clear days, you can get sweeping views across the southern Icelandic Highlands.

From this point, you pass numerous fumaroles, vents, and steaming patches of ground. Combined with the fog and low clouds rolling over the ridges, this really amplified the mood and made it feel as if we were walking on a different planet.
After a while we reached a slightly flatter plateau cut by countless small meltwater and rainwater streams, which meant constant short ups and downs. It doesn’t look too bad on the elevation profile, but the repetition can feel surprisingly tiring.


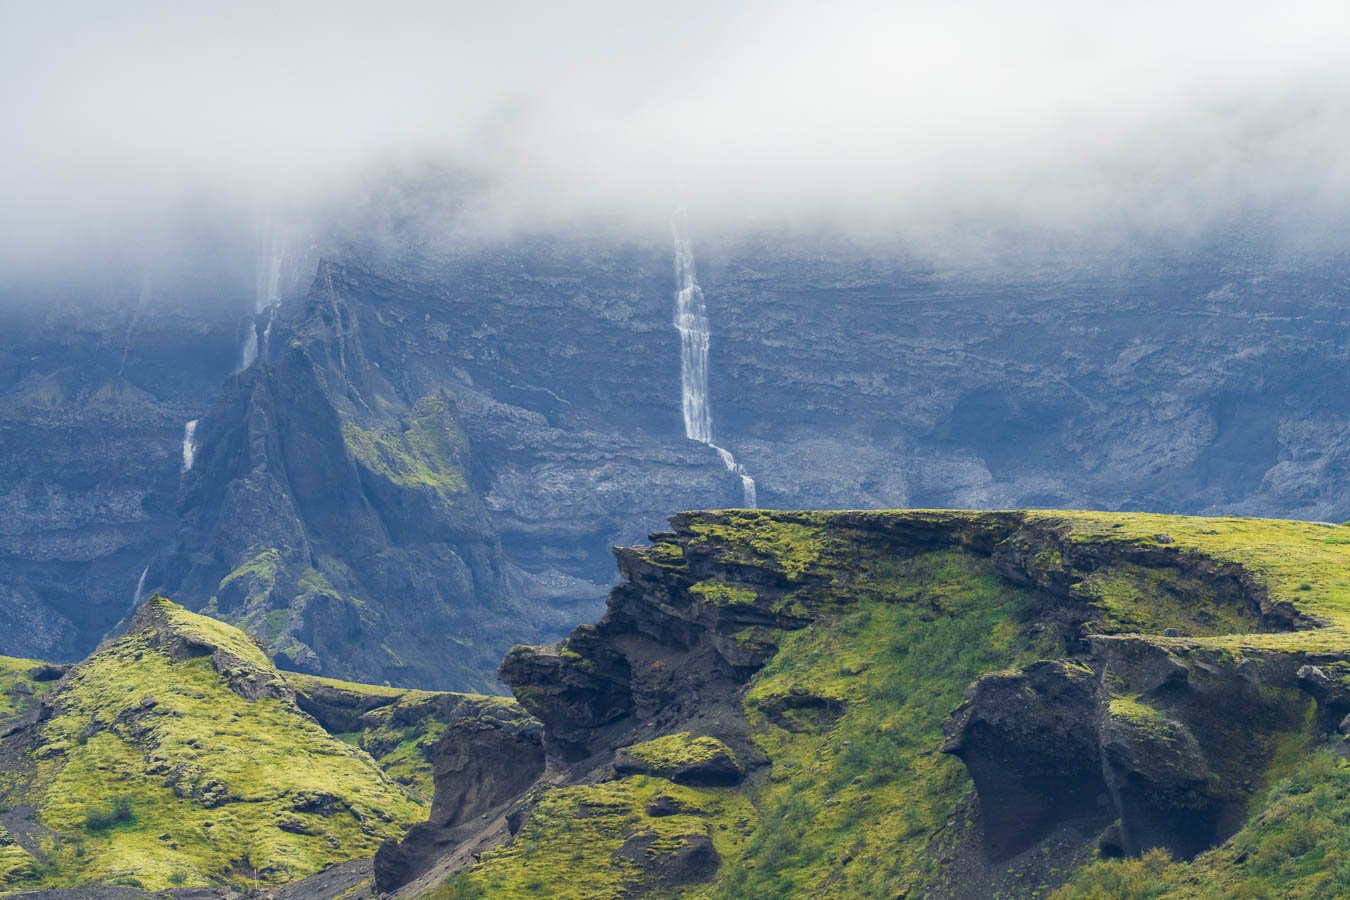
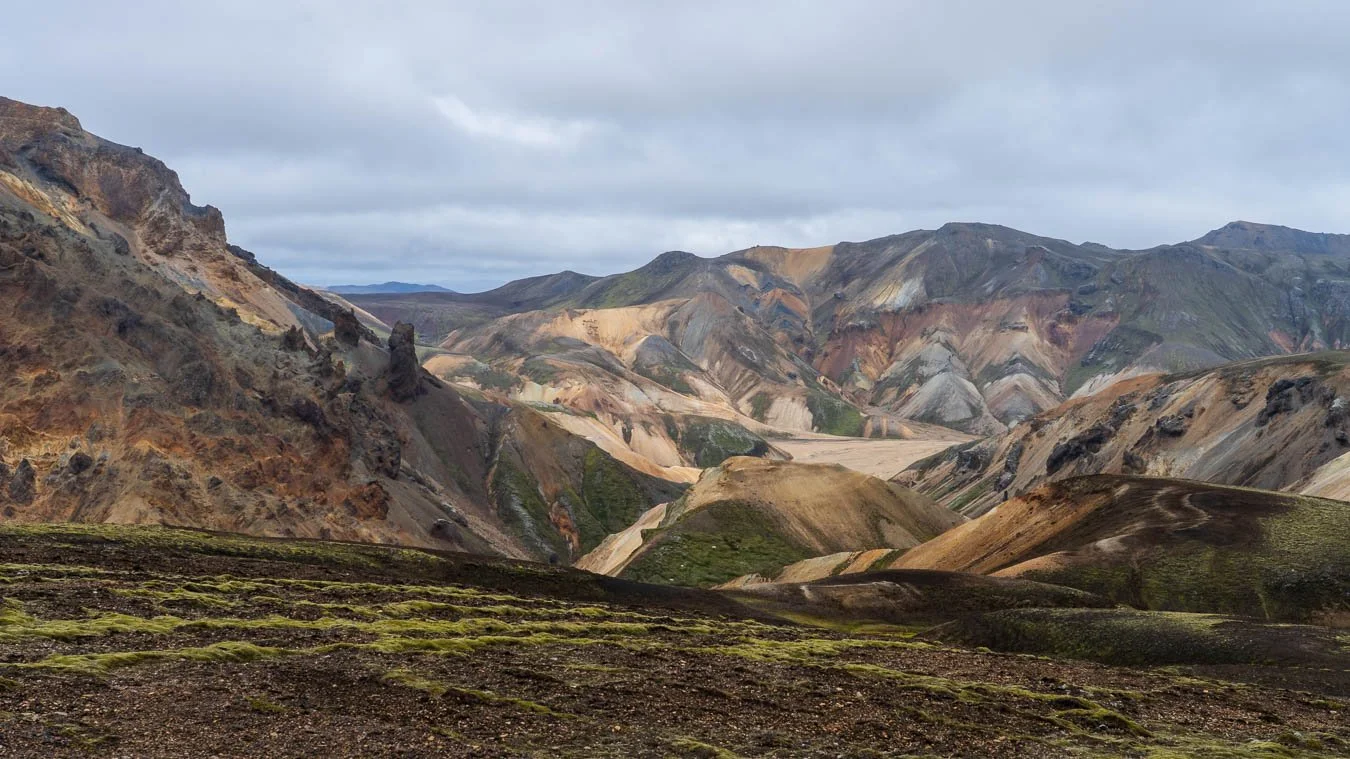
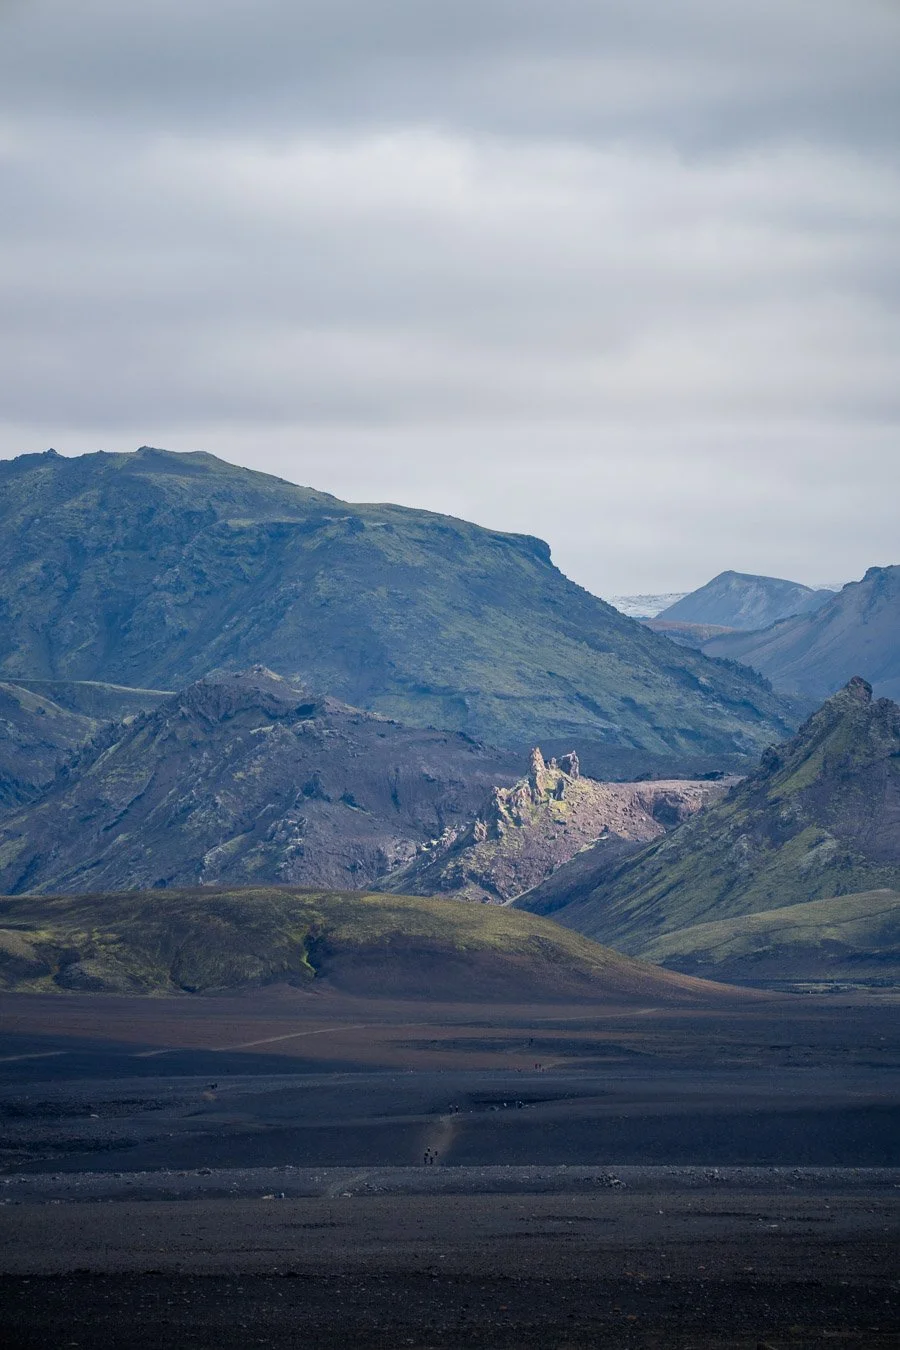
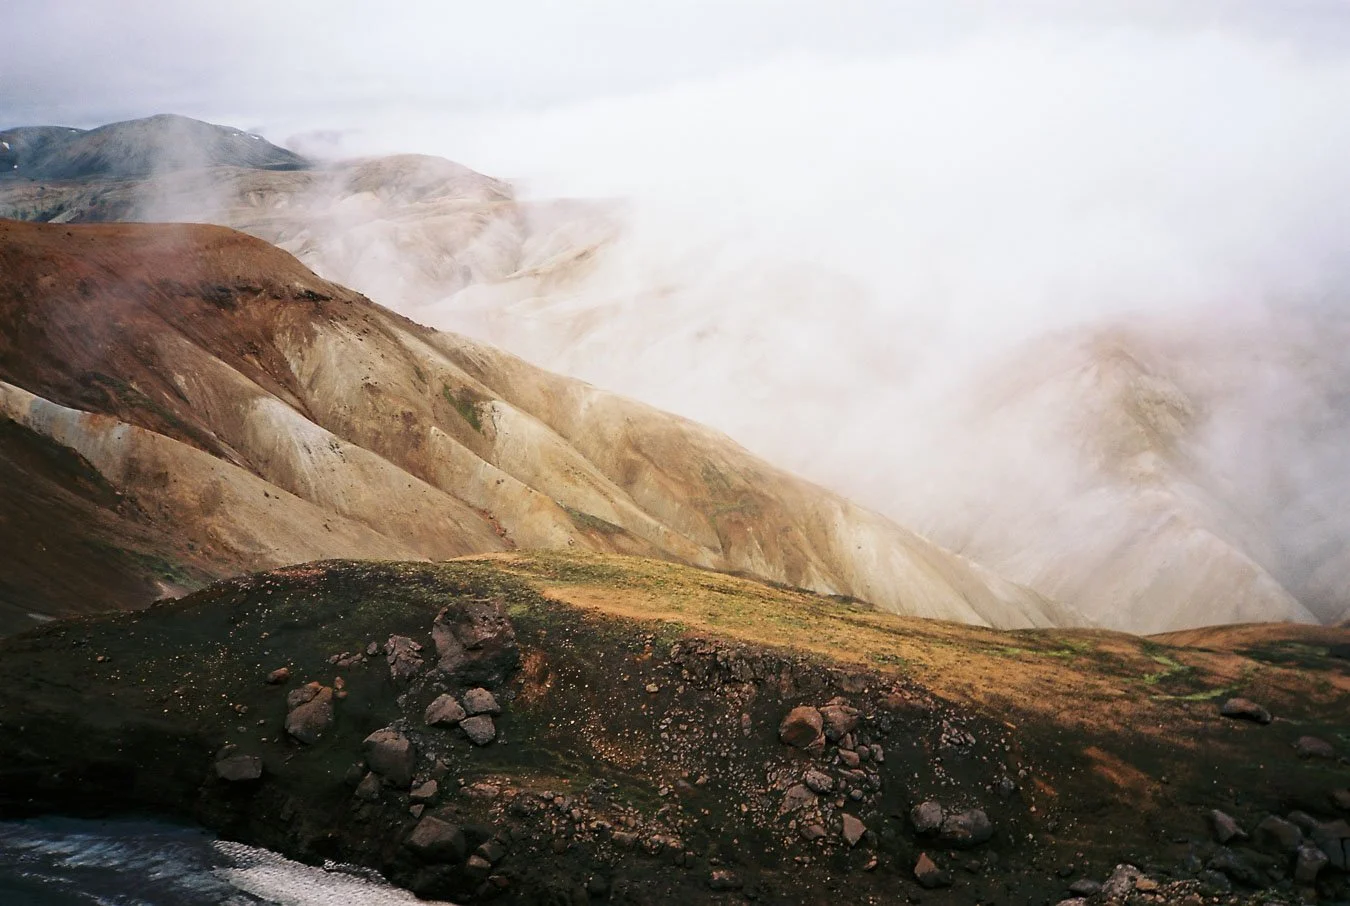
At some point the plateau drops away sharply on one side and suddenly opens up a spectacular view of multi-coloured rhyolite mountains with intricate textures and patterns. We arrived just as a gap opened in the fog, creating a brief but unforgettable, moody panorama.


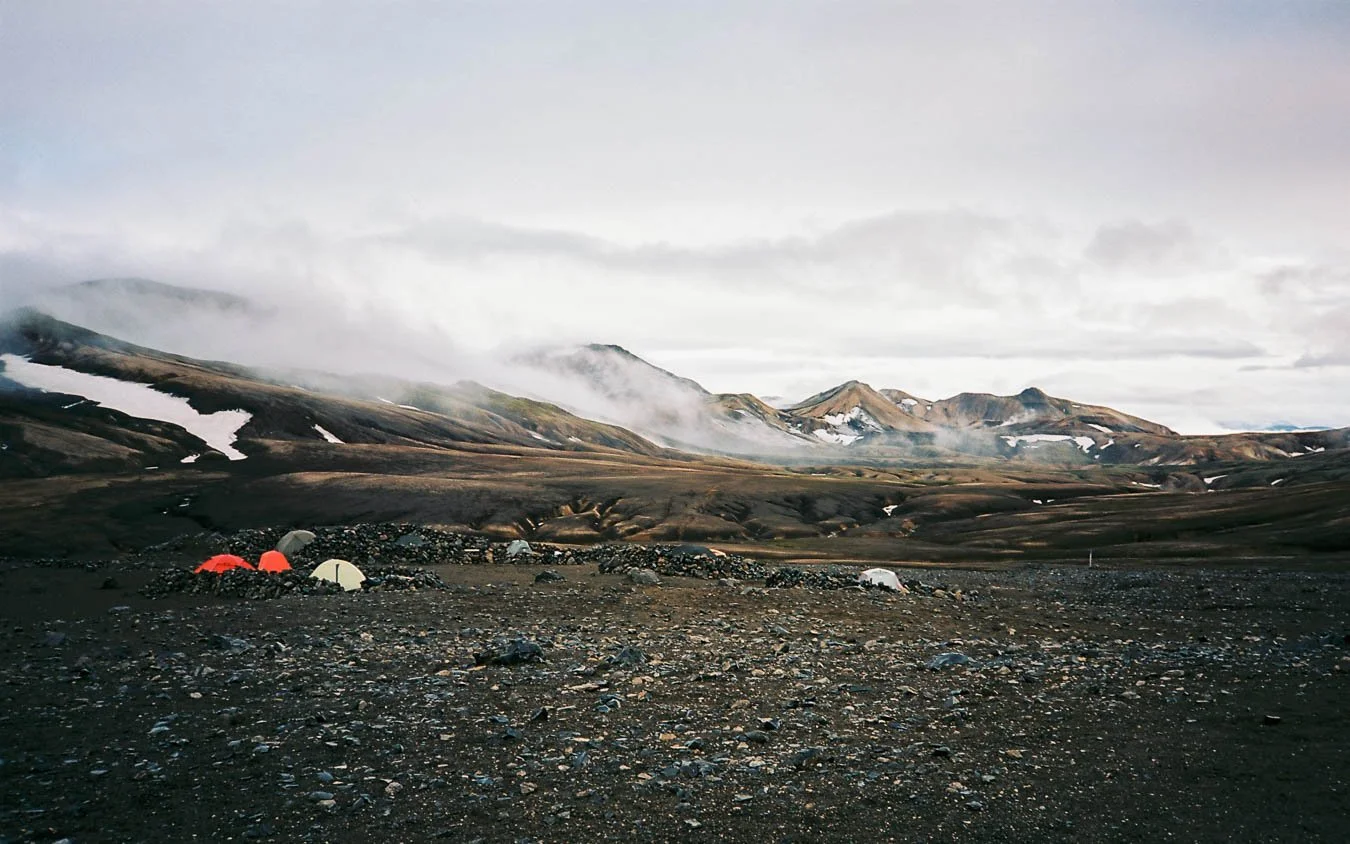
Sheltered tent pitches at the Hrafntinnusker campsite.
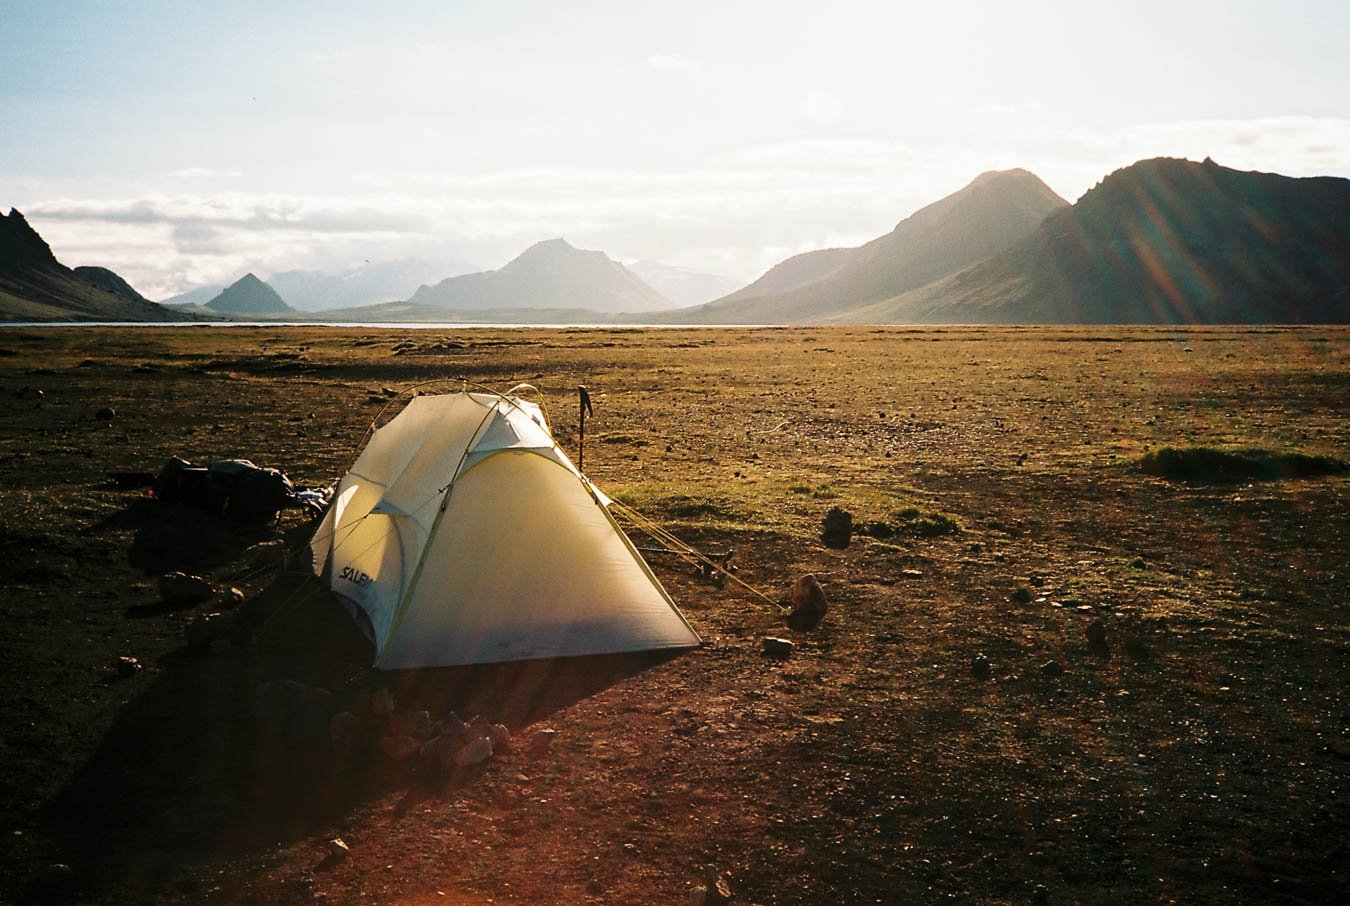
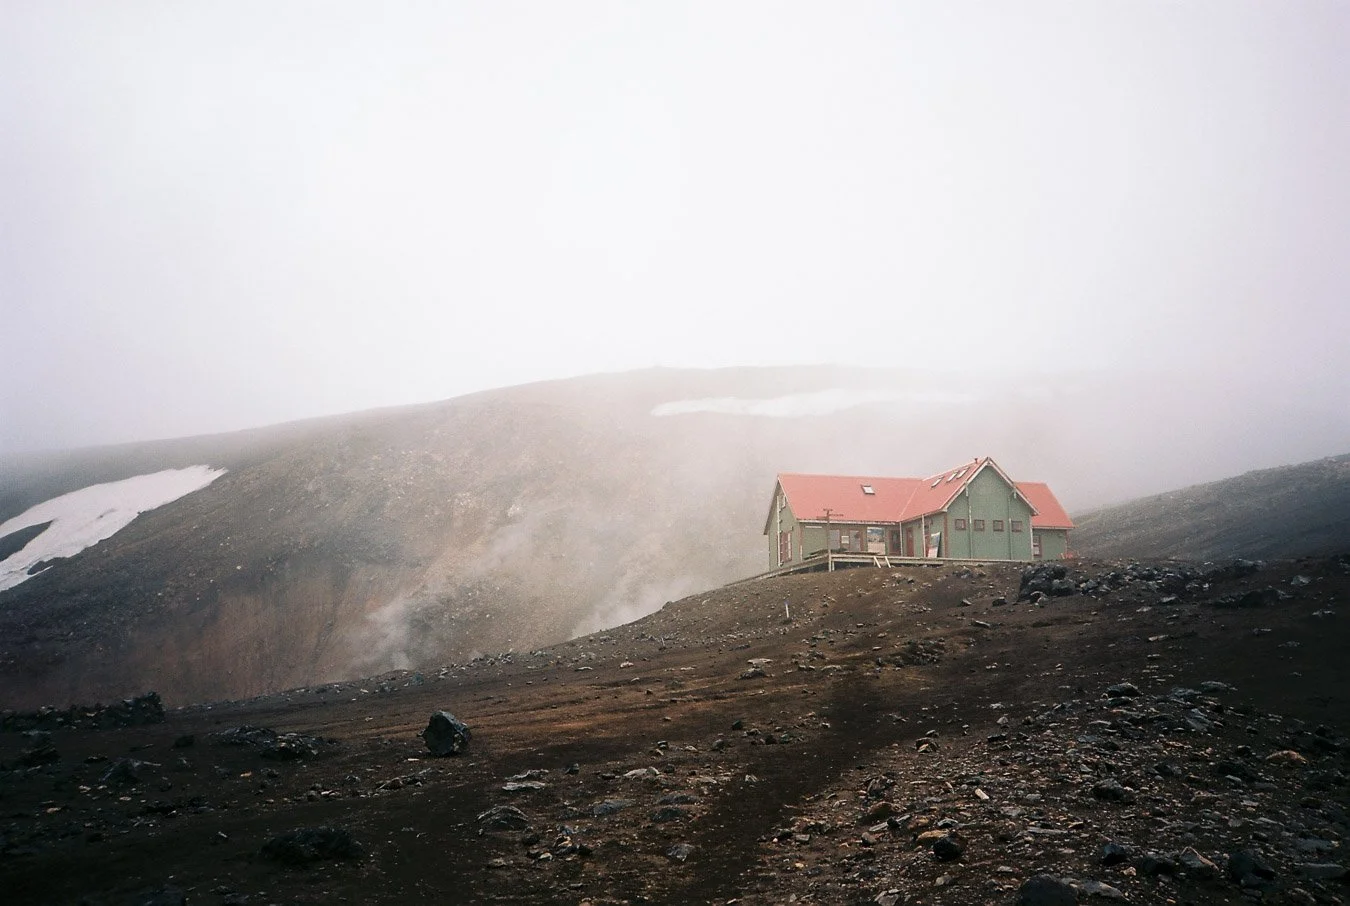
A final short but steep push then brought us to the Hrafntinnusker campsite. Some people skip this hut and continue all the way to Landmannalaugar in a single long day. If you are very fit, travelling light, and don’t mind a longer stage, that is an option. We chose to stay in Hrafntinnusker to enjoy an additional sunset and sunrise along the trail and to keep the pace relaxed. The campsite is perched high on the mountainside with great views of the surrounding rugged rocks and ridges, which makes a strong case for staying there unless you are really short on time or determined to finish the trail in fewer days than usual. There is a warden’s hut, a main hut for those who booked beds, basic toilets and sinks, and a small separate shelter where campers can cook and escape the wind. There are no showers here, and as always you must carry out all of your rubbish.

Sleeping hut at the Hrafntinnusker campsite.
Day 4 – Hrafntinnusker to Landmannalaugar
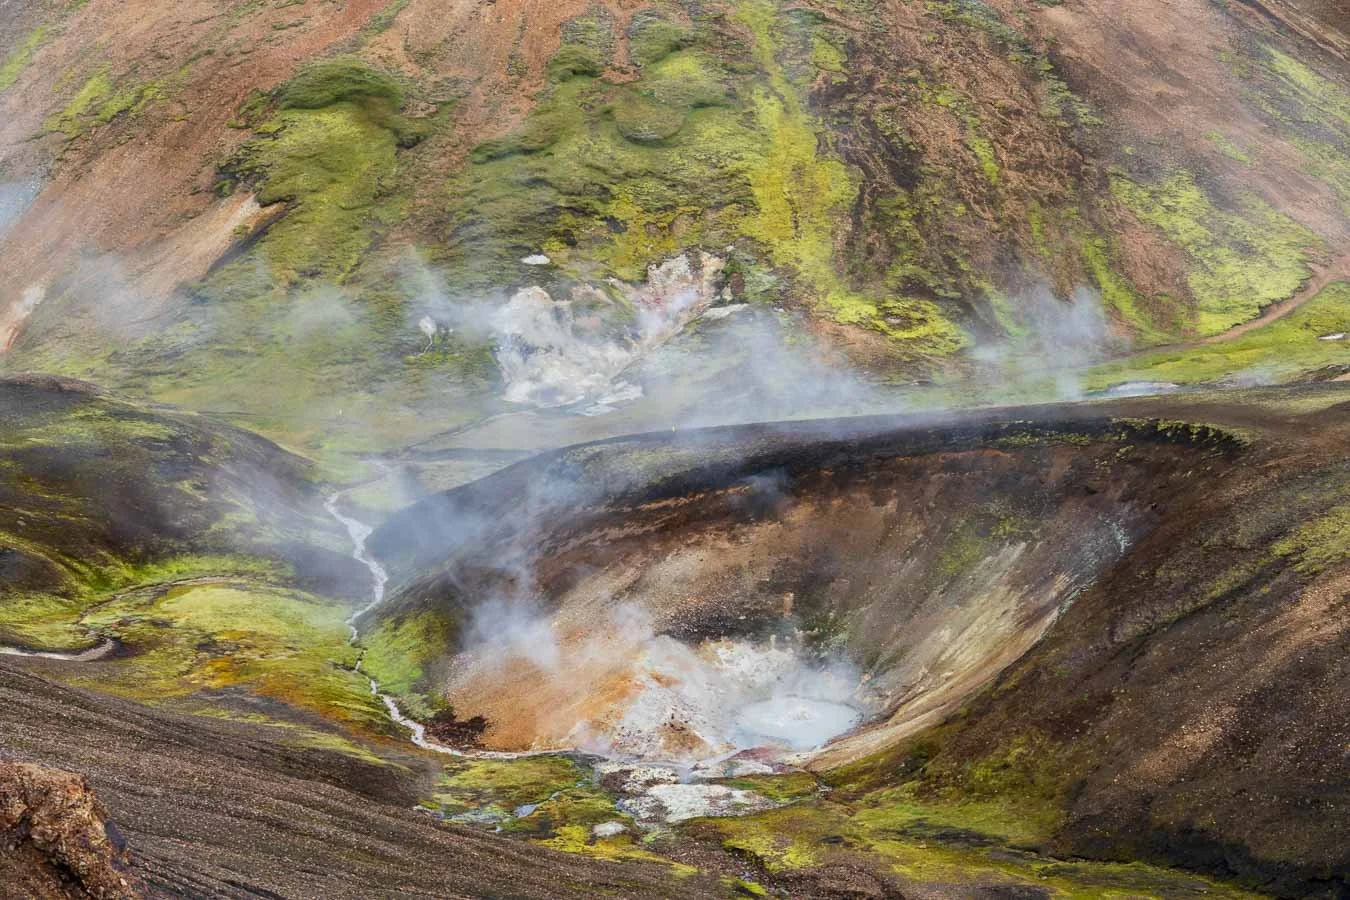
Our final push led us from Hrafntinnusker to Landmannalaugar. The segment is 10.5 km long with around 650 m of elevation gain. It starts with a short traverse over an icefield, which was easy to cross when we were there (though it can be more challenging earlier in the season). Beyond that, the route continues over gently undulating terrain broken by yet more small streams, so you get plenty of minor ascents and descents. As you lose altitude, geothermal features start to appear more frequently, with hot springs, steaming vents, and colourful mineral deposits scattered across the slopes.
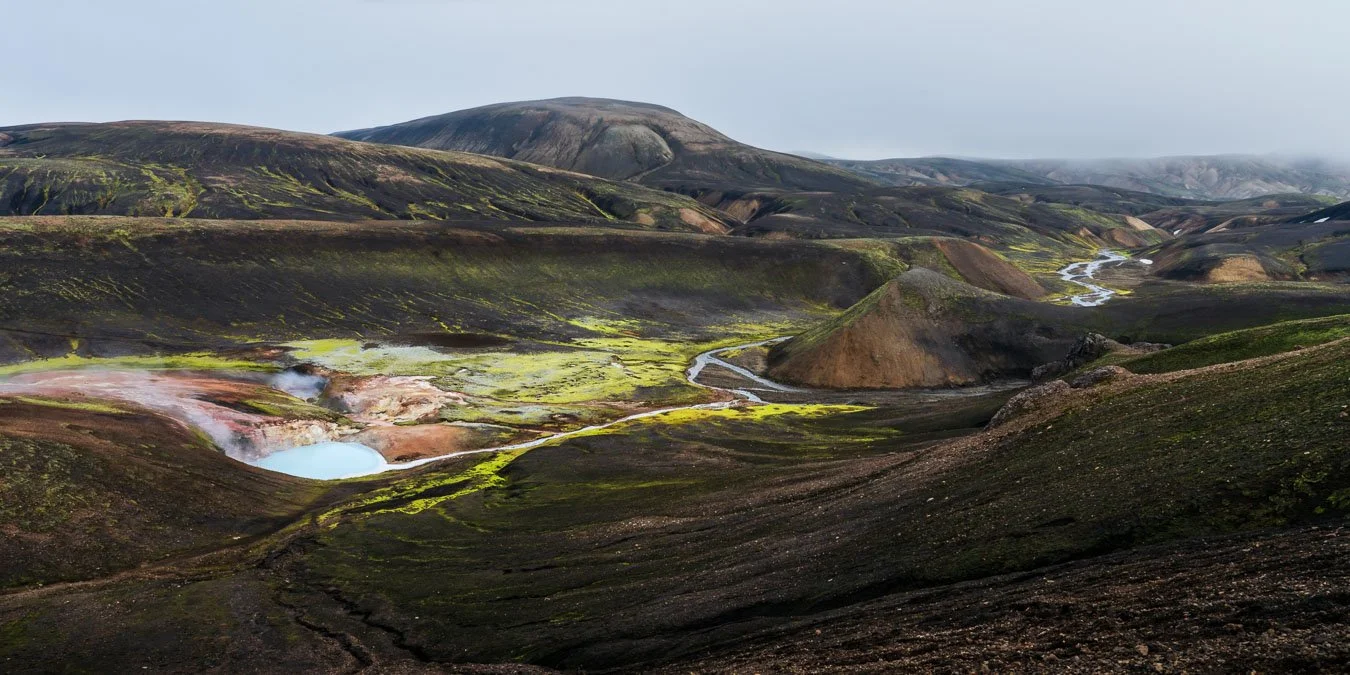
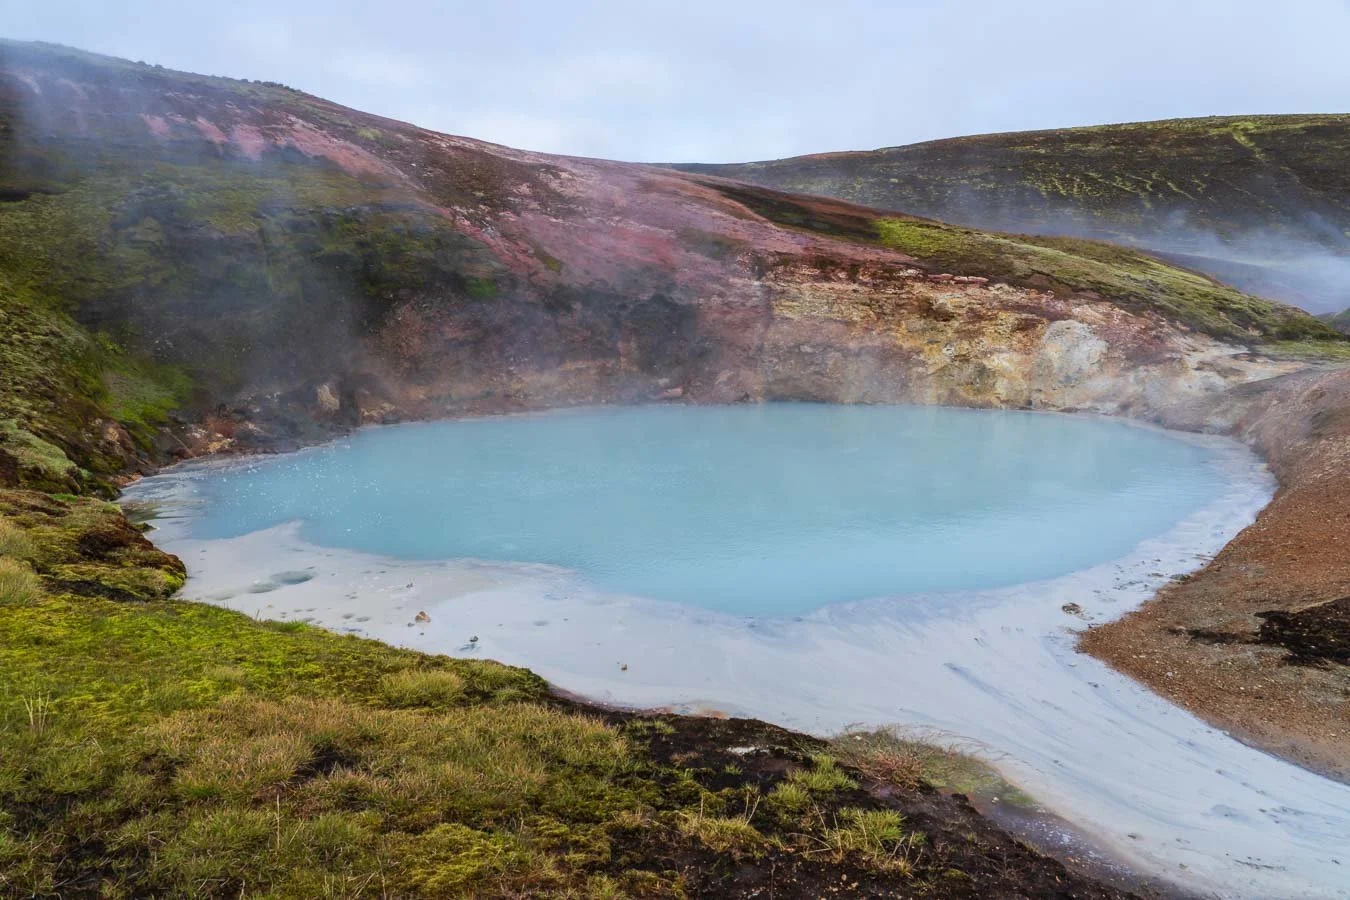
At one point, the trail opens up to a beautiful view of the Hamragilskvísl stream, framed by vividly colored moss and ending in a striking turquoise hot pool.
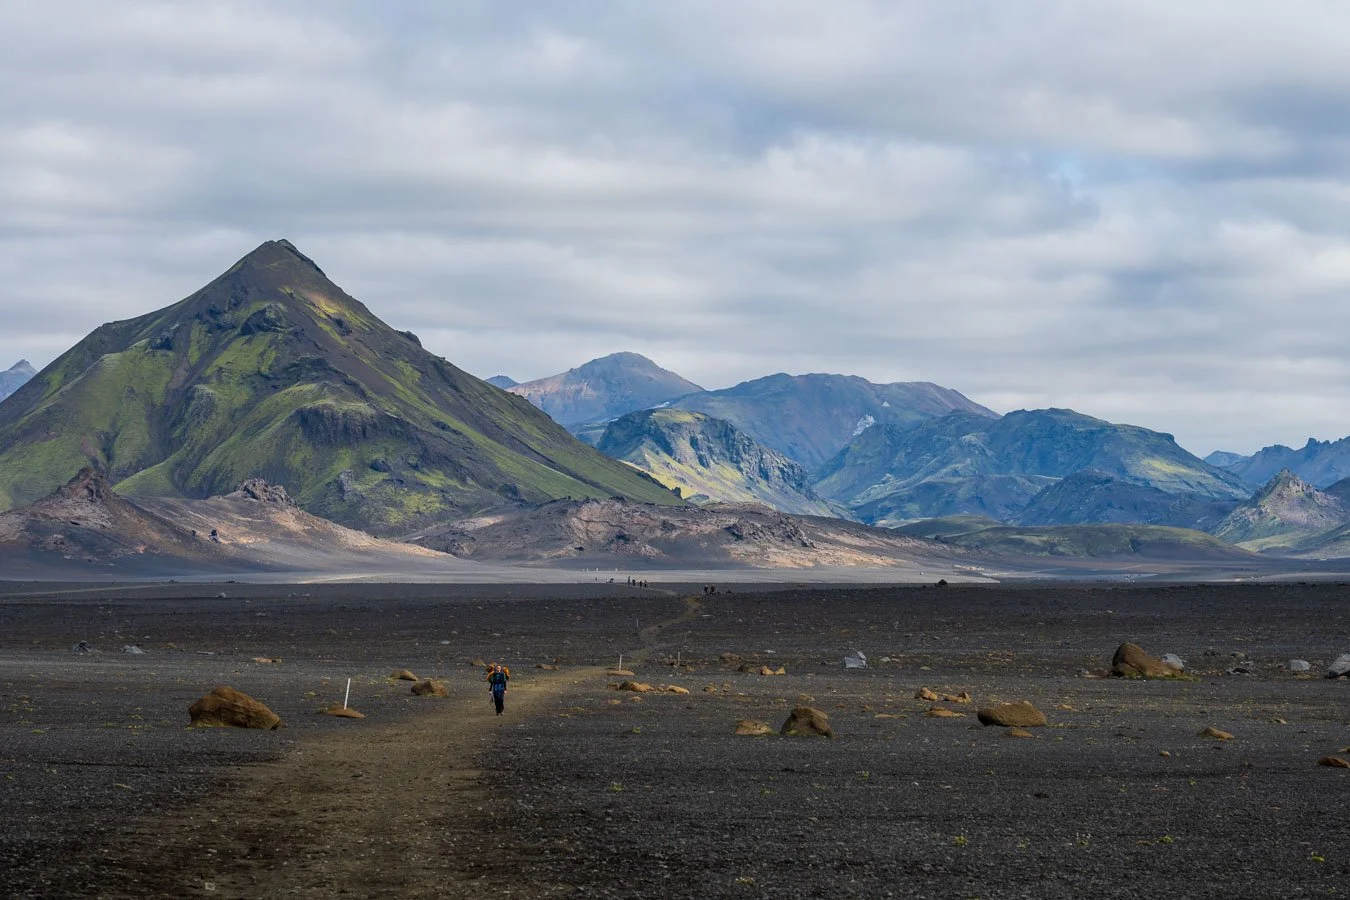
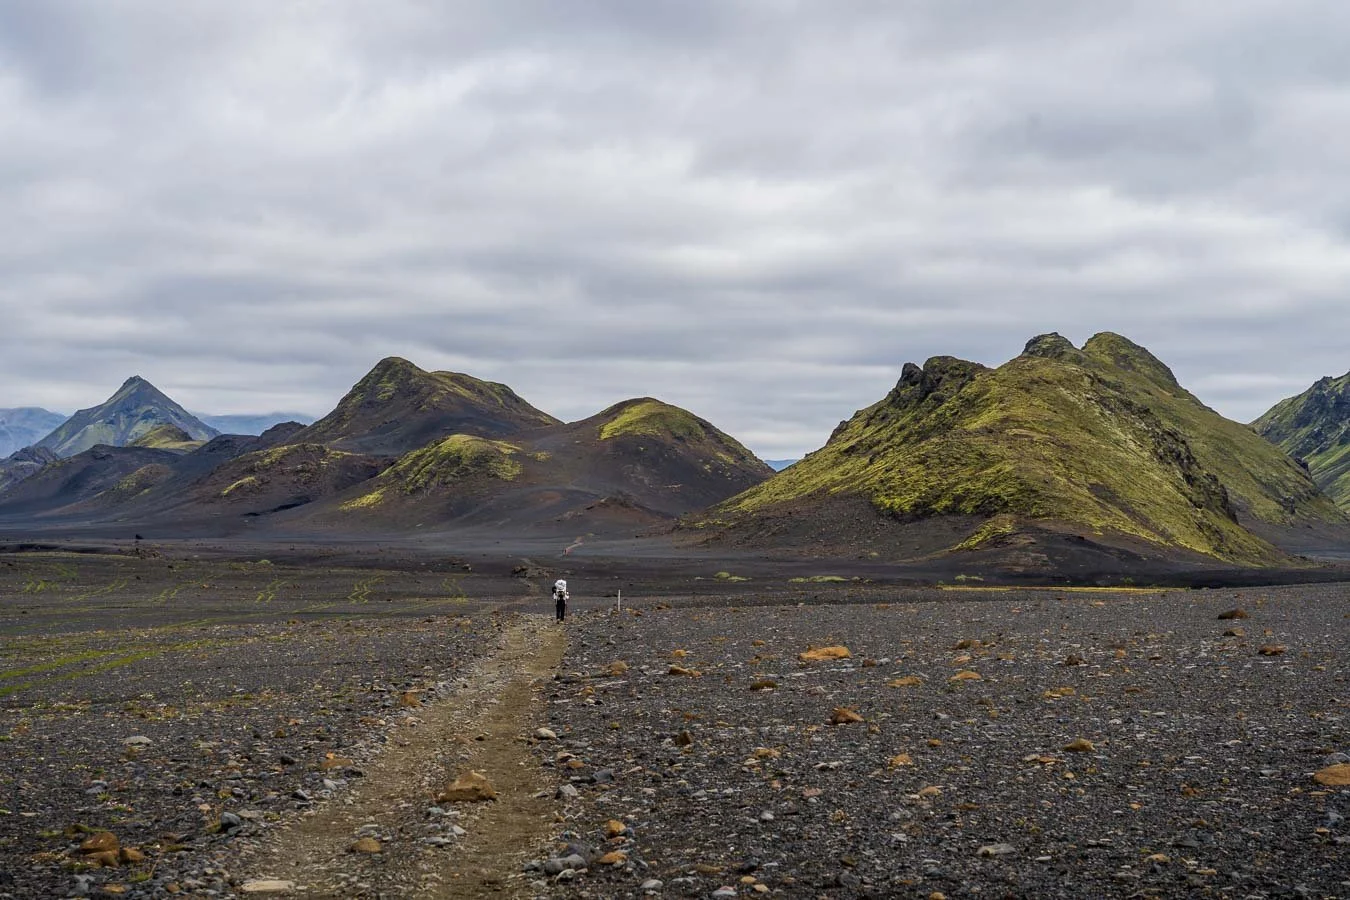
Further down, the landscape shifts fully into the typical Landmannalaugar scenery. Rhyolite mountains painted in shades of yellow, red, green, and brown line the trail, and you can often spot tiny silhouettes of hikers on distant slopes, which really emphasises the scale of the terrain.
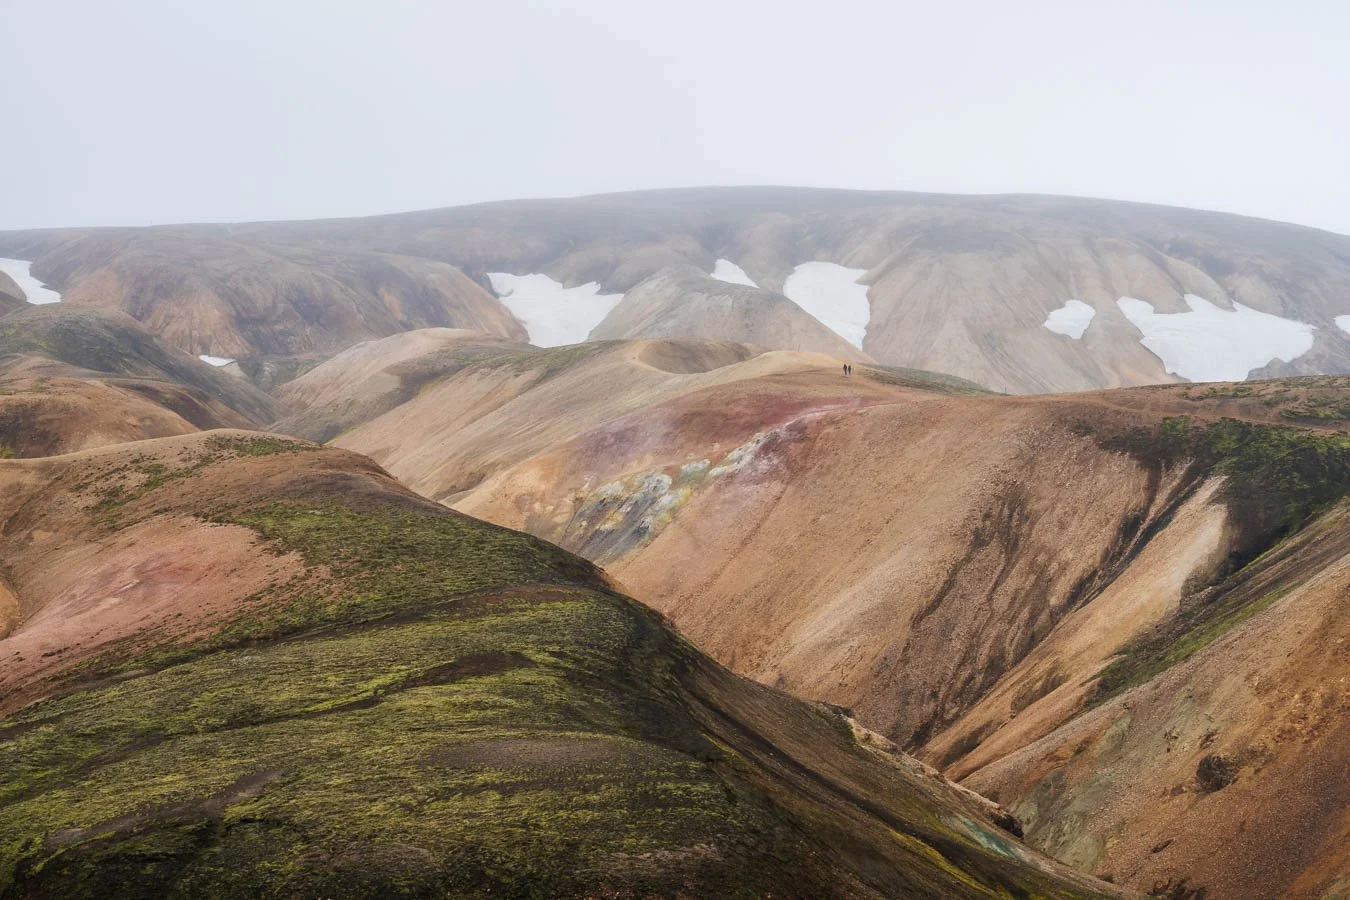
Distant hikers on the Laugavegur trail crossing expansive rhyolite hills between Hrafntinnusker and Landmannalaugar.
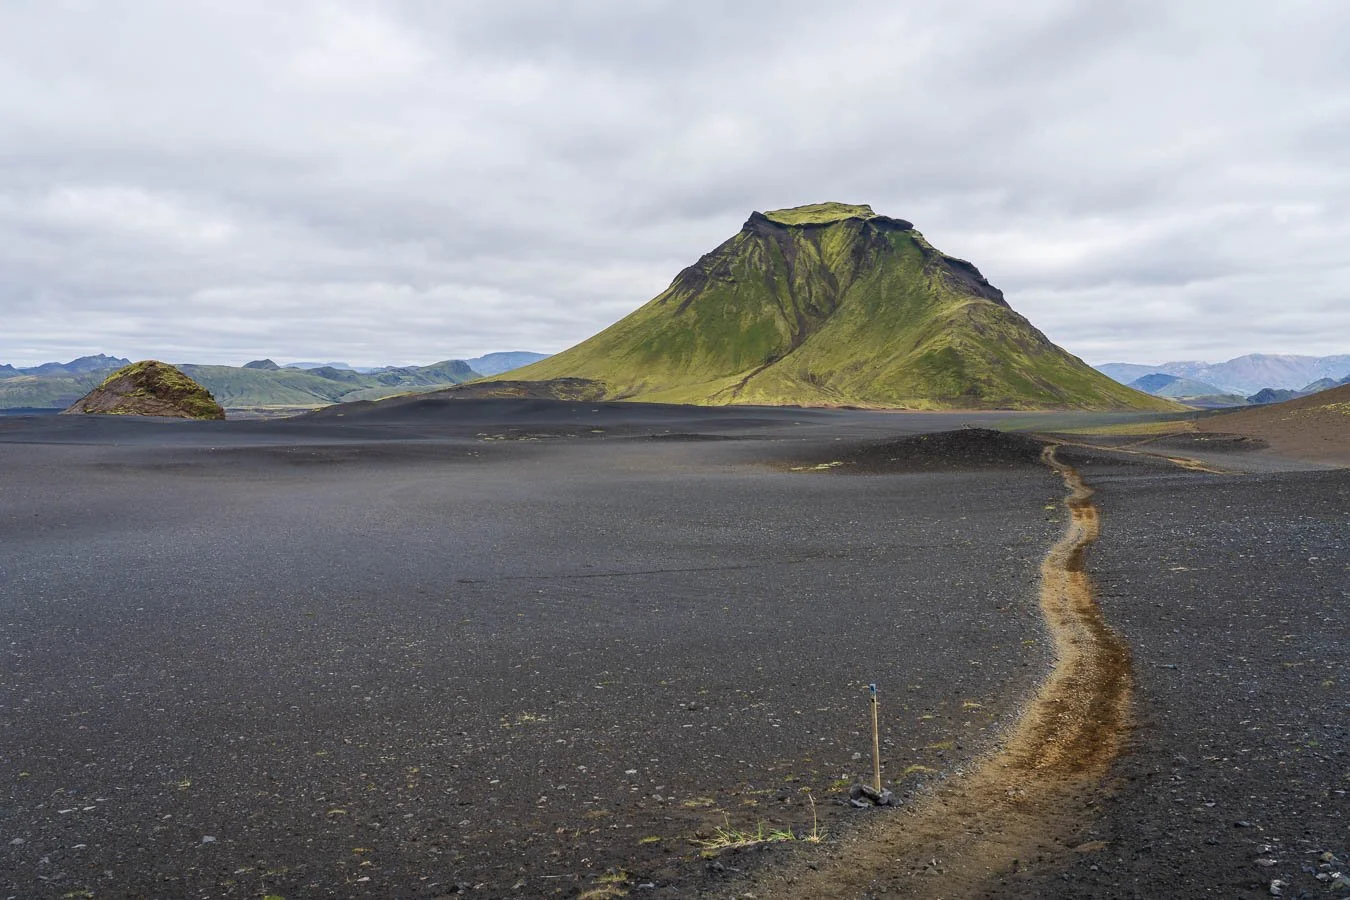
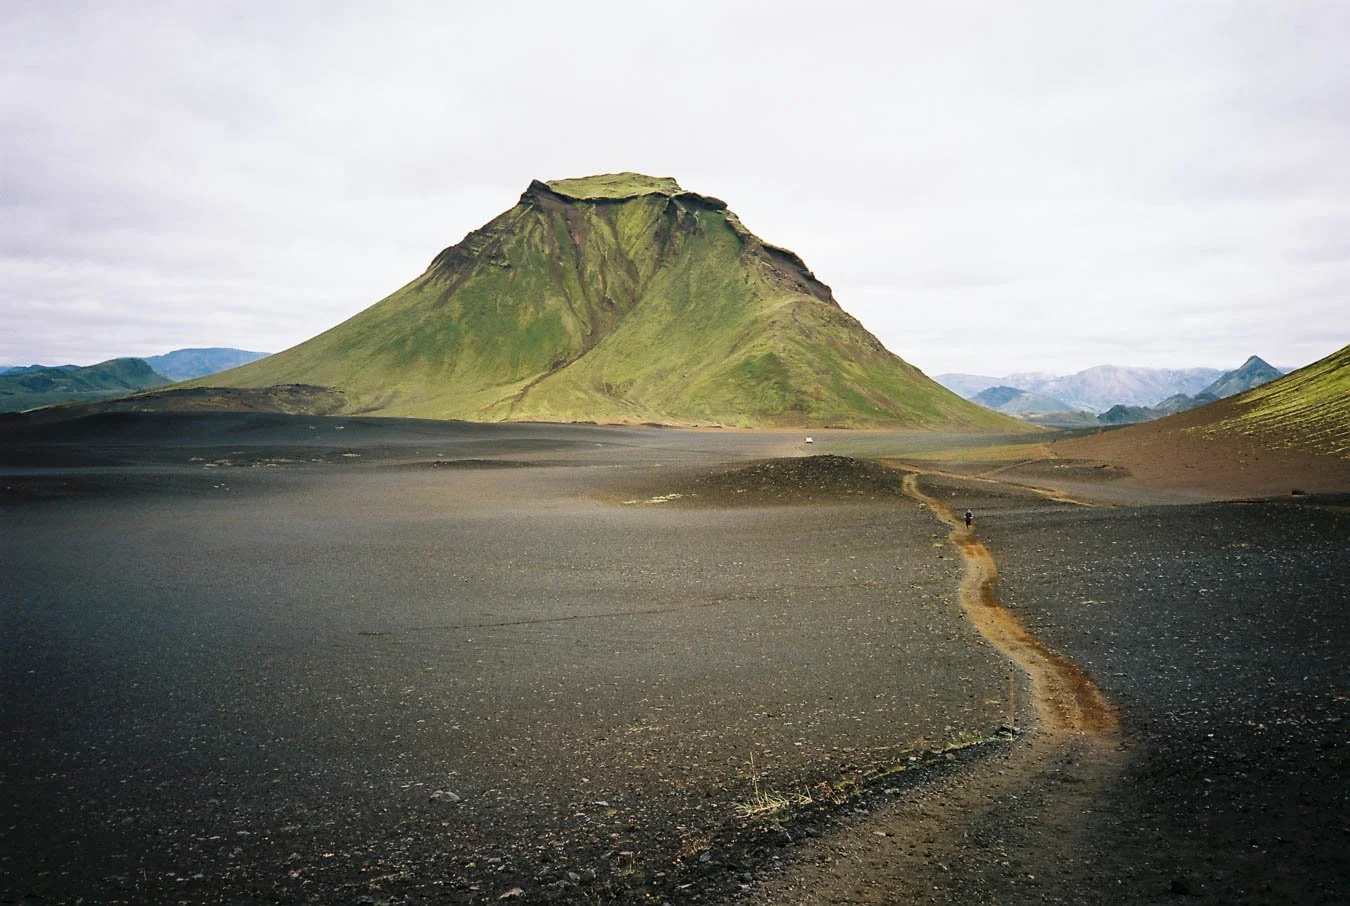
Eventually, the distinctive rock formation on the red and green slopes of the volcano Brennisteinsalda comes into view, signalling that you are nearly at the end of the Laugavegur. Shortly afterwards, from a slightly more open and elevated viewpoint, you can see the Landmannalaugar campsite below. From there it’s a last descent and a relatively flat ‘stroll’ into camp, and with that you have officially completed the Laugavegur trail! We arrived there in the early afternoon. Landmannalaugar is by far the largest and busiest campsite on the route, with many (day) hikers and people arriving in 4x4 vehicles.


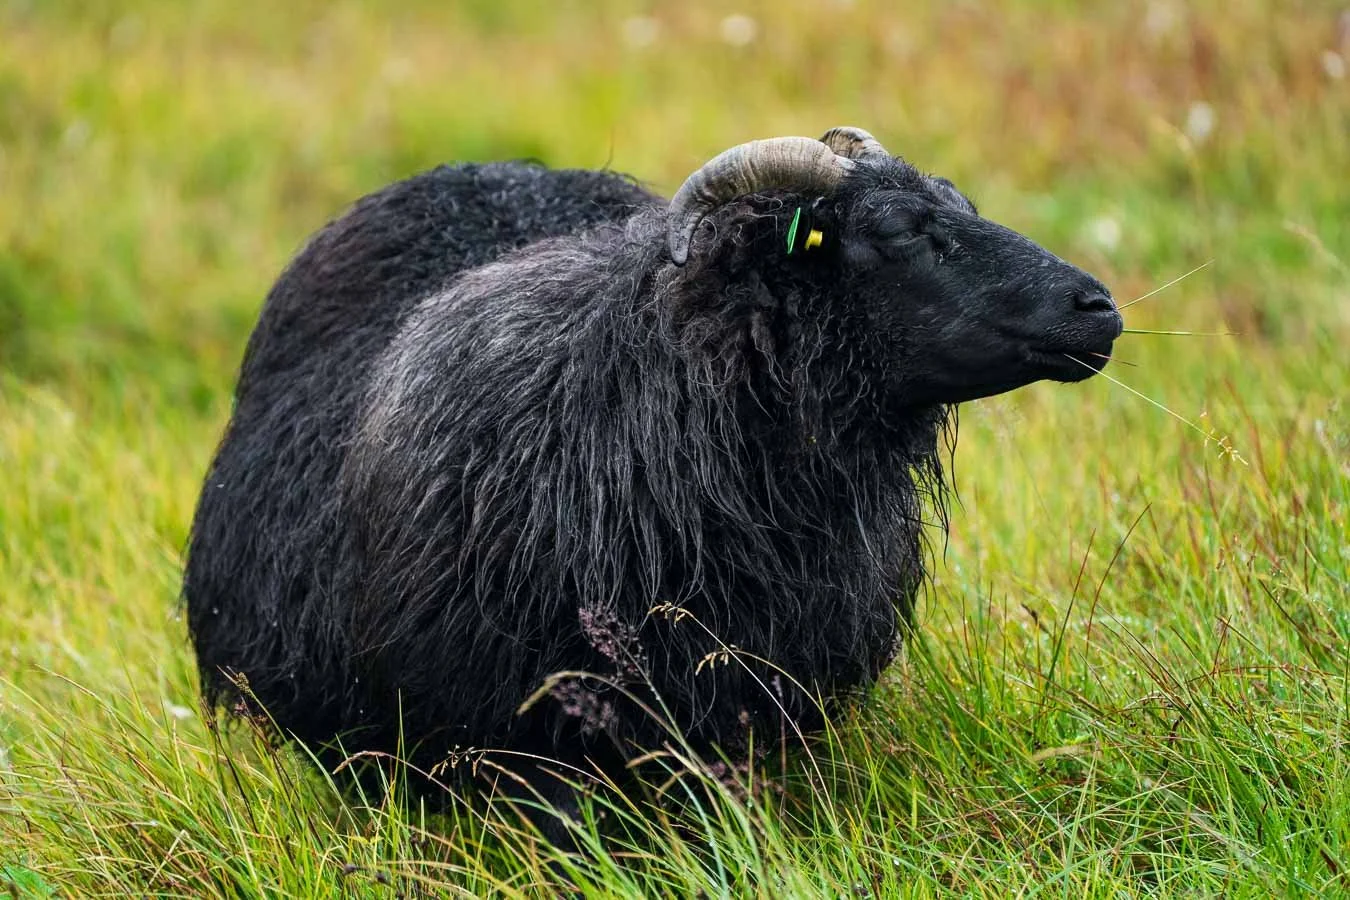
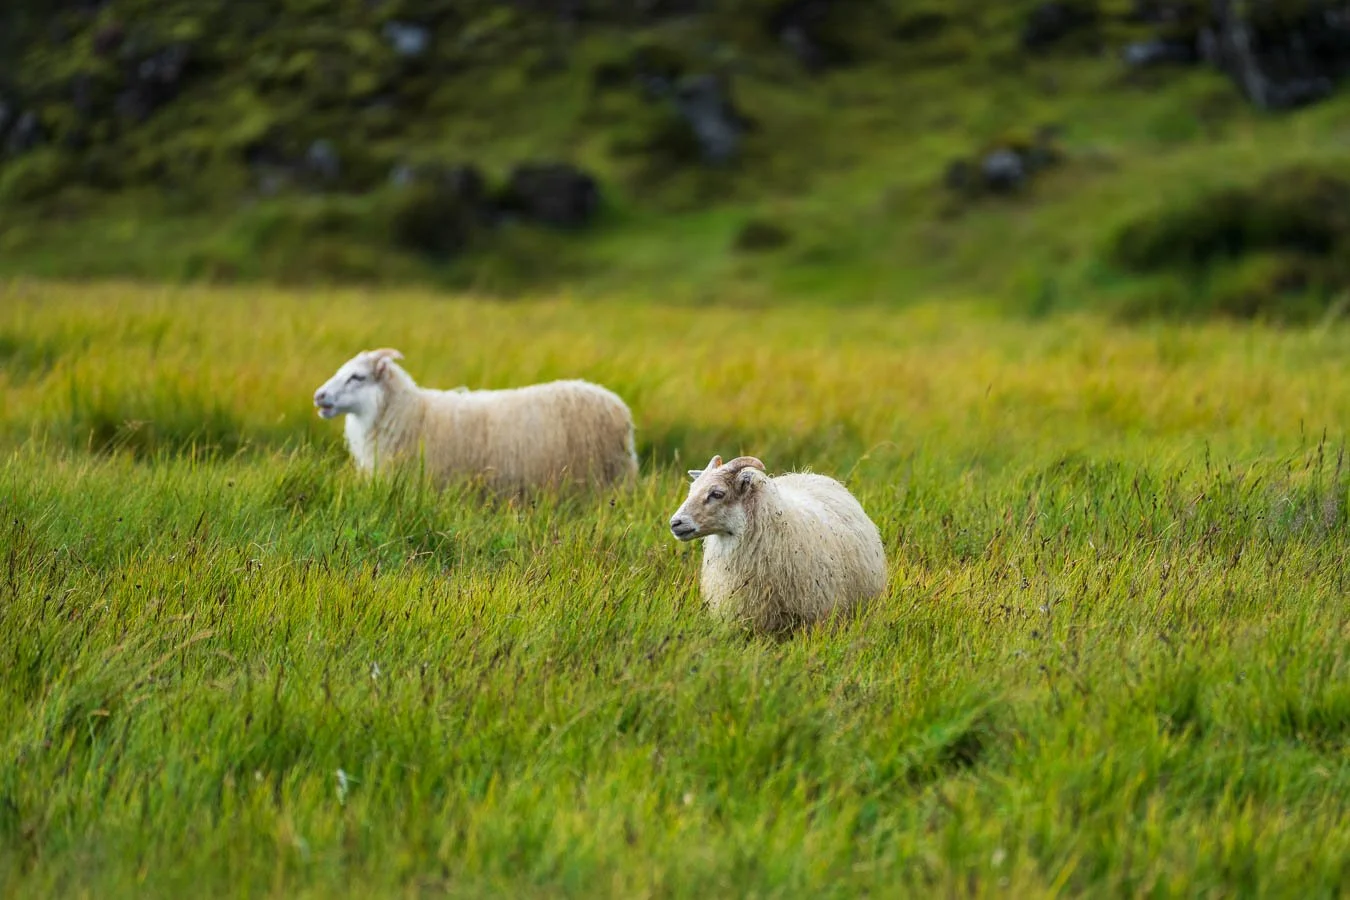
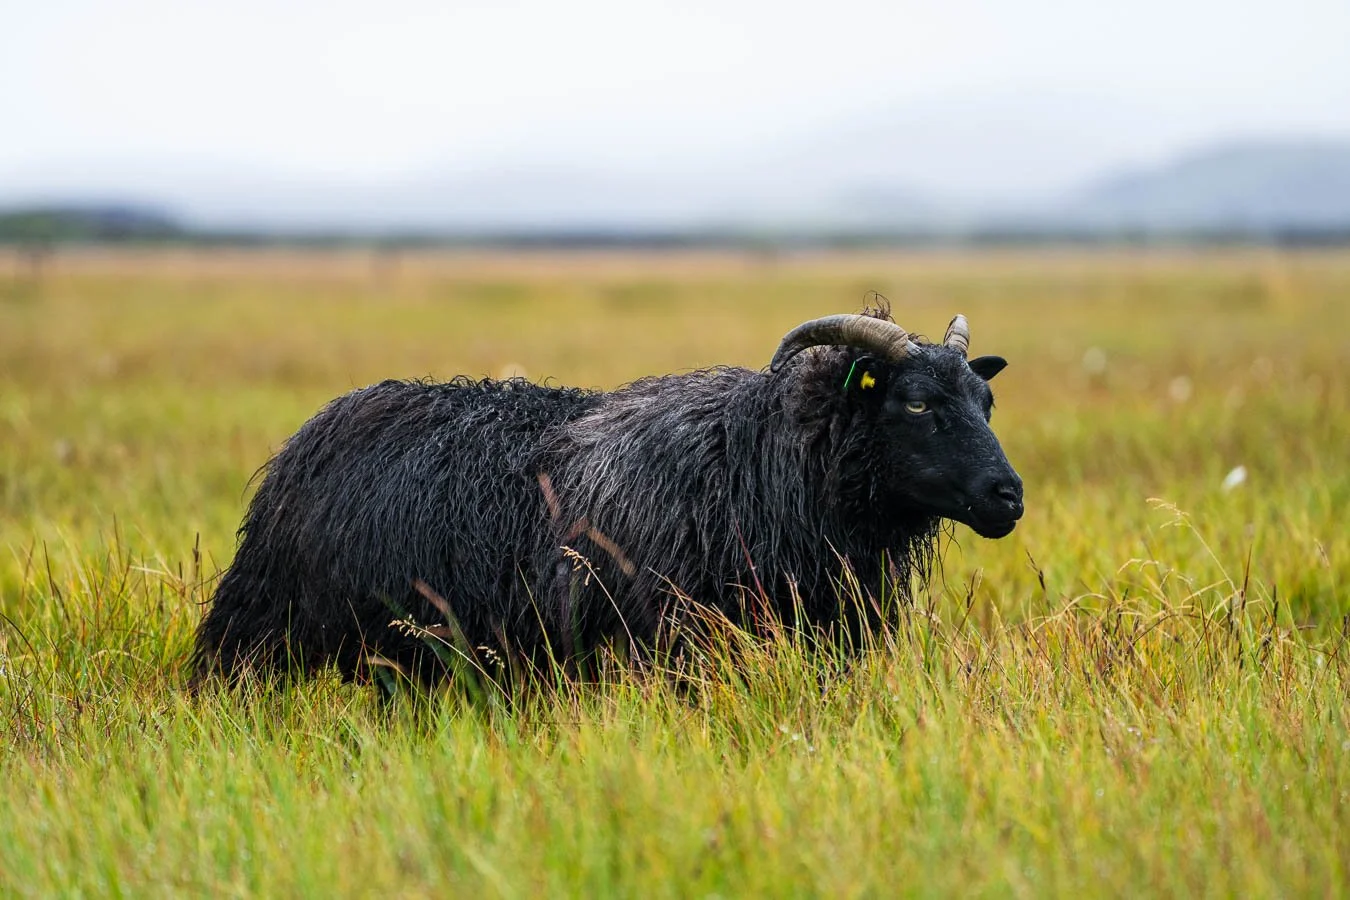
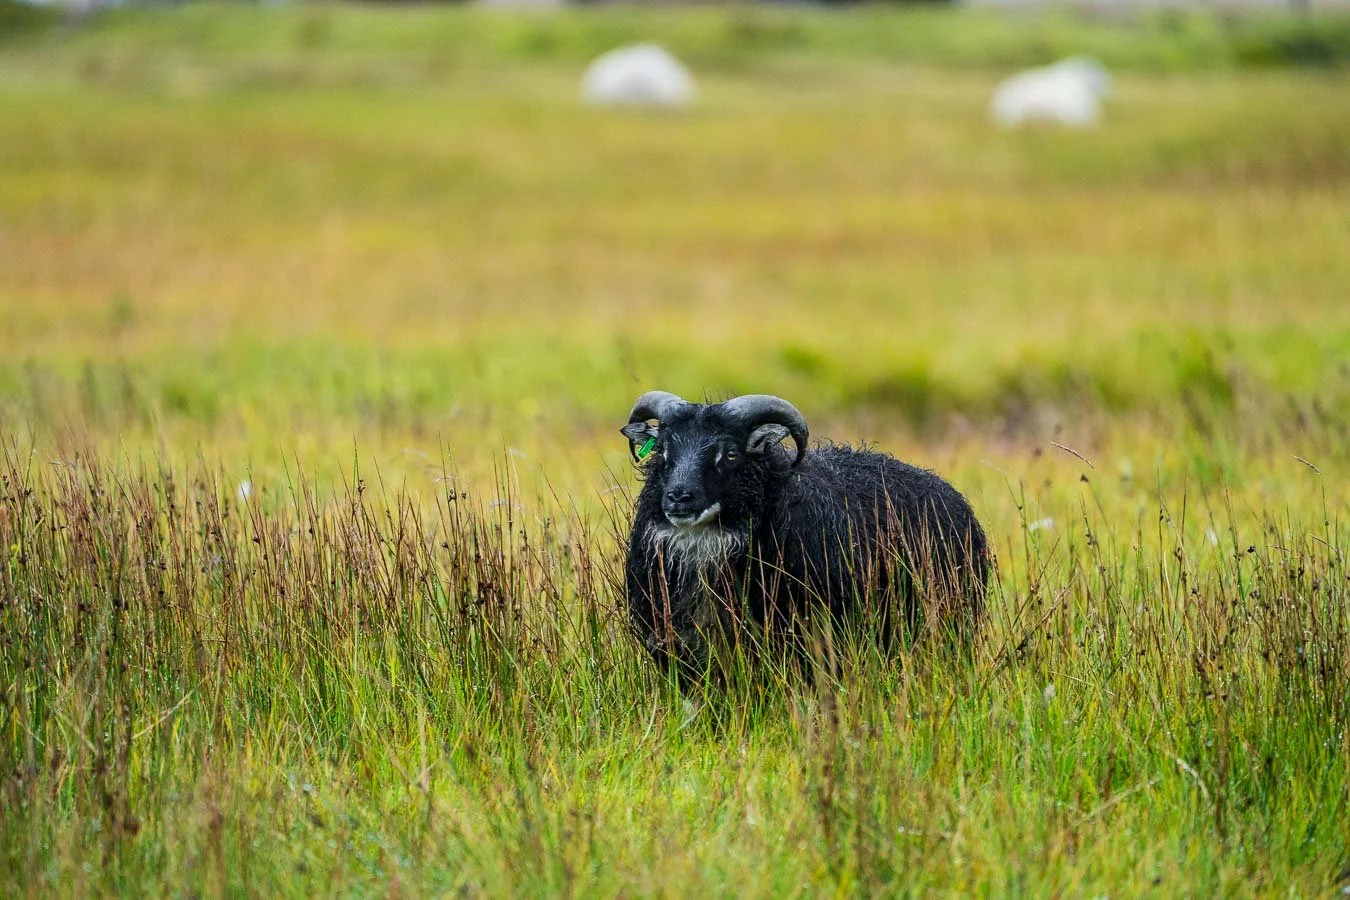
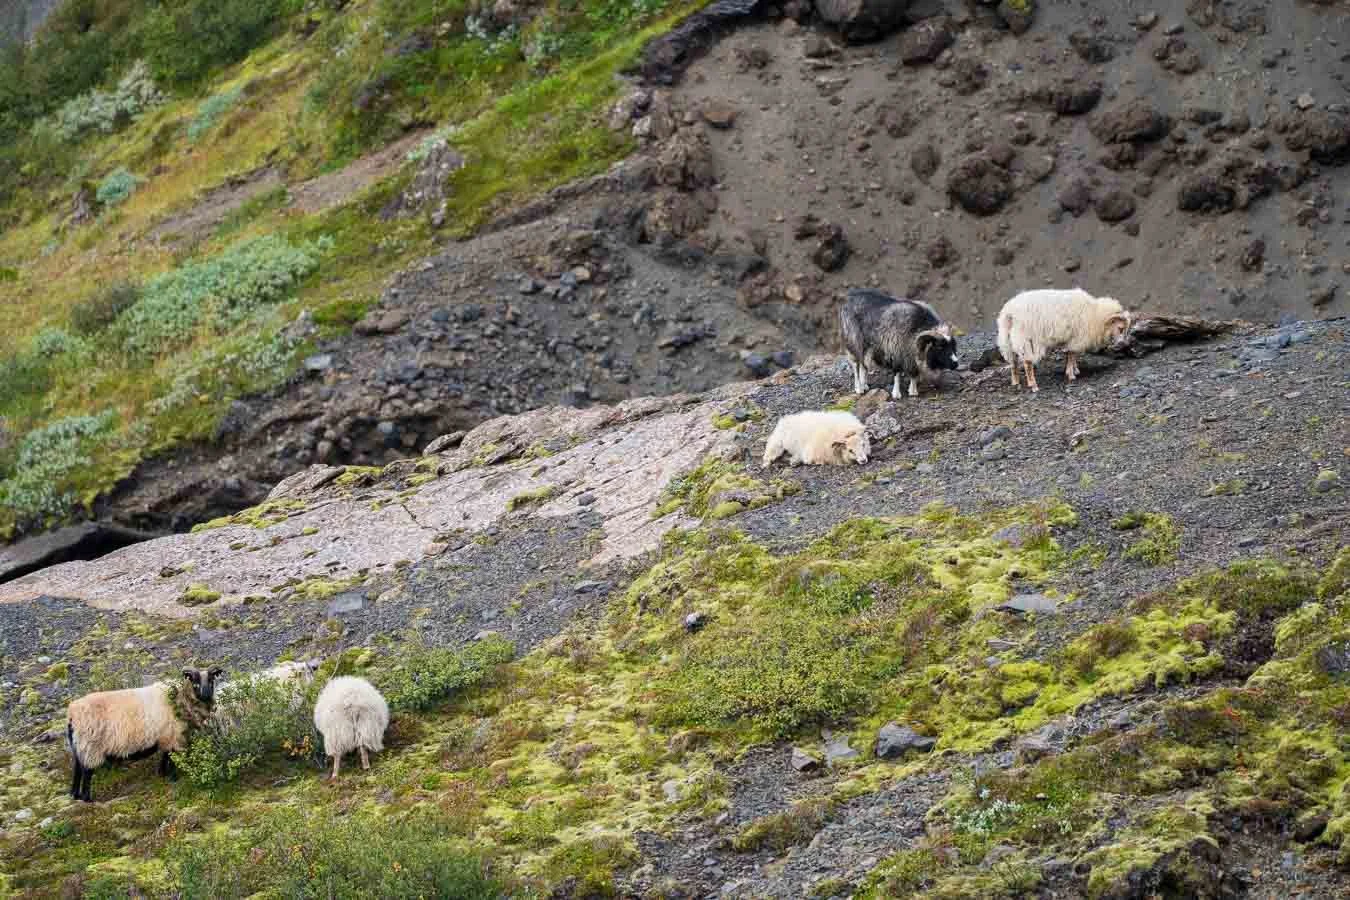
Despite the size of the place, there are no hot showers, but there is something better nearby, namely the natural hot springs just a short walk from camp. Access is free; you just need to find a spot where the water is comfortably warm and avoid the hotter patches. On the way there, you might even meet a few curious sheep.
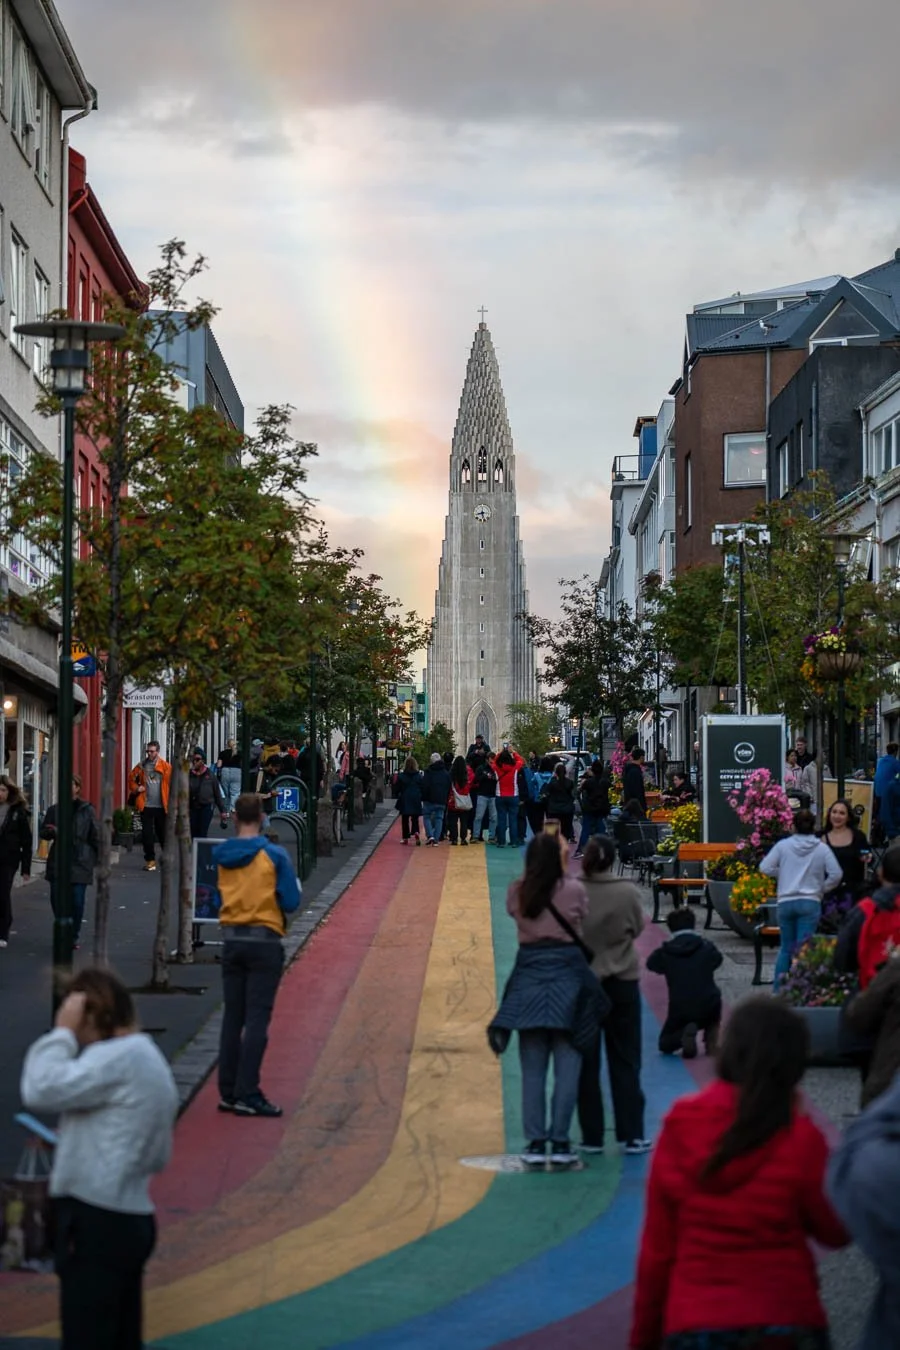
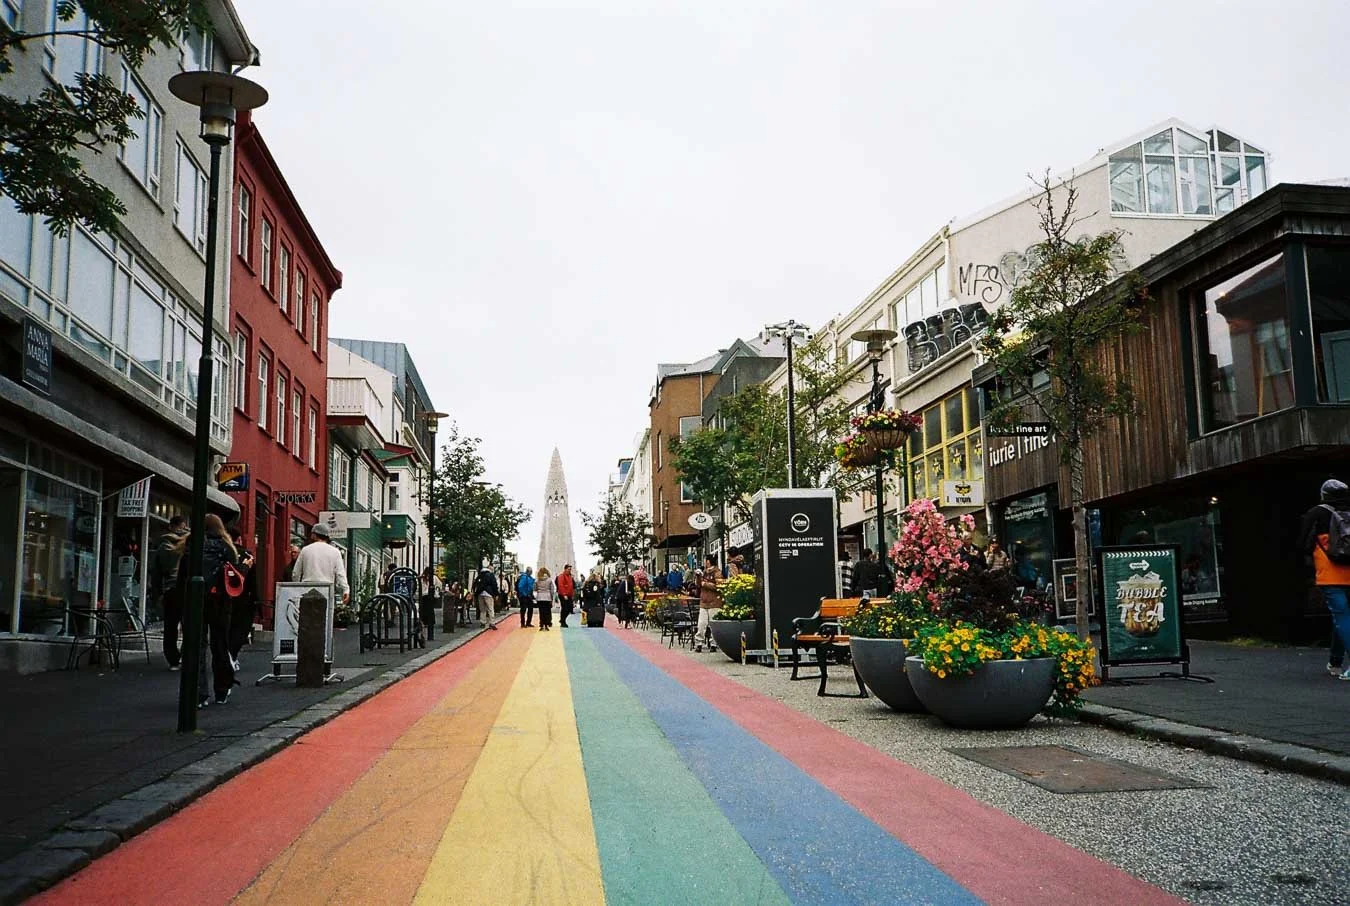
We got really lucky with this scene of a rainbow emerging behind Hallgrímskirkja and Rainbow Street on our last day in Reykjavík.
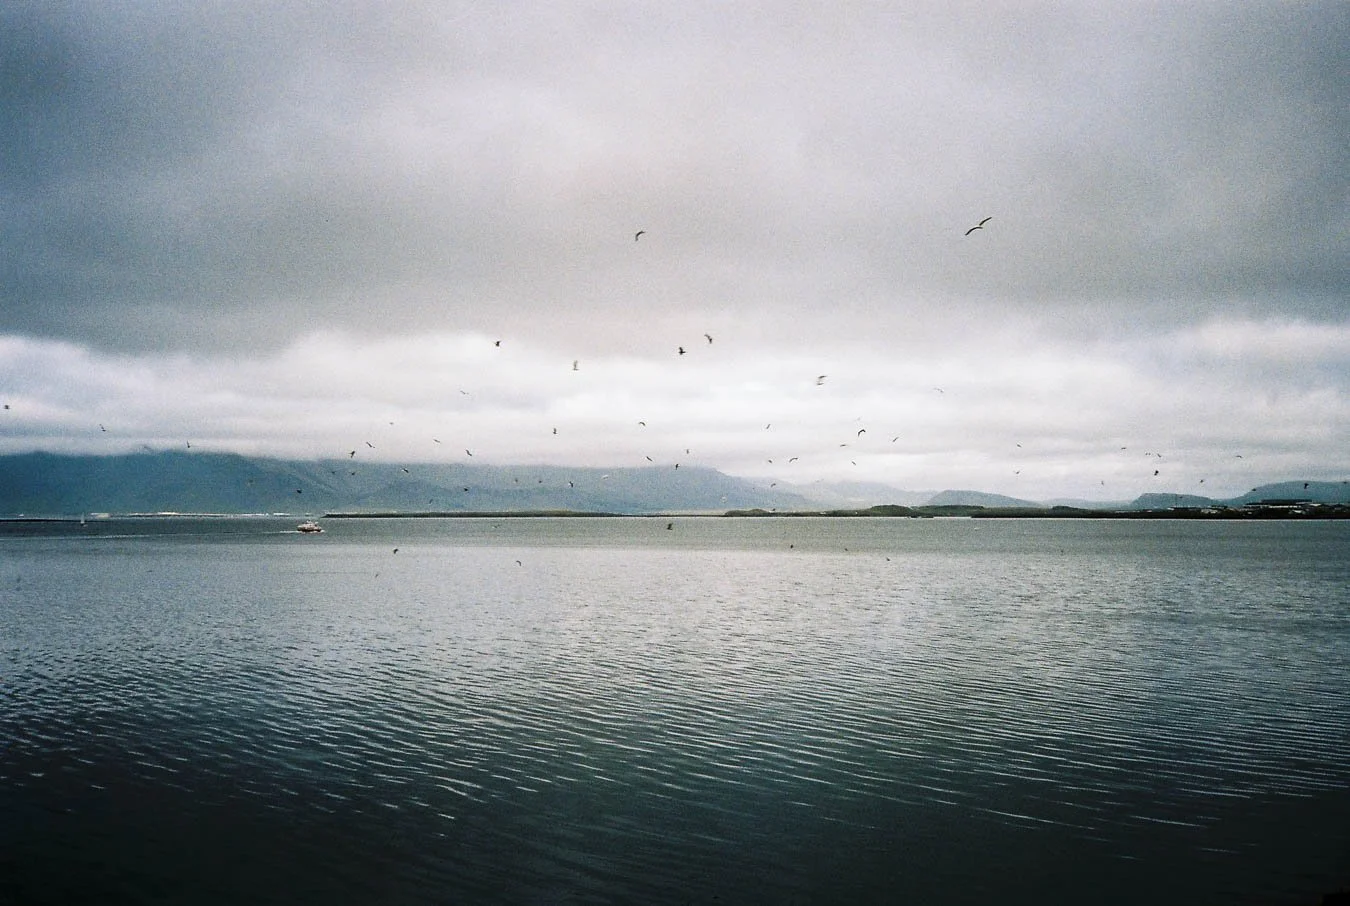
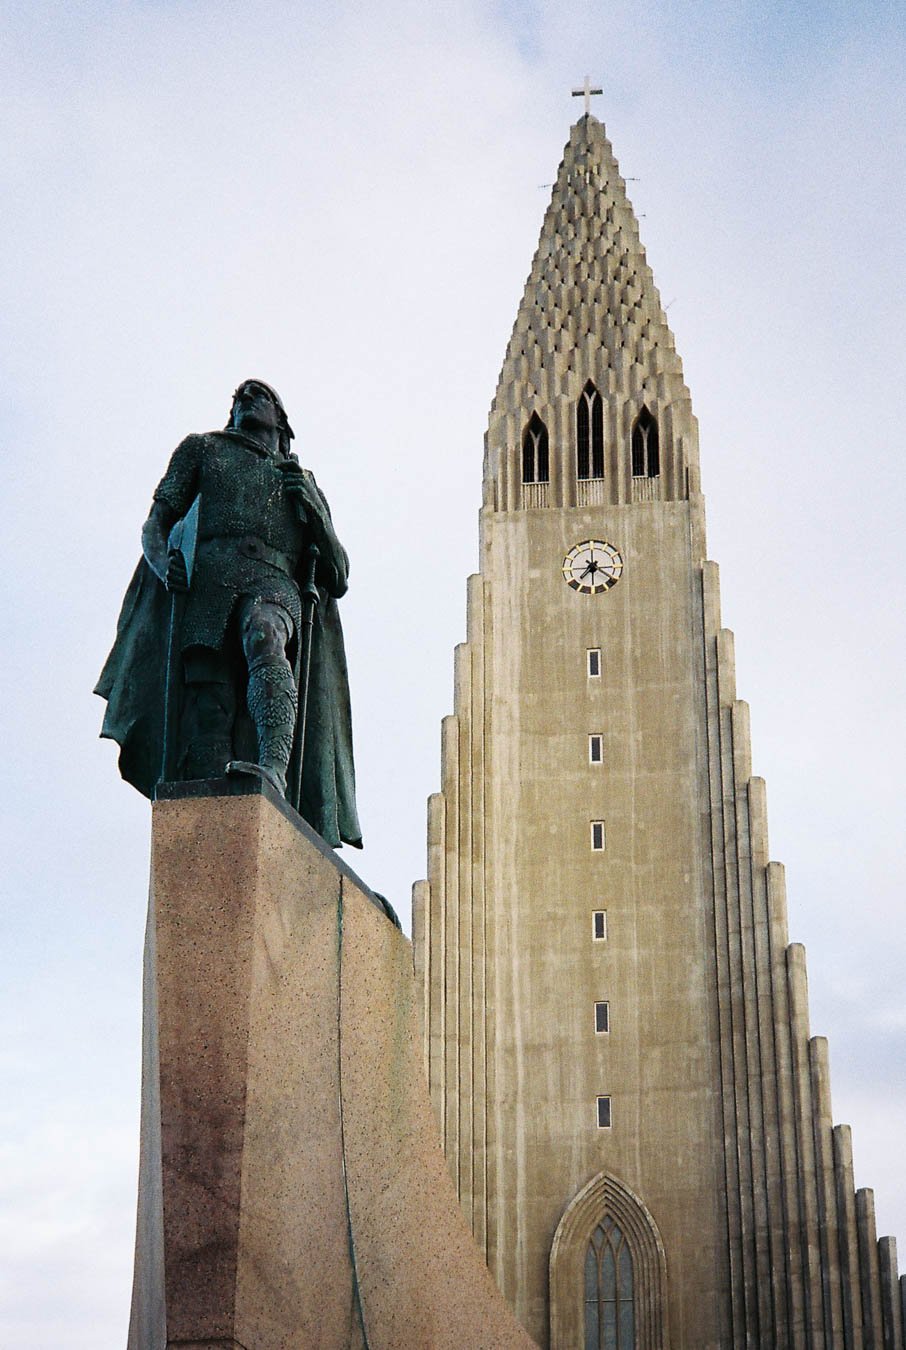
We spent one last night in our tent at Landmannalaugar before catching the bus back to Reykjavík the following afternoon. There we stayed two more nights, giving ourselves a full day to recharge and do some basic sightseeing (visiting spots like the harbour area, the rainbow street, and of course the obligatory Hallgrímskirkja) before taking the bus back to the airport and eventually heading home.
Planning & Preparation Advice
Despite being considered one of the most beautiful trails in the world, the Laugavegur is not a particularly technical hike. The path is generally well maintained, and you never have to scramble or use your hands. That said, it is still a multi-day trek through a fairly remote volcanic landscape. You will be walking several days in a row, typically around 15 km per day with several hundred metres of elevation gain, all while carrying a heavier backpack. A bit of planning therefore makes the difference between really enjoying the surreal landscapes and wondering why you signed up for this in the first place.
Direction – North to South or South to North?
Endless views across the black sand desert on the section leading toward Álftavatn / Hvanngil from Emstrur.
First of all, you need to decide in which direction you want to hike the Laugavegur. The more popular choice is north to south, starting in Landmannalaugar and finishing in Þórsmörk. In that direction the elevation profile is slightly more favourable, with a bit more downhill or gentle descending. The downside is that this is the direction most people choose, so you will simply see more hikers in front of you throughout the day.
Going south to north, starting in Þórsmörk and ending in Landmannalaugar, means you are moving against the main flow. You still meet plenty of people, but most of them come towards you rather than walking ahead of you, which makes the experience feel quieter and more immersive. I also found this direction more satisfying in terms of scenery. You begin in the relatively lush valleys of Þórsmörk and gradually work your way up into the harsh, colourful, geothermal mountains around Landmannalaugar, so it feels as if you are slowly crossing into another world.

One of the few ascents on the Laugavegur that you only have to tackle when hiking south to north, not in the more common direction.
Suggested Stage Breakdown
Usually, the Laugavegur is hiked in four days. Some people compress it into three long stages, while others stretch it to five to keep things more relaxed. In any case, there are six campsites in total, and wild camping is strictly forbidden, so you’ll be sleeping either in huts or in the designated tent areas at these sites every night.
Our south–north setup looked like this and worked very well in terms of distance and daily effort:
Arrival day: Reykjavík → Þórsmörk (Volcano Huts) + Orange Loop day hike (13.2 km, ~500 m elevation gain)
Day 1: Þórsmörk → Emstrur (16.3 km, ~450 m elevation gain)
Day 2: Emstrur → Álftavatn (15.9 km, ~450 m elevation gain)
Day 3: Álftavatn → Hrafntinnusker (11.3 km, ~750 m elevation gain)
Day 4: Hrafntinnusker → Landmannalaugar (10.5 km, ~650 m elevation gain)
Day 6: Bus back and departure (you may want to extend your stay at the Landmannalaugar campsite by a full day/night to do some day hikes there)

There are several stunning day hikes in Landmannalaugar, making it well worth extending your stay before or after the Laugavegur, depending on the direction you hike it.
With this breakdown, no day felt rushed and we never had to leave at dawn or arrive at camp late in the evening. If you prefer longer days, you can always cut one stage by skipping a campsite – for example, some people walked directly from Álftavatn to Landmannalaugar and bypassed Hrafntinnusker.


Huts vs. Tents
If you’re happy to camp, organisation becomes much easier. You don’t need fixed hut reservations for specific dates; you simply show up, pay for your tent spot at the warden’s hut, and pitch your tent in the designated area. All campsites accept card payments, but having a bit of cash as a backup is sensible in case there are technical issues with the card terminals.
If you don’t want to carry a tent and prefer sleeping inside the huts, with proper beds and indoor cooking spaces, you need to plan much earlier. The huts book out quickly in the main season. For our timeframe, some dates were already fully booked as early as February (!), when we started planning the trip. So if you definitely want to hike the Laugavegur but want to avoid camping, it is strongly recommended to book the huts well in advance.
Booking Transport
The Laugavegur isn’t a loop, so you’ll have to arrange transport to the start and from the end. Highland buses can and do sell out, especially on good-weather weekends, so booking your connections to and from Landmannalaugar / Þórsmörk in advance is very advisable if you have fixed dates.
Even if your schedule is a bit flexible, it can still be useful to reserve rough dates and then adjust them later if there are free seats. We used Icelandia and were genuinely happy with them – both with the bus service itself and with how accommodating they were when we had to change our tickets (both date and destination) on very short notice due to delayed luggage. On our return journey we also saw other travellers manage to switch onto our bus back to Reykjavík on the day, despite originally being booked for a different date, simply because there was still space.
Clothing & Equipment
The Highlands (and the Laugavegur in particular) are only accessible in summer. Don’t let that fool you, though. While it can be warm and sunny at times (for example, I hiked in shorts and a t-shirt during the middle of the day on some segments), it can also be very cold and especially windy, particularly in the evenings and mornings when the sun is gone. You should also expect frequent rain and potentially even some snow on the trail, as well as graupel showers, especially early or late in the season.
This wide variation in weather conditions, both throughout the day and over the season, means proper layering is essential so you can adapt:
Base layers that dry quickly
A warm mid-layer (fleece, light down, or synthetic jacket)
A waterproof and windproof shell jacket
Waterproof trousers or at least trousers that dry fast
Hat, gloves, buff
Good footwear is of course important as well. Hiking boots or sturdy trail runners both work, but boots have the advantage of more ankle support and slightly more protection in wet, muddy sections. Hiking poles are not absolutely essential (given the well-maintained trails), but they can still be very helpful on loose ascents and descents, for stability in river crossings, and when your legs are simply tired on day three or four.
In addition, a sturdy tent that is actually rated for higher wind speeds and good water resistance can be an invaluable investment. Getting proper rest along the trail makes a big difference to how much you enjoy the hike overall.
If you plan to add the Fimmvörðuháls trail, treat it a bit more seriously. Since it goes to higher altitudes, running between the glaciers Eyjafjallajökull and Mýrdalsjökull, conditions can be harsher and snow and ice are more likely, making some sections more slippery. Hiking poles become very useful there, and light micro-crampons can be a smart addition depending on conditions. Always check the most recent trail reports (e.g. on the usual hiking apps) and the weather forecast before you commit!
What might be among the most important pieces of equipment for you is some sort of footwear for the river crossings, depending on how sensitive you are to the freezing cold water in the glacial rivers you have to wade through along the Laugavegur. While they are manageable to cross barefoot, having a dedicated pair of non-slip water shoes (or light sandals with a secure heel strap) can make a huge difference. They help protect you from the cold (the wider crossings really do hurt a bit after a few seconds) and also provide extra stability on slippery rocks (hiking poles help a lot here as well), without adding much weight to your pack.
As you will most likely bring a stove to cook food along the way, you will also need to buy gas canisters before starting your hike. If you go north to south, this is less of a concern, as you can usually buy some in the small shop at Landmannalaugar (though in busy times stock might run out) or, if you are lucky, find partially used canisters in the leftover food and fuel rack in the cooking tent. If you have time between arriving in Iceland and starting the hike, it is still a good idea to look for canisters in Reykjavík first. If you are going south to north, gas logistics are a bit more complicated, because you cannot buy canisters in Þórsmörk. In that case, you definitely have to find some in Reykjavík before leaving for your hike. You can get them at the BSI bus terminal; they are probably not the cheapest option, but you don’t have to worry about opening hours (unlike regular outdoor shops, which might be closed on Sundays, for example). Alternatively, you can keep an eye out for unfinished canisters at the entrance area of the BSI terminal or in hostels.
Another gadget that worked a lot better than expected and proved genuinely useful was a portable solar panel for charging (I used a simple one from Decathlon). Since there are no power outlets at the campsites if you stay in a tent (I have no experience with the sleeping huts), it was very convenient to strap the panel to the outside of my backpack or to the tent and charge my phone or power bank whenever the sun was out. Of course, you are somewhat dependent on the weather, which can be a gamble in the Icelandic Highlands, but I still managed to fully recharge my power bank twice. That meant I could carry fewer power banks and worry less about running out of battery, while still using my phone relatively freely for photos and offline maps, and keeping lanterns, headlamps, and camera batteries topped up.
Another fairly universal piece of advice is to sort out offline maps before you go. Download the relevant sections onto your phone or navigation device and, ideally, get an old-school physical map as a backup. Given the limited electricity along the trail, a paper map is not the worst idea, even though the route is generally well marked. You can usually buy one in an outdoor store in Reykjavík, but check opening hours in advance so you can actually go before your hike starts. For example, we arrived on a Saturday and wanted to start hiking on Monday; the shop we had in mind was closed on Sunday, so that plan did not work out for us.
Recommendations & Lessons Learned

Overall, the Laugavegur is a very well-marked trail and, by multi-day trek standards, not overly difficult (with its 55 km in length and a total elevation gain of roughly 2,200 m). If you are reasonably fit, properly equipped, ideally have some experience (especially if you are camping in a tent the whole way), and have your logistics sorted, it’s a genuinely stunning and quite accessible way to experience the Highlands of Iceland.
The only part that really demands extra attention is the Þórsmörk–Skógafoss extension, the so-called Fimmvörðuháls trail (24.3 km with around 1,060 m of elevation gain), which you may want to add before or after the Laugavegur. Because it runs over a high pass between two glaciers (Eyjafjallajökull and Mýrdalsjökull), it can have narrow, exposed, and slippery sections and is much more sensitive to bad weather, snow, and ice. If you’re considering adding it, check recent trail conditions and the weather carefully, and don’t underestimate it. At the very least, bring trekking poles; micro-crampons can also be a smart addition depending on conditions. There are two huts on this section (Baldvinsskali and Fimmvörðuskáli), which can make things more manageable if you want to travel lighter without a tent and heavy sleeping bag, but they need to be booked in advance via the Icelandic Touring Association.

Fimmvörðuháls trail (bottom left), linking Þórsmörk and Skógar over the high pass between Eyjafjallajökull and Mýrdalsjökull.
If you don’t want to commit to the full Fimmvörðuháls traverse, you can still consider giving Þórsmörk a bit of extra time. Staying one or two additional nights at a campsite there is absolutely worth it if your schedule and budget allow. The valley is incredibly scenic, and while you get hints of it from the bus ride, that doesn’t compare to what you see once you get out on the trails. Even relatively straightforward hikes like the Orange Loop give you views that easily justify the extra day.

The Volcano Huts campsite in Húsadalur (where we stayed) also makes Þórsmörk a nice place to linger. There are hot showers, a sauna, a restaurant, and even the option of glamping tents or private rooms if you want to treat yourself after (or before) the long Laugavegur trek. In that sense, hiking the Laugavegur north to south has its charm, because you finish in a place where you can immediately recover a bit in comfort. In contrast, going south to north, you arrive in Landmannalaugar. The hot springs there are undoubtedly a great experience, but the campsite itself offers less in terms of overall comfort or ‘luxury’, which can be something you appreciate after several days out in the Icelandic Highlands.
One practical lesson we learned the hard way is to factor in a sufficient buffer for luggage delays before your hike. If you’re flying in with checked bags that contain essential gear, any delay directly eats into your hiking time. Having at least one, ideally two, nights in Reykjavík before heading into the Highlands is a good safety net. Otherwise, the only real way to compensate for lost time is to hike a very long day and potentially skip a campsite stage you would have preferred to keep. And if everything arrives on time, you simply get a relaxed day or two to explore Reykjavík instead of stressing and worrying that your whole trip just got spoiled by delayed baggage.
Beyond these points, there really isn’t a huge list of extra complications. You will be out there walking the full distance anyway, and you are at the mercy of whatever weather Iceland decides to throw at you. If you book your buses and (if needed) huts early, sort out where you’ll get gas canisters and other essentials in Reykjavík or at the trailhead, bring enough food (campsites mostly sell snacks and drinks), and come prepared with proper clothing for wind, rain, cold, and the occasional nice day, then the rest is mostly about being present and taking it all in. For us, the Laugavegur delivered some of the most surreal and otherworldly scenery we’ve ever walked through, and with a bit of upfront planning there’s a good chance it will do the same for you.
Conclusion
While my first road trip along Iceland’s Ring Road already made me fall in love with this small but incredibly diverse and rugged island, I always knew I had to come back for the Highlands. Many of the iconic images you associate with Iceland – for instance, moss-covered, strangely shaped mountains, dark volcanic hills, and steaming geothermal fields – are taken there, and the Laugavegur trail really delivered on that expectation.
Over just a few days, it felt like walking through several different worlds. You start in the relatively lush valleys and birch scrub around Þórsmörk, with glacier rivers cutting through green slopes. These gradually give way to more barren, almost desert-like plains of black volcanic sand shaped by former ice fields, until you finally reach the surreal geothermal landscape around Landmannalaugar with its hot pools, fumaroles, and colourful rhyolite formations. This transition from ‘stunning but still somewhat familiar’ to ‘completely otherworldly’ is especially immersive when hiking south to north. It’s the less popular direction because the elevation profile is a bit less favourable, but that lower popularity adds an extra layer of solitude and immersion.
Regardless of which direction you hike, it’s an incredible experience and is called one of the most beautiful hikes in the world for a reason. If you’re comfortable camping in a tent the whole way, you can get by with comparatively little planning beyond the bus logistics and some basic gear organisation, which also makes it a relatively affordable way to explore the Highlands compared to booking huts along the trail or renting a 4x4. If you can, it’s absolutely worth planning one or two extra days in Þórsmörk, since some of the best viewpoints there aren’t technically part of the Laugavegur at all. And if you feel up to the challenge and conditions are right, adding the Fimmvörðuháls extension on top is a very tempting way to take the whole experience even further.
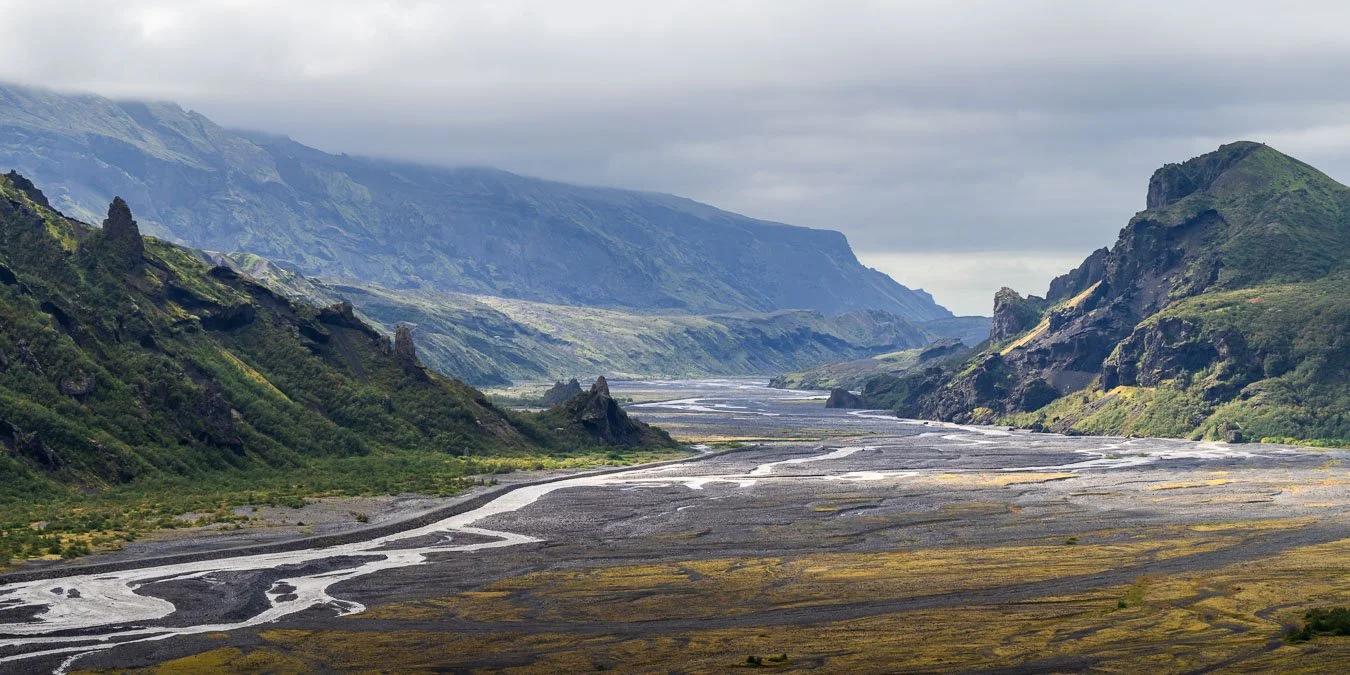
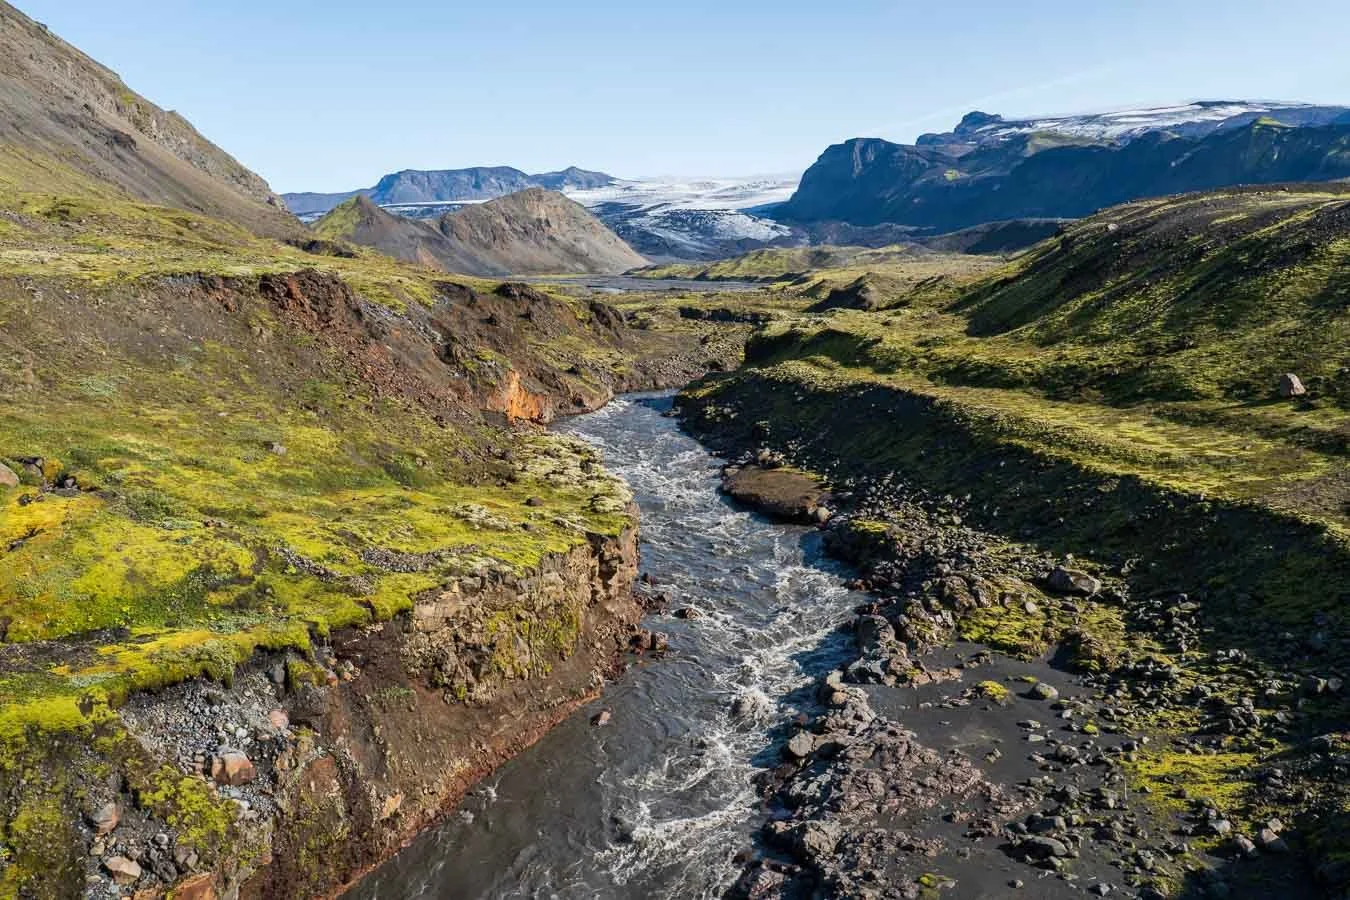
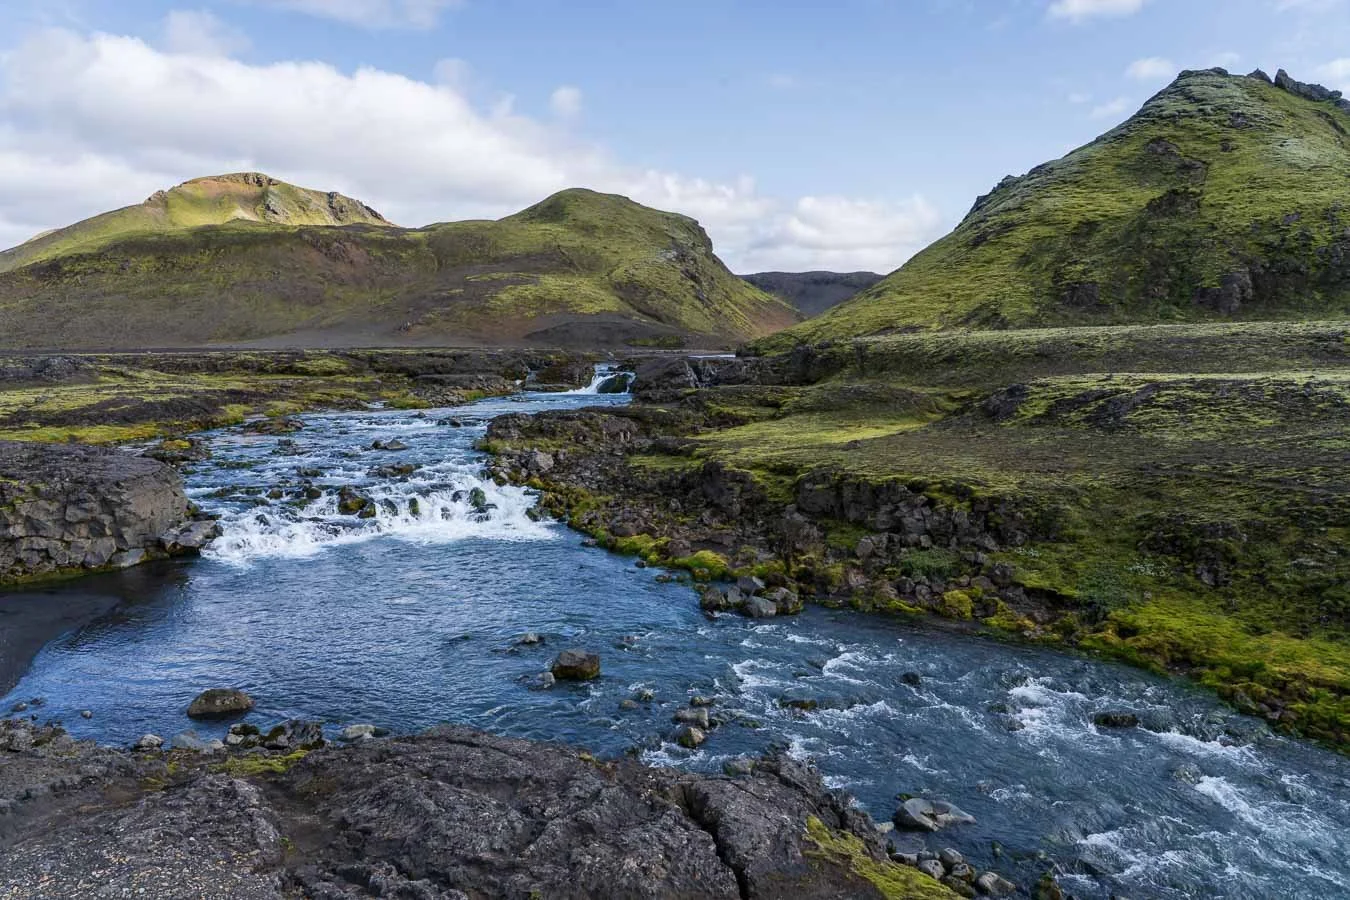
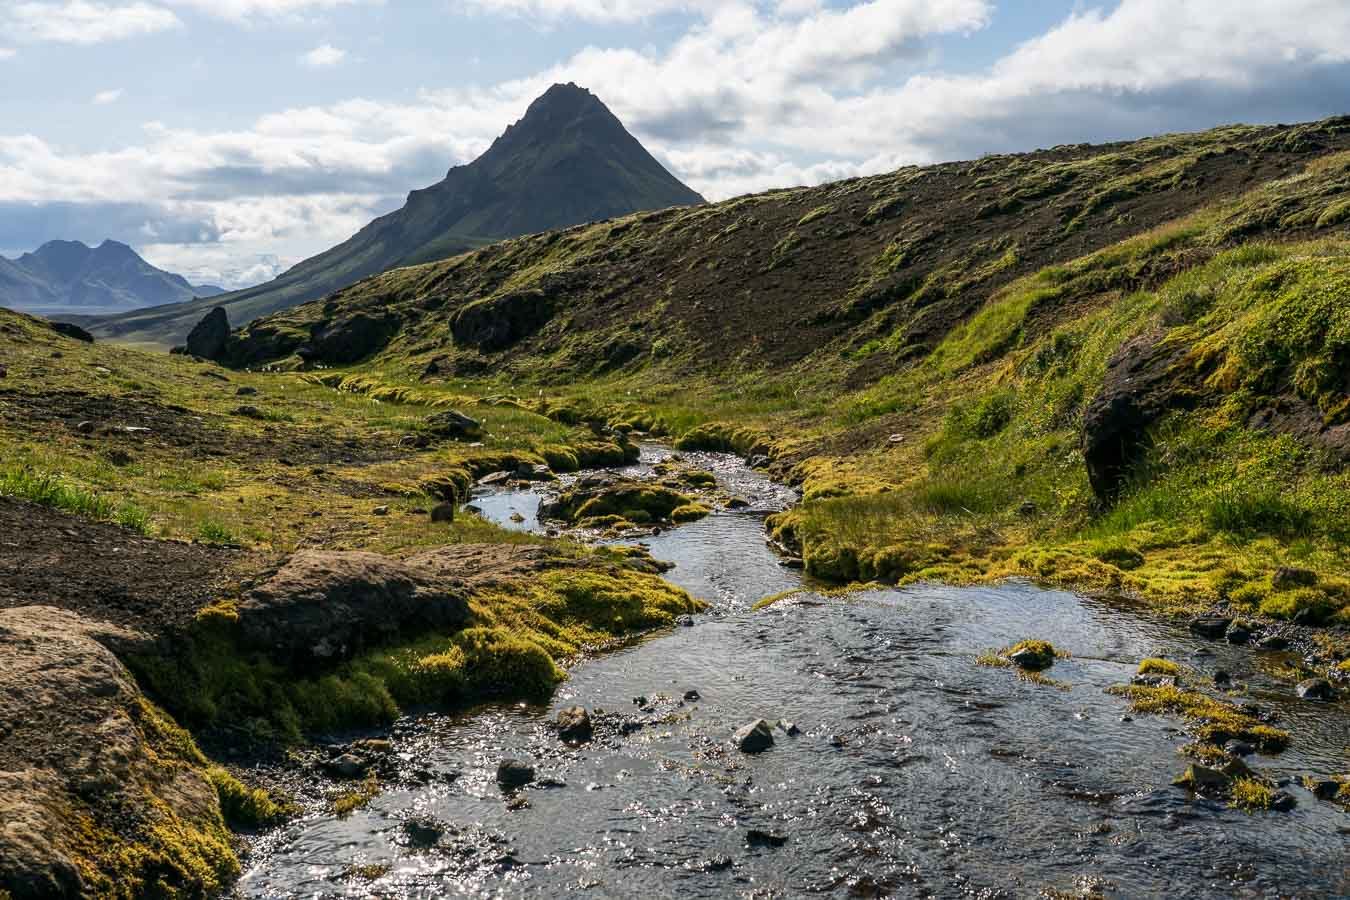
Stunning scenes like this, with the Krossá winding between the mountain ridges of the Þórsmörk valley, can be found along the Laugavegur trail and throughout Iceland’s Highlands.
Additional Content
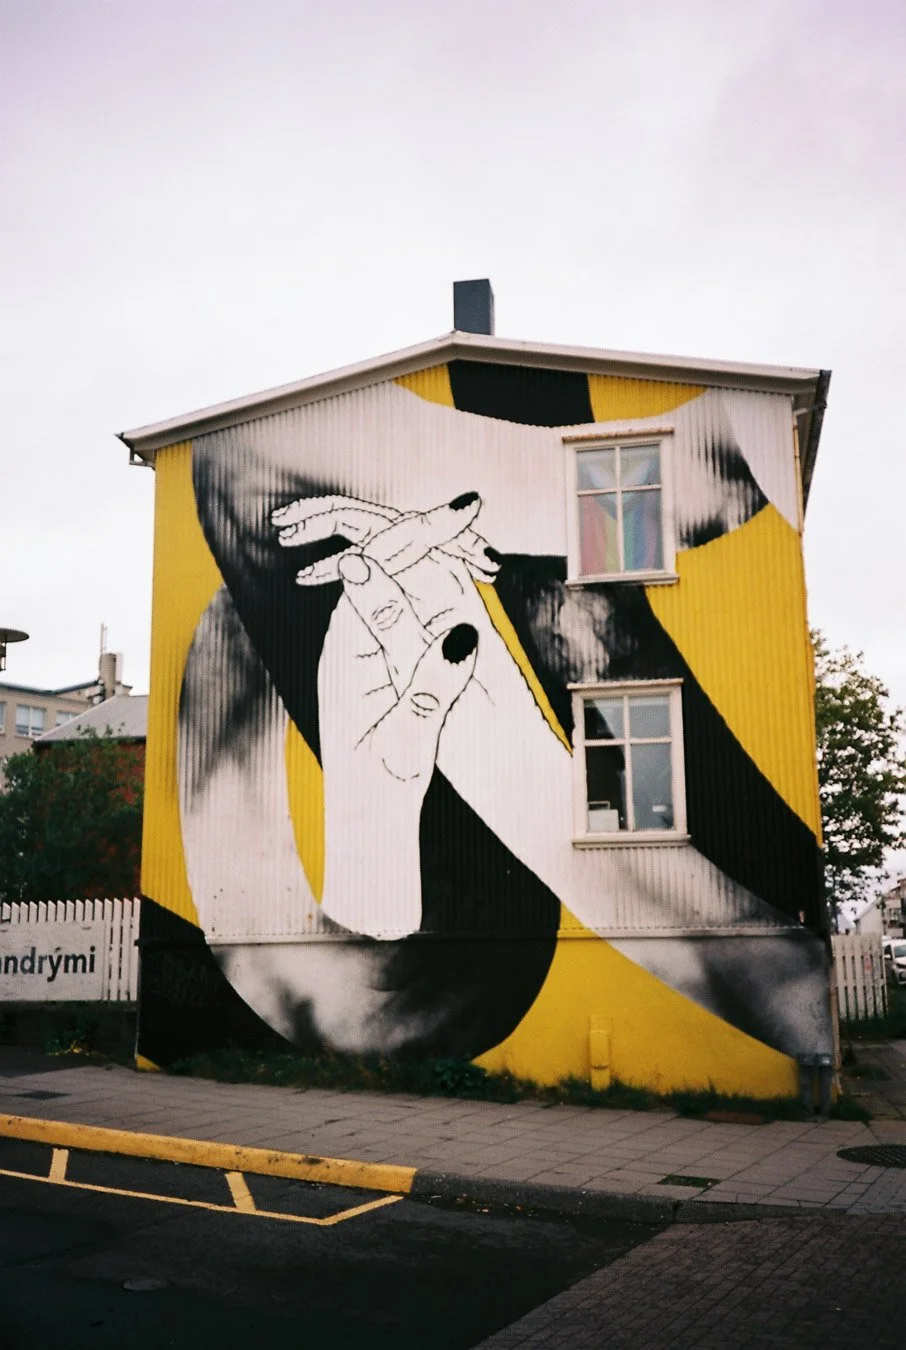
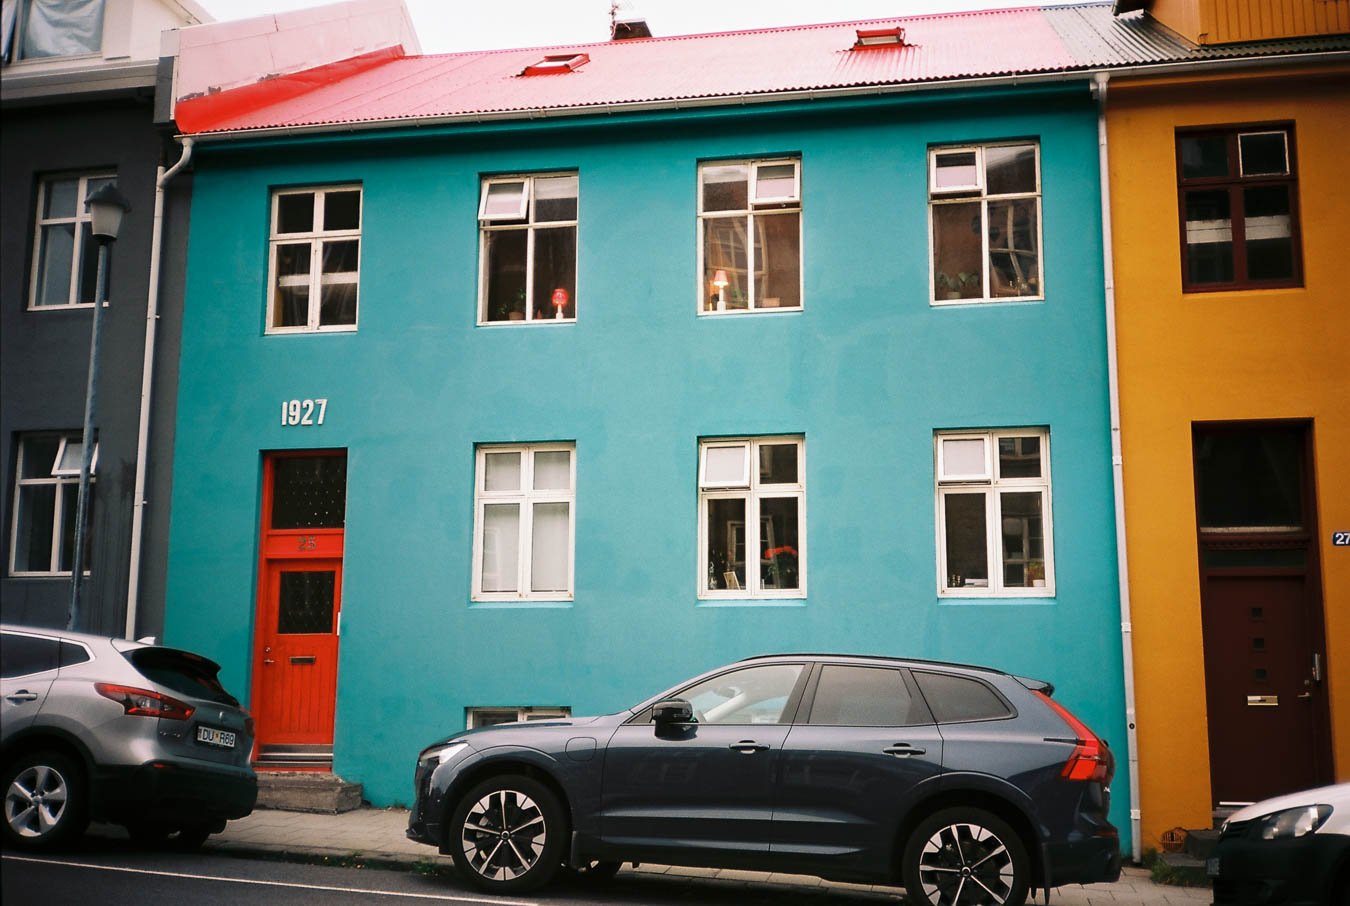
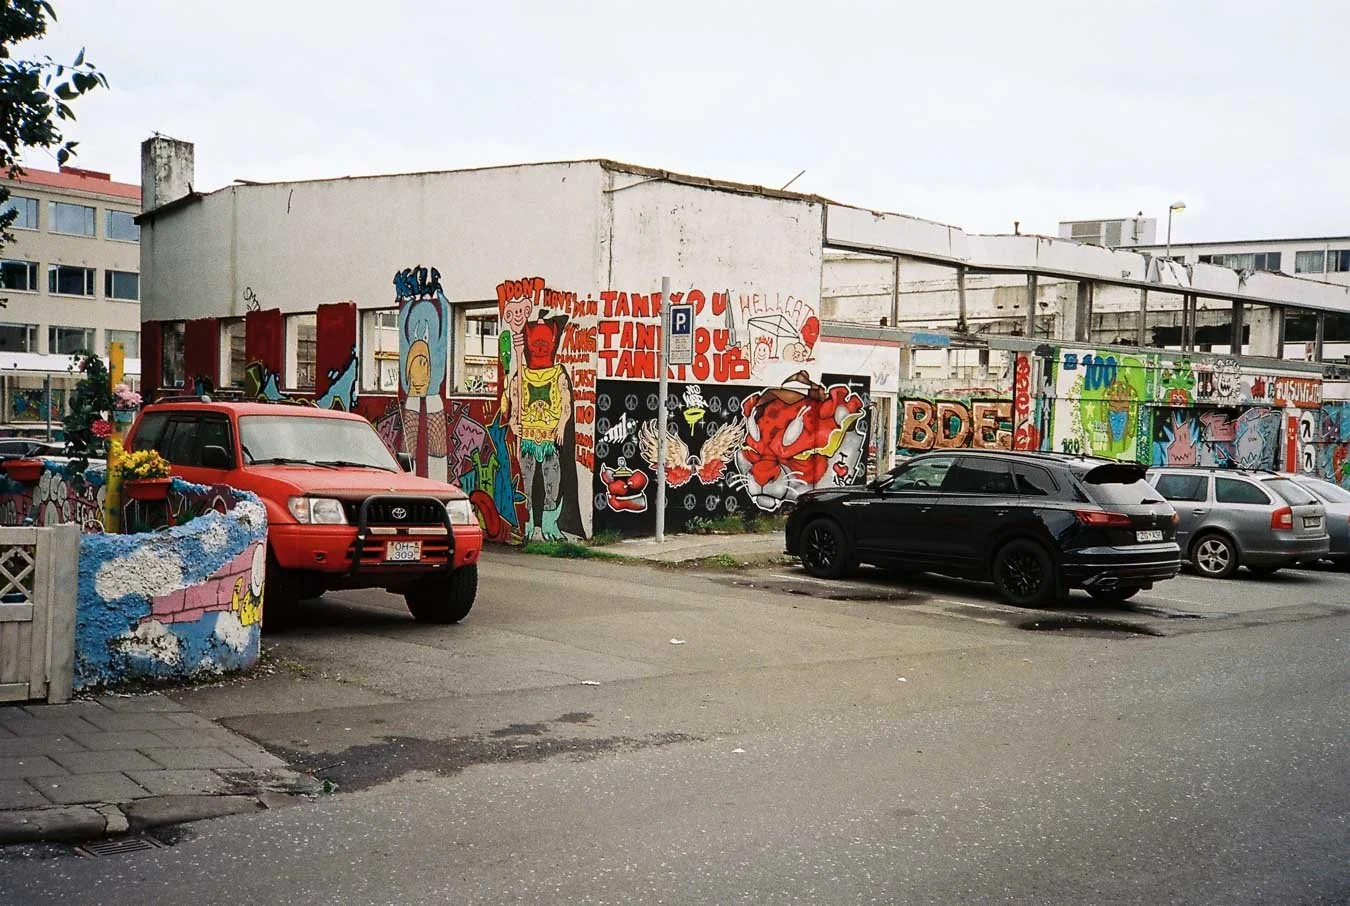
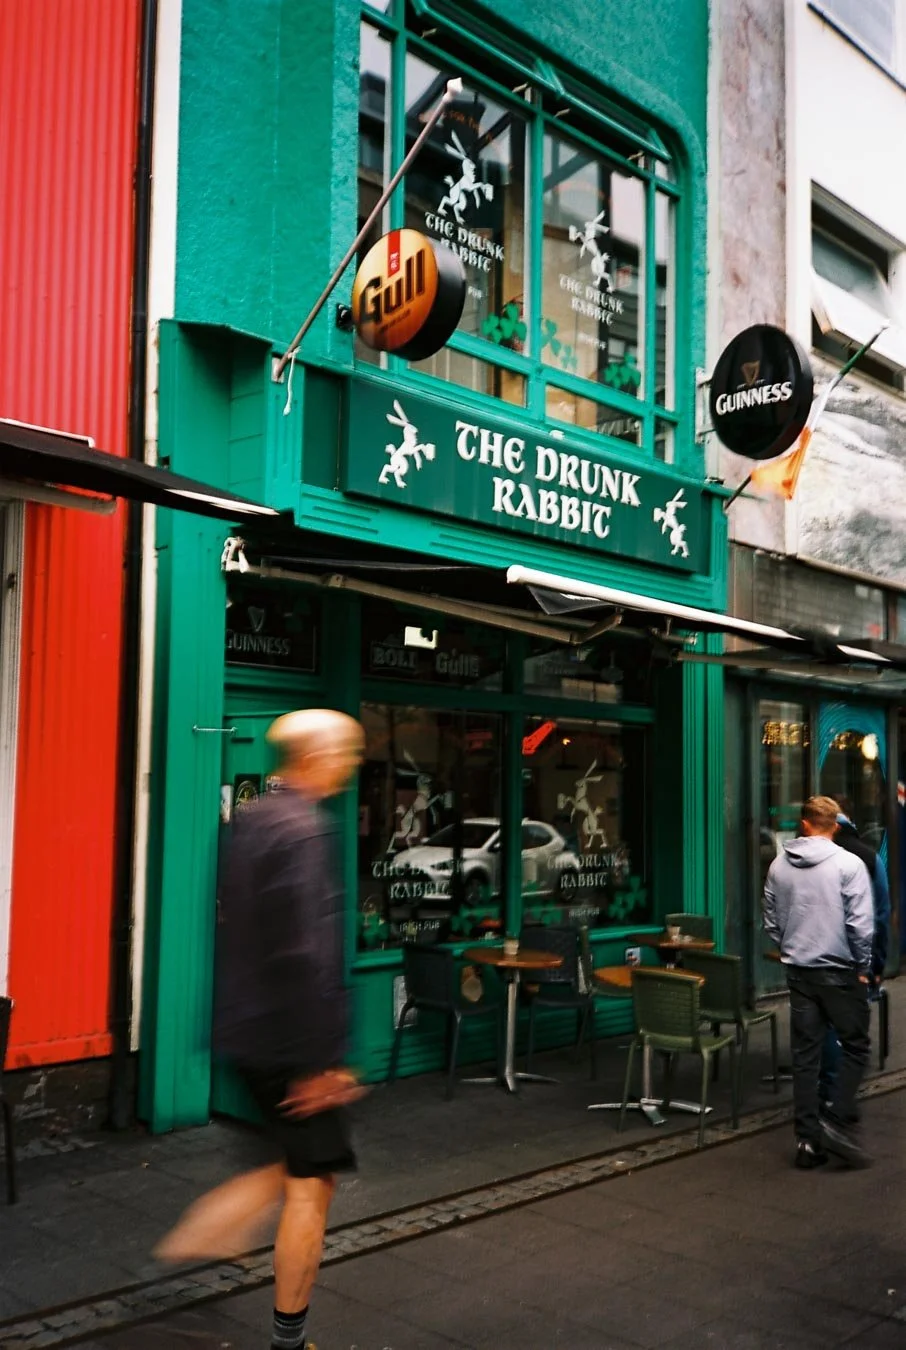
Some more 35 mm film moments from along the Laugavegur trail and Reykjavík.


Useful Links
Here are some links and resources to assist you in planning your own hiking adventure along the Laugavegur through the Highlands of Iceland!
General Links
General safety information (also available as an app)
Wind speeds (also available as an app)
Campsites / Accomodation
Ferðafélag Íslands (Iceland Touring Association)
Hut availability (Laugavegur)
Volcano Huts Campsite (Þórsmörk)
Hostel B47 (good hostel in Reykjavík)
Eric the Red Guesthouse (great guesthouse in Reykjavík)
Bus Connections
Other Links
Map
For the best viewing experience, exploring this website on a desktop browser is recommended.
Due to the large number of featured photos, the images are somewhat compressed. For higher-quality versions of selected pictures, visit the photo gallery!
If you enjoyed this blog post and want to see more content beyond Iceland’s Highlands, explore the blog posts from other journeys around the world!
And in case you have more questions about the itinerary or anything else, feel free to get in touch here!